


The sensor board button
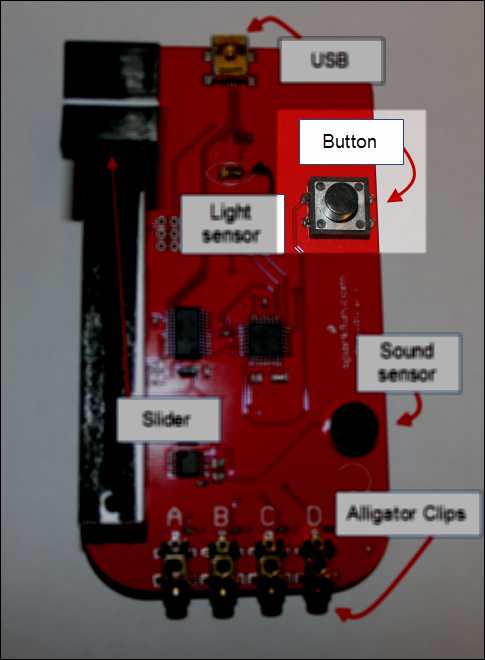
Our PicoBoard also has a built-in button, as shown in the following image. This can be handy for anything where you might want a button to be pressed in your programs.
Getting ready
This recipe will explore checking to see if the button has been pressed. We'll do this by creating a program where the sprite will move across the screen when the button is pressed.
All you need to do to get this recipe ready is to open a new Scratch file and make sure your PicoBoard is fully functional. Also note that we are using a different sprite in this program called duck1:

Of course, you can use any sprite you'd like.
How to do it...
Follow these steps to implement button use in your program.
-
Drag over a
 block.
Drag in a forever if block from the Control category.
-
Drag from the Sensing category the
 block into the conditional block from step 2. You'll have:

Within the conditional block, drag a move () steps block from the Motion category.
Attach to the block from step 4 an if on edge...


