Developing websites and deploying them to production
Having established a production website and several development sites, Sarah faced a new challenge. She needed to deploy content from one environment to another. She had built the website with Brenda in the Rob the Builder development environment that she had created in Chapter 1, now she needed to deploy it to the production environment she had created in Chapter 1. To do this, she would use the Power Pages solution tool to add her website and then deploy the solution to the production environment. Here are the steps for the same:
- In the studio, Sarah selected the Home | Solutions tab.
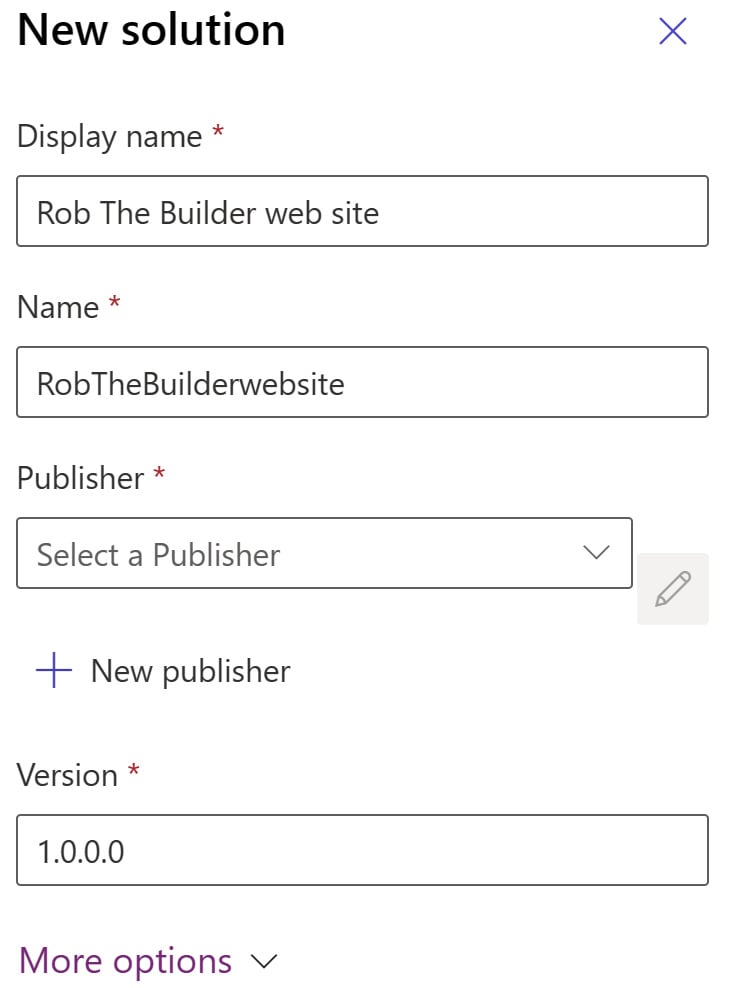
- She then clicked New solution and entered a name, as shown in Figure 2.7.
- Within the solution, Sarah added the website and pressed Export.
- Once that was complete, Sarah downloaded the
.zipexport to her local PC. - In the studio, Sarah selected the production environment and pressed Import. After that, she chose the downloaded
.zipfile to import:

Figure 2.7 – New solution for deploying the website
Now that the website was deployed, it was still set as private. It was time to set it to Public so that other users and the public could view the new website.
Setting the website to public
Sarah selected the settings to set the website as public, and they tested it on their phones to see how it looked.
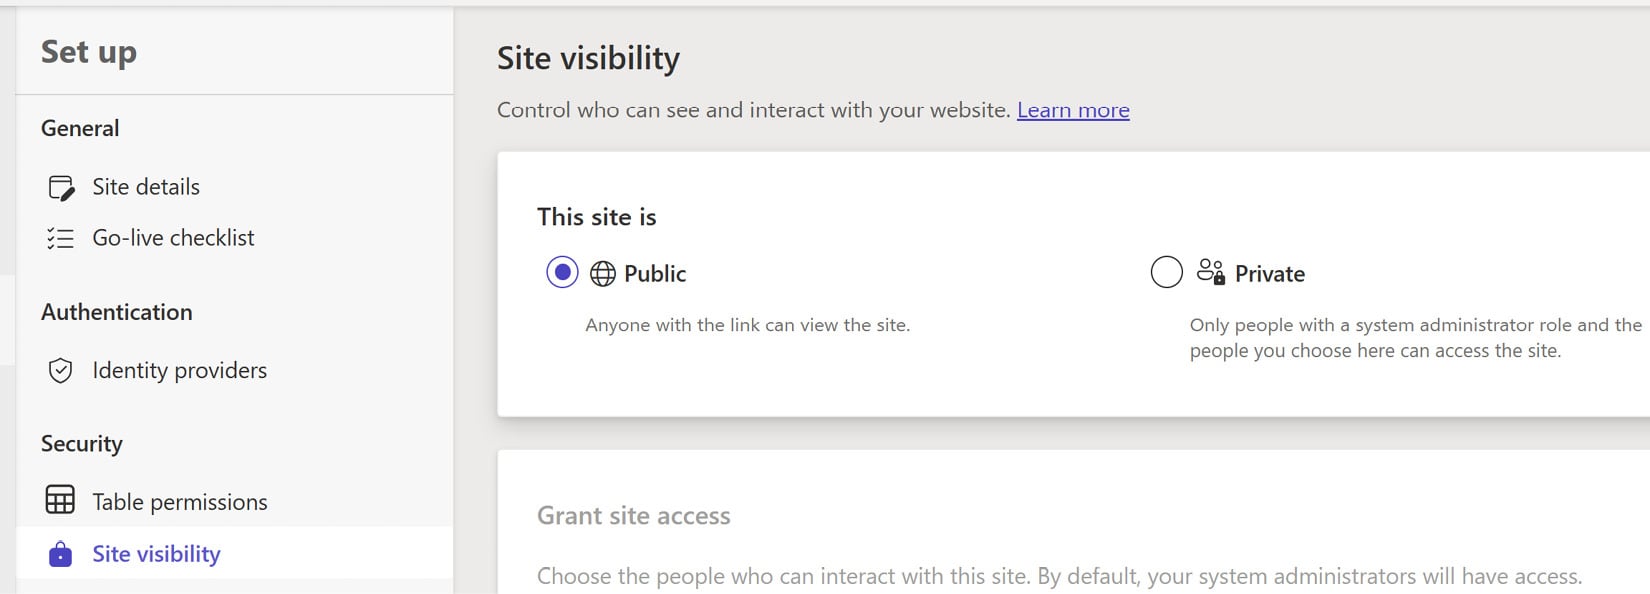
To do this, in the studio production environment, Sarah selected the Set up tab and set Site visibility, as shown in Figure 2.8, to Public:

Figure 2.8 – Site visibility
The website static pages were ready, and Brenda was ready to show them to her colleagues and announce them to her customers.


