Getting to know the UI shortcuts
There are a few more helpful things to know about for getting around in the viewport. You can use keyboard shortcuts to hide and show the toolbar or to control navigation in the 3D Viewport.
The N panel
The N panel is the panel that appears when you press N. It’s sometimes called the sidebar or the side panel—in this book, I’ll be calling it the N panel:
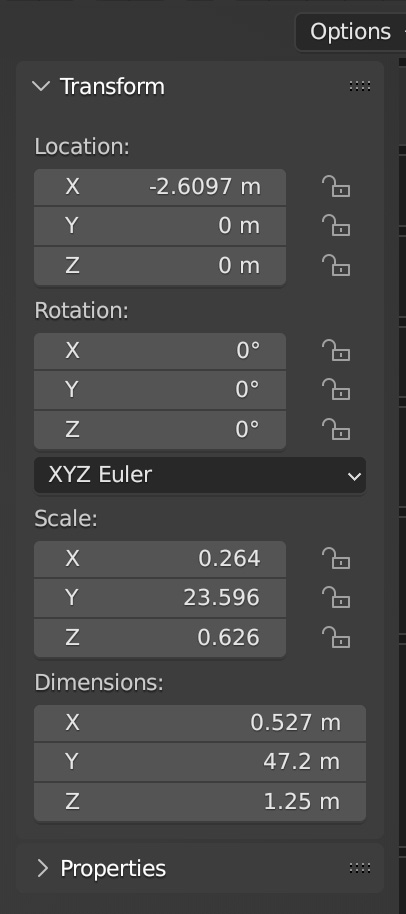
Figure 1.15 – The N panel
This panel gives you quick access to the selected object’s position, rotation, and scale values. In Chapter 3, Creating a Low Poly Tree, you’ll learn how to edit these. The N panel also exists in many of the other editor types (the Shader Editor, for example).
To hide the N panel, just press N again.
The toolbar
The toolbar is a bank of tools down the left-hand side of the viewport. These tools are, for the most part, simple conveniences. They’re useful while you’re learning Blender, but you’ll eventually end up using keyboard shortcuts to work faster.
To show and hide the toolbar, you just press T.
There’s also a secret way to see the names of all the tools in the toolbar—hover your cursor over the right edge of the toolbar until your cursor turns into a double arrow:
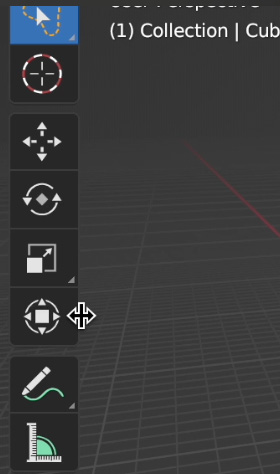
Figure 1.16 – Expanding the toolbar
Now click and drag toward the viewport. Once the toolbar is wide enough, you’ll see the tool names, as shown in Figure 1.17:
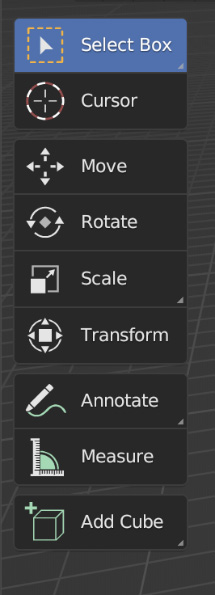
Figure 1.17 – The toolbar
You’ll notice the top tool is selected by default. This is the Select tool. By default, it’s in Select Box mode, but you can press W to toggle through all the different Select tools:
- Tweak, which lets you click and drag objects
- Box, which is the default (leave it on this mode for this book)
- Circle, which gives you a circle “brush” to select with
- Lasso, which gives you a Photoshop-like lasso tool
If, during the course of this book, you find that you’re not able to select objects as you expect, it’s likely that you ended up with the wrong Select tool by accident. Just press W to cycle through each tool and get back to the default Select Box.
Walk Navigation
There’s another, less common way to navigate the viewport in Blender. You can walk around in it using the arrow keys, similar to how you would navigate a video game.
To activate it, go to View | Navigation and click Walk Navigation to enter walk mode. Use the arrow keys to move around and the mouse to steer. There are a lot of other options—look in the Status bar at the bottom of the window to see them all.
It’s a little annoying to go through all those menus every time you want to use Walk Navigation, though.
Here’s how you can set your own shortcu:
- Go to View | Navigation and right-click on Walk Navigation.
- Click Assign Shortcut.
- Press Shift + F on your keyboard to set it as the shortcut. I picked Shift + F because it doesn’t already do anything.
Now you can turn on Walk Navigation simply with the push of a button!
If you get lost
When you’re working in the 3D Viewport, you might pan or zoom too far in one direction—and get lost.
If you ever do get lost in the viewport, here’s how to un-lose yourself:
- Select any object in Outliner by clicking on it.
- Press the ~ key to open the View menu. The View menu is a pie menu—these menus are super-easy to operate. Just move your mouse toward the option you want and then click! In this case, choose the View Selected option:
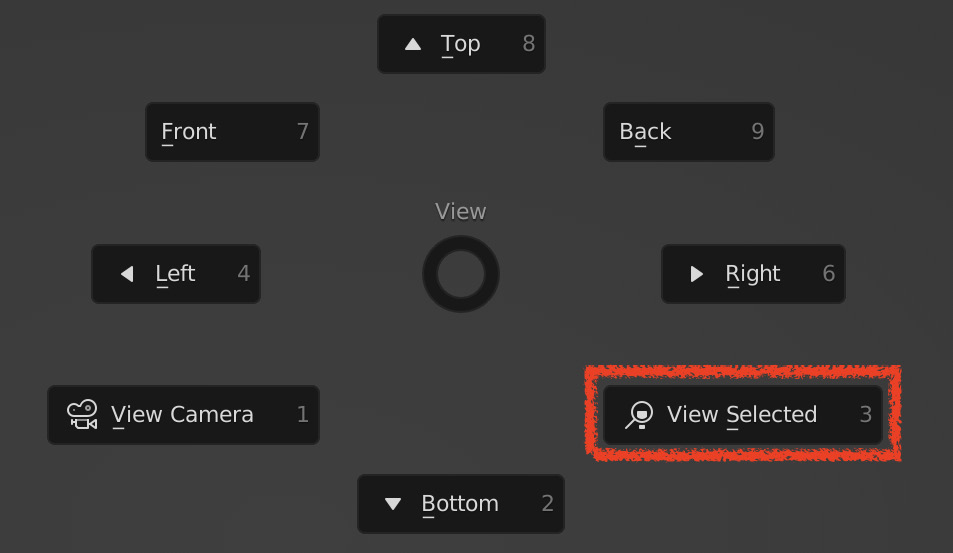
Figure 1.18 – The View pie menu
This will center the view around the object you have selected. This is a really good way to navigate the viewport—and it also works well for finding something you’ve misplaced!
You don’t have to use the mouse to select options in the menu—you can also use the number keys. You’ll notice that each option in the View pie menu has a small number next to it—pressing that number will select that option.
So, to select the View Selected option, you can press ~ then 3—no mouse needed!
Now you have the ability to re-center the view on any selected object, no matter where you currently are in the 3D Viewport. This is an incredibly helpful technique, especially in larger Scenes.
In the next section, we’ll explain those mysterious tabs across the top of the window.


