Interacting with basic actuators
In this recipe, we are now going to see how to control the outputs of the Arduino board. This will be very useful in the rest of the book, as we will control several output devices, such as lamps.
Getting ready
To realize this recipe, we first need to have something to control. Here, I will just use a simple relay, but you can of course use components, such as a single LED.
This is the relay I used for this recipe:
- 5V relay (https://www.pololu.com/product/2480)
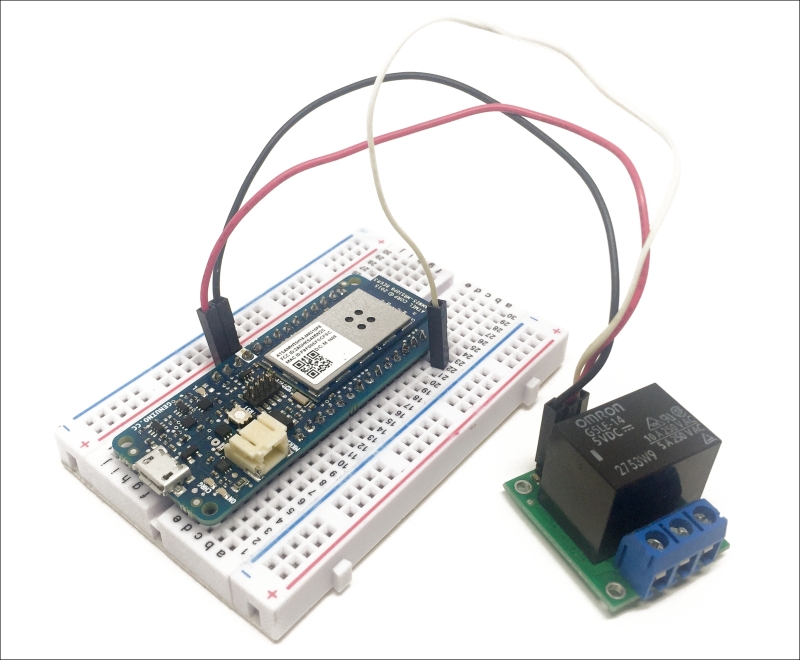
We are now going to assemble the project for this recipe. First, plug the MKR1000 board into the breadboard. After that, connect the relay VCC pin to the VCC pin of the Arduino board, and the GND pin to the ground of the MKR1000. Finally, connect the SIG pin of the relay to pin 5 of the Arduino board. This is the final result:

How to do it...
- We are now going to configure the board to see how to control outputs, like this relay. To illustrate this we are going to switch the relay on and off every second. This is the complete sketch for this recipe:
// Pins int relayPin = 5; void setup() { // Set pin as output pinMode(relayPin, OUTPUT); } void loop() { // Set relay ON digitalWrite(relayPin, HIGH); // Wait delay(1000); // Set relay OFF digitalWrite(relayPin, LOW); // Wait delay(1000); } - Now, copy this sketch into the Arduino IDE and upload it to the Arduino board. Once that's done, you should immediately see (and hear) the relay switching on and off every second.
How it works...
The sketch simply uses the digitalWrite() function of the Arduino language to control the state of the pin to which the relay is connected, along with the delay() function, therefore switching the relay on and off continuously.
There's more...
You can, of course, use what you learned in this project to control other output devices, such as LEDs. We are going to see in other recipes, later in this book, how to control larger output devices, such as lamps and other home appliances.
See also
You can now continue to the next set of recipes, where we are actually going to connect the board to the Internet.


