The first thing that comes to mind when we speak about Java is that it is platform-independent. This feature has made Java a hot programming tool in the market. So what exactly does platform-independent mean?
The code that we write is independent of the environment; be it Windows, Unix, Linux, or Solaris. Basically, when we write a Java program, the Java compiler converts the program to bytecode. When we run the Java code, the Java compiler converts the entire programming code to bytecode. For example, we are working on a Windows machine. When we run the program and the Java compiler runs and creates bytecode for us, this bytecode can be taken and executed on any other platform, such as Linux, macOS, and Unix. So this means we are developing a bytecode in Windows, and that bytecode is runnable on any other platform. So this is what we mean by platform-independent.
This is a really cool feature that we have in Java programming. Whenever you ask someone to download Java, the first question you will be asked is, is it JDK or JRE? People tend to get confused between these two terminologies. We need to be clear about this before we start downloading and configuring Java in our machines. Let's have a look at both JRE and JDK:
- JRE stands for Java Runtime Environment: It is responsible for running our Java program. If our aim is to just run a plain Java core code then JRE is sufficient.
- JDK stands for Java Development Kit: It is used to debug our Java code, or if we want to have the Java documents or something similar.
JDK contains JRE, Java documentation, and debugging tools, and other cool things. It's an entire Java kit from which we will get all of its components. So it's up to us what we download, but I would recommend we only have JDK to be on the safe side. If we want to just practice and run our program, JRE is also sufficient, but let's stick to JDK.
So now let's go back and download Java from the internet and try to configure it in our machines. To download Java, navigate to the following page: https://java.com/en/download/. When you click on the Free Java Download button, as shown in the following screenshot, the JRE version will be downloaded:
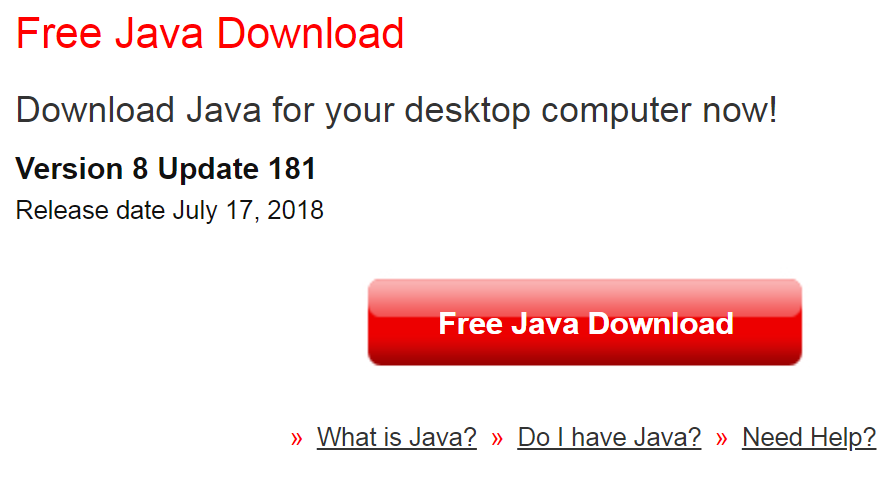
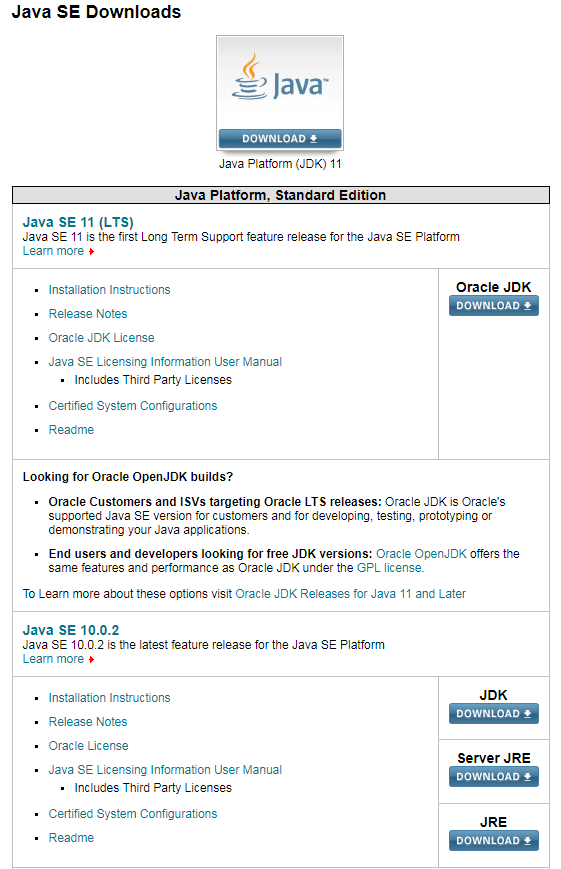
But we intend to use JDK for our program, so navigate to the following site: https://www.oracle.com/technetwork/java/javase/downloads/index.html. Here, there are multiple versions of JDK. The latest version out in the market right now is Java SE 10.0.2. Click on DOWNLOAD, as shown in the following screenshot, so that all the components are downloaded and configured in our machine:
It takes a while because there are quite a few steps to configure it. Keep clicking on Next so that Java is successfully configured in our machine. To check whether Java is installed in our machine, navigate to C:\Program Files. If we find the folder named Java there, it means that Java has been successfully installed in our machine. The Java folder is shown in the following screenshot:
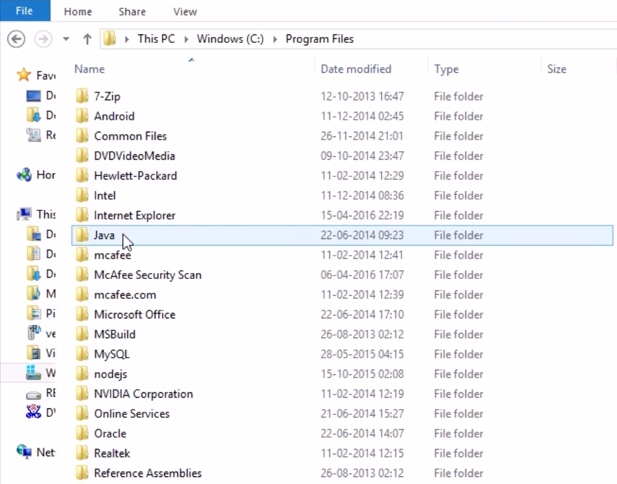
An important point to remember here is that if we are on 64-bit, only then will we see this Java folder in Program Files. If our machine is on 32-bit, then we need to go back to Program Files (x86) to get the Java folder.
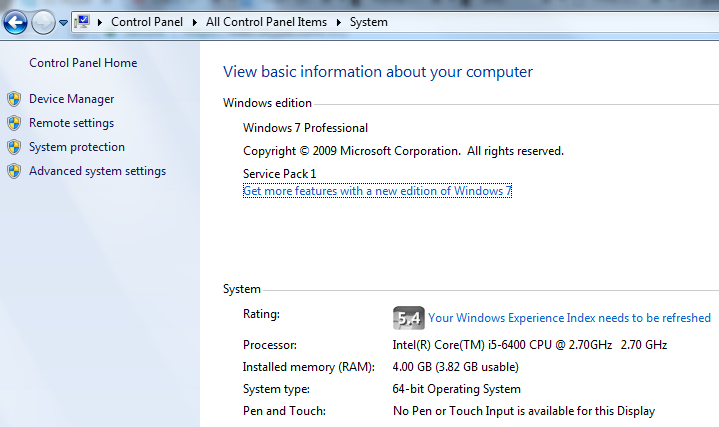
We can check our system type by going to Control Panel and clicking on System. The system I am working on is 64-bit, as displayed in the following screenshot:
After it is successfully downloaded, we enter the Java folder and observe that both JDK and JRE have been downloaded. We enter the JDK folder and copy the entire file path. We are doing this because we need to set environment variables. Setting environment variables means that we are letting our system know where the Java folder is located.
In our case, the Java folder is in C:/Program Files/Java/JDK, but Windows doesn't know where exactly it is. So to make our system aware of the location, we will place the JDK home path in our system variables. This will help our machine know where the Java folder is located, so that whenever we run our program, it will identify the exact JDK version and run our program. To update this in system environment variables, we copy the entire JDK path. Go to Control Panel, select System and Security, select System, and click on Advanced System Settings. In Advanced System Settings, select Environment Variables. When we click on Environment Variables, the following window appears:
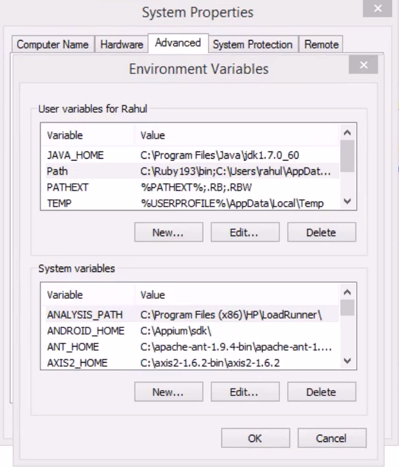
When we click on New in the User variables for Rahul section, we will get a prompt to add a New User Variable. We put in the name as JAVA_HOME, paste the JDK path in the variable value text box, and click on OK, as shown in the following screenshot:
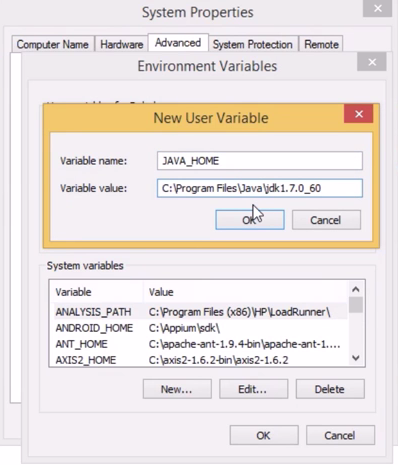
This is how we let our system know where exactly the Java folder is present. We will need to update another variable too. To do that, we go back to the JDK folder and enter the bin folder. We will see multiple .exe files, as shown in the following screenshot:
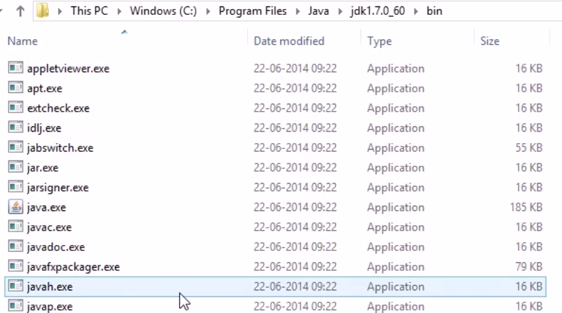
We copy the bin folder location path and return to our System Properties window. In System Variables, we will see a variable named Path. Double-clicking on it will show us a prompt to Edit System Variable, as shown in the following screenshot:
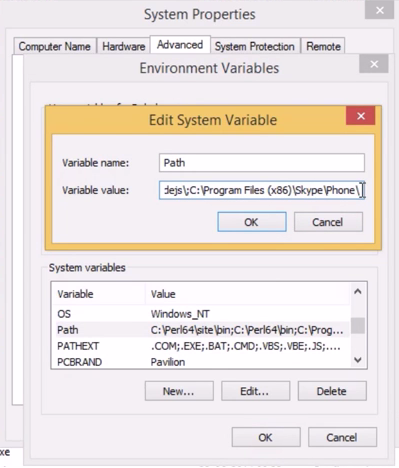
In the variable value, we go to the end, add a semicolon, and paste the bin folder path. This means we are setting the Path variable to the bin folder. We also create a new variable called JAVA_HOME, pointing to the Java folder. We need to set these two variables before we start working on Java. Once we set both the variables and click on OK, we will successfully set Environment Variables.
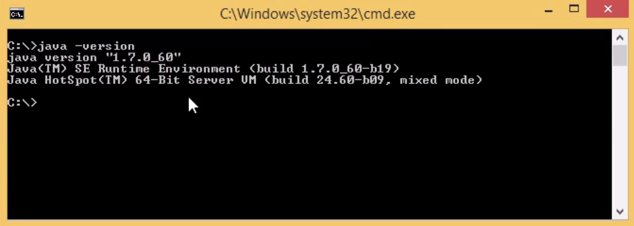
If we want to cross-check if the environment variables are properly configured or not, we use Command Prompt. In Command Prompt, we enter java -version and hit Enter. If we get an output as shown in the following screenshot, it means that Java has been successfully configured on our system:
The previous instructions take care of installing and configuring the system from our end. Next, we will try to download Eclipse, which is a Java editor tool where we write, run, and debug our code. As a pre-requisite to downloading Eclipse, we have to make sure that Java is properly configured in our machine. If any of the installation or configuration steps haven't been done correctly, Eclipse will not install properly.


