iSCSI block storage – manual provisioning and deployment
We will start by installing targetcli and using that to set up iSCSI to provide block-based storage to other systems for file usage, boot systems, and so on. This will showcase the wide range of uses that come with iSCSI block storage implemented with RHEL 8.1. We will then show how to decommission the storage device and clean up the systems after utilizing the resources.
First, we will install targetcli in order to utilize the iSCSI systems on rhel1:
$ sudo dnf install targetcli -y
We will follow that by enabling the system to start up the iSCSI block storage. When the system boots or has an issue that causes the target system to need to restart, it will reload the service in order to keep the storage up and operational:
$ sudo systemctl enable target
After that, we will allow iscsi-initiator through firewalld in order to ensure that the other servers are able to access the block storage without issue. We will also reload the firewall, or the opening you just made will not be there:
$ sudo firewall-cmd --permanent --add-service=iscsi-target
$ sudo firewall-cmd –reload
After that, we will be utilizing the new service we just installed—targetcli—to create network block storage in order to share it with rhel2.example.com:
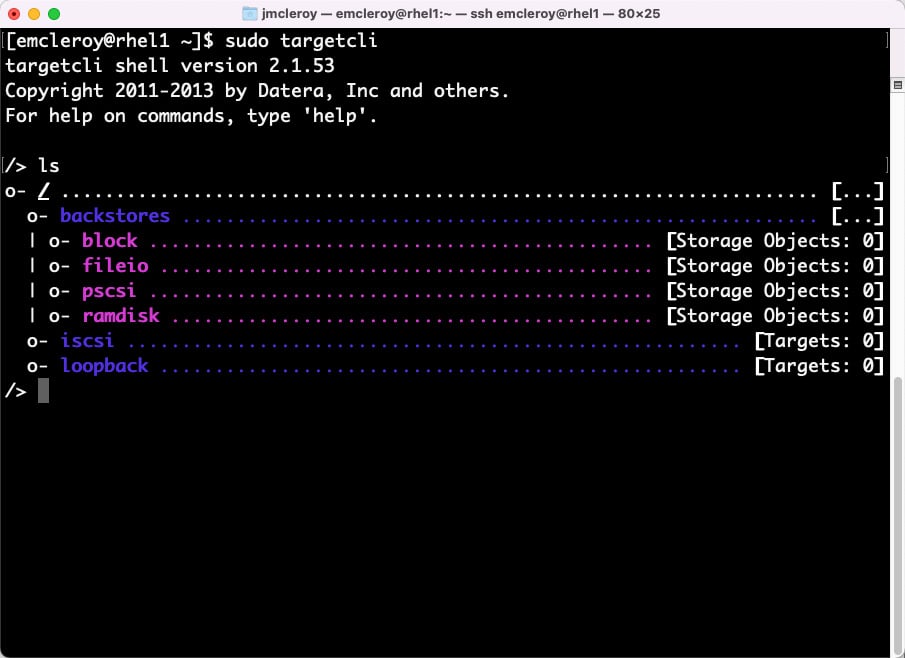
Figure 1.14 – targetcli initiated for the first time
We will now create backstores for the physical disk partitioning. We will be creating backstores of the type block in order to meet the needs of the iSCSI system today. This will allow the persistent filesystems and us to set up how we would like the LUNs to be in terms of size and security:
/> cd /backstores/block
/backstores/block> create blockstorage1 /dev/sdb
Created block storage object blockstorage1 using /dev/sdb.
Next, we will create an IQN in the /iscsi directory in order to provide a target and destination for the block storage device:
/backstores/block> cd /iscsi
/iscsi> create iqn.2022-05.com.example:rhel1
Created target iqn.2022-05.com.example:rhel1.
Created TPG 1.
Global pref auto_add_default_portal=true
Created default portal listening on all IPs (0.0.0.0), port 3260.
/iscsi> ls
o- iscsi ..................................... [Targets: 1]
  o- iqn.2022-05.com.example:rhel1 .............. [TPGs: 1]
    o- tpg1 ........................ [no-gen-acls, no-auth]
      o- acls ................................... [ACLs: 0]
      o- luns ................................... [LUNs: 0]
      o- portals ............................. [Portals: 1]
        o- 0.0.0.0:3260 .............................. [OK]
As you can see in the preceding code snippet, a default portal was created on port 3260 for connectivity to the block storage backstores using the create command for the IQN. Next, we will create a LUN for physically supporting the storage needs of the iSCSI block storage:
/iscsi> cd /iscsi/iqn.2022-05.com.example:rhel1/tpg1/luns
/iscsi/iqn.20…sk1/tpg1/luns> create  /backstores/block/blockstorage1
Created LUN 0.
The next thing we need for iSCSI is an ACL to allow traffic to reach our storage devices successfully. We will need to exit out of targetcli temporarily to view the Red Hat name for the initiator’s IQN. It can be found in /etc/iscsi/initiatorname.iscsi:
Global pref auto_save_on_exit=true
Configuration saved to /etc/
[emcleroy@rhel1 ~]$ vi /etc/iscsi/initiatorname.iscsi
Here is an example of the initiator name that is currently being used on the next image:
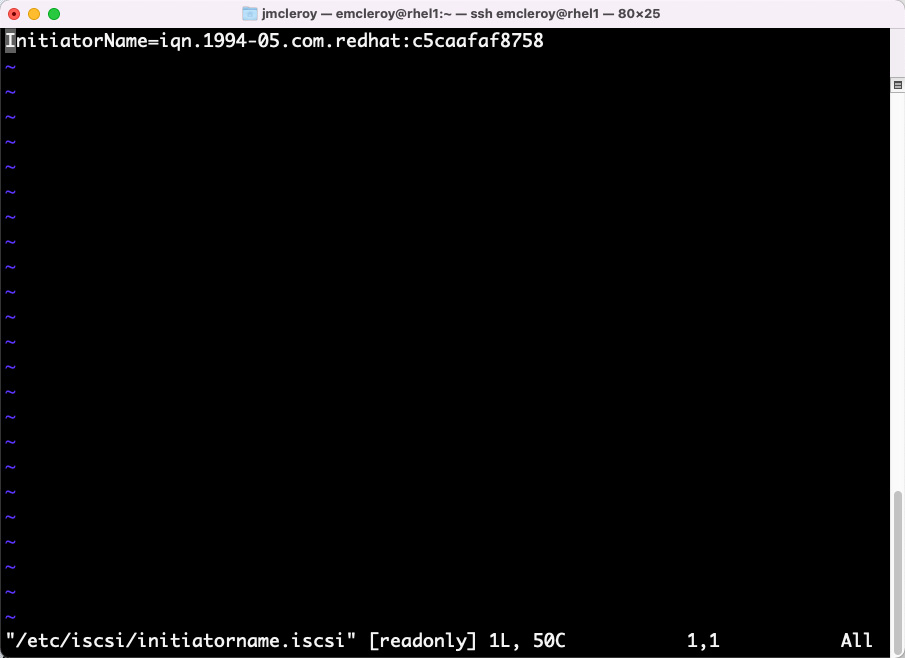
Figure 1.15 – initiatorname.iscsi
We will go back into targetcli and finish up the system preparations, setting up the system to use an ACL of our choosing for the system that will be utilizing the block storage:
[emcleroy@rhel1 ~]$ sudo targetcli
targetcli shell version 2.1.53
Copyright 2011-2013 by Datera, Inc and others.
For help on commands, type 'help'.
> cd /iscsi/iqn.2022-05.com.example:rhel1/tpg1/acls
/iscsi/iqn.20...sk1/tpg1/acls> create iqn.2022-05.com.example:rhel2
Created Node ACL for iqn.2022-05.com.example:rhel2
Created mapped LUN 0.
Next, we will remove the default portal and create one on the specific IP address of our server:
> cd /iscsi/iqn.2022-05.com.example:rhel1/tpg1/portals
/iscsi/iqn.20.../tpg1/portals> delete 0.0.0.0 3260
Deleted network portal 0.0.0.0:3260
/iscsi/iqn.20.../tpg1/portals> create 192.168.1.198 3260
Using default IP port 3260
Created network portal 192.168.1.198:3260.
Finally, the following is your completed block storage target:
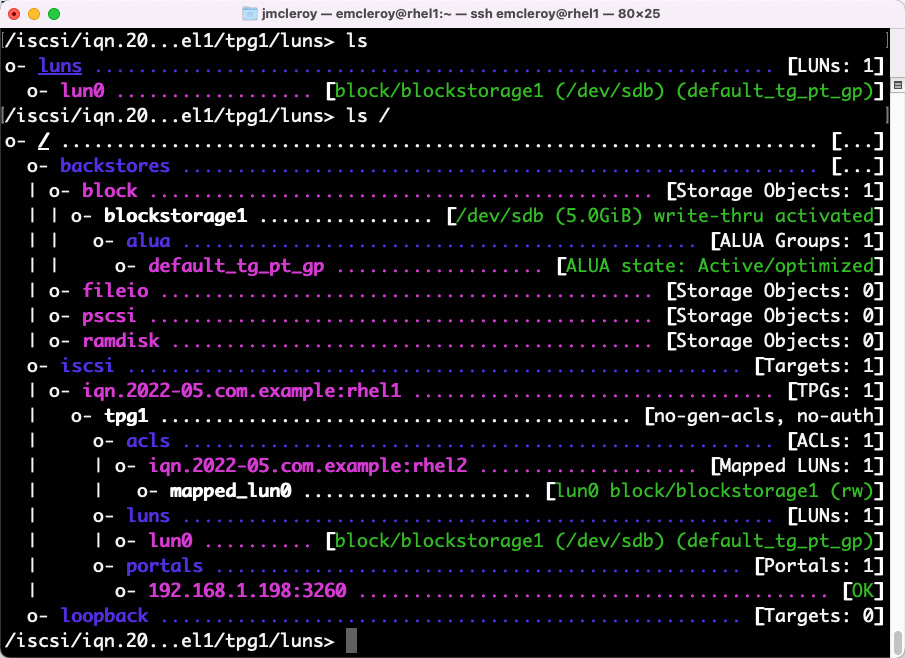
Figure 1.16 – iSCSI block storage target
We have just shown how to provision iSCSI block storage for consumption. Now, we will showcase how to utilize that block storage for actual usage in your systems. We will connect from rhel1.example.com to rhel2.example.com and mount it, provision it, and utilize it to move and store files, as one of the examples of how we can use these systems is to increase the storage capacity of remote servers without needing to increase space, power, or cooling directly for the rack the server is housed within.
The first thing we will need to do is install the iSCSI utilities, as on the exam you may not have the installation of the Server with the GUI:
$ sudo dnf install iscsi-initiator-utils targetcli -y
This allows us to ingest the iSCSI block storage that we created previously. Next, we are going to look up the configured target on rhel1 (192.168.1.198) (please note: this might be a different IP for you in your lab) and log in to it to ensure connectivity. From here, we need to set the login information on the /etc/iscsi/iscsid.conf file in order to pass the correct login information so that we can log in to the storage device:
$ sudo getent hosts rhel1
Now, we will set the InitiatorName field so that we can pass a known entry to the connecting server using the following commands:
[emcleroy@rhel1 ~]$ sudo vi /etc/iscsi/initiatorname.iscsi
InitiatorName=iqn.2022-05.com.example:rhel1
[emcleroy@rhel1 ~]$ sudo systemctl restart iscsid.service
Please note you can use the manual page to gain further insight into the iscsiadm command set with the man iscsiadm command. On rhel2, we will do a discovery of available block devices using the iscsiadm command. The –m flag specifies the mode—in this case, discovery. The –t flag specifies the type of target—in our case, st, which is sendtargets, which tells the server to send a list of iSCSI targets. The –p flag specifies which portal to use, which is a combination of IP address and port. If no port is passed, it will default to 3260:
[emcleroy@rhel2 ~]$ sudo iscsiadm -m discovery -t st -p 192.168.1.198:3260
Please note the output from the preceding command will be as follows:
192.168.1.198:3260,1 iqn.2022-05.com.example:rhel1
As you can see here, we have a block device that is showing as available.
We will try to log in to the device, and you can see we have logged in and it is showing the device connected, as follows:
[emcleroy@rhel2 ~]$ sudo iscsiadm -m node -T iqn.2022-05.com.example:rhel1 -p 192.168.1.198 -l
In the preceding code, we are using the –m flag to choose node mode. We are using the –T flag to specify the target name. We are again using the –p flag for the portal, which defaults to port 3260. Finally, we are using the –l flag to tell iscsiadm to log in to the target.
Next, we are going to use the –m mode flag to check the session and –P to print the information level of 3:
[emcleroy@rhel2 ~]$ sudo iscsiadm -m session -P 3
iSCSI Transport Class version 2.0-870
version 6.2.1.4-1
Target: iqn.2022-05.com.example:rhel1 (non-flash)
     Current Portal: 192.168.1.198:3260,1
     Persistent Portal: 192.168.1.198:3260,1
You can see that we have sdb, which is the second drive on rhel2, and now we have sdc as well:
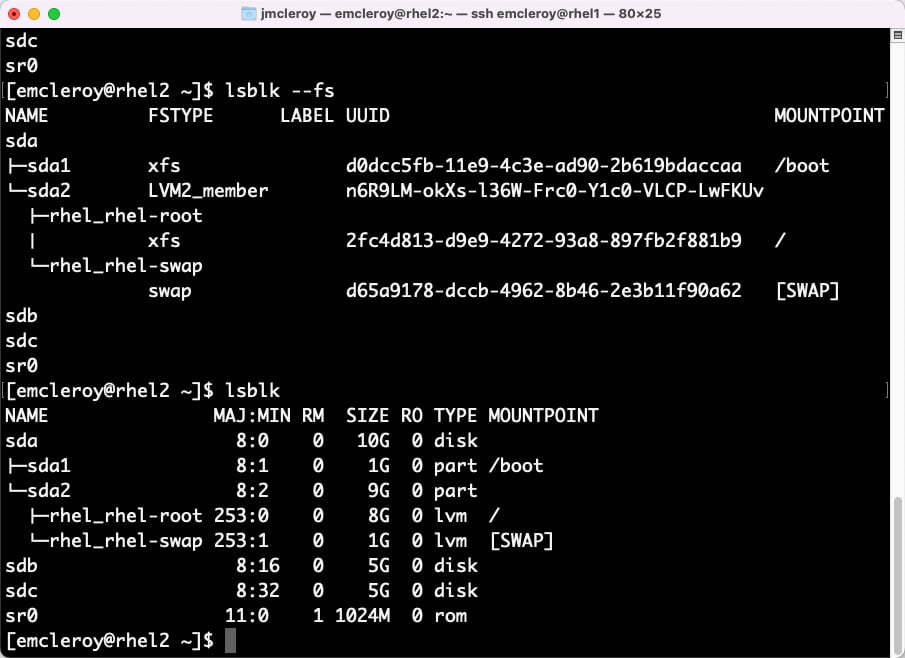
Figure 1.17 – sdc drive is now showing up
Next, we are going to partition the drive and format it with xfs. This will allow us to mount the system on boot as well as to save persistent files. This can be used for many things from file storage to OS or databases. First, we are going to format the drive to xfs:
[emcleroy@rhel2 ~]$ sudo mkfs.xfs /dev/sdc
meta-data=/dev/sdc               isize=512    agcount=4, agsize=327680 blks
         =                       sectsz=512   attr=2, projid32bit=1
         =                       crc=1        finobt=1, sparse=1, rmapbt=0
         =                       reflink=1
data     =                       bsize=4096   blocks=1310720, imaxpct=25
         =                       sunit=0      swidth=0 blks
naming   =version 2              bsize=4096   ascii-ci=0, ftype=1
log      =internal log           bsize=4096   blocks=2560, version=2
         =                       sectsz=512   sunit=0 blks, lazy-count=1
realtime =none                   extsz=4096   blocks=0, rtextents=0
Then, we are going to use the following command to get the UUID to use in fstab to make it a persistent mount that will automatically mount at startup:
[emcleroy@rhel2 ~]$ lsblk -f /dev/sdc
NAME FSTYPE LABEL UUID                                 MOUNTPOINT
sdc  xfs          38505868-00de-4269-88d8-3357a22f2101
[emcleroy@rhel2 ~]$ sudo vi /etc/fstab
Here, we can see an example of the added value highlighted in fstab:
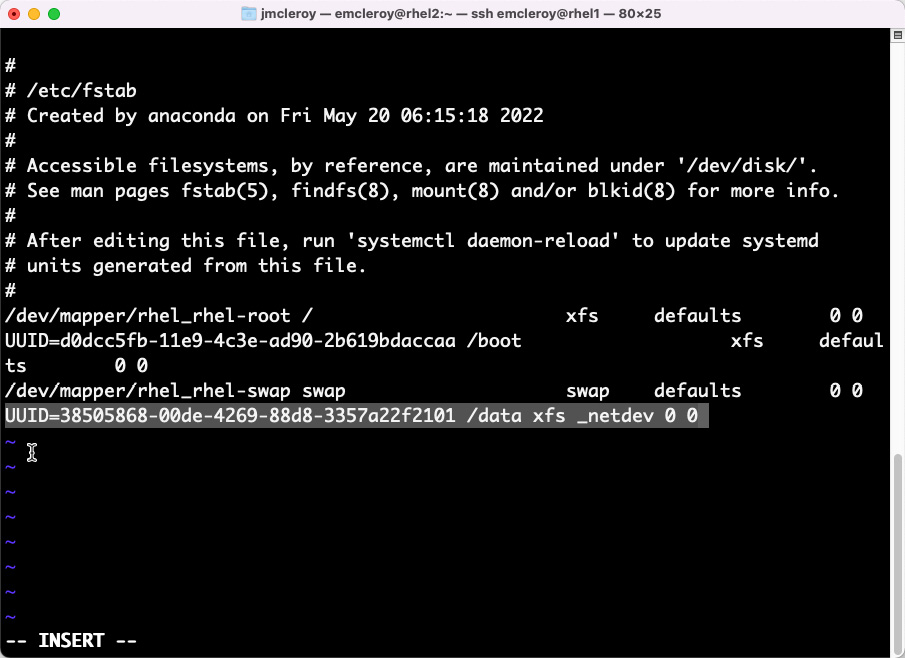
Figure 1.18 – Updated fstab after adding the iSCSI block storage device
Here are the lines where we added the new iSCSI drive to fstab. Please note that for network devices, we pass the _netdev option. Next, we are going to mount the system in order to use it for moving files around:
[emcleroy@rhel2 ~]$ sudo mkdir -p /data
[emcleroy@rhel2 ~]$ sudo mount /data
[emcleroy@rhel2 ~]$ df /data
Filesystem     1K-blocks  Used Available Use% Mounted on
/dev/sdc         5232640 69616   5163024   2% /home/emcleroy/data
[emcleroy@rhel2 ~]$ cd /data
After it is mounted, we are going to move into the new drive, create a folder and a test .txt file, and ensure it saves, which it does by using the following commands:
[emcleroy@rhel2 ~]$ sudo mkdir test
[emcleroy@rhel2 ~]$ cd test/
[emcleroy@rhel2 ~]$ sudo vi test.txt
Next, we are going to remove the mount, log out of the connection, and delete the leftovers:
[emcleroy@rhel2 ~]$ cd
[emcleroy@rhel2 ~]$ sudo umount /data
[emcleroy@rhel2 ~]$ sudo iscsiadm -m node -T iqn.2022-05.com.example:rhel1 -p 192.168.1.198 -u
Logging out of session [sid: 8, target: iqn.2022-05.com.example:rhel1, portal: 192.168.1.198,3260]
Logout of [sid: 8, target: iqn.2022-05.com.example:rhel1, portal: 192.168.1.198,3260] successful.
[emcleroy@rhel2 ~]$ sudo iscsiadm -m node -T iqn.2022-05.com.example:rhel1 -p 192.168.1.198 -o delete
This wraps up the section on manually setting up iSCSI. Next is automating it. We will go into more detail in the hands-on review and the quiz at the end of the book. I hope you are enjoying this journey as much as I am.


