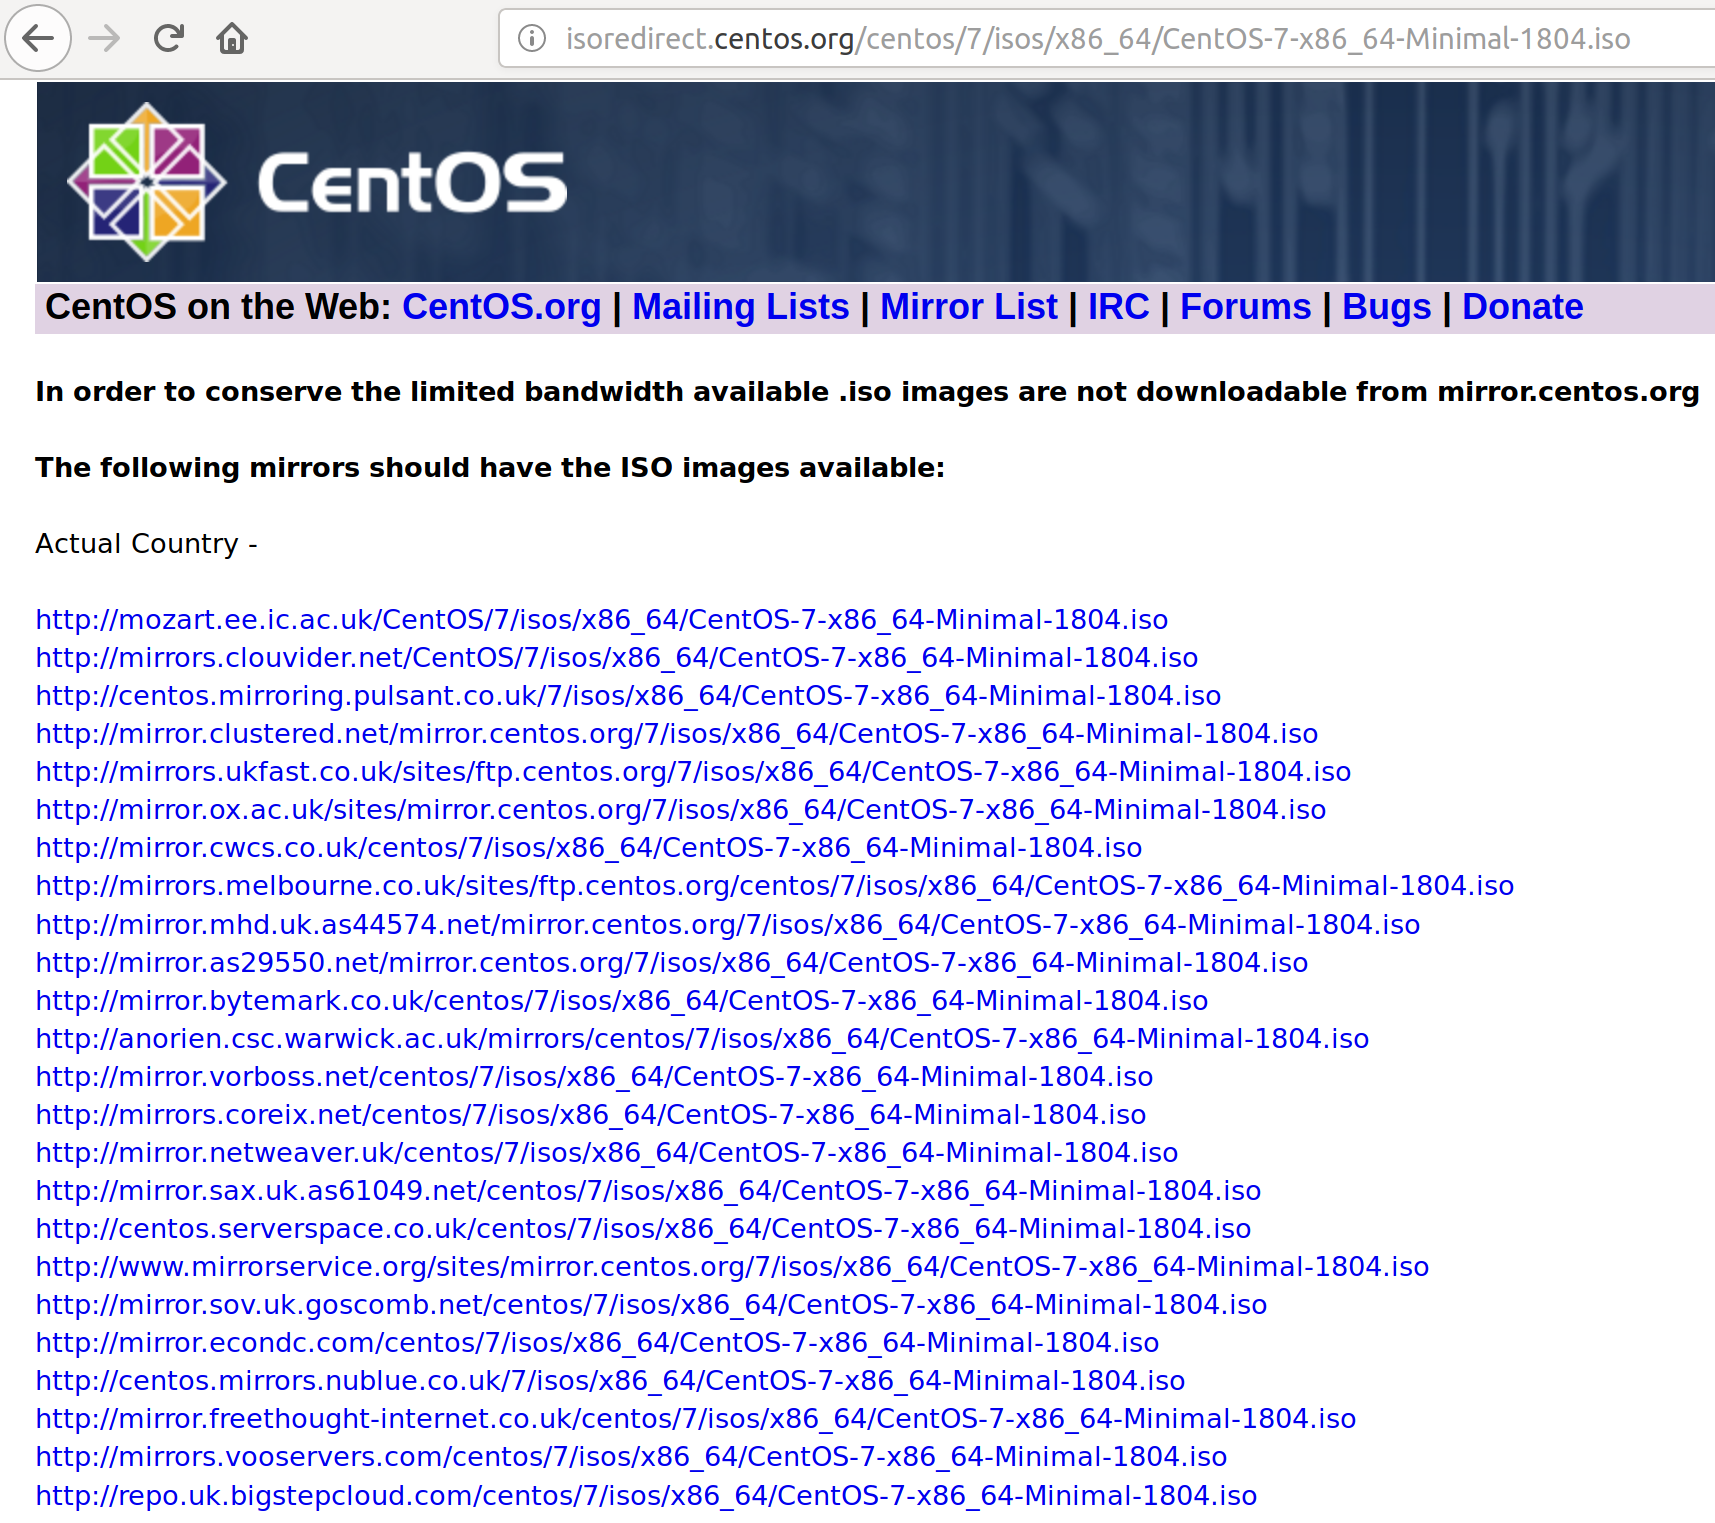
Now that we have our VM, it's time to install our OS on it.
Clicking Start on the top of the main VirtualBox window, with your VM selected, should prompt you to first select a startup disk.
I've navigated to my Downloads folder and chosen the downloaded image from earlier.
Pressing Start will boot the machine from our media.
You will be presented with the option screen within the VM, with Test this media & install CentOS 7 selected by default.
I usually hit the up arrow (within the VM window) to select only Install CentOS 7 and skip the media check, though you may wish to perform the test.
If you're using physical media to install a machine (a DVD or CD), it might be a good idea to run a test of the media prior to installation.
Pressing Enter will continue the installation.
You will be prompted to choose your language. I choose English, because I'm monolingual.
Once done, you will find yourself on the landing page of the most recent CentOS installer:
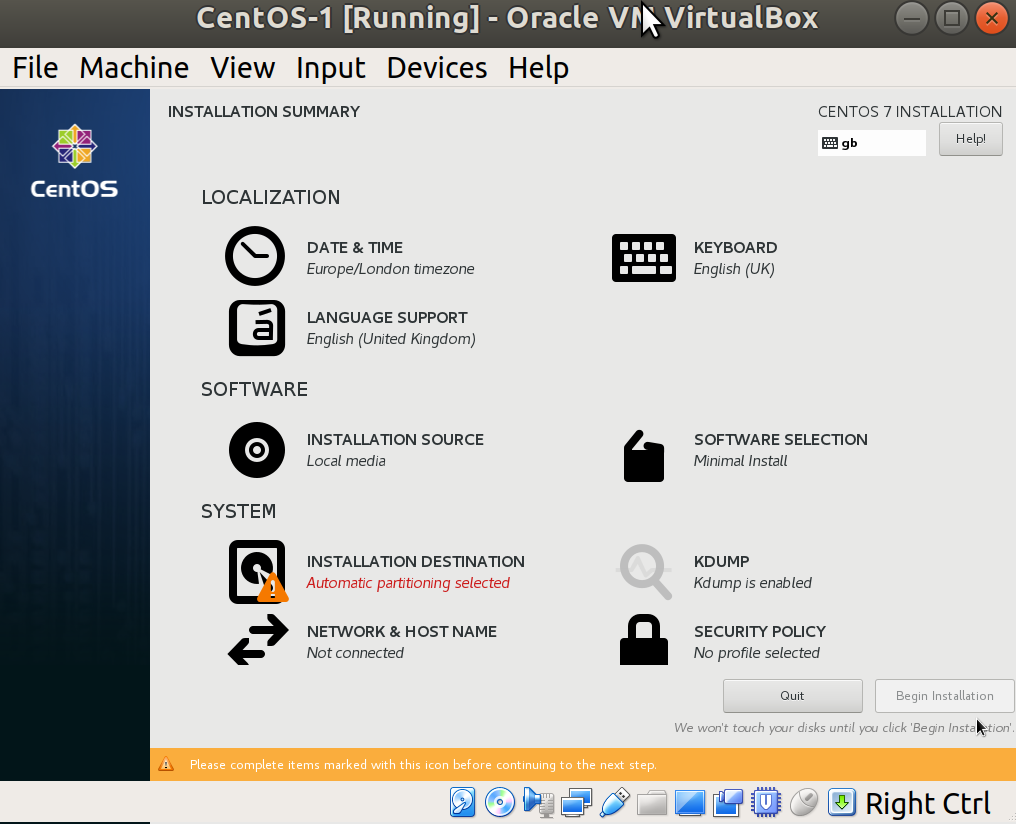
Note the message at the bottom, suggesting that items marked with the yellow icon need to be completed.
Because our date/time, keyboard, and language are all correct, we'll move on to the next stages, but feel free to correct any of these settings if they're wrong for you.
Notice that under INSTALLATION SOURCE we've got Local media selected, and under SOFTWARE SELECTION we've got Minimal Install. This is a product of us selecting the minimal image earlier on, and gives us a good chance to talk about installation over the internet.
First, we need to configure our network. Click on NETWORK & HOST NAME to do this.
You should have a single Ethernet device, provided as part of the default provisioning step when making our VM.
Toggle the ON/OFF toggle to the right of your device name, and check that the network values are populated in a similar way to mine:
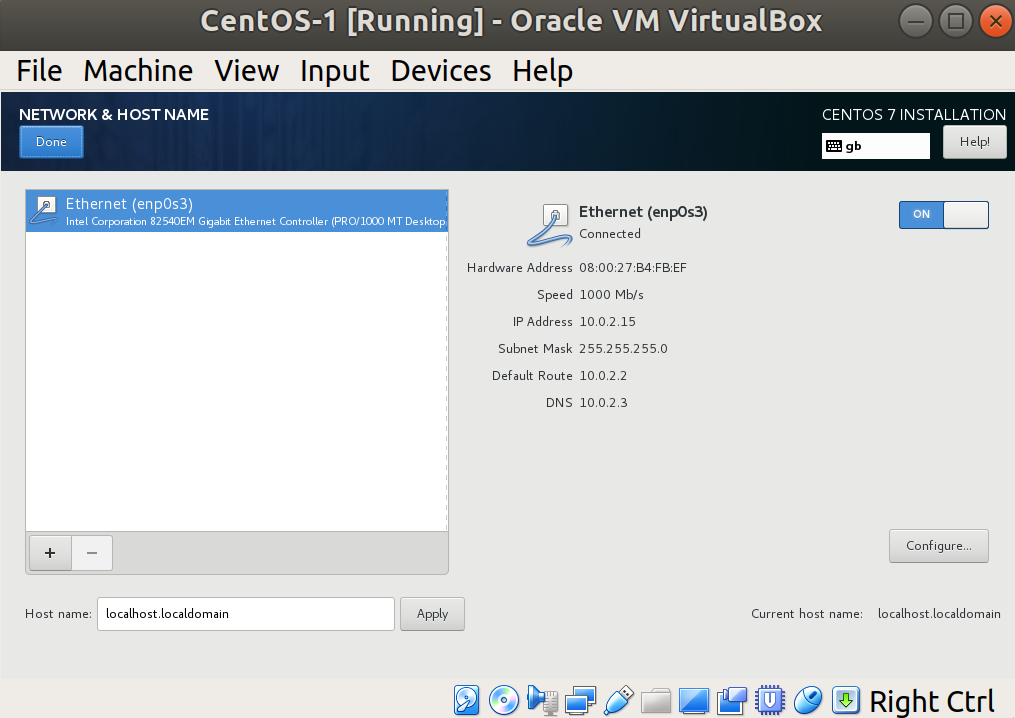
VirtualBox creates a NAT network by default, meaning that your VM doesn't sit on the exact same network as the host computer. Instead, the VM exists in a network by itself, but with a path to the outside world (via your host machine).
Press Done in the top left to complete our network setup (for now)!
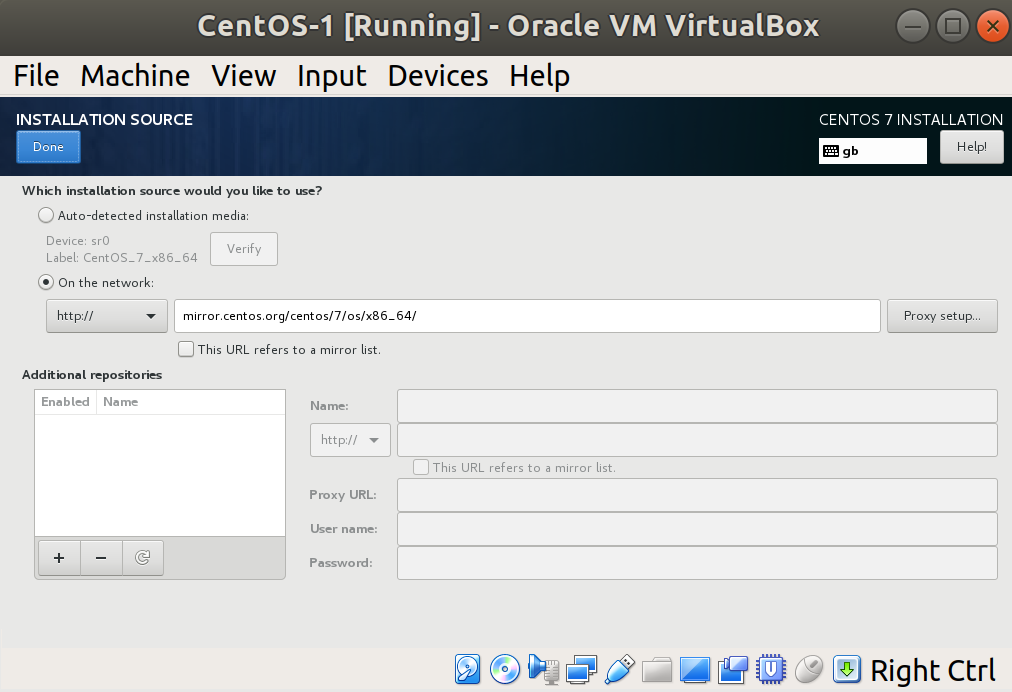
Back on the main screen, click on INSTALLATION SOURCE:
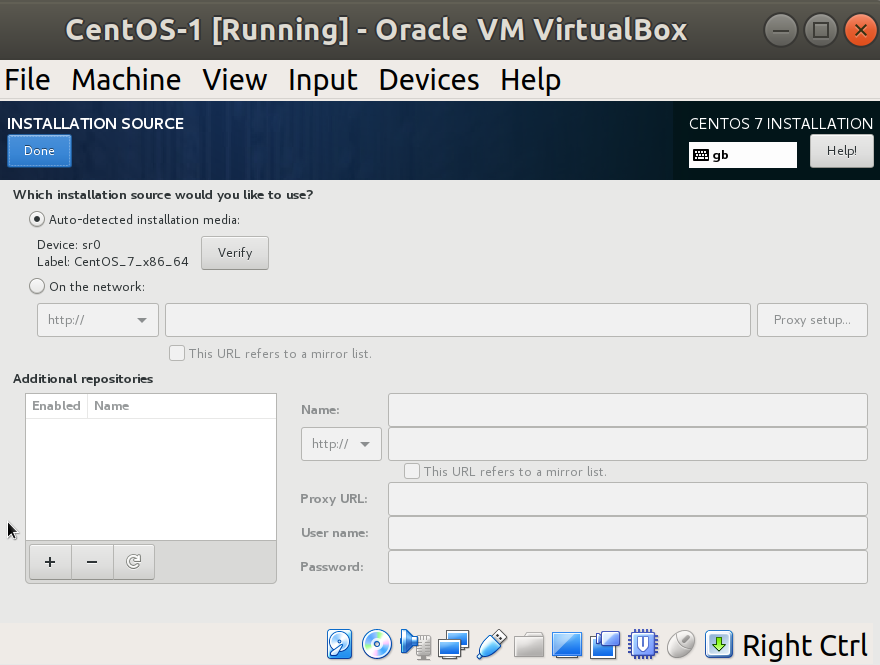
Within this screen, you can see that the auto-detected media is actually our disk image (sr0 being Linux's denotion of the disc drive).
Change the selected radio button to be On the network.
Populate the URL bar with the following:
mirror.centos.org/centos/7/os/x86_64/
You should end up with the following screenshot:
Press Done in the top left.
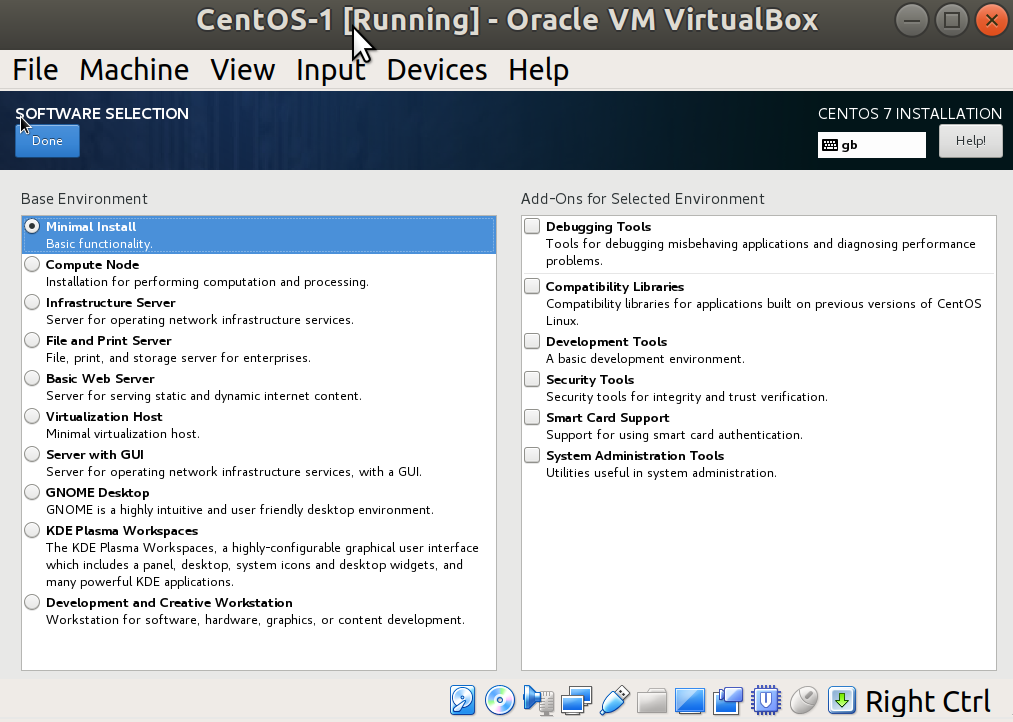
Once you're back on the main screen, it will be indicated that your software source has changed, and you need to verify this by entering the SOFTWARE SELECTION window. Proceed with this.
Have a read through the different options, but for now leave Minimal Install selected and click Done:
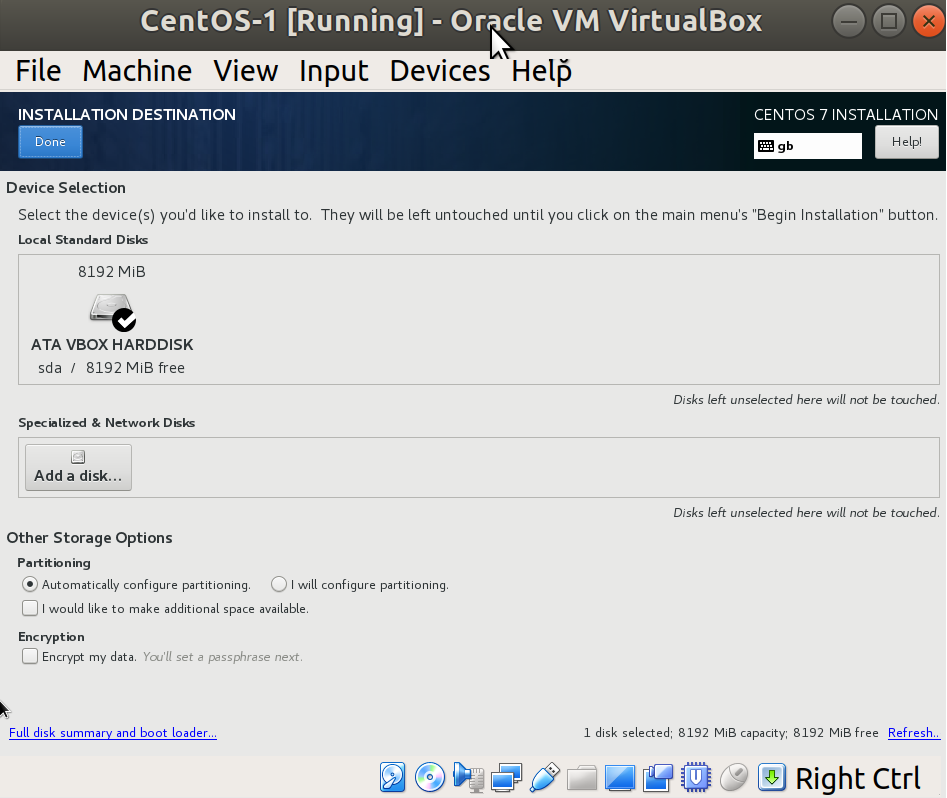
The last thing to do from the main screen is set our INSTALLATION DESTINATION. Click through to this screen.
Have a read of the options, but for now we're not going to bother with changing the default partition layout, or encrypting our disk. You should also see that the default selected disk is our 8 GB VirtualBox one.
Click Done (you shouldn't have had to make any changes, but the installer makes you enter this screen at the very least):
We've finally finished our (fairly basic) configuration. Hit the Begin Installation button at the bottom of the main screen.
You'll see the installation begin, and will be given the following screen while you wait:
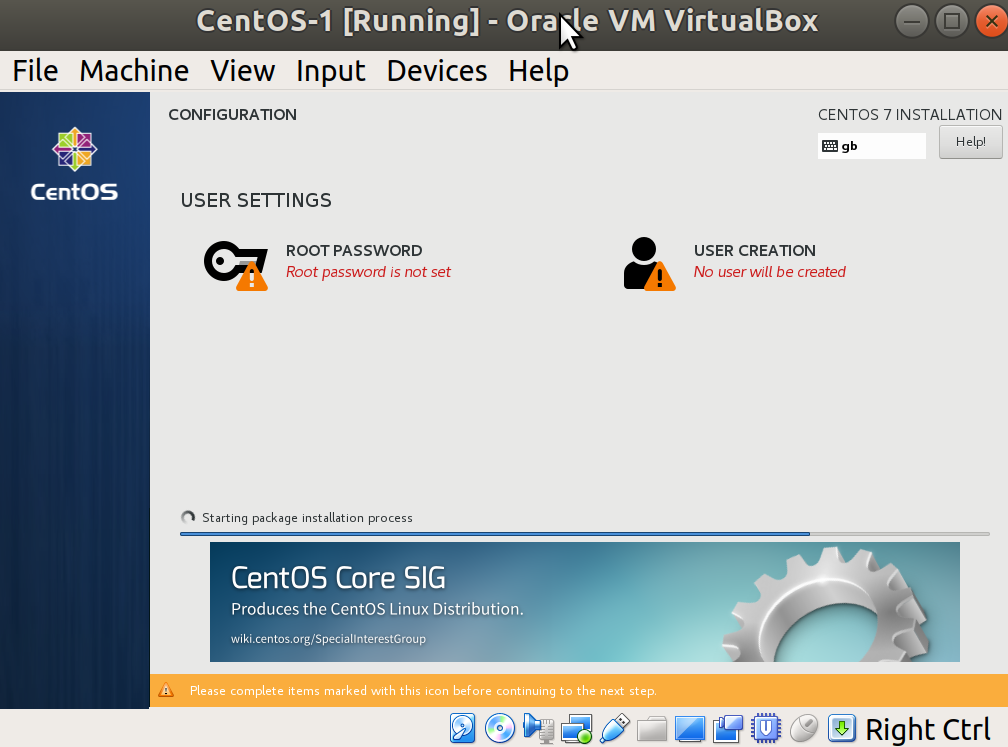
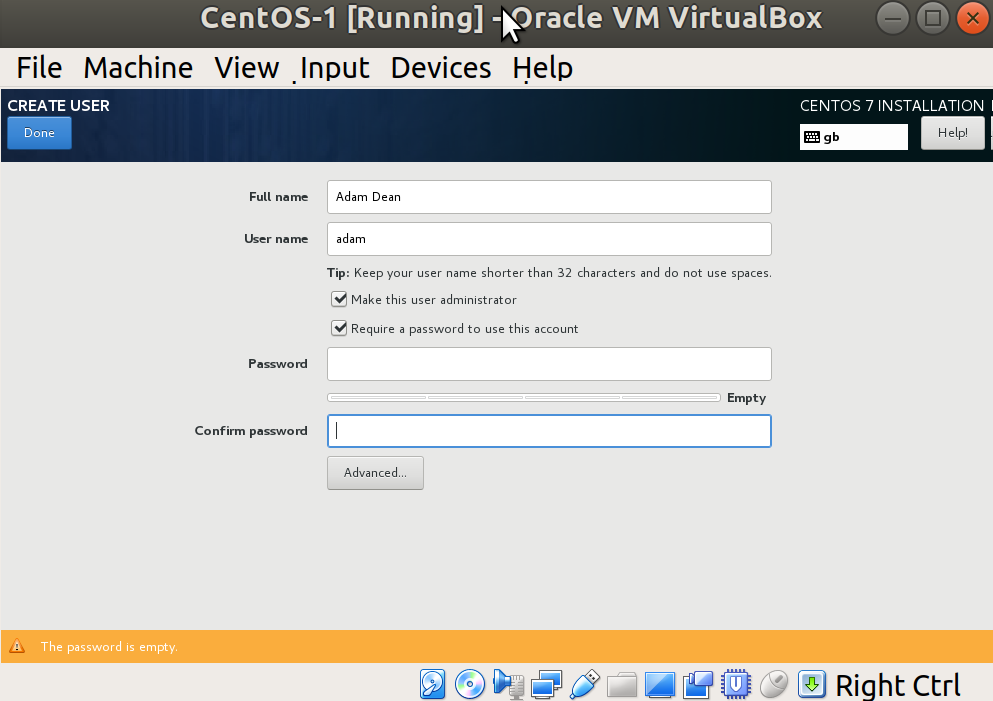
Click on the options at the top in turn, setting a root password and creating a user.
The root user is akin to the administrator on a Windows system; it's all-powerful and can be dangerous in the wrong hands. Some distributions don't even prompt you to set a root password on installation, making you use your own user and su or sudo instead.
When making your user, flag them as an administrator too:
Clicking Done will take you back to the installation progress screen, where you may be prompted through the rest of the installation, and eventually get asked to reboot into your freshly installed system.
No sane person should ever have to produce that many screenshots.


