Search icon CANCEL
Subscription
0
Cart icon
Your Cart (0 item)
Close icon
You have no products in your basket yet
Save more on your purchases! discount-offer-chevron-icon
Savings automatically calculated. No voucher code required.
Arrow left icon
Explore Products
Best Sellers
New Releases
Books
Videos
Audiobooks
Learning Hub
Free Learning
Arrow right icon
Arrow up icon
GO TO TOP
Implementing Cisco UCS Solutions

You're reading from   Implementing Cisco UCS Solutions Deploy, manage, and automate your datacenter

Arrow left icon
Product type Paperback
Published in Apr 2017
Publisher
ISBN-13 9781786464408
Length 482 pages
Edition 2nd Edition
Tools
Concepts
Arrow right icon
Authors (2):
Arrow left icon
Prasenjit Sarkar Prasenjit Sarkar
Author Profile Icon Prasenjit Sarkar
Prasenjit Sarkar
Anuj Modi Anuj Modi
Author Profile Icon Anuj Modi
Anuj Modi
Arrow right icon
View More author details
Toc

Table of Contents (15) Chapters Close

Preface 1. What's New with Cisco UCS FREE CHAPTER 2. Installing Cisco UCS Hardware 3. Setting Up a Lab Using Cisco UCS Emulator 4. Configuring Cisco UCS Using UCS Manager 5. Configuring LAN Connectivity 6. Configuring SAN Connectivity 7. Creating Identity Resource Pools, Policies, and Templates 8. Creating and Managing Service Profiles 9. Managing UCS through Routine and Advanced Management 10. Virtual Networking in Cisco UCS 11. Configuring Backup, Restore, and High Availability 12. Cisco UCS Failure Scenarios Testing 13. Third-Party Application Integration 14. Automation and Orchestration of Cisco UCS

Learning to create IP pools


IP Pools are the logical IP address that can be assigned to blade servers. There are two kind of IP pools in UCSM.

  • ext-mgmt pool
  • iscsi-initiator pool

An ext-mgmt pool is collection of IP addresses that are assigned as management interface to blade server. This IP address provide KVM console to manage the server remotely while iscsi-initiator pool provide the IP address for accessing the iSCSI storage

The following are the steps to create ext-mgmt pool:

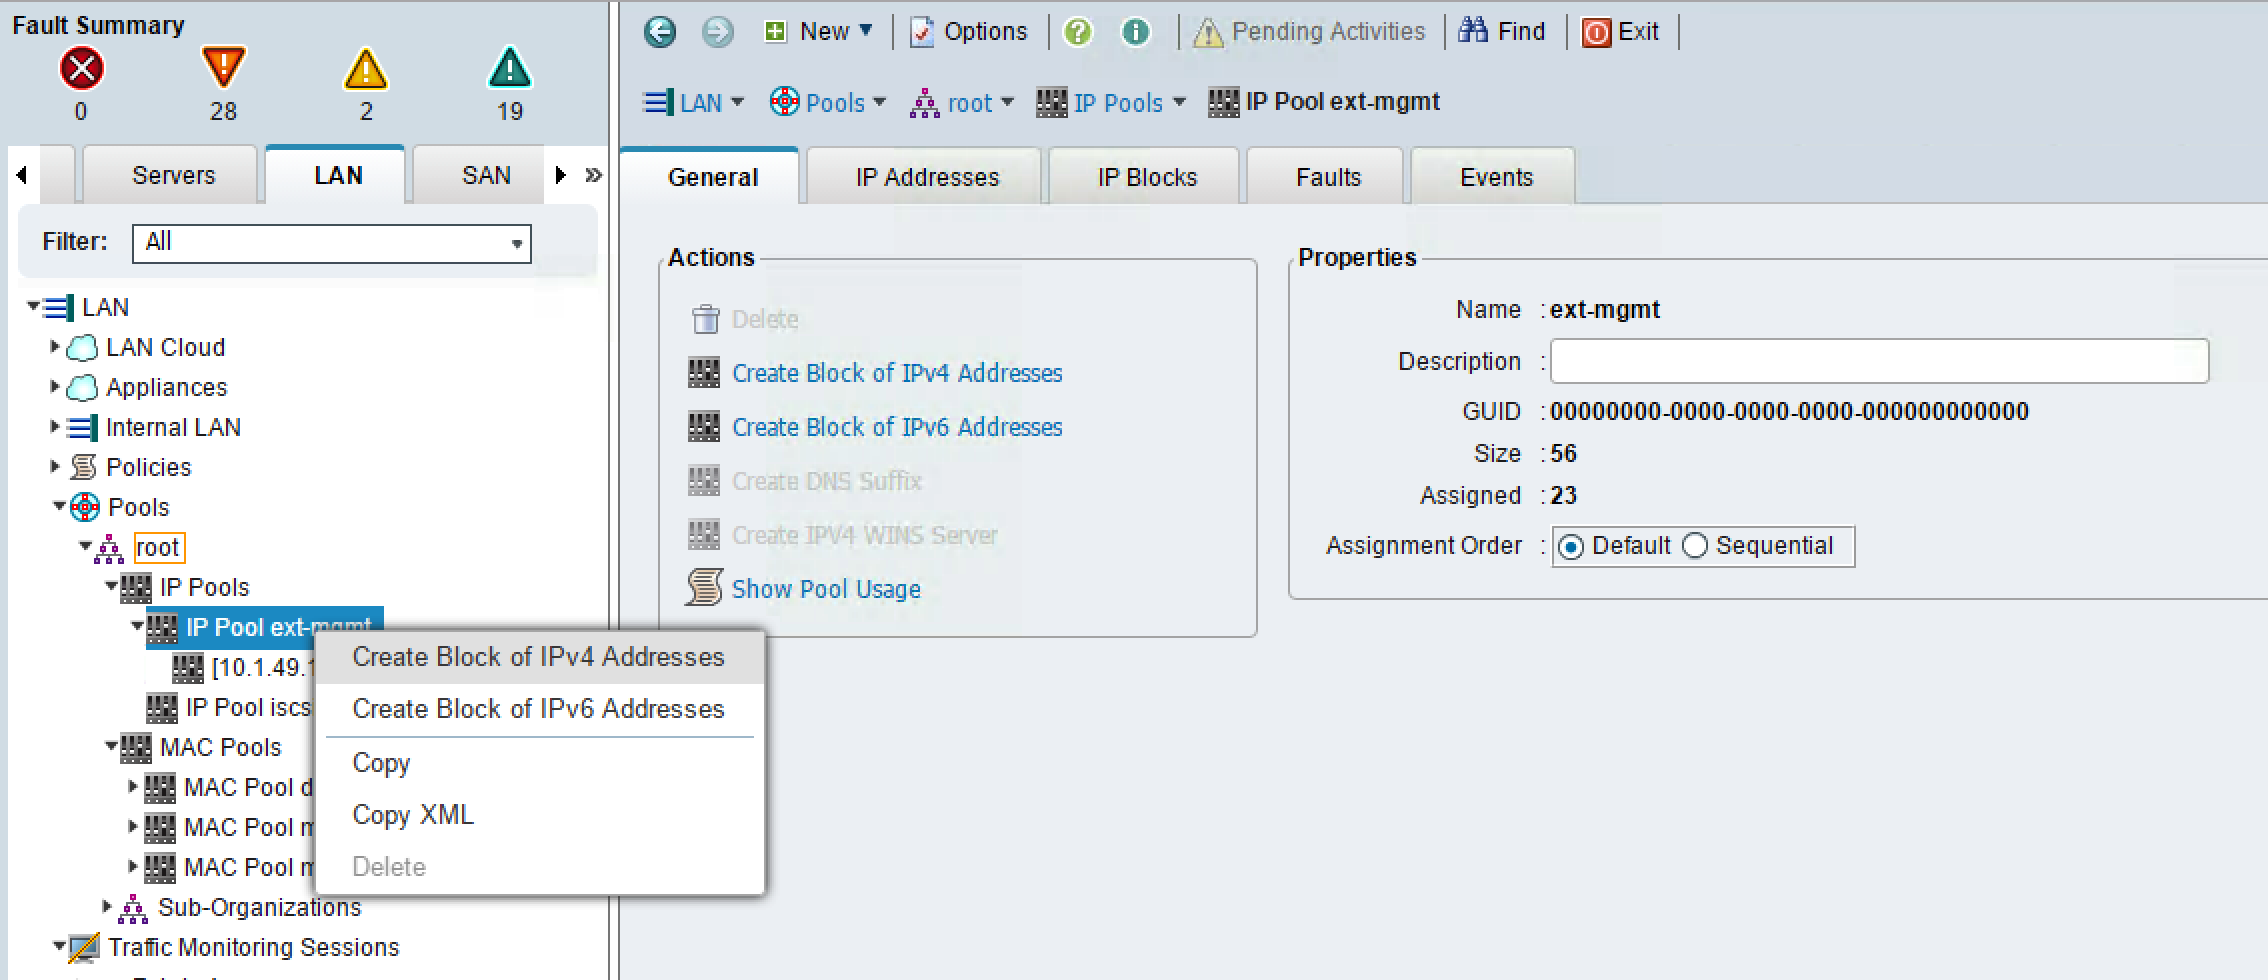
  1. Log in to the UCSM.
  2. Click on the LAN tab in the navigation pane.
  3. Click on the Pools tab and expand root.
  4. Click on the IP Pools tab and expand it.
  5. Right-click on IP Pool ext-mgmt, and click on Create Block of IPv4 Addresses, as shown in the following screenshot:
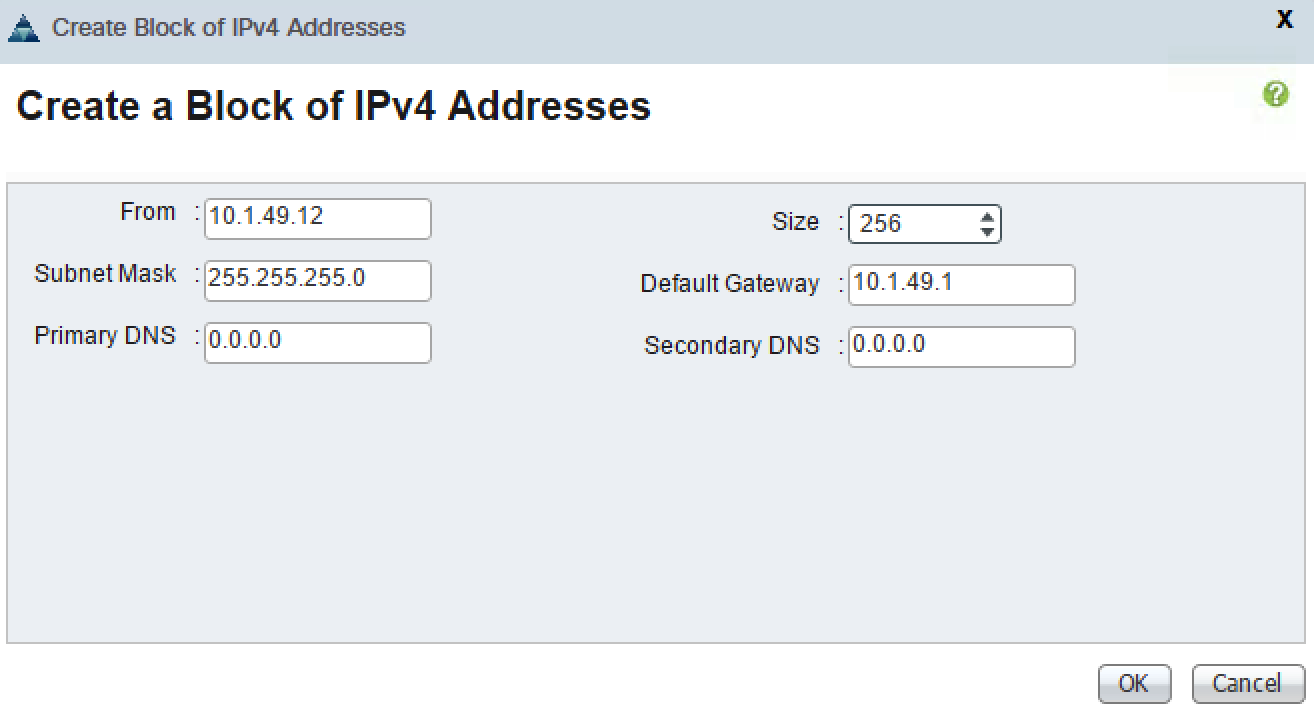
  1. Enter the management IP address information in From along with range in Size, Subnet Mask and Default Gateway details as shown in the screenshot.
  2. Click on Ok.
lock icon The rest of the chapter is locked
Register for a free Packt account to unlock a world of extra content!
A free Packt account unlocks extra newsletters, articles, discounted offers, and much more. Start advancing your knowledge today.
Unlock this book and the full library FREE for 7 days
Get unlimited access to 7000+ expert-authored eBooks and videos courses covering every tech area you can think of
Renews at $19.99/month. Cancel anytime
Banner background image