Setting up deployment groups
Deployment groups are logical agent groupings for application deployment on target machines based on environments – they are typically named based on your project needs and promotion levels before they go to production. Agents are installed in each environment. Each agent under the deployment groups supports only Windows and Linux.
These deployment groups can be divided based on environments, such as development (Dev), quality assurance (QA), user acceptance testing (UAT), and production (Prod), as shown in the following figure:
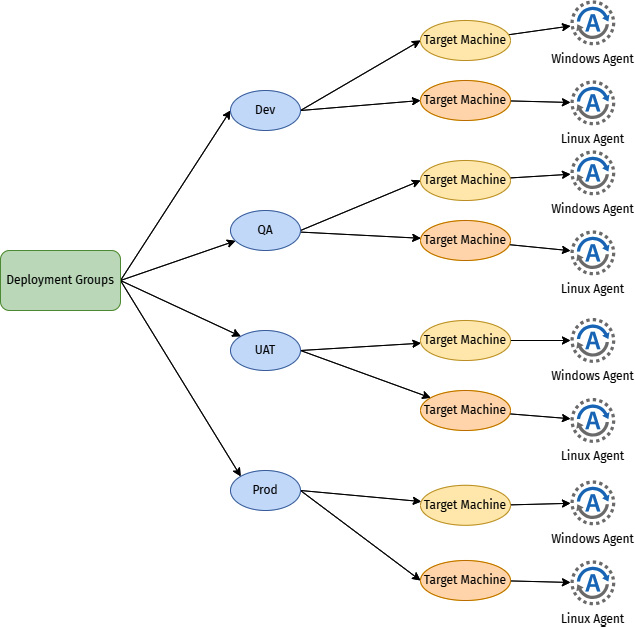
Figure 1.24 – Deployment groups concept
To create a deployment group, follow these instructions:
- Navigate to Pipelines | Deployment groups | Groups | Add a deployment group:
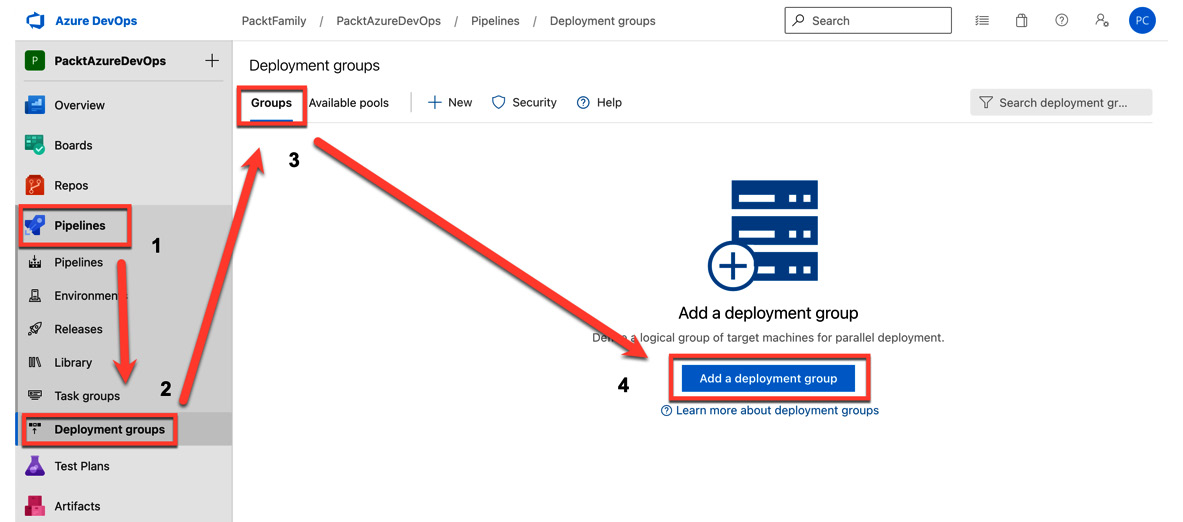
Figure 1.25 – Adding a deployment group
- Enter the required information and click Create:
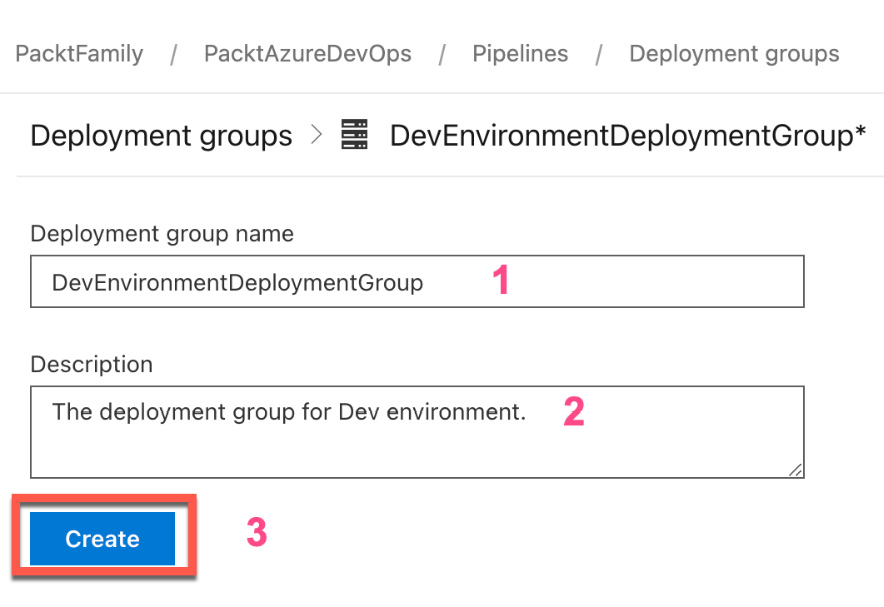
Figure 1.26 – Entering deployment group information
- After creating the deployment group, you must set up the deployment agent under your deployment group. There are two operating systems the deployment agents support:
- Windows users can install an agent of the deployment group by copying the PowerShell script and running it with an administrator command prompt:
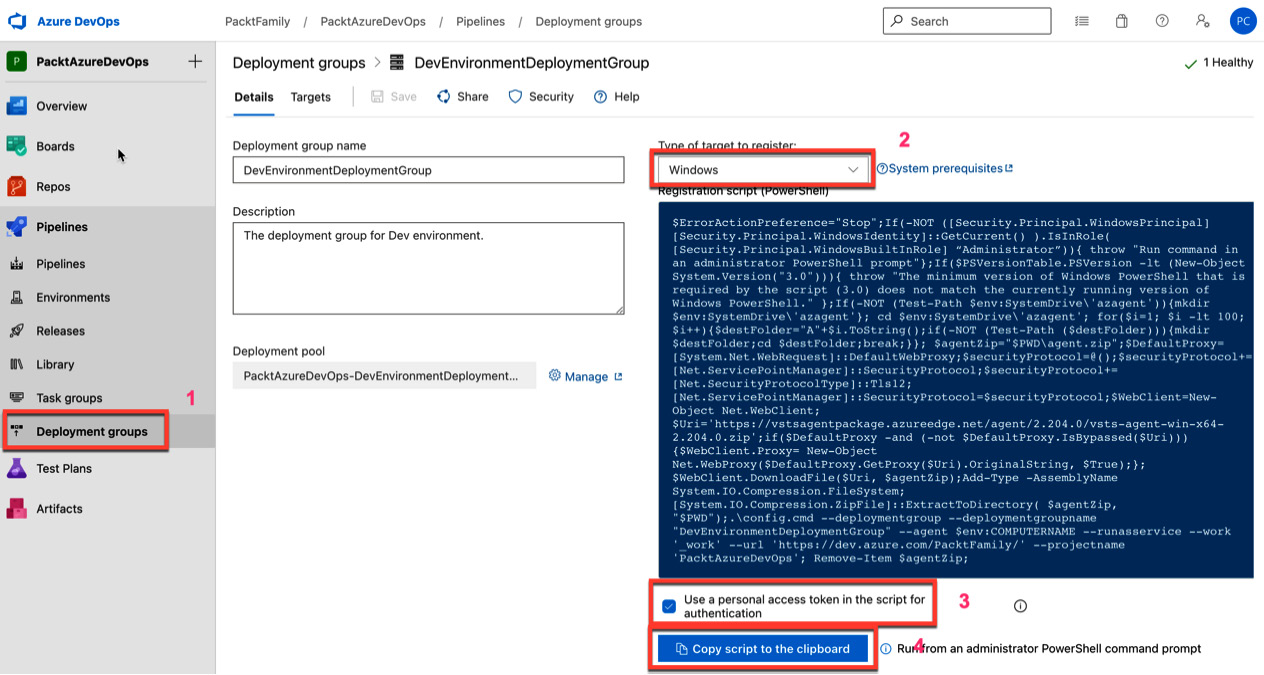
Figure 1.27 – Script to deploy an agent on Windows
- Linux users can install an agent of the deployment group by copying the bash shell script and running it with an administrator command prompt:
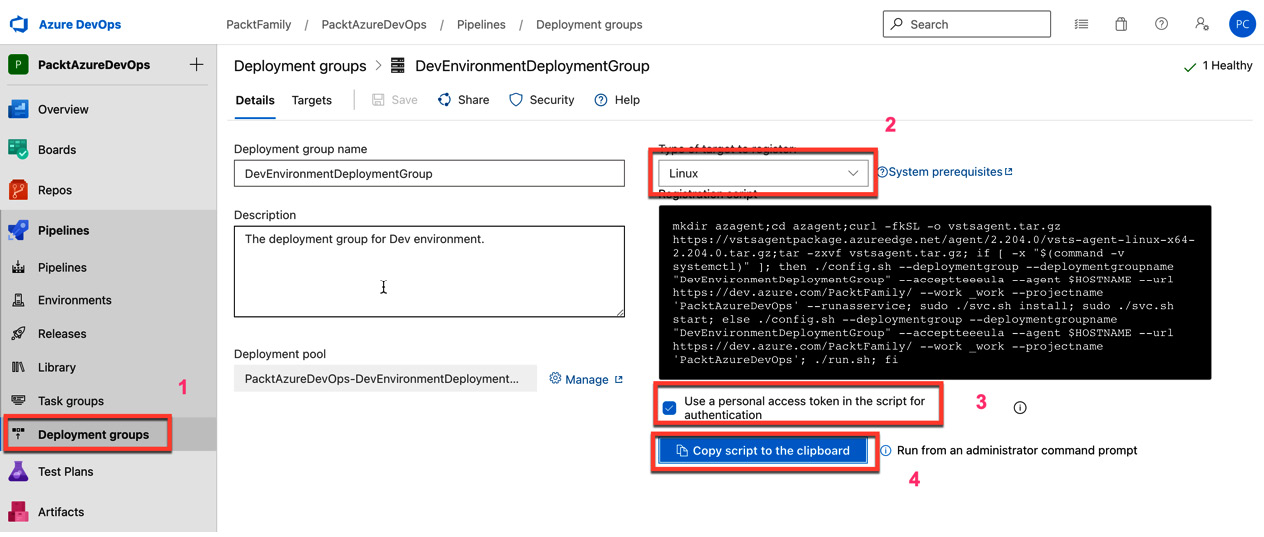
Figure 1.28 – Script to deploy an agent on Linux
- After setting up the agent for deployment groups, you will see that the build agent of the deployment group is online:
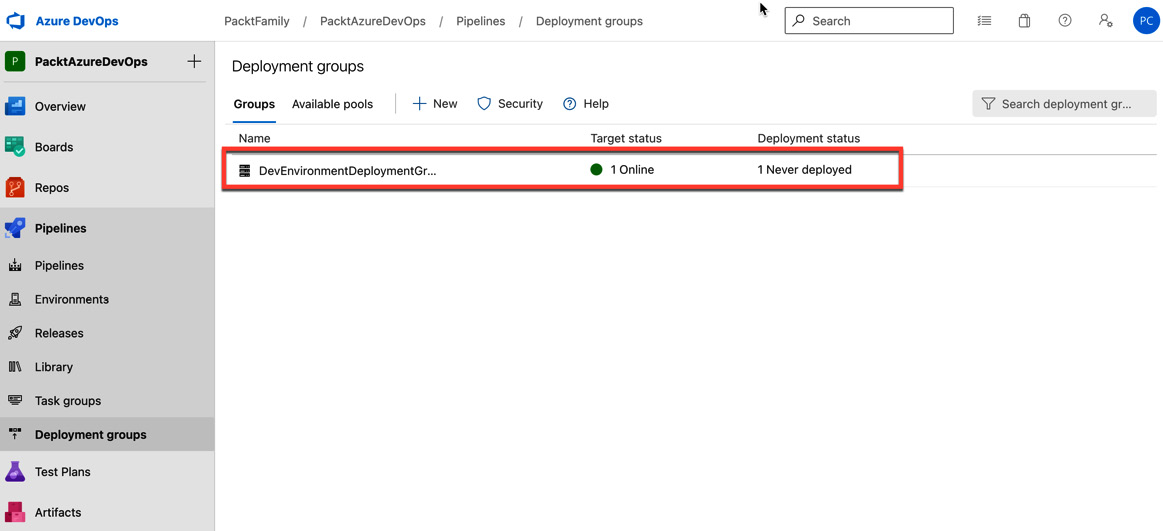
Figure 1.29 – The deployment agent is online
After setting up the build and deployment agent on a self-hosted computer, you are ready to create your first Azure pipeline.


