Creating shared document libraries
One of the strengths of SharePoint is that it is a great document management system. Although you can attach documents to records directly within Dynamics AX, you may want to use SharePoint as a store, so that people without access to Dynamics AX can still have access to the documents. SharePoint also allows you to index documents a number of different ways, allowing them to link to more than one record within Dynamics AX.
For this recipe, we will show how you can create an Accounts Payable document library to store all of your vendor invoices and scanned documents.
Before we show you how to access these documents from within Dynamics AX, you need to create a library to store the documents.
Getting ready
Before you start on this example, you will need to make sure that you have administrator privileges on your document management site. To check this carry out the following step:
Access the site, and open up the Site Actions menu. You need to make sure that you have the ability to create a New Document Library:

How to do it...
To create a new document library for your Accounts Payable scans and images, follow these steps:
From your SharePoint site that you want to store your documents in, access the Site Actions menu, and then select the New Document Library menu item:

This will open up the Document Library creation form. Give the library a name for the area of the business that will be using the documents, and then click on the Create button:

Now you should have a generic document library. We want to be able to index and search through our documents though. So we will add a few index fields to the document library. To do this, click on the Create Column button in the Library/Manage Views section of the ribbon bar:

This will open up the Create Column dialog box, and we will create a column for Vendor Account Number:

After doing that, create non-required columns for Invoice Number (AccountNum), Document Amount (Amount), Document Date (Date), Purchase Order Number (PurchaseOrder), and Company ID (Company).
From the Library/Manage Views tab on the ribbon bar, you may also want to rearrange and hide the columns to make the library tidier.
How it works...
From the document library, we can now upload our scanned documents and images to SharePoint through the Upload Documents button.

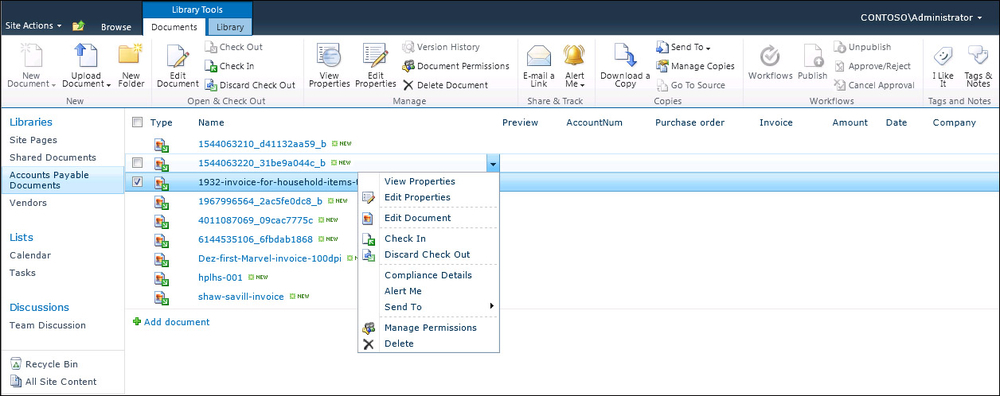
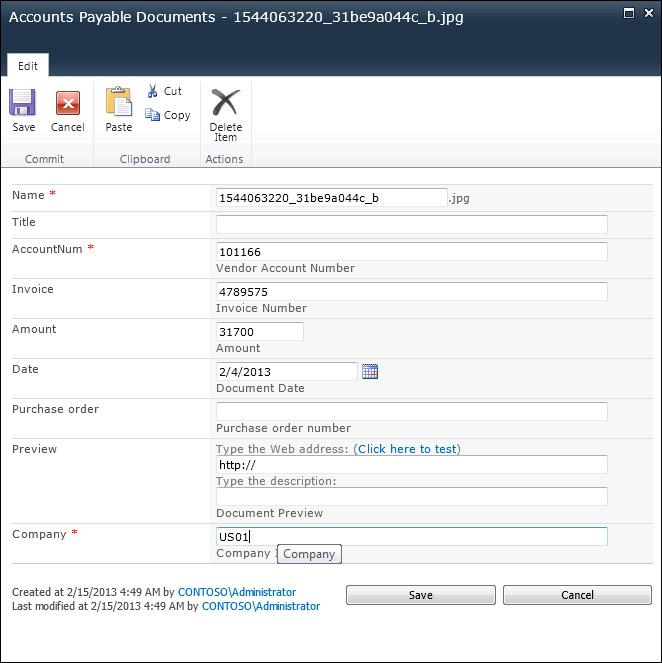
Once you have your documents uploaded, you can the open up the Properties panel for the document through the drop-down box beside the document name.

The column properties allow you to add additional index information to documents, so that later on we are able to search and find documents that relate to specific data in the database.

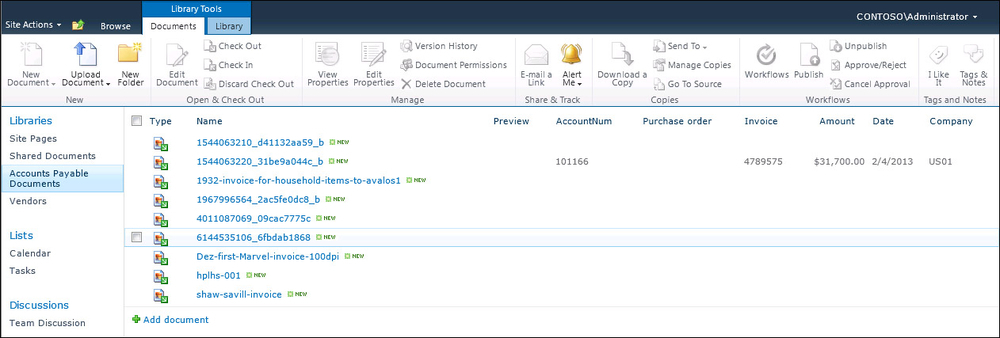
As we index these documents we are able to see the indexed column values in the main view of the document library.

Additionally, if you have a number of documents in your library, you can use the filter button to just find the documents that you are looking for.


