Using text frame options
The text frame options can be a useful feature when working with text in InDesign. You can use them to format your text into multiple columns within a frame, apply inset spacing around the edge of a frame, align your text vertically within a frame, and lots more.
In this recipe, we will look at some of the more useful features of this dialog box, along with some practical examples of how these are applied.
Getting ready
In order to complete this recipe, simply open InDesign on your system and create a new document with 12 pages, as shown in the Creating a new document recipe in Chapter 1. During this exercise, you will need to be able to create text frames and add placeholder text, as shown in the Creating text frames and adding placeholder text recipe.
How to do it…
In order to use text frame options, follow these steps:
- Let’s start by adding a large text frame and filling it with placeholder text. Select the frame, then under the Object menu, choose Text Frame Options. You can also access the feature by right-clicking on the text frame and then choosing Text Frame Options. This will bring up the Text Frame Options dialog box, as seen in Figure 2.42:
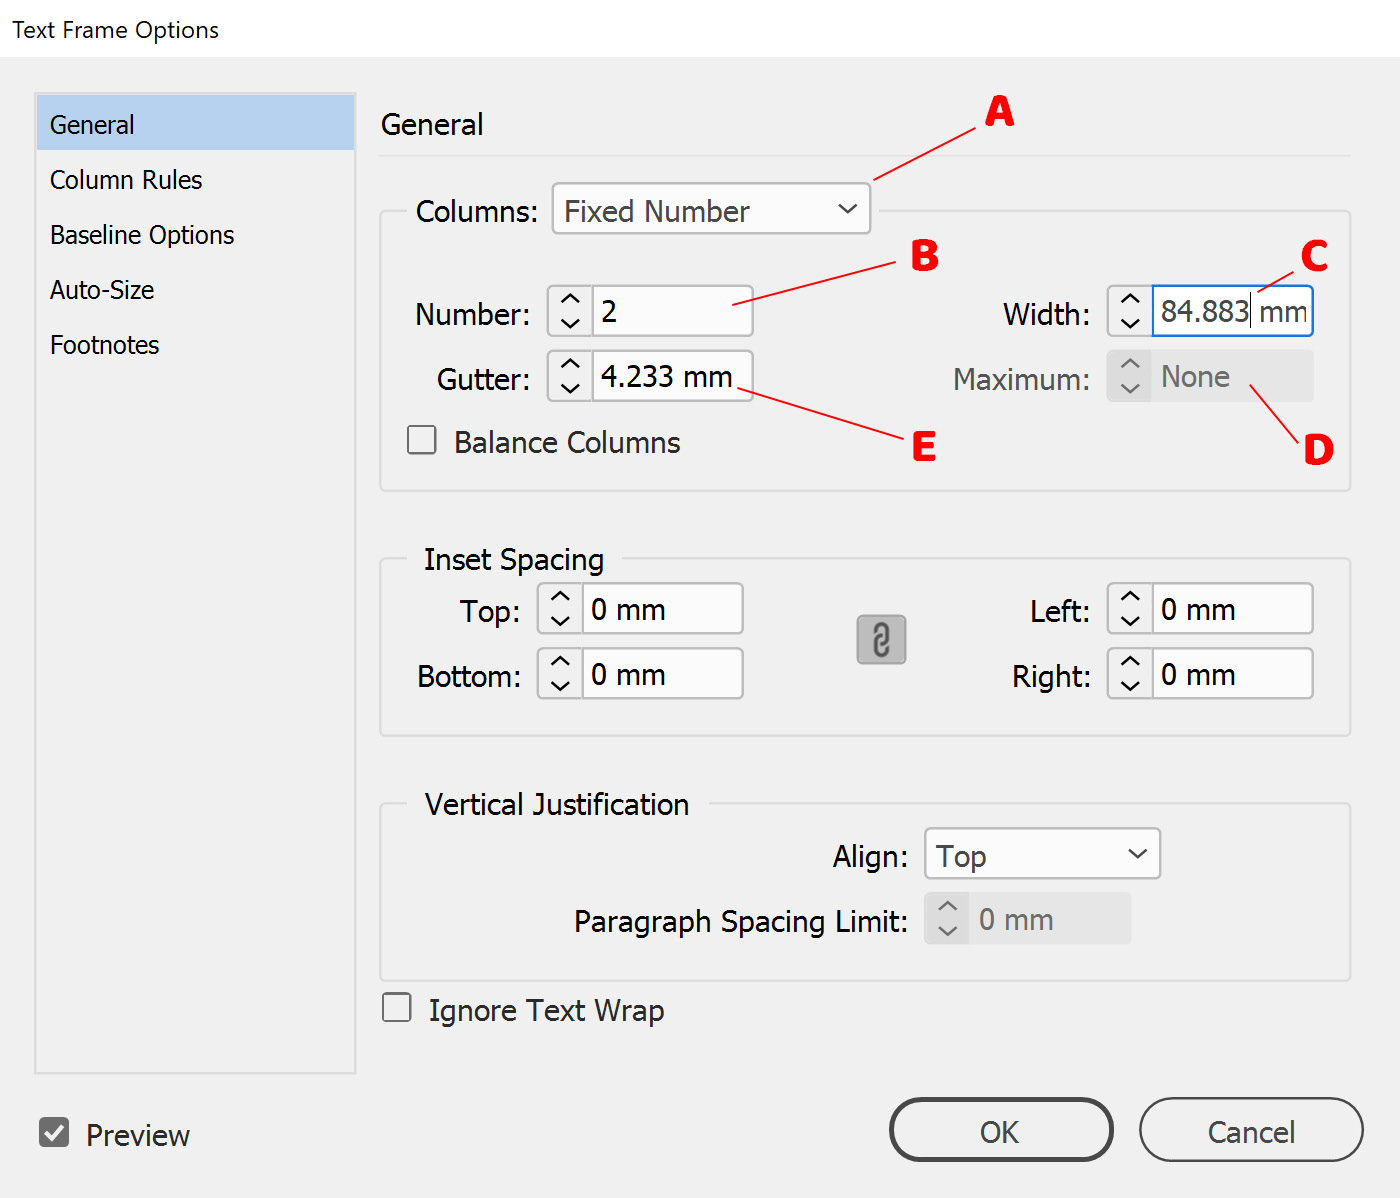
Figure 2.42: Text Frame Options dialog box
- In the Columns dropdown (marked as A in Figure 2.42), you have a choice of three options:
- Fixed Number: Lets you decide the number (marked as B in Figure 2.42) of columns to use
- Fixed Width: Lets you set the width (marked as C in Figure 2.42) value of columns, and InDesign automatically adjusts the text frame width to compensate
- Flexible Width: Allows you to set a maximum width (marked as D in Figure 2.42) value for your columns, and InDesign will add as many equally sized columns as possible without exceeding this width on each column
There is also a Gutter option here (marked as E in Figure 2.42) that allows you to control the space between the columns (we won’t be using this, but it’s worth knowing).
In our case, we will choose Fixed Number and set the number value to 2, and then click OK. This will result in the text frame having two columns of equal width.
- Next, we will delete a bit of text from the second column, and you will notice the columns automatically become unbalanced, with the first column being full while the second column is now half empty, as shown in Figure 2.43. To resolve this, bring up the Text Frame options again, as shown in step 1, and click the Balance Columns checkbox (marked as A in Figure 2.43), and InDesign will attempt to balance out the columns to a similar length, as seen in Figure 2.44:
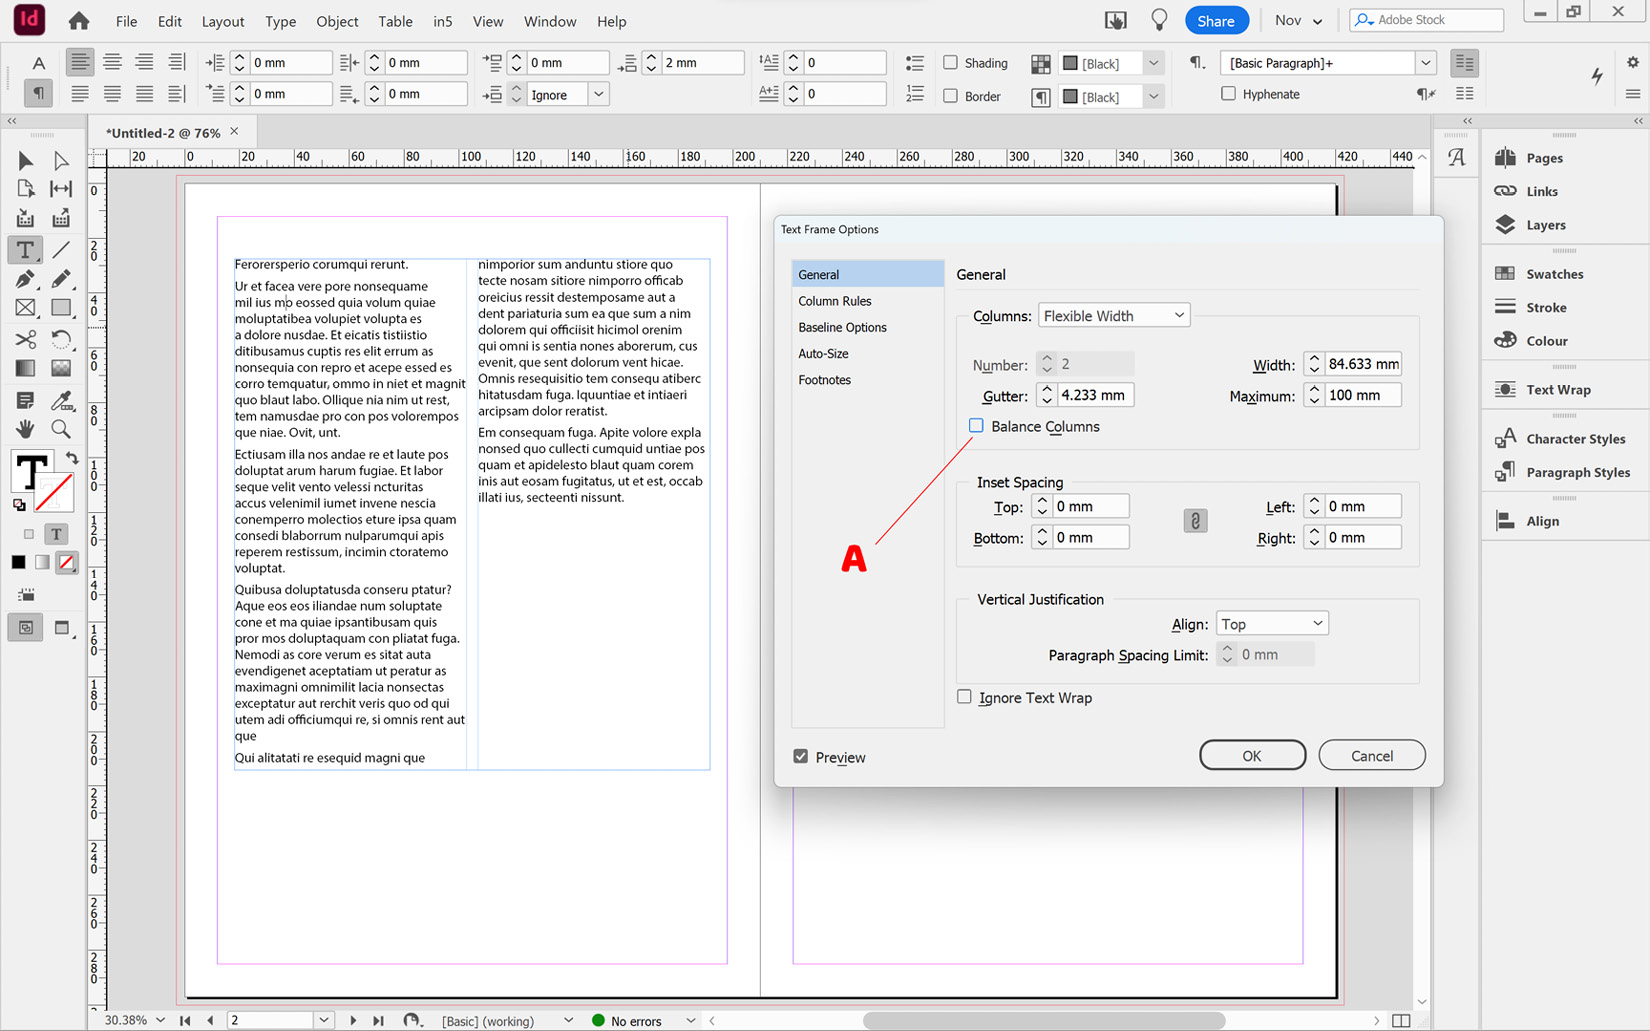
Figure 2.43: Balancing columns in Text Frame Options
- When working on multiple-column layouts, you might want to add column rules into the gutter separating the columns. In the Text Frame Options dialog box, you will see down the left-hand side there are five options to choose from, and with our text frame set to two columns, we will now click on the second of these options, which is Column Rules (marked as A in Figure 2.44), and this will bring up the Column Rules options.
Column rules are decorative dividing lines that can be inserted between the columns, and if you choose to use these, you can format them to the style you prefer. You can turn column rules on and off with the checkbox at the top of the dialog box (marked as B in Figure 2.44):
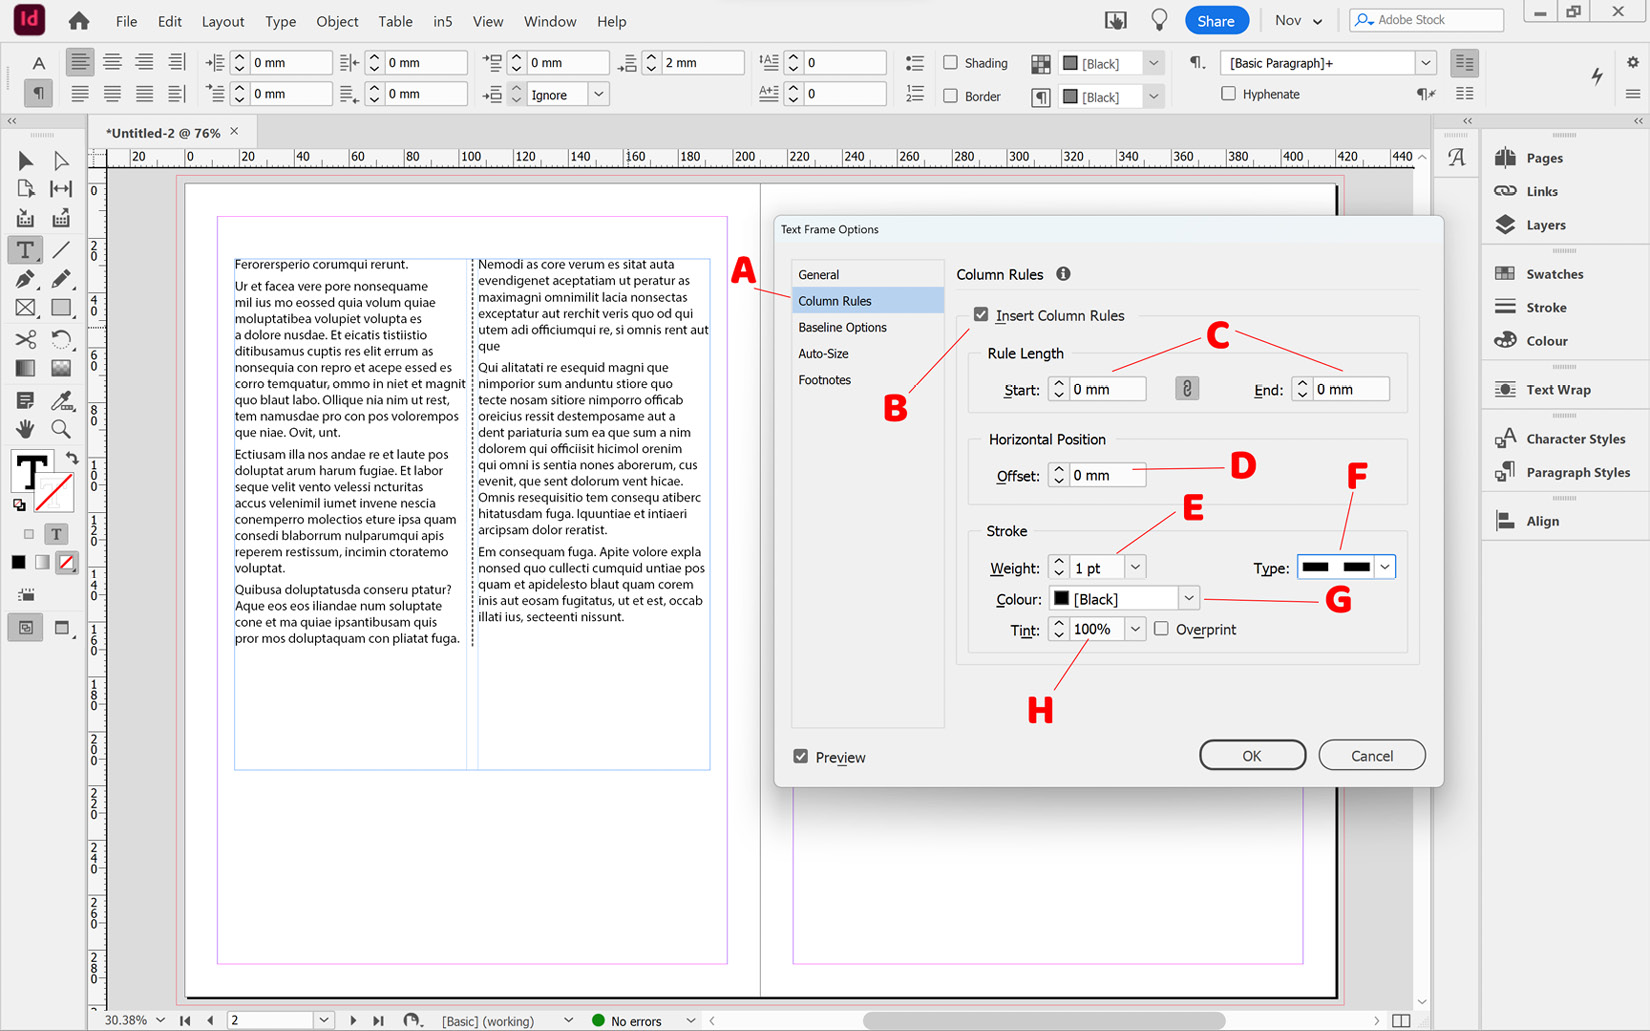
Figure 2.44: The Column Rules options within the Text Frame Options dialog box
The settings available when creating column rules will include the following:
- Rule Length |Start and End: How far from the top and bottom of the column the rule starts and ends (marked as C in Figure 2.44)
- Horizontal position | Offset: Allows you to move the column rule from left to right in relation to the column gap (marked as D in Figure 2.44)
- Stroke Weight: How thick the column rule is going to be (marked as E in Figure 2.44)
- Type: The type of line used for the column rule; you can choose here from a range of decorative presets (marked as F in Figure 2.44)
- Colour: Lets you set the color of the line (marked as G in Figure 2.44)
- Tint: Lets you adjust the lightness of the color by changing the white content (marked as H in Figure 2.44)
- The Overprint box is for creating effects within print and can be left disabled when creating standard column rules
In our case, we will leave the column rules with all default settings except for Type, which we will change to a Dashed (3 and 2) line.
- Another useful feature of the Text Frame Options feature is the inset spacing. Let’s create another small text frame, but this time give the frame a background color. To do this, simply select the frame with the Selection tool, and then click the Fill box on the Control panel (marked as A in Figure 2.45) and change the Colour value to Cyan:
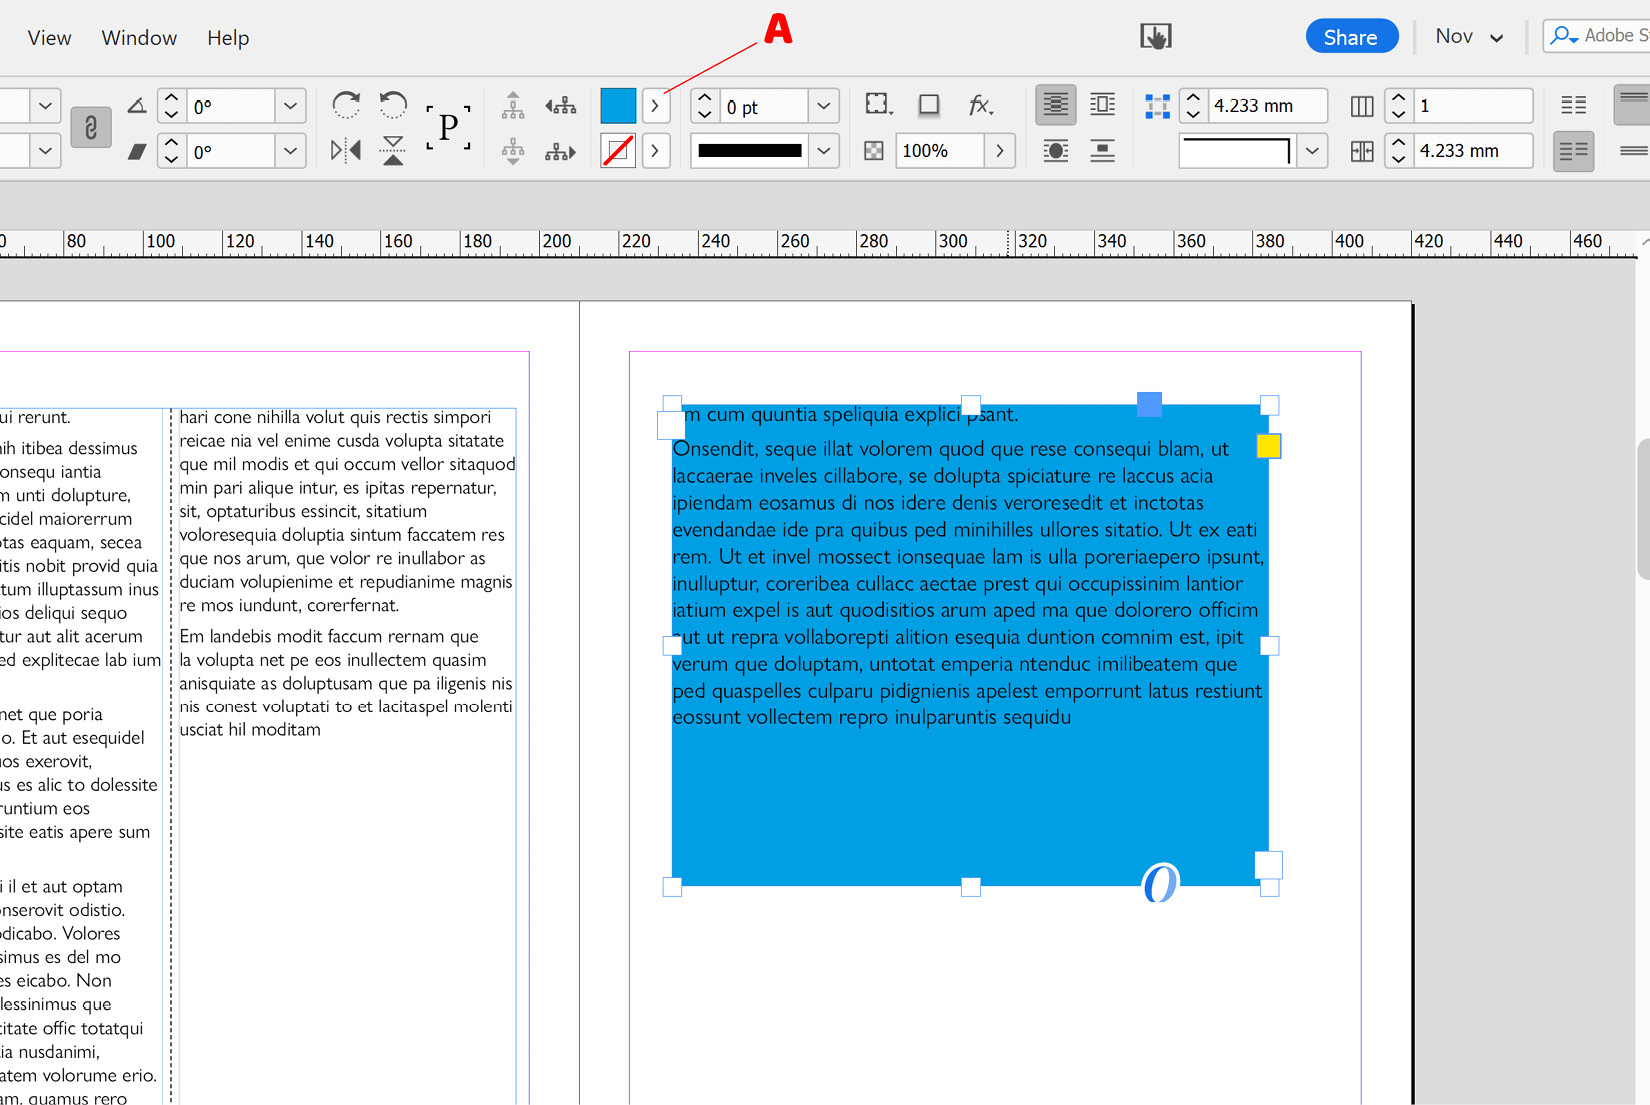
Figure 2.45: Changing the frame fill color
- Now, right-click on the text frame and open Text Frame Options (or, if you prefer, do so from the Object menu). In the General section, you will see an Inset Spacing option with entry boxes for Top, Bottom, Left, and Right. All four are linked by default, so changing one will change the others. If you wish to unlink them, you can click the small link symbol (marked as A in Figure 2.46); in this instance, we won’t do so. We will increase the indent value (marked as B in Figure 2.46) to 6 mm, and you should now have an area of padding around the edge of your frame (marked as C in Figure 2.46).
If you don’t see the changes immediately, just check that the Preview checkbox is checked (marked as D in Figure 2.46):
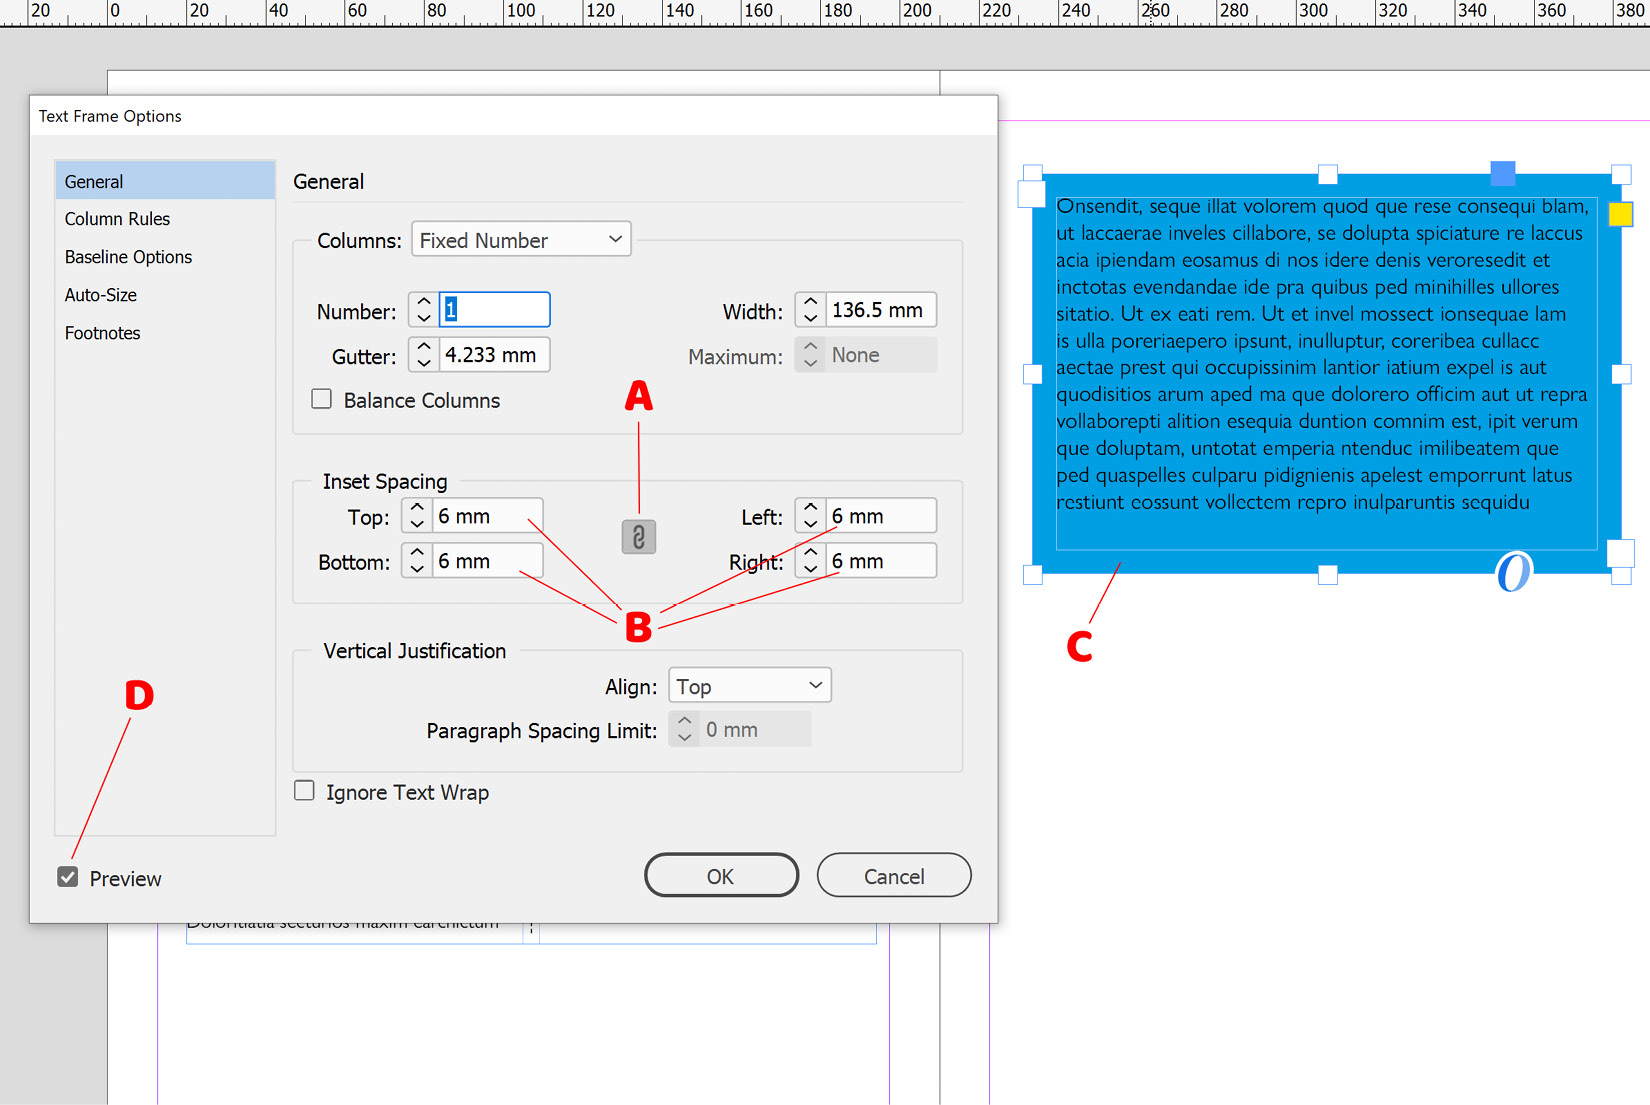
Figure 2.46: Changing inset spacing in Text Frame Options


