Installation of the NAV demo environment is very simple. Running the setup and selecting a predefined configuration is all it takes to install the NAV server with the demonstration database and development tools. On the other hand, experienced users can customize the installation according to their personal needs.
Installing the NAV development environment
Setup configuration
Installation is started by running setup.exe from the root folder of the NAV DVD. After accepting the license agreement, you will be offered two options: either install the predefined demo configuration (install demo), or choose installation options manually (choose an installation option).
If you prefer to run the default installation, all necessary system components will be installed on the same computer. This option will set up NAV Server, NAV Client, the development environment, and a demonstration database with a demo license. This setup will create a new named SQL Server instance, NAVDEMO, and restore a database, Demo Database NAV (11-0), on this server instance.
If you select the second option while choosing an installation option, a list of configurations will be suggested. Each of these configurations can be further customized, or installed with the predefined set of components.
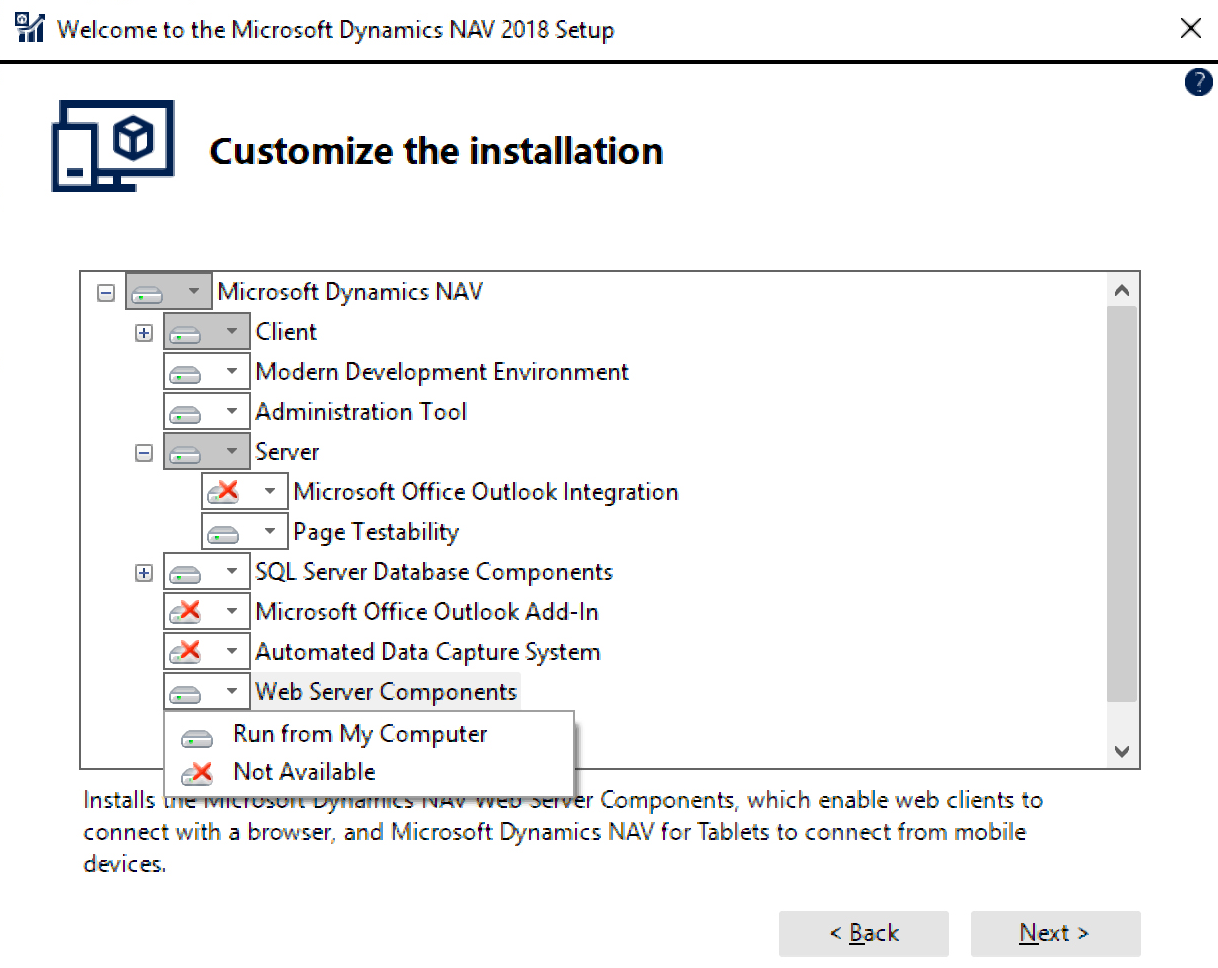
Developer configuration is a recommended setup step. Besides the components listed previously, it will also install web server components to provide web access to the NAV server. But you should note that this option requires Internet Information Services (IIS) running in Windows authentication mode, which is not supported in basic Windows editions. If you are installing NAV on a computer running under Windows 10 Home or Windows 8 Home editions, this option cannot be installed. In this case, disable the Web Server Components option manually or choose the Install Demo option.
The following screenshot shows the list of components that should be installed. If you choose to disable the optional Web Server Components, select the Not Available option in the installation menu:

Accept all components suggested in this configuration and move to the next step, where you can set up the installation location and other parameters for NAV Server and SQL Server.
Now, if you accept all the default options without changes, the demo database will be created on the default instance of SQL Server (MS SQL Server), if there is one on the computer where the installation is run. If no default instance is found, a new one will be created.
Now you can hit Apply and wait until the installation completes.
License information
A demonstration license uploaded with the demo installation supports limited functionality, and most of the examples in this book will not work under the limited demo license. A development license is required to import and run the sample code files, as well as develop your own objects.
To review the license currently uploaded to the server, choose the menu option Tools | License information. The following line in the license description will tell you that the uploaded license file is intended for demonstration only:
Configuration: NAV 2018 Product Demo
To upload the developer's license, click Upload in the same window and choose the appropriate license file.


