As a penetration tester, it is recommended to set up your own verification lab to test any kind of vulnerabilities and have the right proof of concept before emulating the same on a live environment.
Building a verification lab
Installing defined targets
In order to practice the art of exploitation, it is always recommended to make use of the well-known vulnerable software. In this section, we will be installing Metasploitable3, which is a Windows platform, and Mutillidae, which is a PHP framework web application.
Metasploitable3
Metasploitable3 is an indubitable vulnerable VM that's intended to be tested for multiple exploits using Metasploit. It is under BSD-style license. Two VMs can be built for practice, which can be downloaded from: https://github.com/rapid7/metasploitable3. You can download the ZIP file and unzip it in your favorite Windows location (typically, we segregate in the D:\HackTools\ folder) or you can git clone https://github.com/rapid7/metasploitable3 using Bash command. Install all of the relevant supporting software such as Packer (https://www.packer.io/downloads.html), Vagrant (https://www.vagrantup.com/downloads.html), VirtualBox, and the Vagrant reload plugin. The following commands should install all of the relevant vulnerable services and software:
- On Windows 10 as the host operating system, you can run the following commands:
./build.ps1 windows2008
./build.ps1 ubuntu1404
- On Linux or macOS, you can run the following commands:
./build.sh windows2008
./build.sh ubuntu1404
After the VirtualBox file download, you'll just have to run vagrant up win2k8 and vagrant up ub1404 in the same PowerShell. This should bring up your new VM in your VirtualBox without any problem as shown in the following screenshot:

Mutillidae
Mutillidae is an open source insecure web application, which is designed for penetration testers to practice all of the web-app specific vulnerability exploitation. XAMPP is another free and open source cross-platform web server solution stack package developed by Apache Friends. The XAMPP can be downloaded from: https://www.apachefriends.org/download.html.
We will now be installing the Mutillidae to our newly installed Microsoft windows 2008 R2 server to host it:
- Once XAMPP is downloaded, let's go ahead and install the executable by following the wizard. Once the installation is complete and the XAMPP launched, you should be able to see the following screen. We will be using XAMPP version 5.6.36 / PHP 5.6.36:

- Mutillidae can be downloaded from: https://sourceforge.net/projects/mutillidae/files/latest/download.
- Unzip the file and copy the folder to C:\yourxampplocation\htdocs\<mutillidae>.
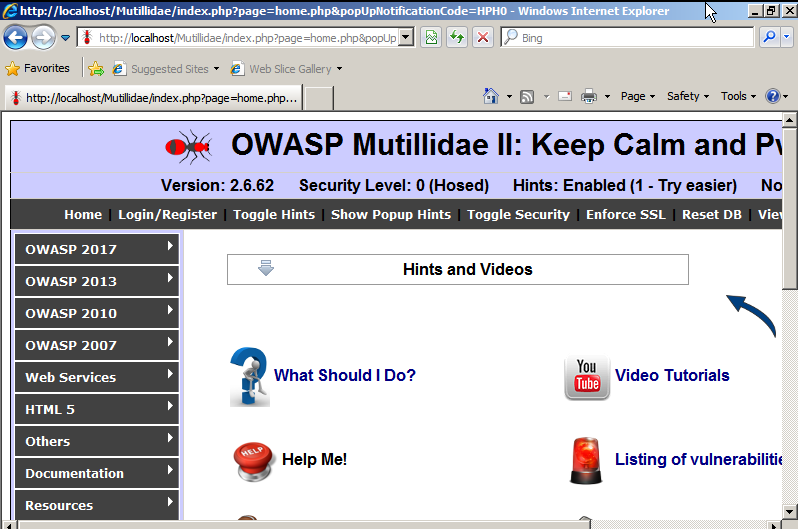
- You have to ensure XAMPP is running Apache and MySQL/MariaDB and finally access the .htacess file inside the mutillidae folder and ensure that 127.0.0.1 and the IP range are allowed. We should be able to see the web application installed successfully as shown in the following screenshot and it can be accessed by visiting http://localhost/mutillidae/:

Setting up an Active Directory and Domain Controller
In the previous edition of Mastering Kali Linux for Advanced Penetration Testing, we learned how to set up an Active Directory in Windows 2008 R2. In this section, we will install Active Directory on Windows 2008 R2. Once you've downloaded the ISO from Microsoft and installed the operating system on VMware workstation player or VirtualBox, you should be able to do the following steps:
- Open the Server Manager from the taskbar.
- From the Server Manager, click on Add roles and features.
- Select Role-based or Features-based installation from the Installation Type screen and click Next.
- By default, the same server will be selected.
- From the Server Roles page place a checkmark in the checkbox next to Active Directory Domain Services. Additional roles, services, or features are also required to install Domain Services: click Add Features.
- Select optional features to install during the AD DS installation by placing a check in the box next to any desired features, and then click Next, operating system compatibility checks, then select Create a new domain in a new format and click Next.
- Enter the FQDN (Fully Qualified Domain Name). In the example, we will create a new FQDN as mastering.kali.thirdedition; that should take us to forest functional level. We can select Windows 2008 R2 and click Next; that will enable us to install the DNS (Domain Name System). During this installation, it is recommended to set a static IP to this machine so that the domain controller features can be enabled; in our case, we set the static IP of this server to 192.168.x.x. Finally, you'll need to set the Directory Services Restore mode administrator password; a summary of the configuration will be present.
- On the Confirm installation selections screen, review the installation and then click Install.
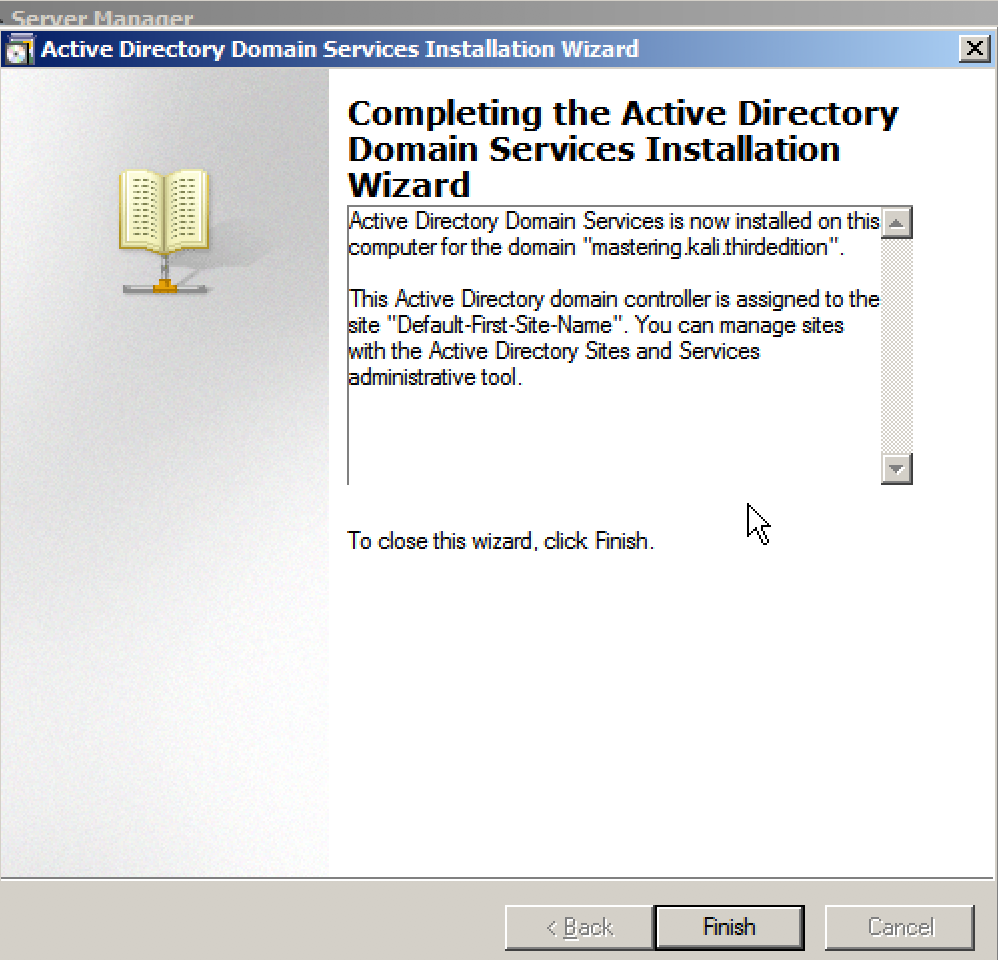
- Once everything is complete, you should be able to see the following screenshot:

Adding users to the Active Directory
To demonstrate the privilege escalation in later chapters, we will create a normal user with domain user privilege and a domain administrator user with full privileges.
To create a normal user on domain, run the following command in the command line on our Domain Controller:
net user normaluser Passw0rd12 /add /domain
To create a domain administrator account, the following commands will create a user as admin and add this user to the domain admins group:
net user admin Passw0rd123 /add /domain
net group "domain admins" admin /add /domain
To validate these users are created, you can use the domain controller by simply running net user from the command line and you should be able to see the users, as shown in the following screenshot:

Adding Metasploitable3 Windows to the new domain
Now we will go back to the Metasaploitable3 Windows that we installed and add it to our newly created domain by following the steps:
-
Add the IP address of the domain controller to the DNS setting by editing the Ethernet adapter properties. This is to resolve the FQDN; Metasploitable3 will need to query the domain controller for the domain name resolution.
-
Click Start button and right click on My Computer and select Properties; under Computer name, Domain and Workgroup settings click on Change settings, that should pop up a system properties windows. On the window click, on Change.
- Select the radio button from Workgroup to Domain and enter the domain name as shown in the following screenshot; in our case, the domain name is mastering.kali.thirdedition:

- That should prompt you to enter the username and password, and we can login as either normaluser or admin that we created. Once authenticated, the system is connected the domain and any domain user will be able to log in to Metapsloitable3.
This should provide us with a wide range of exposure to multiple vulnerabilities on the network:
- A vulnerable Windows 2008 R2 (Metasploitable3 server) that is connected to a domain (mastering.kali.thirdedition).
- A vulnerable web application hosted on a vulnerable Windows 2008 R2 Server (Metasploitable3)
- A vulnerable services Linux machine (Metasploitable3) running Ubuntu 14.04
- A domain controller with one domain admin and one normal user


