Adding libpcap to your project
The first thing that we need to do is add libpcap to our project. Whenever there is a project that you need to add libpcap to, you need to follow the steps mentioned here.
Getting ready
We need to create an OS X project that we can add the libpcap library to.
How to do it…
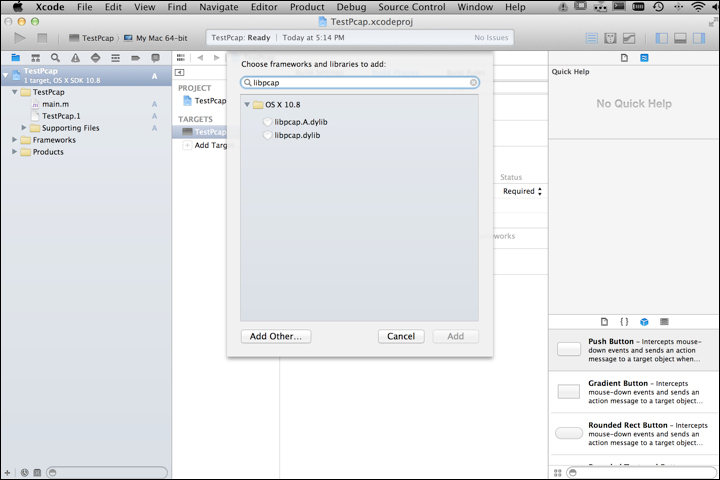
Once the project is created, we need to add the library to our project using these steps:
Select the project name from the project navigator area within your Xcode project.
Select the project name from the TARGET section.
Select the Build Phases tab and open the Link Binary With Libraries section.
Click on the + sign.
Type
libpcapin the search box and select the libpcap.dylib library.

Now that we have the library linked to the project, we need to set the application to run as root for debugging. To do so, follow these steps:
To run your project as root, navigate to Product | Scheme | Edit Scheme from the top menu as shown in the following screenshot:

In the window that opens up, change the Debug Process...


