Creating the ArcGIS Desktop Python Toolbox
There are two ways to create toolboxes in ArcGIS: script tools in custom toolboxes and script tools in Python toolboxes. Python toolboxes encapsulate everything in one place: parameters, validation code, and source code. This is not the case with custom toolboxes, which are created using a wizard and a separate script that processes the business logic.
A Python Toolbox functions like any other toolbox in ArcToolbox, but it is created entirely in Python and has a file extension of .pyt. It is created programmatically as a class named Toolbox. In this section, you will learn how to create a Python Toolbox and add a tool. You'll only create the basic structure of the toolbox and tool that will ultimately connect to an ArcGIS Server map service containing the wildfire data. In a later section, you'll complete the functionality of the tool by adding code that connects to the map service, downloads the current data, and inserts it into a feature class. Take a look at the following steps:
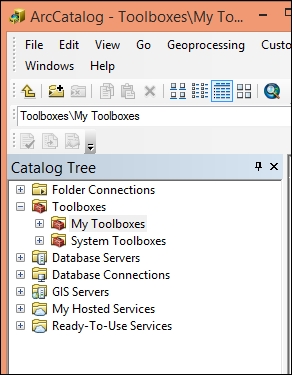
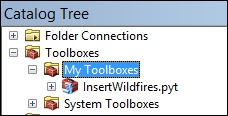
- Open ArcCatalog: You can create a Python Toolbox in a folder by right-clicking on the Folder and navigating to New | Python Toolbox. In ArcCatalog, there is a folder called Toolboxes, and inside it, there is a My Toolboxes folder, as shown in the following screenshot. Right-click on this folder and navigate to New | Python Toolbox.
- The name of the toolbox is controlled by the filename. Name the toolbox
InsertWildfires.pyt.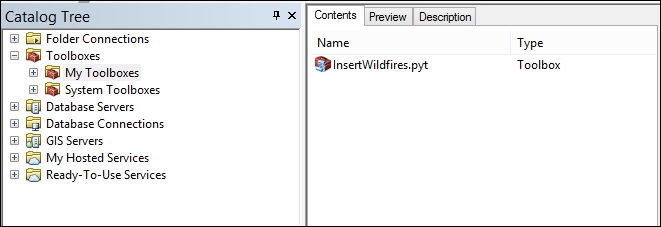
- The Python Toolbox file (
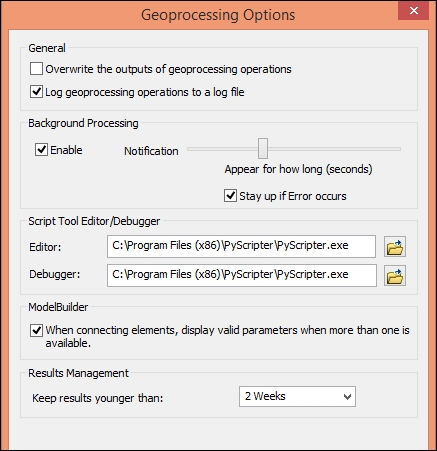
.pyt) can be edited in any text or code editor. By default, the code will open in Notepad. However, you will want to use a more advanced Python development environment, such as PyScripter, IDLE, and so on. You can change this by setting the default editor for your script by navigating to Geoprocessing | Geoprocessing Options and going to the Editor section. In the following screenshot, you'll notice that I have set my editor to PyScripter, which is my preferred environment. You may want to change this to IDLE or whichever development environment you are currently using.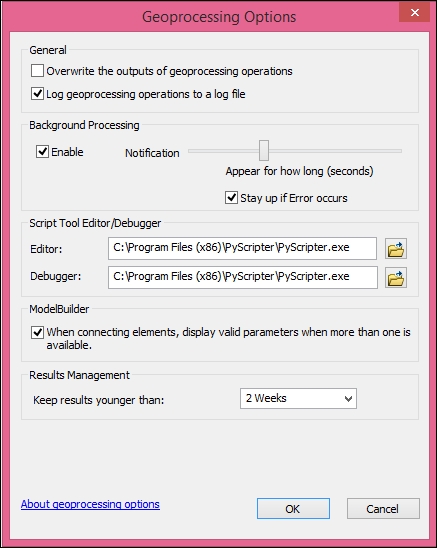
- For example, to find the path to the executable for the IDLE development environment, you can navigate to Start | All Programs | ArcGIS | Python 2.7 | IDLE. Right-click on IDLE and select Properties to display the properties window. Inside the Target textbox, you should see a path to the executable, as shown in the following screenshot. You will want to copy and paste only the actual path starting with
C:\Python27and not the quotes that surround the path.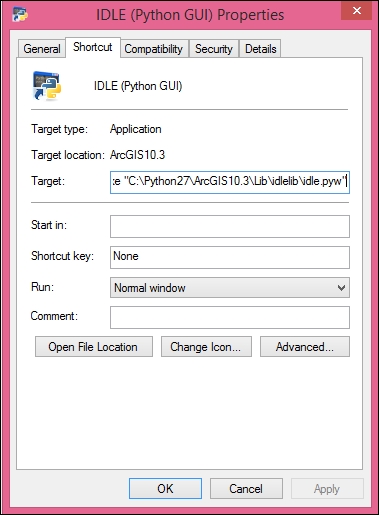
- Copy and paste the path into the Editor and Debugger sections inside the Geoprocessing Options dialog box.
- Right-click on
InsertWildfires.pytand select Edit. This will open the development environment you defined earlier, as shown in the following screenshot. Your environment will vary depending upon the editor that you have defined: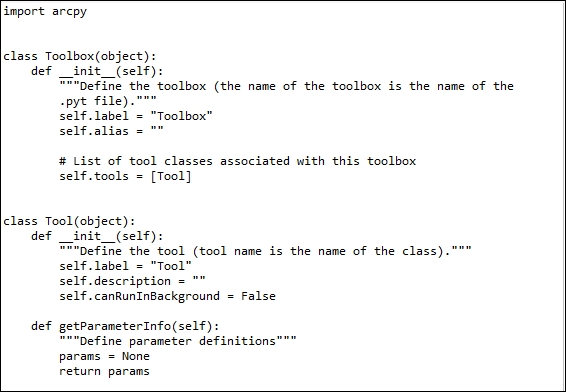
- Remember that you will not be changing the name of the class, which is
Toolbox.However, you will have to rename theToolclass to reflect the name of the tool you want to create. Each tool will have various methods, including__init__(), which is the constructor for the tool along withgetParameterInfo(),isLicensed(),updateParameters(),updateMessages(), andexecute(). You can use the__init__()method to set initialization properties, such as the tool's label and description. Find the class namedToolin your code, and change the name of this tool toUSGSDownload, and set thelabelanddescriptionproperties:class USGSDownload(object): def __init__(self): """Define the tool (tool name is the name of the class).""" self.label = "USGS Download" self.description = "Download from USGS ArcGIS Server instance" self.canRunInBackground = FalseTip
Downloading the example code.
You can download the example code files from your account at http://www.packtpub.com for all the Packt Publishing books you have purchased. If you purchased this book elsewhere, you can visit http://www.packtpub.com/support and register to have the files e-mailed directly to you
You can use the
Toolclass as a template for other tools that you'd like to add to the toolbox by copying and pasting the class and its methods. We're not going to do that in this chapter, but I wanted you to be aware of this. - You will need to add each tool to the
toolsproperty (the Python list) in theToolboxclass. Add theUSGSDownloadtool, as shown in the following code snippet:def __init__(self): """Define the toolbox (the name of the toolbox is the name of the .pyt file.""" self.label = "Toolbox" self.alias = "" #List of tool classes associated with this toolbox self.tools = [USGSDownload] - Save your code.
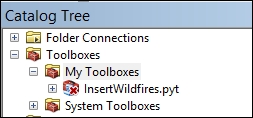
- When you close the code editor, your toolbox should be automatically refreshed. You can also manually refresh a toolbox by right-clicking on the InsertWildfires.pyt and selecting Refresh. If a syntax error occurs in your code, the toolbox icon will change, as shown in the following screenshot. Note the red X next to the toolbox. Your tool may not visible inside the toolbox either. If you've coded everything correctly, you will not see this icon, as shown in the following screenshot:
- To see the error, right-click on InsertWildfires.pyt and select Check Syntax.
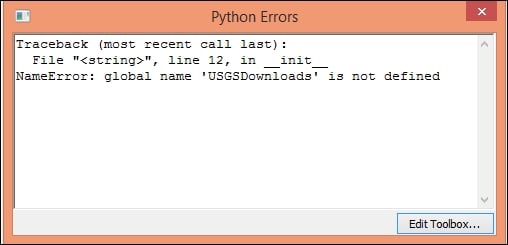
Assuming that you don't have any syntax errors, you should see the following screenshot of the Toolbox/Tool structure:
Working with tool parameters
Almost all tools have parameters. The parameter values will be set by the end user with the Tool dialog box, or they will be hardcoded within the script. When the tool is executed, the parameter values are sent to your tool's source code. Your tool reads these values and proceeds with its work. You use the getParameterInfo() method to define the parameters for your tool. Individual parameter objects are created as part of this process. If necessary, open InsertWildfires.pyt in your code editor and find the getParameterInfo() function in the USGSDownload class. Add the following parameters, and then we'll discuss what the code is doing:
def getParameterInfo(self):

        """Define parameter definitions"""
        # First parameter
        param0 = arcpy.Parameter(displayName="ArcGIS Server Wildfire URL",
                        name="url",
                        datatype="GPString",
                        parameterType="Required",
                        direction="Input")
        param0.value = "http://wildfire.cr.usgs.gov/arcgis/rest/services/geomac_dyn/MapServer/0/query"

        # Second parameter
        param1 = arcpy.Parameter(displayName="Output Feature Class",
                        name="out_fc",
                        datatype="DEFeatureClass",
                        parameterType="Required",
                        direction="Input")
Each parameter is created using arcpy.Parameter and is passed a number of arguments that define the object. For the first Parameter object (param0), we are going to capture a URL to an ArcGIS Server map service containing real-time wildfire data. We give it a display name ArcGIS Server Wildfire URL, which will be displayed on the dialog box for the tool. A name for the parameter, a datatype, a parameter type, and a direction. In the case of the first parameter (param0), we also assign an initial value, which is the URL to an existing map service containing the wildfire data. For the second parameter, we're going to define an output feature class where the wildfire data that is read from the map service will be written. An empty feature class to store the data has already been created for you.
Next we'll add both the parameters to a Python list called params and return, to the list to the calling function. Add the following code:
def getParameterInfo(self):

        """Define parameter definitions"""
        # First parameter
        param0 = arcpy.Parameter(displayName="ArcGIS Server Wildfire URL",
                        name="url",
                        datatype="GPString",
                        parameterType="Required",
                        direction="Input")
        param0.value = "http://wildfire.cr.usgs.gov/arcgis/rest/services/geomac_dyn/MapServer/0/query"

        # Second parameter
        param1 = arcpy.Parameter(displayName="Output Feature Class",
                        name="out_fc",
                        datatype="DEFeatureClass",
                        parameterType="Required",
                        direction="Input")

        params = [param0, param1]
        return params
Tool execution
The main work of a tool is done inside the execute() method. This is where the geoprocessing of your tool takes place. The execute() method, as shown in the following code snippet, can accept a number of arguments, including the tools self, parameters, and messages:
def execute(self, parameters, messages):
        """The source code of the tool."""
        return
To access the parameter values that are passed into the tool, you can use the valueAsText() method. The following steps will guide you through how to add and execute the execute() method:
- Find the
execute()function in theUSGSDownloadclass and add the following code snippet to access the parameter values that will be passed into your tool. Remember from a previous step that the first parameter will contain a URL to a map service containing the wildfire data and the second parameter will be the output feature class where the data will be written:def execute(self, parameters, messages): inFeatures = parameters[0].valueAsText outFeatureClass = parameters[1].valueAsTextAt this point, you have created a Python Toolbox, added a tool, defined the parameters for the tool, and created variables that will hold the parameter values that the end user has defined. Ultimately, this tool will use the URL that is passed to the tool to connect to an ArcGIS Server map service, download the current wildfire data, create a feature class, and write the wildfire data to the feature class. However, we're going to save the geoprocessing tasks for later. For now, I just want you to print out the values of the parameters that have been entered so that we know that the structure of the tool is working correctly. Print this information using the following code:
def execute(self, parameters, messages): inFeatures = parameters[0].valueAsText arcpy.AddMessage(inFeatures) outFeatureClass = parameters[1].valueAsText arcpy.AddMessage(outFeatureClass) - Execute the tool by double-clicking on USGS Download from the InsertWildfires.pyt toolbox that you've created. You should see the following dialog box:
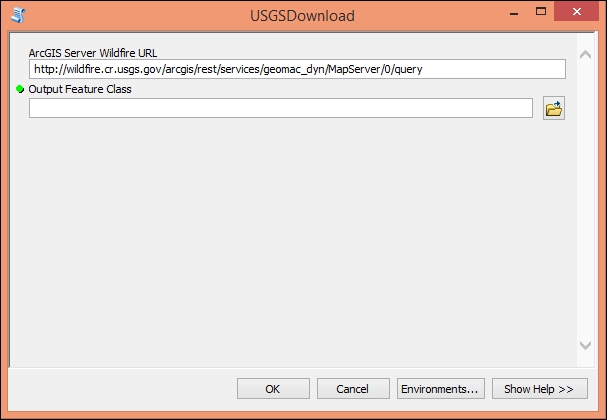
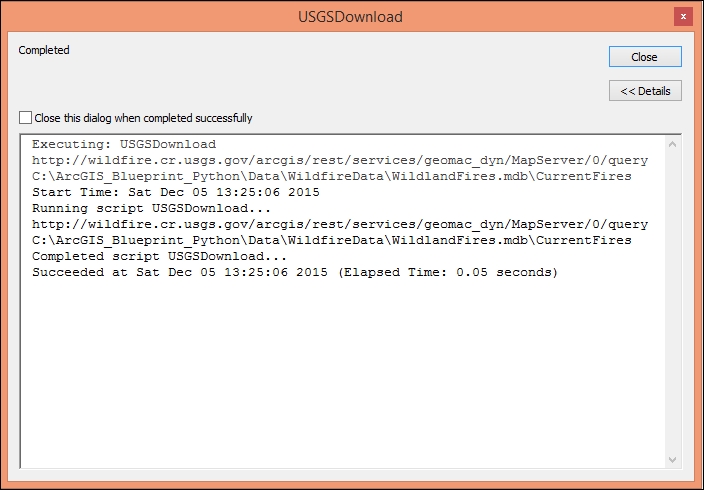
- Leave the default URL parameter as it is and select an output feature class. You'll want to click on the Browse button and then navigate to the
C:\ArcGIS_Blueprint_Python\Data\WildfireDatafolder and select theWildlandFiresgeodatabase. Inside, there is an empty feature class calledCurrentFires. Select this feature class. - Now click on OK. The progress dialog box will contain the parameter values that you passed in. Your output feature class will probably be different than mine, as shown in the following screenshot:
We'll complete the actual geoprocessing of this tool in the next section.


