Working with SNMP monitoring
Now let's do something I enjoy most when working with Zabbix: build SNMP monitoring. My professional roots lie in network engineering, and I have worked a lot with SNMP monitoring to monitor all these different network devices.
Getting ready
To get started, we need the two Linux hosts we used before in the previous recipes:
- Our Zabbix server host
- The host we used in the previous recipe to monitor via the Zabbix active agent
How to do it…
Monitoring via SNMP polling is easy and very powerful. We will start by configuring SNMPv3 on our monitored Linux host:
- Let's start by issuing the following commands to install SNMP on our host:
For RHEL-based systems:
dnf install net-snmp net-snmp-utils
For Debian-based systems:
apt-get install net-snmp net-snmp-utils
- Now let's create the new SNMPv3 user we will use to monitor our host. Please note that we'll be using insecure passwords, but make sure to use secure passwords for your production environments. Issue the following command:
net-snmp-create-v3-user -ro -A my_authpass -X my_privpass -a SHA -x AES snmpv3user
This will create an SNMPv3 user with the username
snmpv3user, the authentication passwordmy_authpass, and the privilege passwordmy_privpass. - Now restart the
snmpddaemon and enable it at boot:systemctl restart snmpd.service systemctl enable snmpd.service
This is all we need to do on the Linux host side; we can now go to the Zabbix frontend to configure our host. Go to Configuration | Hosts in your Zabbix frontend and click Create host in the top-right corner.
- Now fill in the host configuration page:

Figure 2.11 – Zabbix host configuration page for host lar-book-agent_snmp
- Make sure to add the right out-of-the-box template as shown in the following screenshot:

Figure 2.12 – Template OS Linux SNMP
Tip
While upgrading from an earlier Zabbix version to Zabbix 5, you won't get all the new out-of-the-box templates. If you feel like you are missing some templates, you can download them at the Zabbix Git repository: https://git.zabbix.com/projects/ZBX/repos/zabbix/browse/templates.
- We are using some macros in our configuration here for the username and password. We can use these macros to actually add a bunch of hosts with the same credentials. This is very useful, for instance, if you have a bunch of switches with the same SNMPv3 credentials.
Let's fill in the macros under Administration | General and use the dropdown to select Macros. Fill in the macros like this:

Figure 2.13 – Zabbix global macro page with SNMP macros
A cool new feature in Zabbix 5 is the ability to hide macros in the frontend; do keep in mind that these values are still unencrypted in the Zabbix database.
- Use the dropdown to change {$SNMPV3_AUTH} and {$SNMPv3_PRIV} to Secret text:

Figure 2.14 – Zabbix secure text dropdown for SNMP auth and priv macros
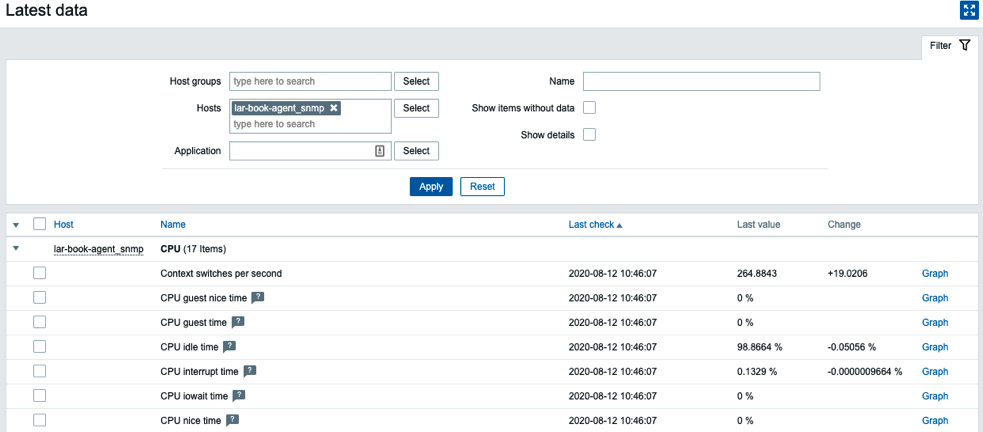
- Now after applying these changes, we should be able to monitor our Linux server via SNMPv3. Let's go to Monitoring | Hosts and check the Latest data page for our new host:

Figure 2.15 – SNMP latest data for host lar-book-agent_snmp
How it works…
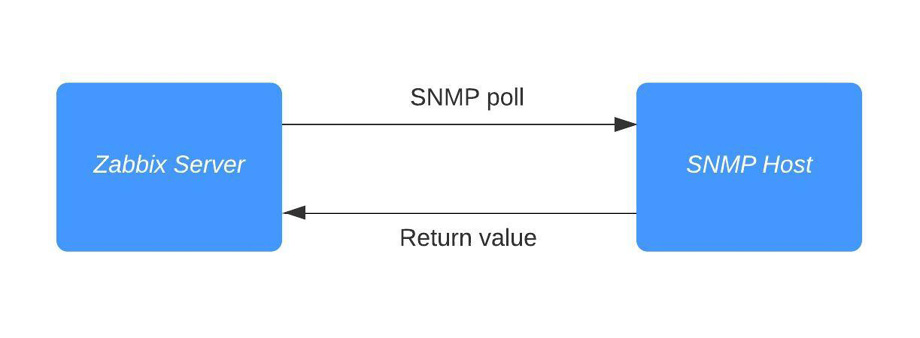
When we create a host as we did in step 4, Zabbix polls the host using SNMP. Polling SNMP like this works with SNMP OIDs. For instance, when we poll the item called Free memory, we ask the SNMP agent running on our Linux host to show us the value for 1.3.6.1.4.1.2021.4.6.0. That value is then returned to us on the Zabbix server:

Figure 2.16 – Diagram showing communication between Zabbix server and SNMP host
Of course, SNMPv3 adds authentication and encryption to this process.
SNMP OIDs work in a tree structure, meaning every number behind the dot can contain another value. For example, see this for our host:
1.3.6.1.4.1.2021.4 = UCD-SNMP-MIB::memory
If we poll that Define acronym, we get several OIDs back:
.1.3.6.1.4.1.2021.4.1.0 = INTEGER: 0
.1.3.6.1.4.1.2021.4.2.0 = STRING: swap
.1.3.6.1.4.1.2021.4.3.0 = INTEGER: 1679356 kB
.1.3.6.1.4.1.2021.4.4.0 = INTEGER: 1674464 kB
.1.3.6.1.4.1.2021.4.5.0 = INTEGER: 1872872 kB
.1.3.6.1.4.1.2021.4.6.0 = INTEGER: 184068 kB
That includes our 1.3.6.1.4.1.2021.4.6.0 OID with the value that contains our free memory. This is how SNMP is built, like a tree.


