First, we calculate angleToTarget, which is the angle from (0, 0, 0) to our normalized target position.
Next, we calculate anglePlayer, which is the angle the player's character is facing. This recipe makes use of the yaw angle of the rotation, which is the rotation about the Y-axis; that is, the direction that a character controller is facing. This can be found in the Y component of a GameObject's eulerAngles component of its transform. You can imagine looking from above and down at the character controller and seeing what direction they are facing – this is what we are trying to display graphically with the radar.
Our desired radar angle (the angleRadarDegrees variable) is calculated by subtracting the player's direction angle from the angle between the target and player, since a radar displays the relative angle from the direction that the player is facing to the target object. In mathematics, an angle of zero indicates an east direction. To correct this, we need to also subtract 90 degrees from the angle.
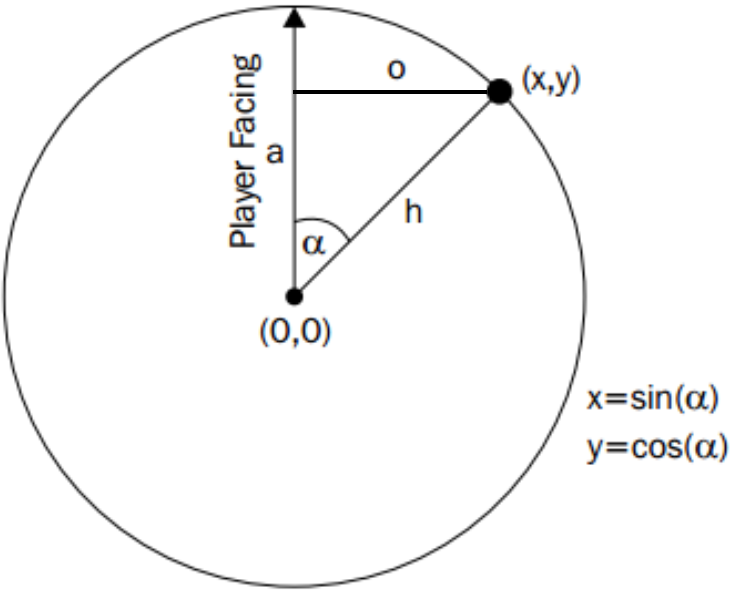
The angle is then converted into radians since this is required for these Unity trigonometry methods. We then multiply the Sin() and Cos() results by our normalized distances to calculate the X and Y values, respectively (see the following diagram):

Our final position values need to be expressed as pixel lengths, relative to the center of the radar. So, we multiply our blipX and blipY values by half the width and the height of the radar; note that we only multiply with half the width since these values are relative to the center of the radar. We then add half the width and the height of the radar image to the blipX/Y values so that these values are now positioned relative to the center.
Finally, a new Vector2 object is created and returned, passing back these final calculated X and Y pixel values for the position of our blip icon.


