Since the nuts and bolts of the Firebase Realtime Database are set up, the next stage is to explore how data can be composed or written to a database tree from an Android application. This section will give points of interest on the most proficient method to write, how to erase database tree nodes, and furthermore, outline a few strategies for taking care of database write errors.
Reading and writing to Realtime Database
Database reference
Essentially, a reference to the database is required. Every Firebase project has its own particular devoted Realtime Database items of which can be examined by opening the project inside the Firebase console and picking the Database option. Inside the console, panels can be selected to show data trees set away in the database, the rules outlined for fetching the access, database use estimations, and so on.
Firebase databases are usually Representational State Transfer (REST) endpoint references, which we will use to add the data. We will understand how to fetch the reference with the following code snippet:
// fetch reference database
FirebaseDatabase mDatabase = FirebaseDatabase.getInstance();
DatabaseReference mDbRef = mDatabase.getReference("Donor/Name");
The preceding code will fetch the reference, on the off chance that the particular path does not exist now, it is composed automatically inside the tree when data is written at that location.
Writing into Realtime Database
Fetch an instance of your database employing getInstance() and reference the location you need to write. You can write most of the primitive data types as they also include Java objects:
// Write a message to the database
FirebaseDatabase mDatabase = FirebaseDatabase.getInstance();
DatabaseReference mDbRef = mDatabase.getReference("Donor/Name");
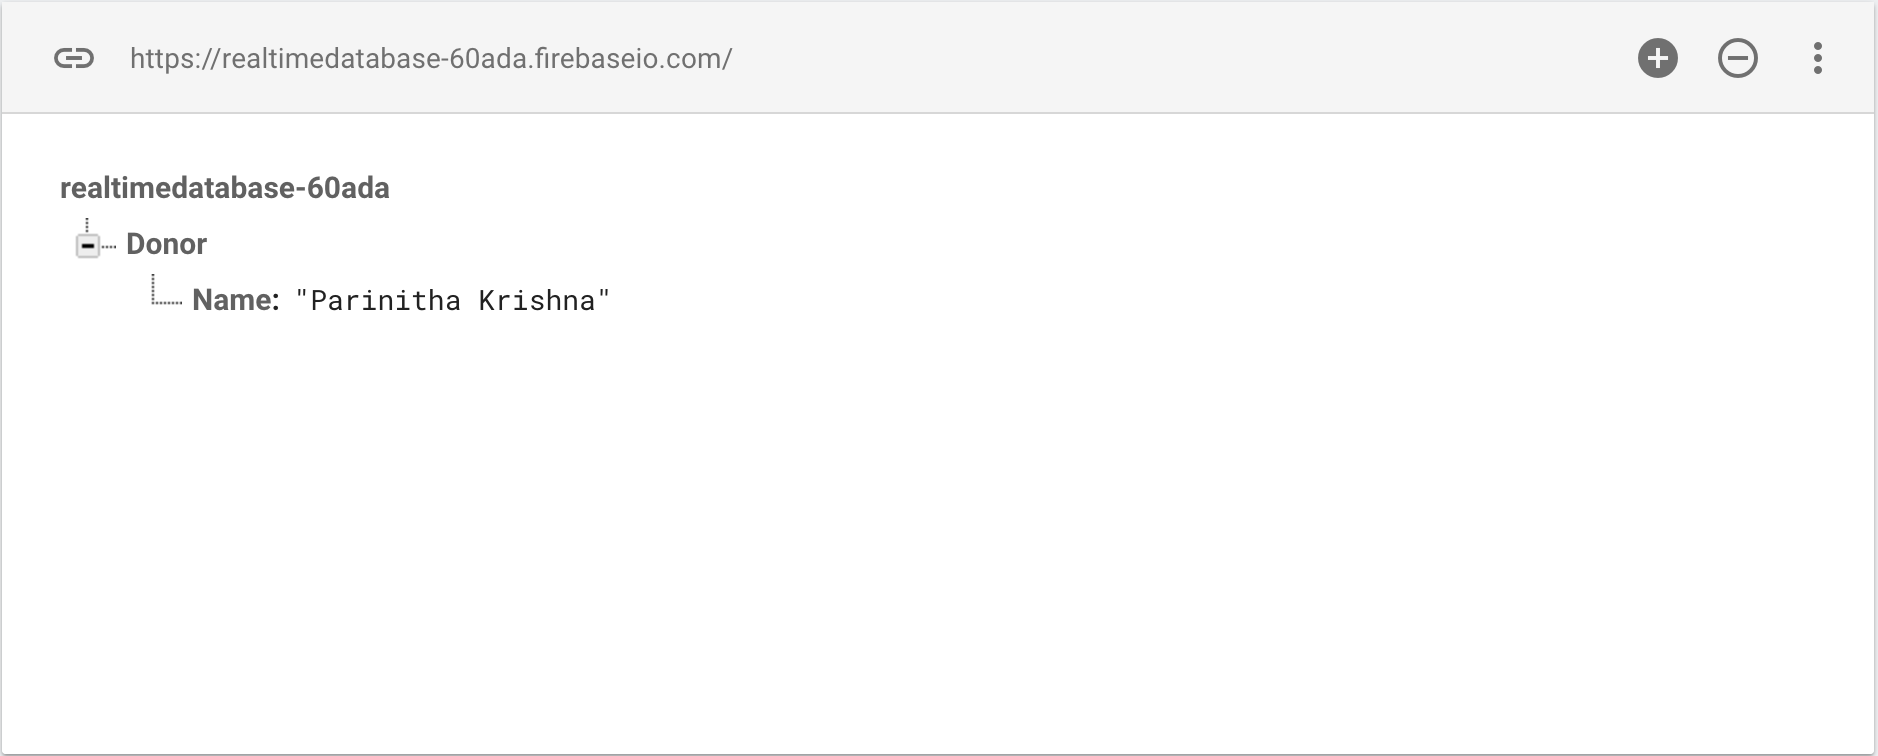
mDbRef.setValue("Parinitha Krishna");
The following screenshot explains the dashboard changes after running the preceding code:
If you notice that there aren't any changes in the dashboard from the write operation, we shall attach an onFailure callback like the following for identifying what's stopping it:
// Write a message to the database
FirebaseDatabase mDatabase = FirebaseDatabase.getInstance();
DatabaseReference mDbRef = mDatabase.getReference("Donor/Name");
mDbRef.setValue("Parinitha Krishna").addOnFailureListener(new OnFailureListener() {
    @Override
    public void onFailure(@NonNull Exception e) {
        Log.d(TAG, e.getLocalizedMessage());
    }
});
{
"rules": {
".read": true,
".write": true
}
}
Reading from Realtime Database
After writing the data into Firebase now it's time to read what we have written. Firebase Realtime Database syncs all the data in real time across platforms and devices. So we have an onDatachanged() callback to read the data:
// Read from the database
mDbRef.addValueEventListener(new ValueEventListener() {
    @Override
    public void onDataChange(DataSnapshot dataSnapshot) {
        // This method is called once with the initial value and again
        // whenever data at this location is updated.
        String value = dataSnapshot.getValue(String.class);
        Log.d(TAG, "Value is: " + value);
    }

    @Override
    public void onCancelled(DatabaseError error) {
        // Failed to read value
        Log.w(TAG, "Failed to read value.", error.toException());
    }
});
Structuring the data with objects
Create a model class with constructors and declare a string to fetch the database reference for a unique key to add the list of objects. The model class is as follows:
public class Users {

    private String Name;
    private String Email;
    private String Phone;

    public Users() {
    }

    public String getName() {
        return Name;
    }

    public void setName(String name) {
        Name = name;
    }

    public String getEmail() {
        return Email;
    }

    public void setEmail(String email) {
        Email = email;
    }

    public String getPhone() {
        return Phone;
    }

    public void setPhone(String phone) {
        Phone = phone;
    }

    public Users(String name, String email, String phone) {
        Name = name;
        Email = email;
        Phone = phone;
    }

}
Now in the activity class using the DatabaseReference class we can set the object value to Firebase, as follows:
public class MainActivity extends AppCompatActivity {

    private static final String TAG = "MainActivity";
    private FirebaseDatabase mDatabase;
    private DatabaseReference mDbRef;
    private String userId;

    @Override
    protected void onCreate(Bundle savedInstanceState) {
        super.onCreate(savedInstanceState);
        setContentView(R.layout.activity_main);

        // Write a message to the database
        mDatabase = FirebaseDatabase.getInstance();
        mDbRef = mDatabase.getReference("Donor/Name");

        //Setting firebase unique key for Hashmap list
        String userId = mDbRef.push().getKey();
        // creating user object
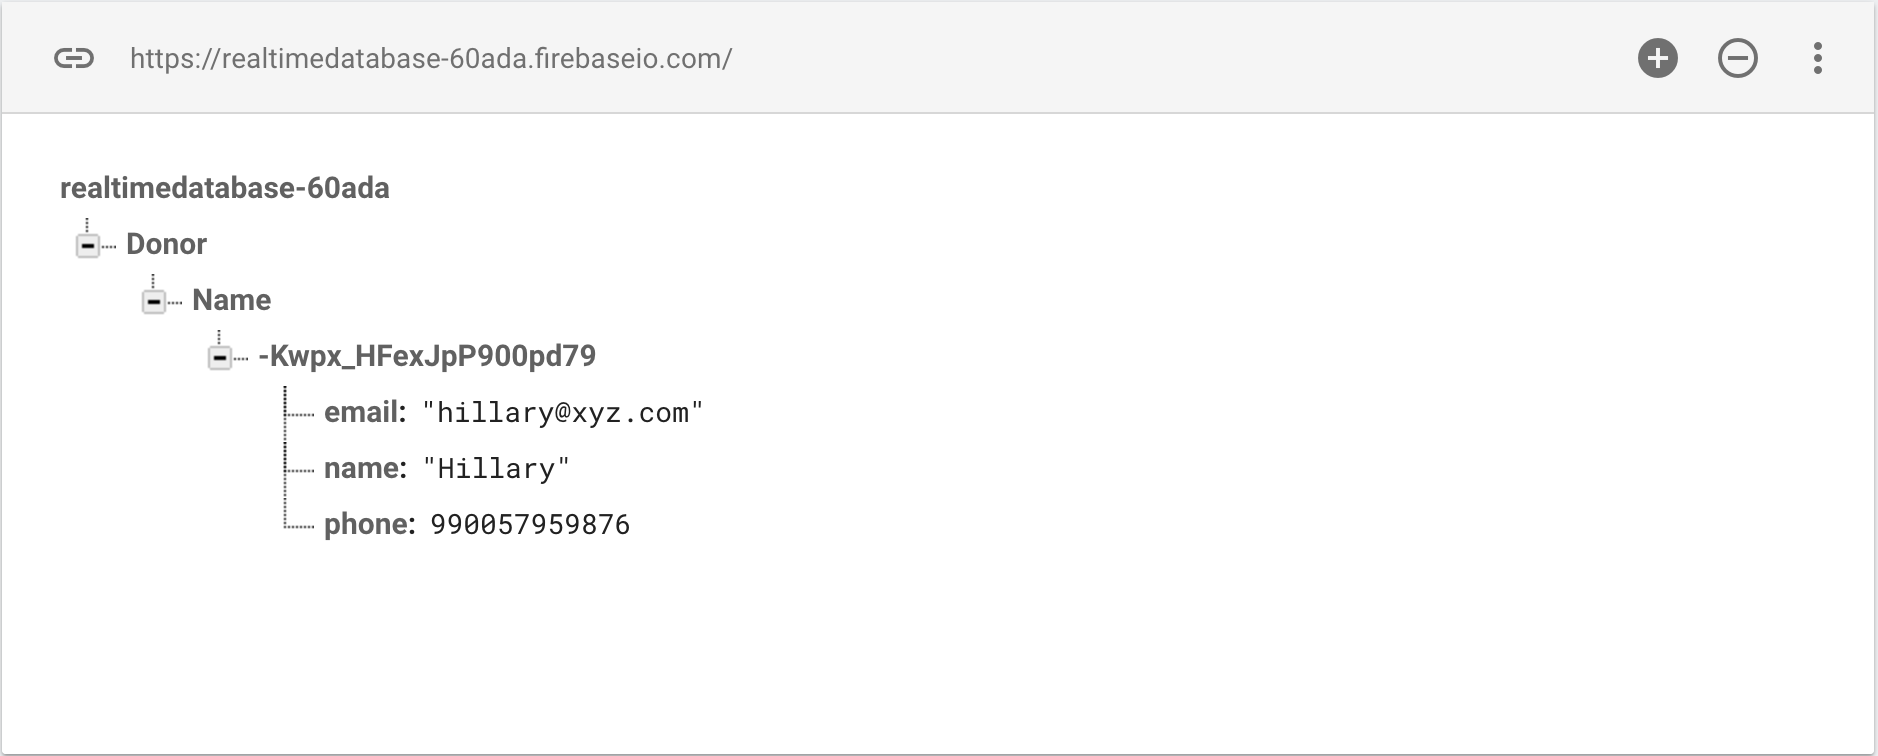
        Users user = new Users("Hillary", "hillary@xyz.com", "90097863873", "Tokyo");

        mDbRef.child(userId).setValue(user);

    }
}
The preceding code will add the object into Firebase as follows:
Reading the objects from Firebase
To read the object data from Firebase Realtime ValueEventListner() whenever there is an update in the database in onDatachanged callback we can read the data changes:
mDbRef.child(userId).addValueEventListener(new ValueEventListener() {
    @Override
    public void onDataChange(DataSnapshot dataSnapshot) {

        Users user = dataSnapshot.getValue(Users.class);

        Log.d(TAG, "User name: " + user.getName() + ", email " + user.getEmail());
    }

    @Override
    public void onCancelled(DatabaseError error) {
        // Failed to read value
        Log.w(TAG, "Failed to read value.", error.toException());
    }
});
When the code is executed, it will result in fetching the data tree to your project. It is up to us how we make use of the data.
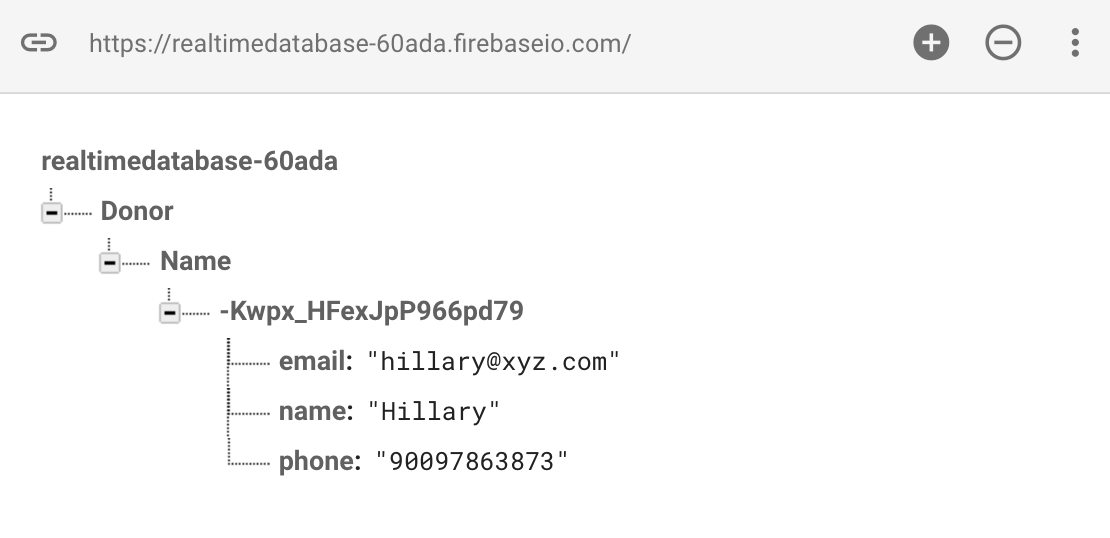
Since we are using unique key mechanism the data will be added under the Name reference with a unique identifier:
Reading value changes
In Firebase Realtime Database to listen to the data changes, we have addValueEventListener for listening to the multiple nodes. In case you want to check the single value by adding addListenerForSingleValueEvent(), we can do that as well:
mDbRef = mDatabase.getReference("/Donor/name");


ValueEventListener changeListener = new ValueEventListener() {
    @Override
    public void onDataChange(DataSnapshot dataSnapshot) {

    }

    @Override
    public void onCancelled(DatabaseError databaseError) {

    }
};

mDbRef.addValueEventListener(changeListener);
When a listener is not required, it should be detached from the database reference object as follows:
mDbRef.removeEventListener(changeListener);
Parsing the DataSnapshot object
In a simple way, DataSnapshot can be accessed through the getValue method. We can use the child() method to reach to a specific path of a snapshot. Consider the following example code snippet that fetches the title:
String title = mDataSnapshot.child("message1").child("title").getValue(String.class);
And all the children can be accessed using the getChildren() method. Consider the following code that is reading all the child details inside a for each loop:
for (DataSnapshot child : mDataSnapshot.getChildren()) {
    Log.i(TAG, child.getKey());
    Log.i(TAG, child.getValue(String.class));
}
Updating data
To update data, we can use the setValue() method by passing updated values. You can likewise utilize updateChildren() by passing the way to update data without exasperating other child nodes:
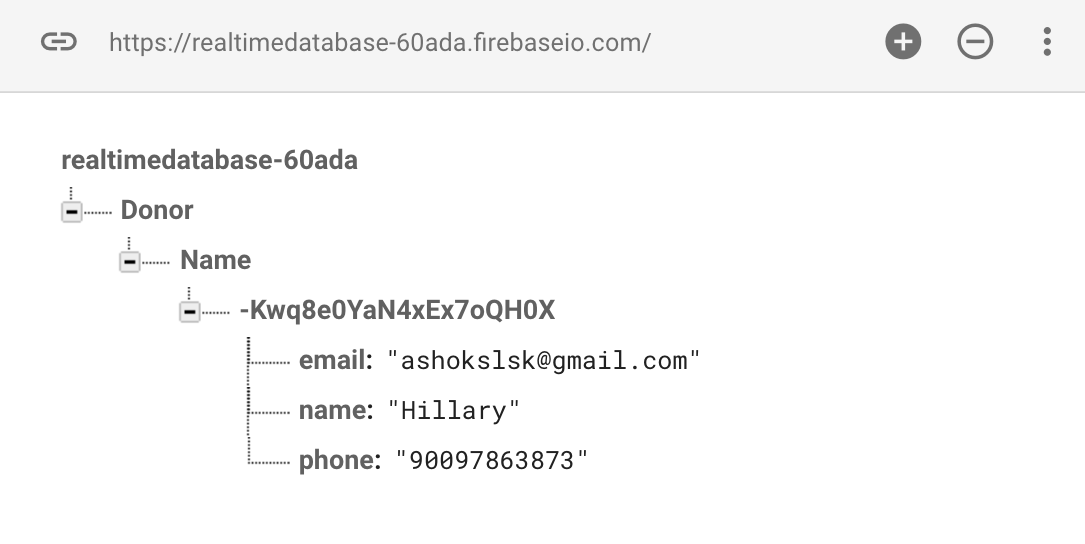
String newEmail = "ashokslsk@gmail.com";
mDbRef.child(userId).child("email").setValue(newEmail);
The following screenshot illustrates the updated value for the email field:
Writing HashMaps to Realtime Database
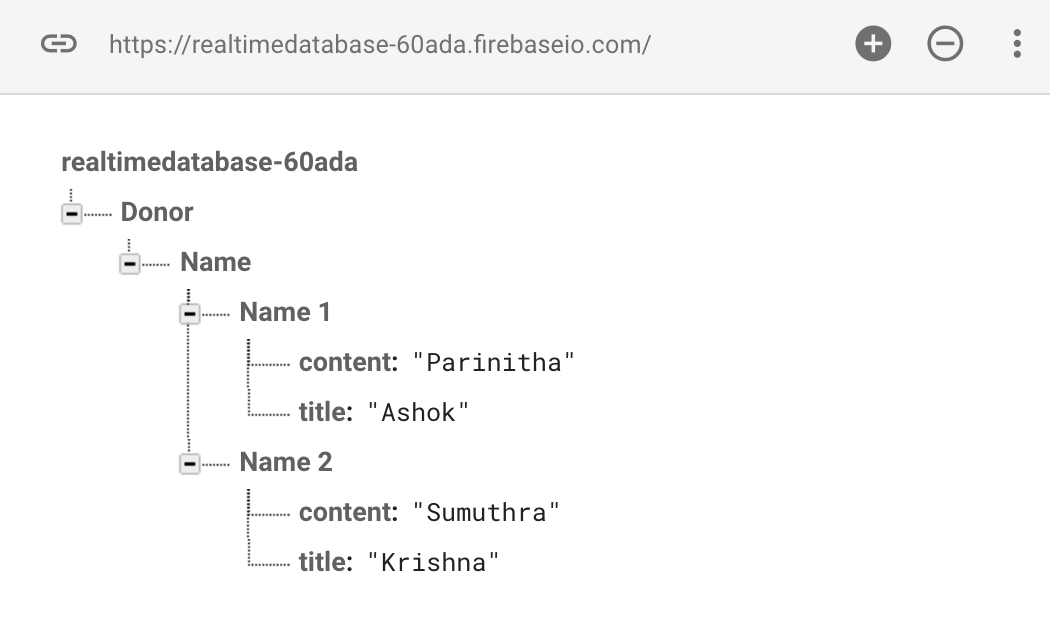
By using the updateChildren() method of the database reference class, we can write the HashMap data structure into Firebase Realtime Database. Let's create a HashMap and add different key-value pairs, each should be reflected in the Realtime Database:
// Write a message to the database
mDatabase = FirebaseDatabase.getInstance();
mDbRef = mDatabase.getReference("Donor/Name");

//Writing Hashmap
Map<String, Object> mHashmap = new HashMap<>();

mHashmap.put("Name 1/title", "Ashok");
mHashmap.put("Name 1/content", "Parinitha");
mHashmap.put("Name 2/title", "Krishna");
mHashmap.put("Name 2/content", "Sumuthra");

mDbRef.updateChildren(mHashmap);
The following screenshot illustrates the HashMap writing in the Firebase console:
Realtime Database and lists
Lists are compelling data structures and they help in numerous use cases. Firebase has excellent support for HashMap and lists. Users can append the data according to the unique key from Firebase, or you can create your logic to create a unique identifier. Using the push() method a user can insert the data, and there are many ways to filter and match the data pushed. Let's see how the push() method helps in creating a list. As usual first grab the reference to the database and then using the push() method get the unique key. Using the push() method we can add a new child:
// Write a message to the database
mDatabase = FirebaseDatabase.getInstance();
mDbRef = mDatabase.getReference("Donor/Name");

//Setting firebase unique key for Hashmap list
String key = mDbRef.push().getKey();

mDbRef.child(key).setValue("First item");
Apart from allowing a database to create a list, it is also necessary to receive a data-changed notification from the list. This can be achieved through adding child event listeners. These listeners will notify the app when there is a new child added. We need to implement a couple of callbacks when we use this listener. Most commonly there is the onChildAdded() method when a child is added, and it sends a new data snapshot with data added. Note that onChildChanged() is called when there is an update to the existing node, and onChildRemoved() is called when a child node is removed. However onChildMoved() is called when any alterations change the list order:
ChildEventListener childListener = new ChildEventListener() {
    @Override
    public void onChildAdded(DataSnapshot dataSnapshot, String s) {
    }
    @Override
    public void onChildChanged(DataSnapshot dataSnapshot, String s) {
    }
    @Override
    public void onChildMoved(DataSnapshot dataSnapshot, String s) {
    }
    @Override
    public void onChildRemoved(DataSnapshot dataSnapshot) {
    }
    @Override
    public void onCancelled(DatabaseError databaseError) {
    }
};

mDbRef.addChildEventListener(childListener);
There are many ways to perform the query on the list. Firebase has a class named Query to access the database inside the application on specified criteria:
Query mQuery = mDbRef.orderByKey();

ValueEventListener mQueryValueListener = new ValueEventListener() {
    @Override
    public void onDataChange(DataSnapshot dataSnapshot) {
        Iterable<DataSnapshot> snapshotIterator = dataSnapshot.getChildren();
        Iterator<DataSnapshot> iterator = snapshotIterator.iterator();
        while (iterator.hasNext()) {
            DataSnapshot next = (DataSnapshot) iterator.next();
            Log.i(TAG, "Value = " + next.child("name").getValue());
        }
    }
    @Override
    public void onCancelled(DatabaseError databaseError) {
    }
};

mQuery.addListenerForSingleValueEvent(mQueryValueListener);
Deleting data
To delete data, you can call the removeValue() method onto database reference. You can likewise pass null to the setValue() method, which does the same delete operation:
//Removes the entire child
mDbRef.child(userId).removeValue();
//Passing null to remove the calue
mDbRef.chile(userId).child("name").setValue(null);

// Similarly Hashmap can also be removed
Map<String, Object> mHashmap = new HashMap<>();

mHashmap.put("Name 1/title", null);
mHashmap.put("Name 1/content", null);
mHashmap.put("Name 2/title", null);
mHashmap.put("Name 2/content", null);
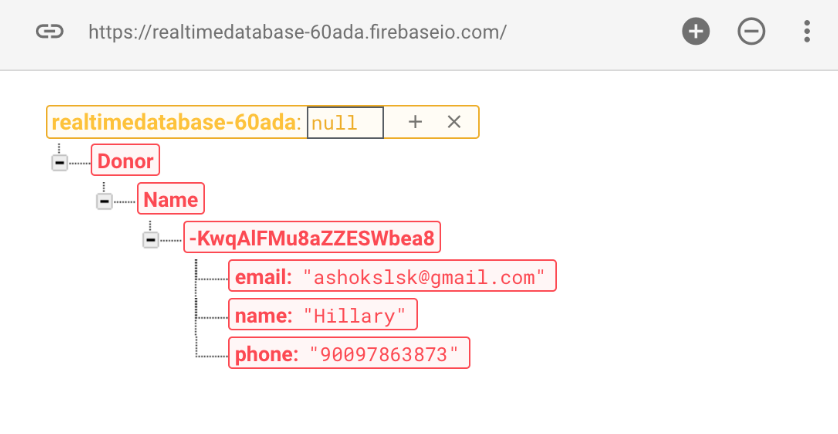
The following screenshot shows the Firebase console reaction for the delete operation:
Offline capabilities
At the point when clients are disconnected from the internet, the Realtime Database SDKs employ local cache on the device to store changes. Later when the device comes online, the local data is automatically synchronized to Realtime Database. We can enable disk persistence to save the data offline from the following lines of code:
//Offline support
FirebaseDatabase.getInstance().setPersistenceEnabled(true);


