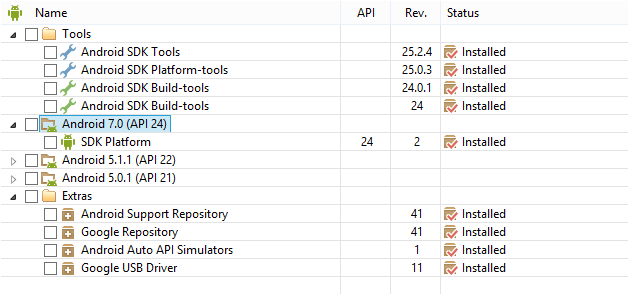
Technically speaking, it is quite possible to describe the Software Development Kit(SDK) as not being a part of Android Studio, as it is used by other IDEs. However, the IDE would be useless without it, and now is as good a time as any to take a quick look at it and its manager.
The Android SDK is a huge collection of APIs, consisting of Java classes and interfaces organized into complex but logical hierarchies along with other utilities, such as USB drivers and hardware accelerators.
The SDK and its components update far more frequently than the operating system itself, a setup that users should be blissfully unaware of. Android users think in terms of Lollipop or Honeycomb; as developers, we see the Android world in terms of SDK levels.
The SDK is controlled with SDK Manager, which can be accessed via the main toolbar or from Settings | Appearance & Behavior | System Settings | Android SDK from the File menu. There is also a standalone SDK Manager, which can be run without Android Studio. This can be found in the following directory: \AppData\Local\Android\sdk.

There are three sections to the SDK manager: tools, platforms, and extras. At the very minimum, you will need to install the latest SDK tools, platform tools, and build tools. You will also need to install the most recent platform and any other platform you intend to target directly. You will also need system images for any virtual devices you wish to create as well as the Google USB driver and HAXM hardware accelerator.
The easiest way to manage the various updates is to set them to be installed automatically, and this can be done from the Settings dialog (Ctrl + Alt + S) under Appearance and Behavior | System Settings | Updates.
The SDK forms the backbone of our development environment, but however well we master it, we still need some way to test our creations, and in the absence of a large number of real devices, this depends on creating virtual devices with the Android device emulator.


