Virtualization with Docker
The most simple explanation of Docker is that it is an application that allows you to create small virtual computers (the proper name for Docker is container, we can also call it a virtual machine) on which an operating system is installed that allows it to run a dedicated application or a set of applications.
There are multiple explanations and resources online about the advantages and disadvantages of Docker-based development. For us, the most important benefit of a Docker-based environment is that it allows us to create a set of containers to run AC without any issues. You can skip the next section if you already have Docker Engine or Docker Desktop installed on your machine.
Installing Docker and the Docker Compose plugin
Docker Engine is available for Linux, macOS, and Windows. There are multiple online instructions on how to install Docker, so I assume that you can install Docker by yourself by following an online tutorial.
Docker Compose is a tool for defining and running multi-container Docker containers. A configuration for all containers and their services is based on a YAML file, which allows you to start all required services to run AC using just one file.
Installing Docker on Windows
For now, let’s just proceed with installing Docker Desktop for Windows. You can find the installation binary files on the Docker website: https://docs.docker.com/desktop/install/windows-install/.
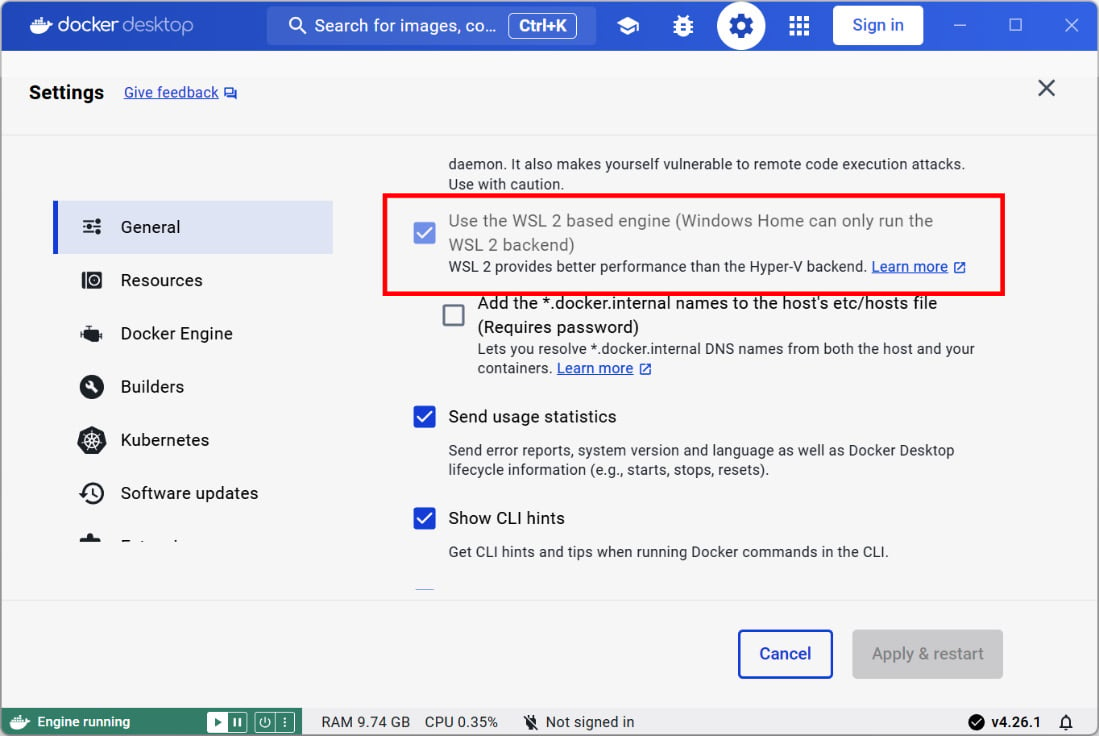
Once you have installed Docker Desktop on Windows, please make sure you have enabled WSL 2 support:

Figure 1.12 – Enabling WSL 2 support
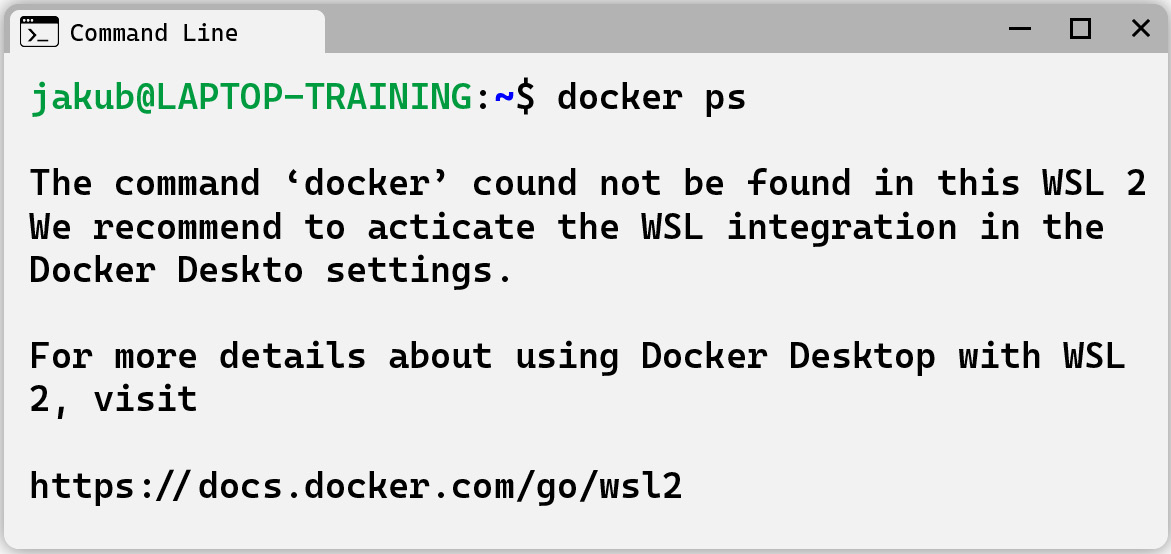
This will allow you to work with Docker containers on your WSL 2 machine. After installing WSL 2 and Docker on your Windows machine, open your Ubuntu console and see if you can use Docker commands inside it. To do this, type the following command:
docker ps
If the message you get is similar to what’s shown in Figure 1.13, you have to enable support for your WSL 2 instance in the Docker Desktop application.
We have to do this for Linux to see and be able to connect to the Docker containers as each Docker container will run a required service to run AC locally:

Figure 1.13 – Docker not being recognized by Ubuntu
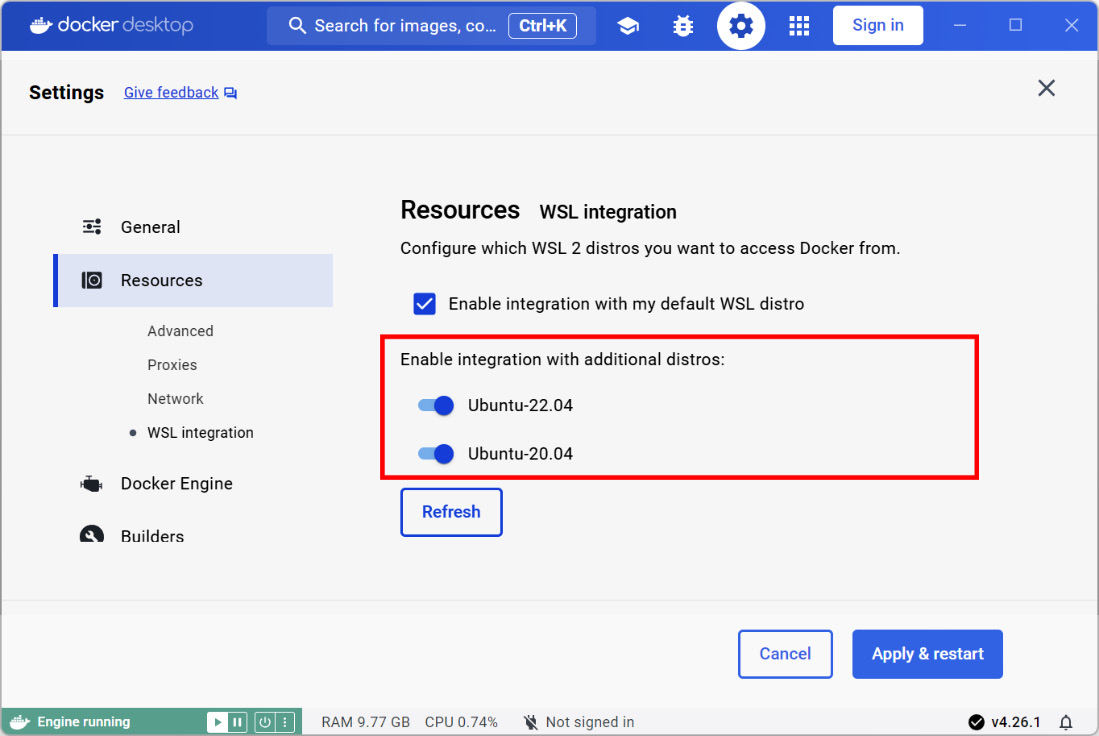
You can do this in Docker’s application configuration by navigating to Resources | WSL integration | Enable integration with my default WSL distro:

Figure 1.14 – Enabling Docker support for WSL
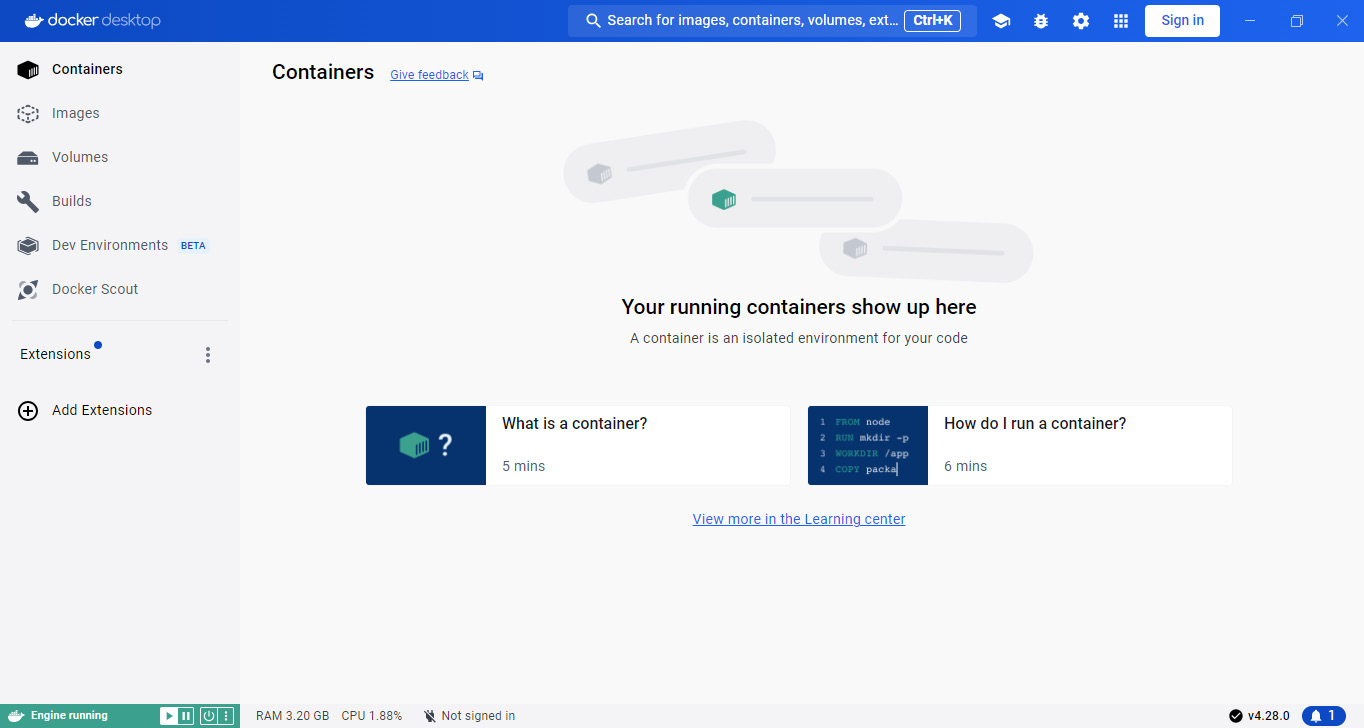
Enable WSL for installed Linux distributions. Click on Apply and Restart. Now, go back to your WSL machine; you should see Docker Engine being connected to it:

Figure 1.15 – Docker Engine connected
With that, your Windows PC is fully ready for the final step of preparing our working environment.
Installing Docker on macOS
Similar to how we did this for Windows, just proceed with the Docker Desktop installation for macOS. You can find the installation binary files on the Docker website: https://docs.docker.com/desktop/install/mac-install/. Just make sure you download the proper file for the CPU you have in your Apple device. Follow these steps:
- Download the proper version based on the CPU located in your Mac:

Figure 1.16 – Picking up the proper Docker version for macOS
- Proceed with the installation.
- Start the Docker application and verify the installation:

Figure 1.17 – Verifying the installation
Installing Docker on macOS does not require any extra steps. You can now go ahead and start reading the Preparing a Docker manager section.
Installing Docker on Linux
The Linux installation can be a little more complex, but it depends on the Linux version you are running. Running Linux does not require you to run Docker Desktop applications –everything can be managed through the CLI via Shell. However, if you haven’t started the Docker installation on Linux, I encourage you to go with the desktop application first.
I think it is safe to assume that if you are working on Linux, you are also familiar with how to install any software packages using the CLI and you probably have Docker running already.
Similar to macOS and Windows, we will also use Docker Desktop, so proceed with the installation.
Wrapping things up
Once you have Docker installed and, for Windows users, installed WSL 2 with the latest version of Ubuntu, you need to check the following commands and make sure you can run them locally (or on a remote server):
- Open a terminal application.
- Check the list of running Docker containers by running the following command (you don’t need to use it; we are just checking if we can use and manage a Docker container as a logged-in user):
docker ps
This command lists all the active Docker containers you have installed. If this is your first time running this command, the list will be empty and will look like this:

Figure 1.18 – Active Docker containers list
- Check whether you can run the
docker-composecommand by typing the following:docker-compose -v
You should see the following output:

Figure 1.19 – Running the docker-compose command
Docker Compose is a tool that simplifies the process of running multiple applications or services together in a containerized environment.
As I’ve explained before, Magento/AC requires a lot of services to run and we will use Docker to run each service in its own container. Without the docker-compose command, we would have to start and configure each Docker container separately and we would have to tell all containers how to communicate with each other.
You can read more about the docker-compose command on Docker’s website. For our local development setup, we just need to be sure that this application (docker-compose) is installed since the next section will describe a tool that uses docker-compose under the hood.
At this point, we are ready for the final step of this chapter – installing a piece of open source software to manage our Docker containers so that we won’t have to do it manually.


