Search icon CANCEL
Subscription
0
Cart icon
Your Cart (0 item)
Close icon
You have no products in your basket yet
Arrow left icon
Explore Products
Best Sellers
New Releases
Books
Videos
Audiobooks
Learning Hub
Free Learning
Arrow right icon
Arrow up icon
GO TO TOP
Enterprise Application Development with Ext JS and Spring

You're reading from   Enterprise Application Development with Ext JS and Spring Designed for intermediate developers, this superb tutorial will lead you step by step through the process of developing enterprise web applications combining two leading-edge frameworks. Take a big leap forward in easy stages.

Arrow left icon
Product type Paperback
Published in Dec 2013
Publisher Packt
ISBN-13 9781783285457
Length 446 pages
Edition 1st Edition
Languages
Tools
Arrow right icon
Author (1):
Arrow left icon
Gerald Gierer Gerald Gierer
Author Profile Icon Gerald Gierer
Gerald Gierer
Arrow right icon
View More author details
Toc

Table of Contents (16) Chapters Close

Preface 1. Preparing Your Development Environment FREE CHAPTER 2. The Task Time Tracker Database 3. Reverse Engineering the Domain Layer with JPA 4. Data Access Made Easy 5. Testing the DAO Layer with Spring and JUnit 6. Back to Business – The Service Layer 7. The Web Request Handling Layer 8. Running 3T on GlassFish 9. Getting Started with Ext JS 4 10. Logging On and Maintaining Users 11. Building the Task Log User Interface 12. 3T Administration Made Easy 13. Moving Your Application to Production A. Introducing Spring Data JPA
Index

Deploying the WAR file to GlassFish

Until now we have always deployed the 3T application to GlassFish via NetBeans using the Run Project command. In production environments we deploy applications through the GlassFish admin console or from the command line using asadmin. We will now learn how to deploy the task-time-tracker-1.0.war file to GlassFish using the admin console.

Opening the GlassFish admin console

Start GlassFish either in NetBeans or in a console window using the asadmin command. We recommend using asadmin as this is normally the way GlassFish is managed in an enterprise environment.
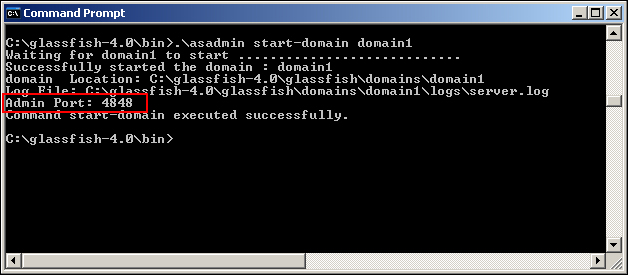
Opening the GlassFish admin console

As we can see in the preceding screenshot, the default GlassFish Admin port value is 4848, as shown in the preceding screenshot, but it will be different if multiple GlassFish domains are configured. Open this location in the browser to display the GlassFish admin console:
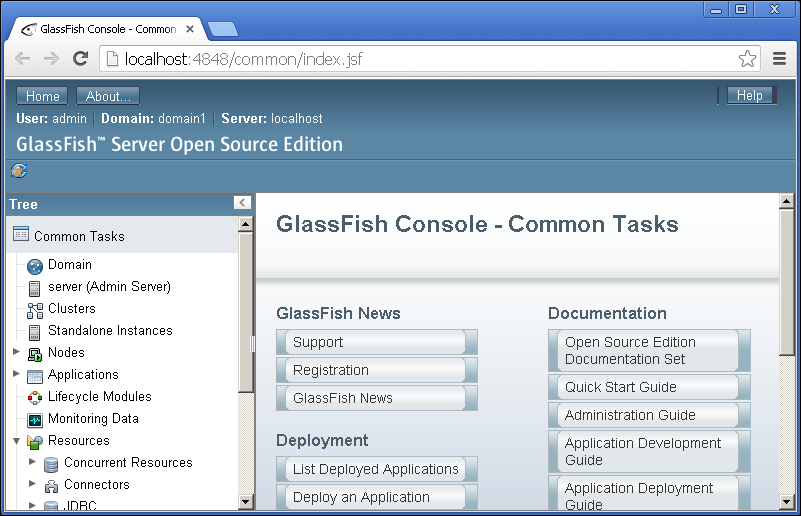
Opening the GlassFish admin console

GlassFish security basics

Working on the localhost will normally not prompt you for a password when using the default GlassFish...

lock icon The rest of the chapter is locked
Register for a free Packt account to unlock a world of extra content!
A free Packt account unlocks extra newsletters, articles, discounted offers, and much more. Start advancing your knowledge today.
Unlock this book and the full library FREE for 7 days
Get unlimited access to 7000+ expert-authored eBooks and videos courses covering every tech area you can think of
Renews at $19.99/month. Cancel anytime
Banner background image