Registering as a Google Play developer
Unlike iOS, deploying your applications to Android devices is free and only requires a few changes in your device settings. A Google Play developer account has only a one-time fee of $25 and doesn't have to be renewed each year. However, just like iOS, you will need a Google Play account to develop in-app purchases, push notifications, or Google Play Game Services. I would recommend setting up an account ahead of time if you inevitably plan on submitting an app to Google Play or need to implement one of these features.
To register as a developer for Google Play, perform the following steps:
- Go to https://play.google.com/apps/publish.
- Log in with an existing Google account, or create a new one. This can't be changed later, so choose the one that is appropriate for your company, if needed.
- Accept the agreement and enter your credit card information.
- Choose a developer name and enter other important information for your account. Again, choose names appropriate for your company to be seen by users in the app store.
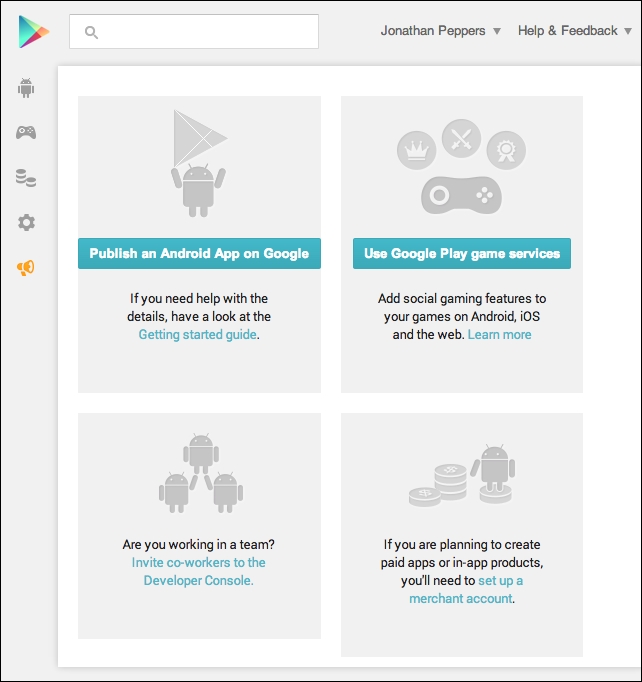
If you get everything filled out correctly, you will end up with the following Google Play Developer Console:

If you plan on selling paid apps or in-app purchases, at this point, I would recommend setting up your Google Merchant Account. This will enable Google to pay you the proceeds toward your app sales by applying the appropriate tax laws in your country. If setting this up for your company, I would recommend getting the assistance of your company's accountant or bookkeeper.
The following are the steps to set up a Google Merchant Account:
- Click on the set up a merchant account button.
- Log in with your Google account a second time.
- Fill out the appropriate information for selling apps: address, phone number, tax information, and a display name to appear on your customers' credit card bills.
When done, you will notice that the help tip for setting up a merchant account is now missing from the developer console, as shown in the following screenshot:

At this point, one would think our account would be fully set up, but there is one more crucial step prior to being able to sell apps: we have to enter the banking information.
Setting up banking for your Google Merchant Account can be performed with the following steps:
- Go back to the Google Play Developer Console at https://play.google.com/apps/publish.
- Click on the Financial Reports section.
- Click on the small link titled Visit your merchant account for details.
- You should see a warning indicating that you do not have a bank account set up. Click on the Specify a Bank Account link to get started.
- Enter your banking information. Again, a company accountant might be needed.
- In a few days, look for a small deposit in your account from Google.
- Confirm the amount by going to http://checkout.google.com/sell.
- Click on the Settings tab, then Financials.
- Next, click on Verify Account.
- Enter the amount that appeared in your bank account and click on Verify deposit.
Your Google Merchant Account is also the place where you can cancel or refund customer orders. Google Play is different from the iOS App Store in that all customer issues are directed to the developers.


