Navigation tools – overview
Navigation involves moving around in your document by panning, zooming, and rotating.
Panning
To pan your view in a document, choose the move tool, which looks like a hand, second from the bottom in the Tools panel. The default shortcut for the move tool is H. This will select the hand tool. If you press H again it will toggle it off and revert to the previous tool you had selected. Another way to achieve this is to simply press and hold the spacebar, which is also a toggle shortcut for the Move tool. Once you let go, it will toggle you back to the previous tool. Alternatively, if you have the Navigator panel on the screen (View | Studio | Navigator), you can also click and drag within this panel to pan the view.

Figure 1.52 – View tool
Zooming
There are a few different methods to zoom in and out of your document in Affinity Designer. Through experimenting with each of these methods, you will find what works best for you. I generally use a combination of a few of them.
Fun fact
The makers of Affinity Designer state that zoom levels of 1,000,000% are possible with this application (!).
Zooming – the Zoom tool
To zoom the view of your document in or out choose the zoom tool, which looks like a magnifying glass and is located at the very bottom of the Tools panel. The default shortcut for the zoom tool is Z. This will select the zoom tool. If you press Z again, it will toggle it off and revert to the previous tool you had selected.

Figure 1.53 – Zoom tool
Power zoom
In general, when zooming in or out, you can either click once each time to zoom in or out in 50% increments or you can click, hold, and drag out an area to quickly zoom right into that specific spot. As you drag, a semi-transparent blue rectangle will show you the bounds of what will be zoomed in when you let go. This is much quicker than multiple clicking and fills the document view with the area you specifically zoomed in on. Note this clicking and dragging an area behavior only seems to work when zooming in. If you try it with the zoom out tool, it will continue to zoom in.
Zooming – keyboard shortcuts
By far, you'll most likely prefer keyboard shortcuts for zooming in and out as you will be doing it repeatedly over the course of your time working in Affinity Designer and you'll want to keep it as efficient as possible:
- Zoom in/out: With the zoom tool active, its default is to zoom in. You can temporarily zoom the view out by pressing and holding the option key (Mac) or Alt key (Windows).
- Zoom in/out: While any tool is active, you can temporarily enable zooming by pressing the spacebar plus the command key (Mac) or Ctrl key (Windows) to zoom in. Or, zoom out by adding the option key (Mac) or Alt key (Windows) to that key combination. Letting go of these keys will revert the tool to what it was.
- Zoom in/out: With the zoom tool active or inactive (in other words, at any time), the (Mac) command key plus the + sign or (Windows) the Ctrl key plus the + sign together will temporarily zoom in the view, while the command key (Mac) plus the – sign or Ctrl key (Windows) plus the – sign will temporarily zoom out the view.
- Zoom to fit: The command key plus 0+ or the Ctrl key (Windows) plus 0 will zoom in the view to include everything on the document or artboards.
- Zoom to 100%: The command key (Mac) plus 1+ or the Ctrl key (Windows) plus 1. Depending on your document's unit settings (inches, pixels, and so on…), this will zoom in the view to where the document's size matches the screen pixels size.
- Zoom to Selection: The command key (Mac) plus the option key, plus 0+ or the Ctrl key (Windows) plus the Alt key, plus 0 will zoom your selection to fill the document view. If you are working with artboards, clicking on the artboards title in the document window, then choosing the Zoom to Selection method will center your artboard in the document window.
- Zoom to Actual DPI Size: The command key plus 8+ or the Ctrl key plus 8 will zoom your selection to the DPI (dots per inch) or print resolution set up in your document setup.
- Zoom to Actual Pixel Size: The command key plus 9+ or the Ctrl key (Windows) plus 9 will zoom your selection to the Pixel (pixels per inch) or pixel resolution set up in your document setup.
Zooming – mouse scroll wheel
Another way to zoom your view in and out is by using a mouse with a scroll wheel. This method can be fast as you don't have to click a shortcut key or the zoom tool in the Tools panel. To do this, you must have the Use mouse wheel to zoom option checked in Preferences | Tools. See Figure 1.54:
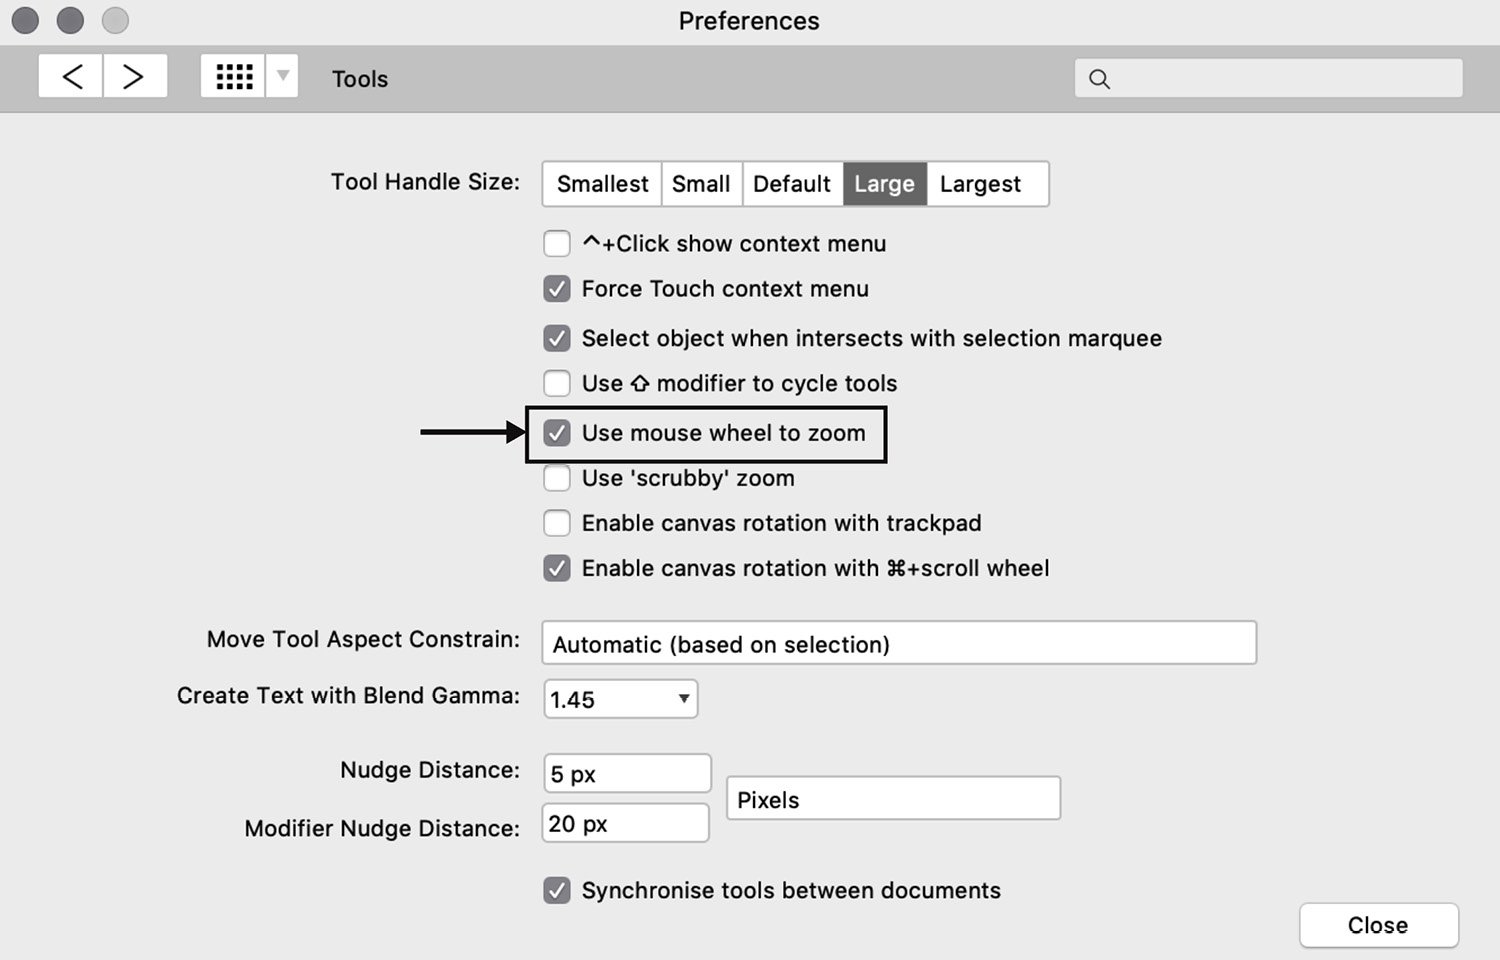
Figure 1.54 – Preferences panel – mouse wheel zoom enabled
As with the zoom tool methods described above, zooming occurs from your mouse position. In other words, wherever your cursor is located in the document view, Affinity Designer will use this location to zoom in or out from.
Zooming – 'scrubby' zoom
Another way to zoom your view in and out is by enabling 'scrubby' zoom in Preferences | Tools. Scrubby zoom gets its name from the movement of panning or "scrubbing" your cursor left and right with the zoom tool active or temporarily enabled by the various methods described previously. Scrubbing left zooms out and scrubbing right zooms in. One thing to note with this method is that you will no longer be able to Power Zoom as described earlier in the callout as this 'scrubby' method overrides the ability to drag out a rectangular area to zoom in on. See Figure 1.55:
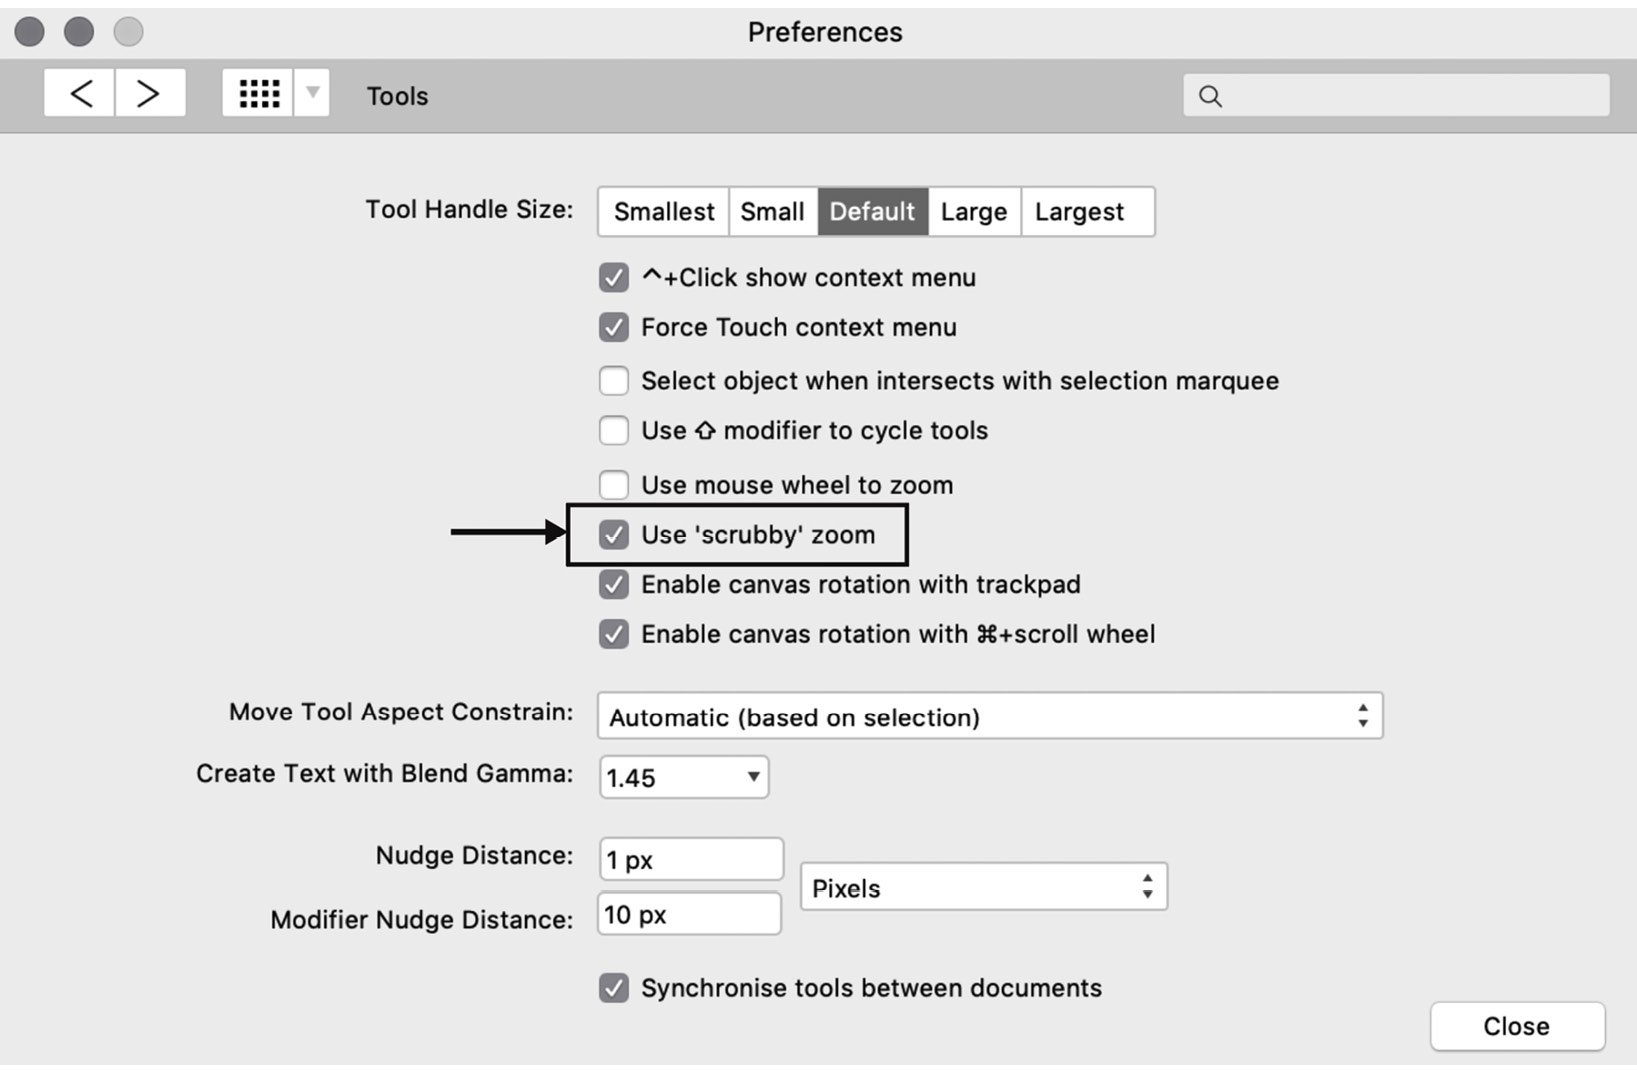
Figure 1.55 – Preferences panel – 'scrubby' zoom enabled
Zooming – the Context toolbar
In the context toolbar, there is a field that indicates the current zoom level of your document in percentage points. Entering your desired zoom level here is another way to zoom in and out.

Figure 1.56 – Context Toolbar zoom level
Zooming – the Navigator panel
Finally, the Navigator panel, which we haven't talked about yet, is another way to zoom your document view in and out. Go to View | Studio | Navigator. There is a slider at the top of the panel that starts at a zoom level of 1% and goes up to 1,000%. It can go higher if you click the + button on the right side.
Another great feature of the Navigator panel is the document thumbnail view, which gives you not only great visual feedback on the zoom level but when you're really zoomed in, it allows you to navigate or pan your document without having to zoom back out to see where things are located. You can stay at the current zoom level and get to other areas of your document while still zoomed in. The transparent gray rectangle in the document thumbnail indicates the position and size of the main document window.
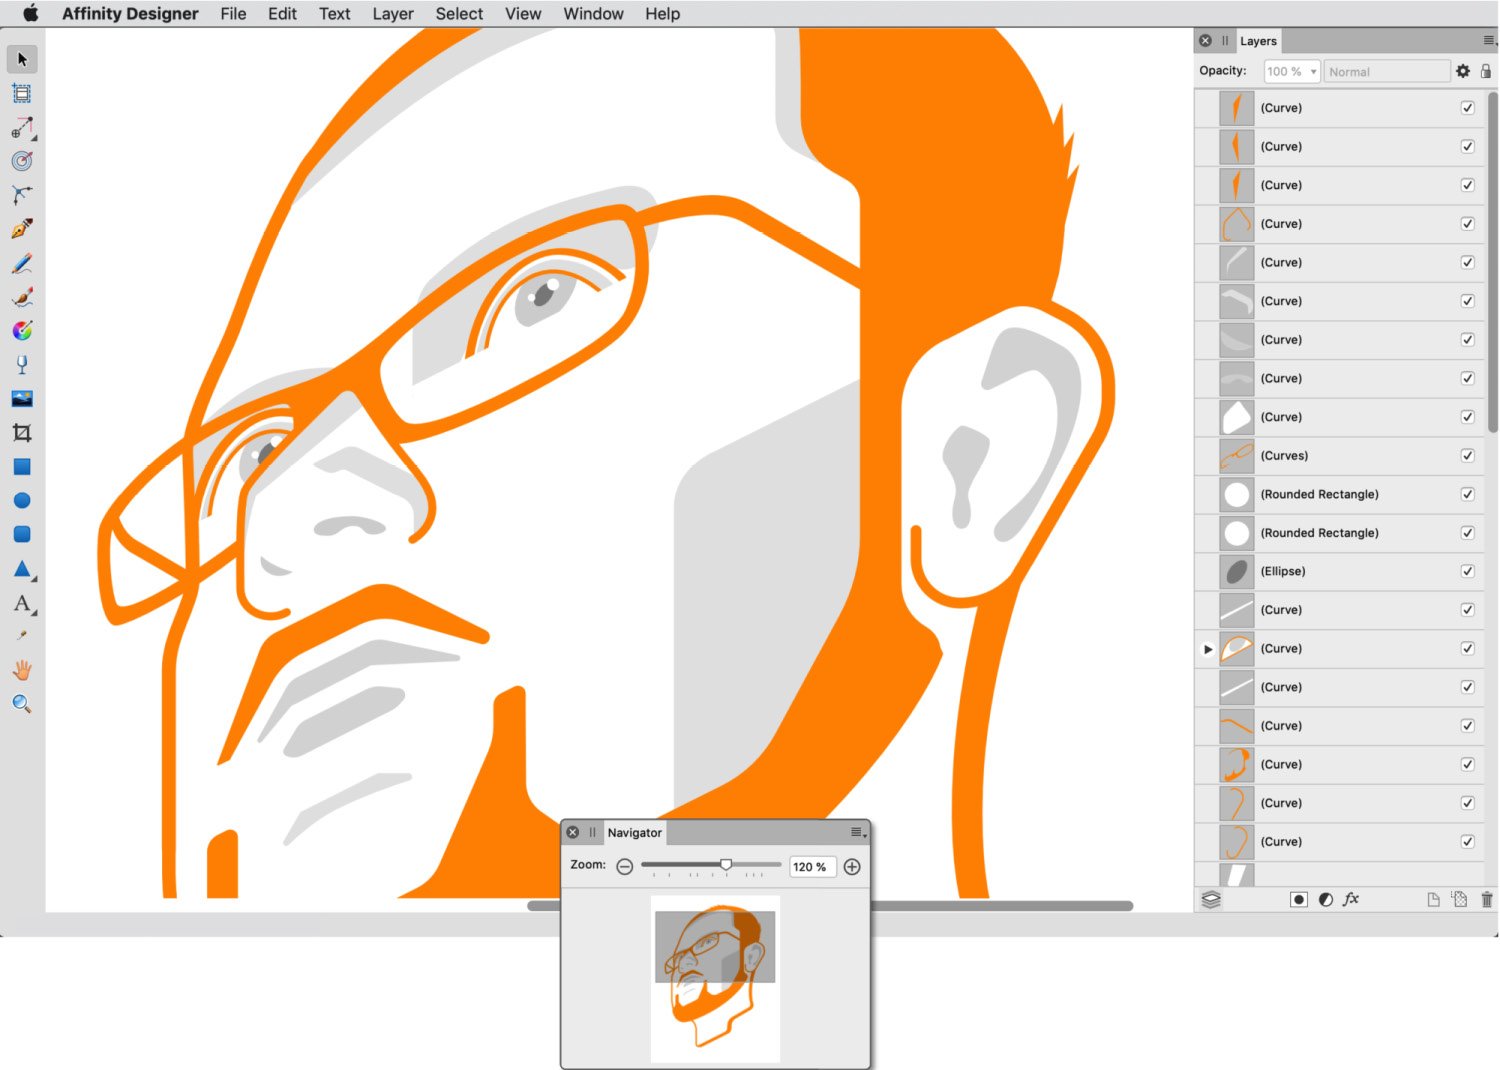
Figure 1.57 – The main document window and the Navigator panel
Rotating
One of the great things about using Affinity Designer is the ability to rotate a document. This allows a more organic workflow similar to working with pencil and paper, especially when painting or freehand sketching in the Pixel Persona using a tablet or a pen display.
Rotating – menu/shortcut
To rotate a document, go to View | ROTATE LEFT or ROTATE RIGHT. This will rotate your document in 15-degree increments. Just below is the option to reset the rotation. If you find you are rotating your work on a regular basis, I would highly recommend you set keyboard shortcuts for each of these options for more enjoyable and efficient work sessions.
Rotating – scroll wheel
Another way to rotate a document is to use your mouse scroll wheel and the command key (Mac) or the Alt key (Windows) to rotate the document around the mouse location. Adding Shift will rotate around the document's center.
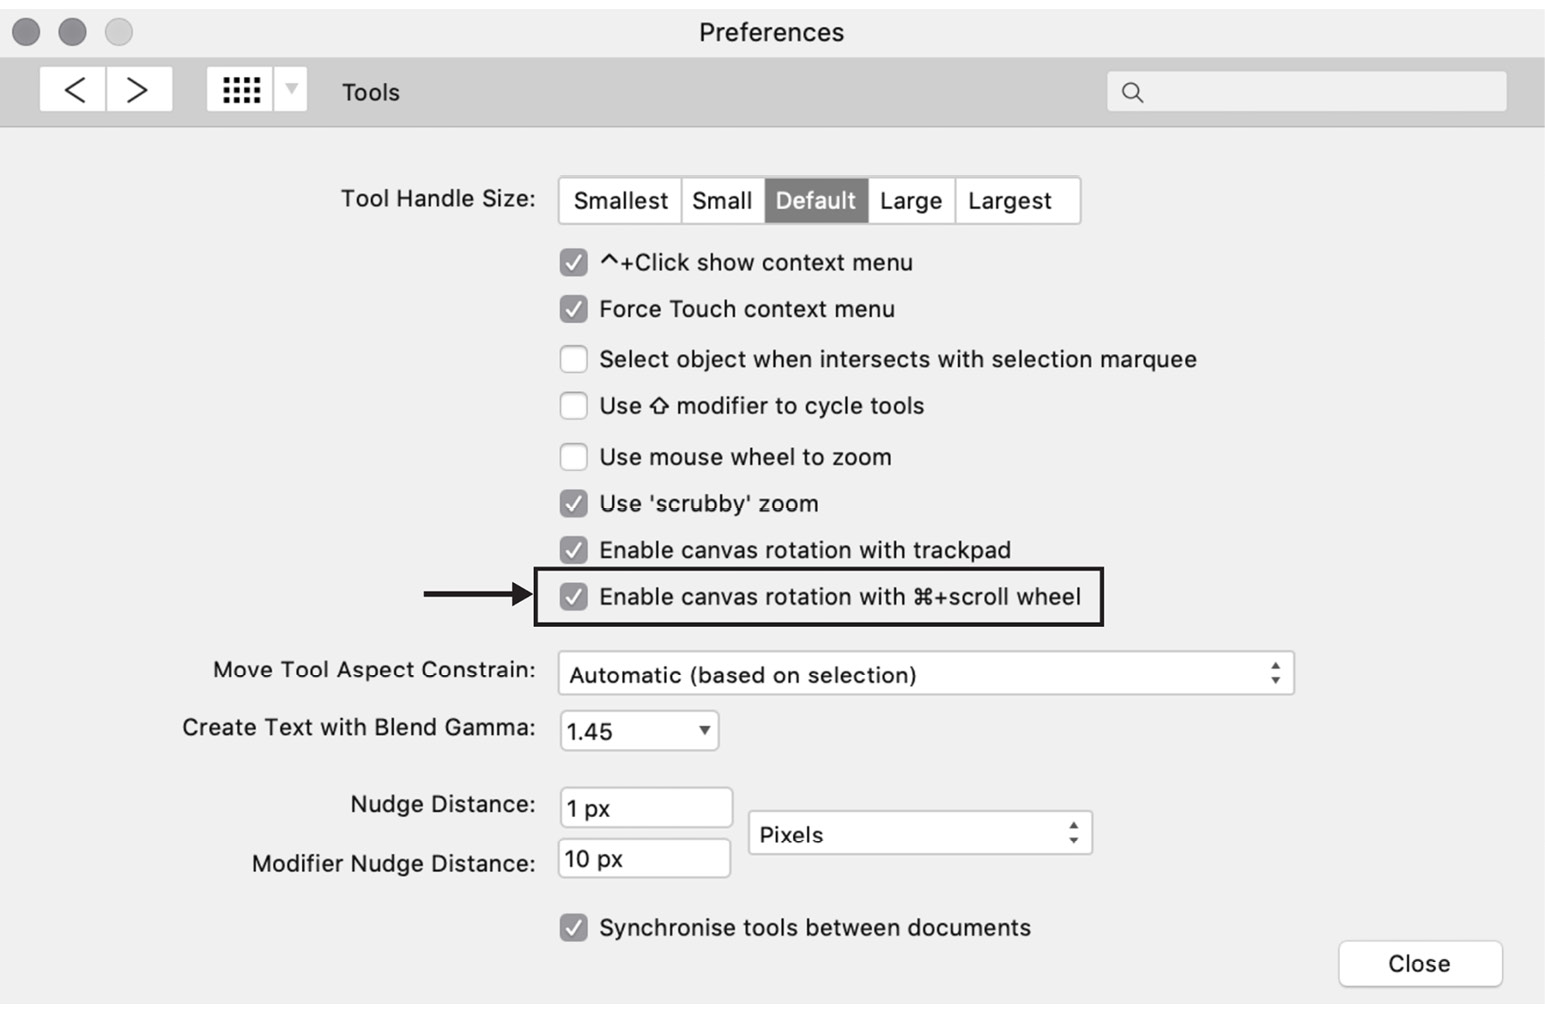
Figure 1.58 – Preferences panel – enable canvas rotation with the command key and scroll wheel enabled
The result looks like this:
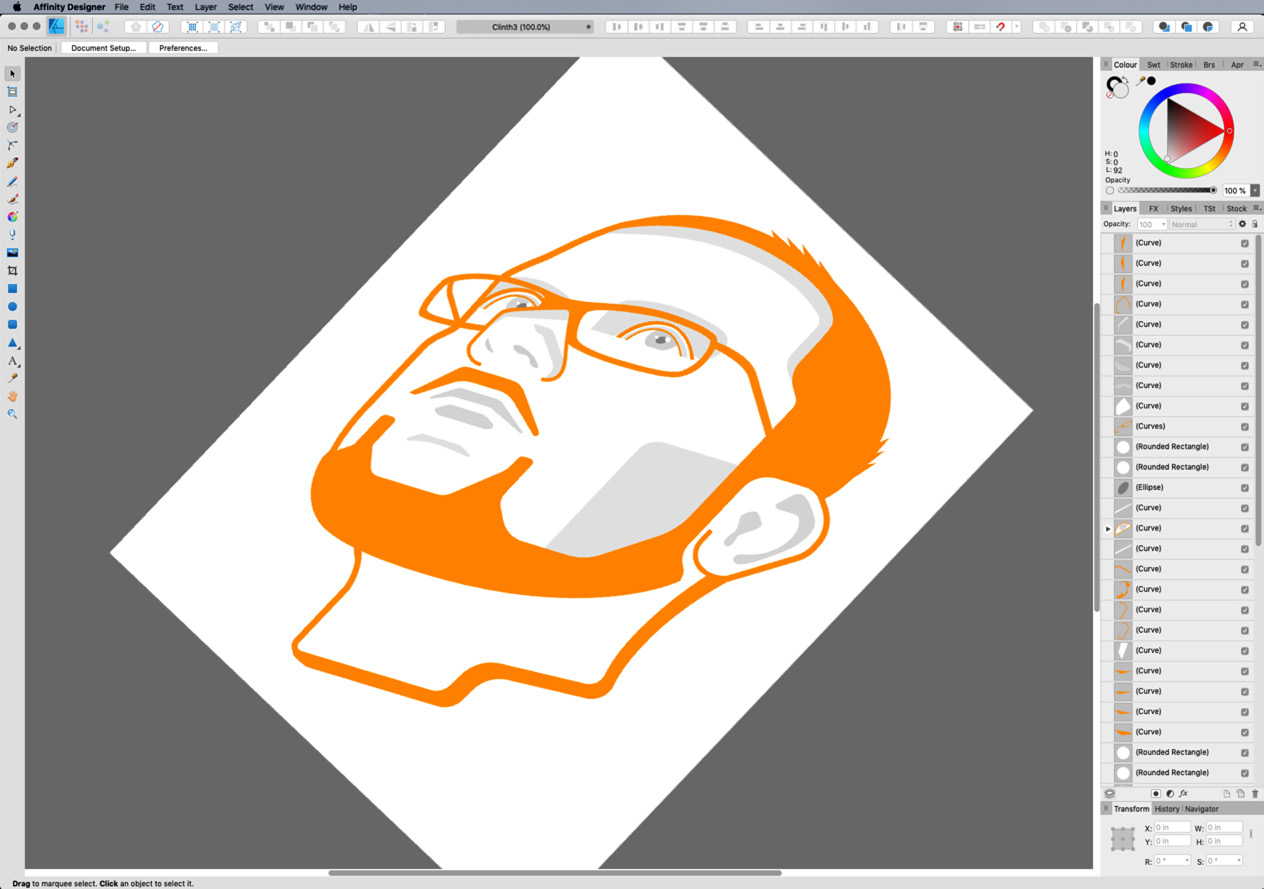
Figure 1.59 – A rotated document


