To configure the Dynamics 365 customer service portal, the following steps need to be performed:
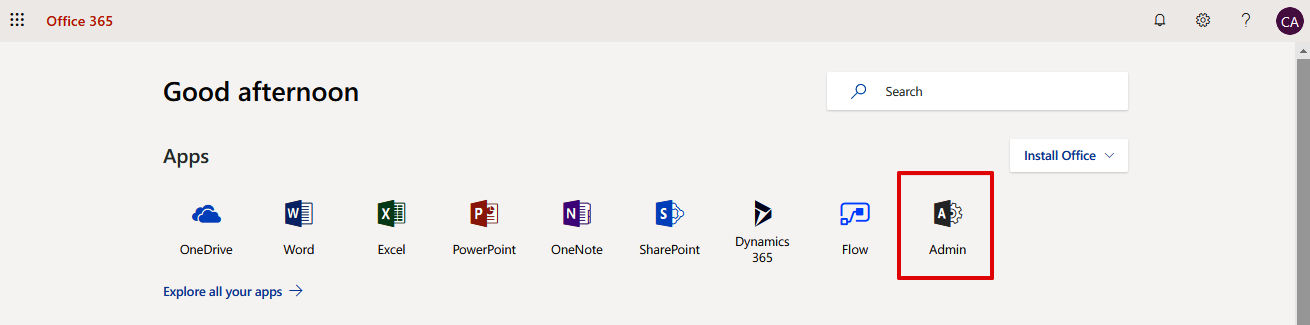
- Go to the https://portal.office.com/ website, enter your credentials, and click on the Admin section:
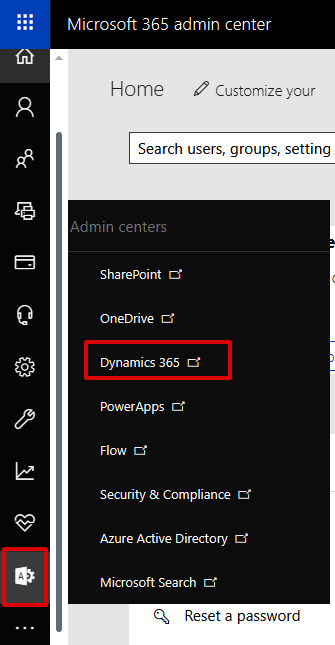
- Go to the Dynamics 365 section, as shown:
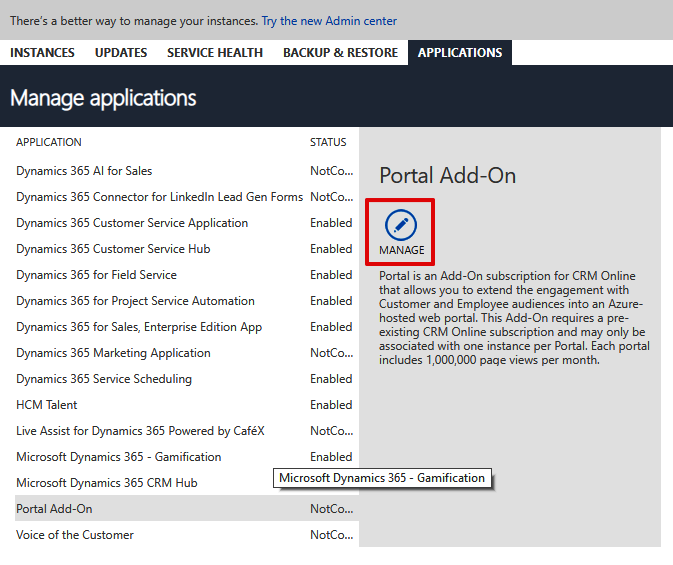
- Select your instance using the Dynamics 365 instance picker and go the APPLICATIONS tab. Find and select Portal-Add On and click on MANAGE:
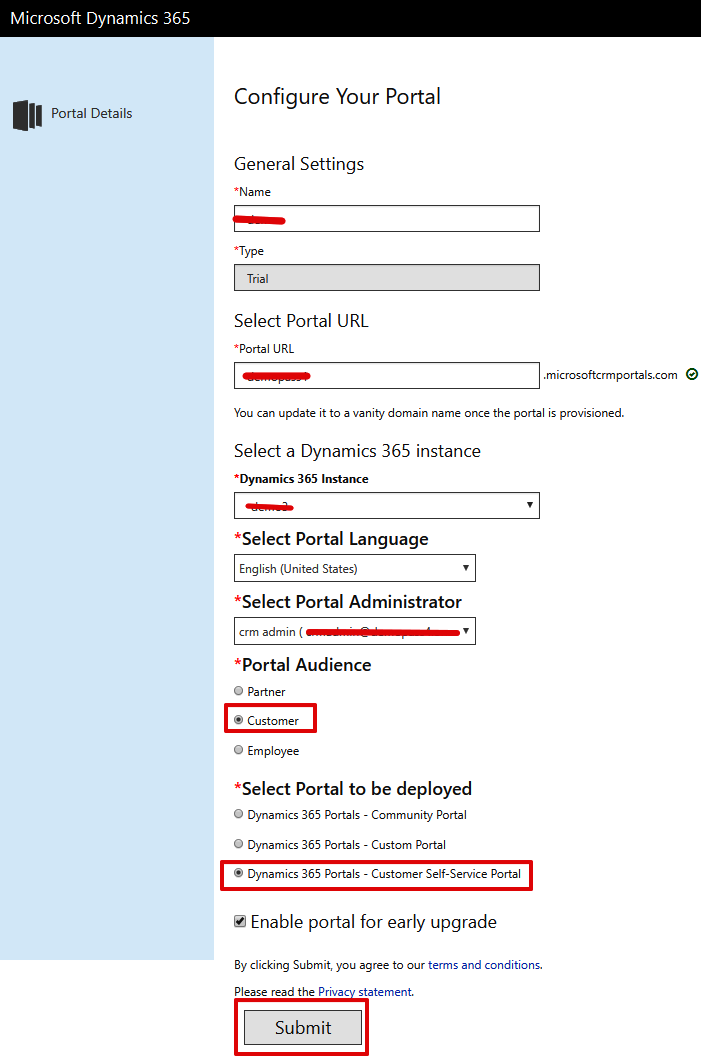
- The portal configuration page will be opened; you can configure the portal with the following settings. After choosing the required settings, click on Submit to proceed, as shown:
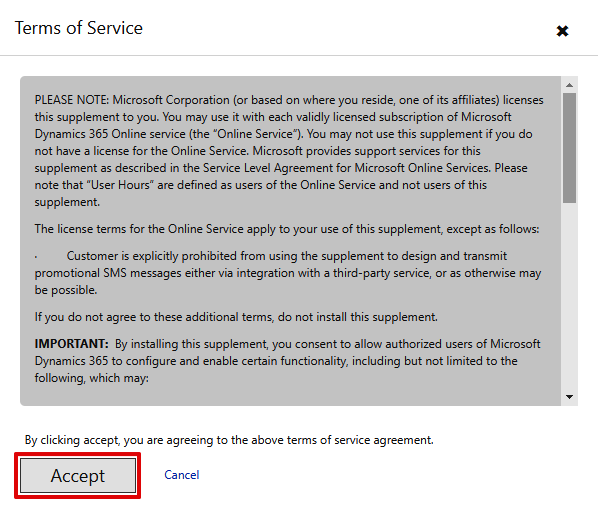
- Click on Accept to abide by the terms and conditions:
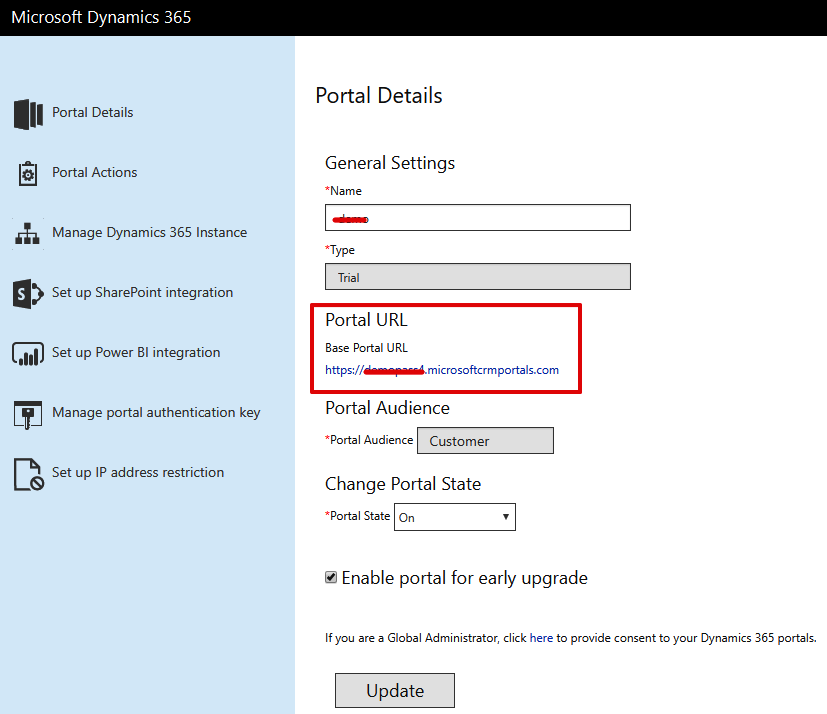
- Wait for some time until the portal is configured. After successful configuration, click on the Base Portal URL to go to the portal site:
A new tab will be opened and you will be redirected to the CONTOSO CUSTOMER...