Drupal Console (https://drupalconsole.com/) is a new command-line tool that has been welcomed by the Drupal community. Like Drush, but in my opinion, much more powerful, Drupal Console allows us to perform site installs, manage configurations, create content, generate boilerplate code, and much more.
A quick look at Drupal Console
Accessing Drupal Console locally
As part of the original composer install of our Drupal project, Drupal console was installed. However, just like accessing Drush locally, we are faced with the same complexities of knowing the exact location of the Drupal console executable.
If we look within the /vendor/drupal/console/bin folder, we will see the executable that allows us to use Drupal console from the command line. We can enter the following command within the Terminal window to run the executable:
./vendor/drupal/console/bin/drupal
Installing Drupal using Drupal Console
We should all be familiar with the typical install process of Drupal: download the files, create the database, set up a localhost, open a browser, and finish the installation. As we all know, this is a necessary evil, but also a time-consuming task. Since we now have Drupal Console installed, we can achieve all this by executing one single command.
Begin by opening a Terminal window, changing into the mastering folder, and executing the following command:
./vendor/drupal/console/bin/drupal site:install
This command will begin a series of prompts that will walk us through the remaining install process, beginning with choosing an install profile:

Select the Standard install, which is option 1, and press Enter.
We will then be prompted to select the language that we want Drupal installed in:

Input English and then press Enter.
Next, we will be prompted to choose the Drupal Database type, Database File, and Database Prefix that Drupal will use for the necessary database and tables. For the sake of demonstration, we will let Drupal Console create an SQLite database:

Select option 2 and then press Enter. Next, we will enter a value of mastering.sqlite as the default name for the Database File and leave the default for the Database Prefix.
At this point, we will be prompted to provide the site name for our Drupal instance:
Input the site name as Mastering Drupal 8 and then press Enter.
Drupal Console now requires us to provide a site email that will be used to notify us of any updates, users that request an account, and various other administrative notifications:
Input the email as admin@example.com and then press Enter.
The next three values we will need to provide will be for our administrator's account and consist of the admin account name, e-mail, and password:

We will input admin for our administrator account name and then press Enter.
Next, we will add a generic administrator account email of admin@example.com and then press Enter.
Finally, we will input an administrator account password of admin and then press Enter.
At this point, Drupal Console will begin the install process and configure our new Drupal 8 instance. If everything is successful, we will be prompted with a notification that the Drupal 8 installation was completed successfully:

Now that Drupal 8 is installed and configured, it would be nice to not have to always type the full path to Drupal Console the next time we want to use it. We can shorten this up to just entering drupal by installing Drupal console globally like we did for Drush.
Installing Drupal Console globally
Having global access to Drupal Console will allow us to execute commands regardless of our location within a project by simply typing drupal.
Begin by opening the Terminal window, changing to our user directory, and executing the following commands:
- Install Drupal Console Launcher:
      curl https://drupalconsole.com/installer -L -o drupal.phar
      mv drupal.phar /usr/local/bin/drupal
      chmod +x /usr/local/bin/drupal
- Update Drupal Console Launcher:
drupal self-update
- Run Drupal Console to list all commands:
drupal list

Running a built-in PHP web server
Another advantage of using Drupal Console within our project is that we can utilize the built-in PHP web server to display our new Drupal 8 site. If we take a look at the available commands listed by Drupal Console, we will notice a command called server.
Open a Terminal window, and enter the following command:
drupal server
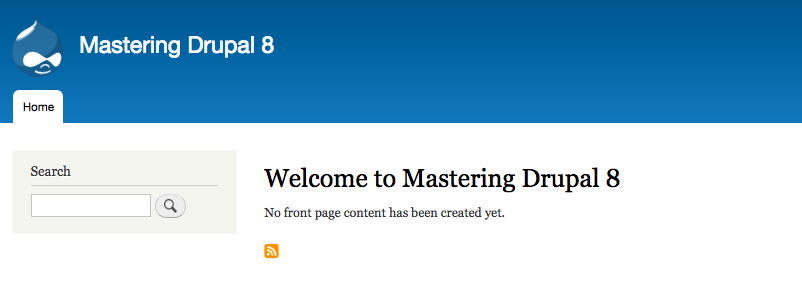
Drupal Console can utilize the current version of PHP installed on our system. It identifies the document root of our Drupal installation and allows us to preview our site within the browser by navigating to http://127.0.0.1:8088:

If we open a browser and enter the url of http://127.0.0.1:8088, we will be taken to our new Drupal 8 instance.

The advantages of using Drupal Console to execute a wide range of commands, including installing Drupal, is that it is a huge time saver. As we dig deeper into Mastering Drupal 8, we will discover additional commands that will allow us to manage users, roles, and content.
So far, we have looked at Composer, Drush, and Drupal Console. However, all this is of no benefit to us if we have no way to ensure that our work is protected and can be shared with other developers. In fact, managing source code is the most important tool any development workflow should embrace.


