Before delving into the details of Unity3D and game development concepts, let's have a look at some of the basics of Unity 5.6 We will go through the unity interface, menu items, using assets, creating scenes, and publishing builds.
Basics of Unity game development
Unity editor interface
When you first time launch Unity 5.6, you will be presented with an editor containing a few panels on left, right, and bottom of the screen. There's nothing to worry from these panels. The following image shows the editor interface when it's first launched:
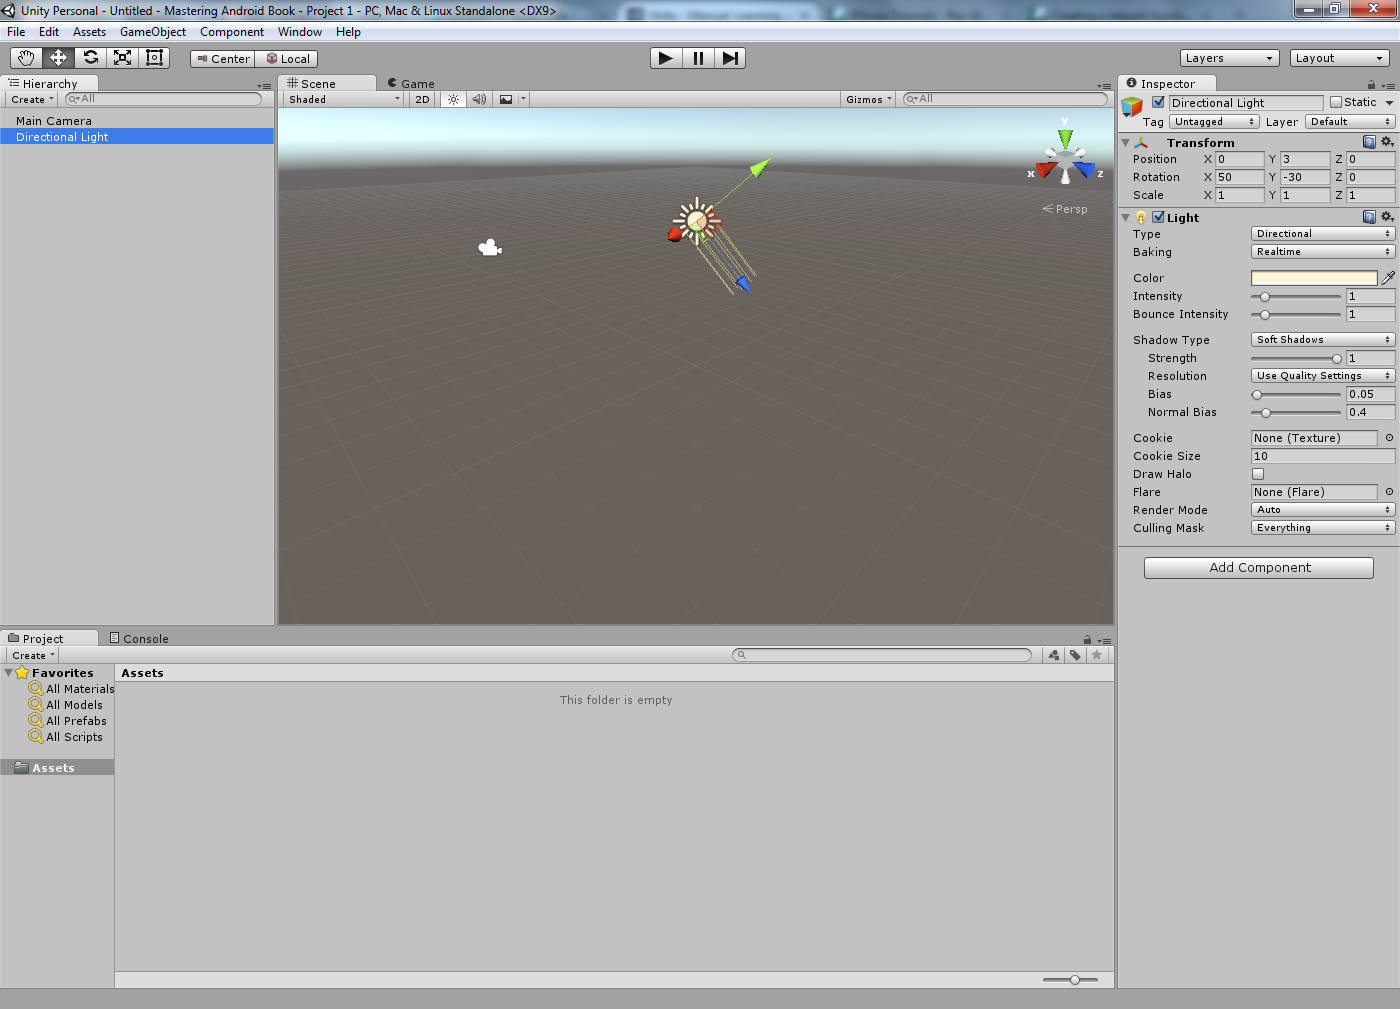
First of all, take the time to look over the editor and become a little familiar with it. The Unity editor is divided into different small panels and views that can be dragged around, resulting in a workspace that can be customized, according to the developer/designer's needs. Unity 5 comes with some pre-built workspace layout templates that can be selected from Layout drop-down menu in the top-right corner of the screen, as shown the following screenshot:
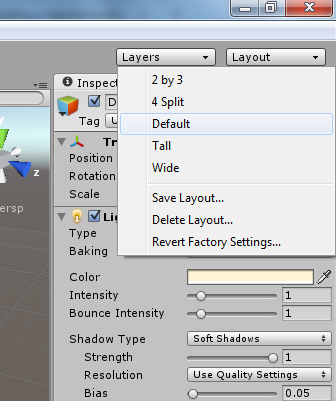
The layout currently displayed in the editor is the Default layout. You can select these layouts and see how the editor's interface changes and how different panels are placed in different positions in each layout. This book uses the 2 by 3 workspace layout for the game.
The following screenshot shows the 2 by 3 workspace with the names of the views and panels highlighted:
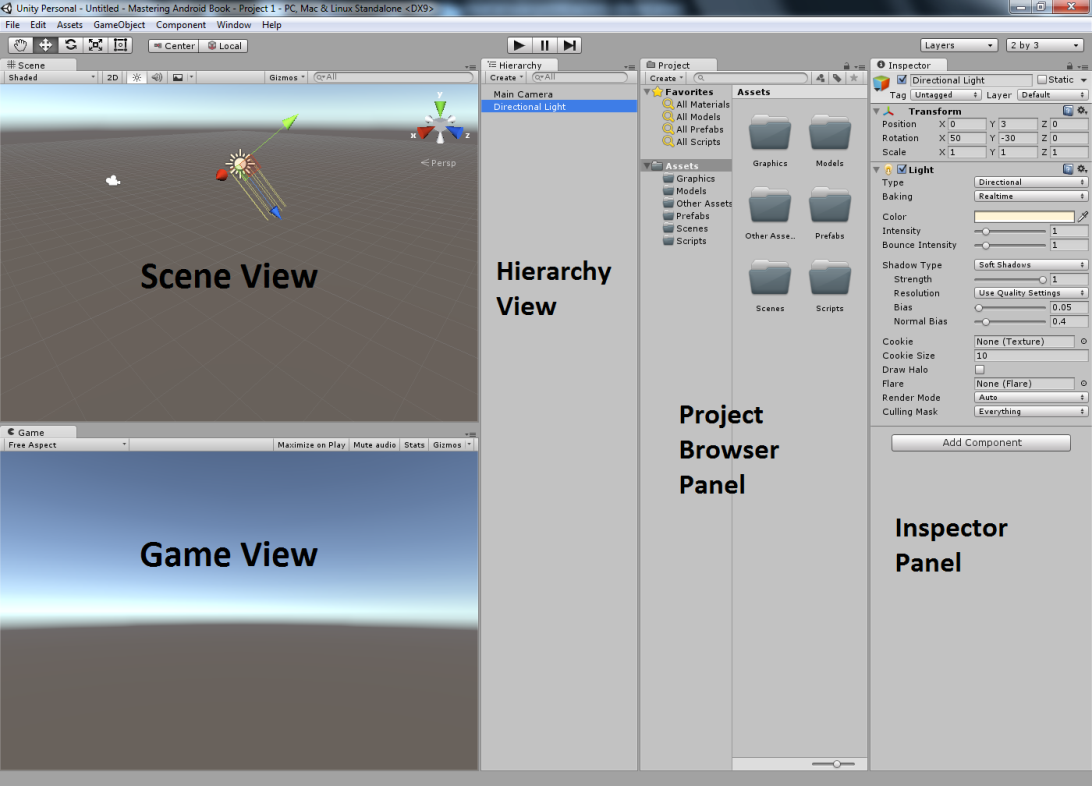
As you can see in the preceding screenshot, Unity editor contains different views and panels. Every panel and view has a specific purpose, which is described in the following section.
Scene View
Scene View is the whole stage for the game development, and it contains every asset in the game from a tiny point to any heavy 3D model. Scene View is used to select and position environments, characters, enemies, the player, camera, and all other objects that can be placed on the stage for the game. All those objects, which can be placed and shown in the game, are called as GameObjects. The scene view allows developers to manipulate game objects such as selecting, scaling, rotating, deleting, and moving. In simple words, Scene View is the interactive sandbox for the developers and designers. The Scene View provides some controls, such as navigation and transformation.
Transform tools
While developing games in Unity, you will place lots of game objects in the scene and their position, scale, and rotations, collectively called as transforms, are managed by transform tools. The following screenshot shows the transform tools:
You can select any selected transform action from this toolbar and change the game object accordingly. The following figure shows the gizmo on the selected game object when a transform tool is selected:
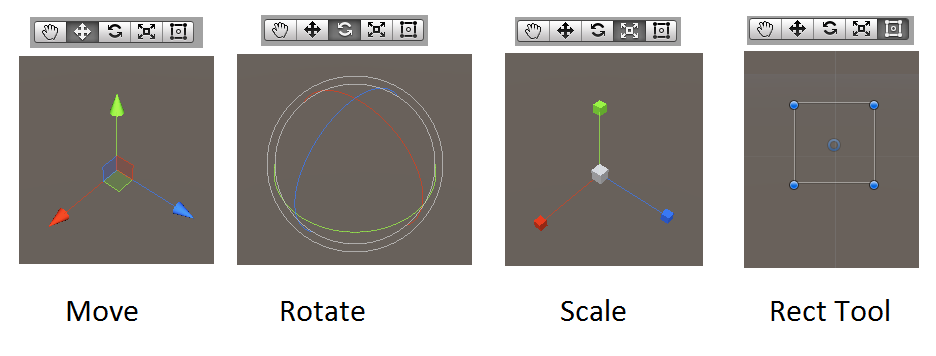
These tools do exactly the same job as their names suggest; move for translation, rotate for rotation, and scale for scaling. The Rect tool on other side was introduced in Unity 4.3 when Unity got native 2D support and tools. This tool is only for 2D sprite objects for their position, scale, and rotations. You can also select these tools with keyboard shortcuts.
Scene View navigation
In the last section, we discussed how GameObjects can be transformed and navigated in the scene. But Unity being a 3D environment, it has an easy interface to view the scene from different angles, sides, and perspectives using mouse and keyboard shortcuts. You can observe the Scene Gizmo in the top-right corner of the Scene view. This gizmo is used to rotate the view according to the developer's needs. The following screenshot shows the gizmo of the scene:
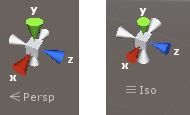
Every view of the scene is shown in either perspective or isometric. There is also another view for the scene which we will discuss in the next section.
Scene View control bar
The control bar is shown at the top of the Scene View and it gives the developer more control to navigate through their scenes and create games easily. This bar includes options such as enabling/disabling gizmos, sounds, and selecting view modes. The important part of this bar is the 2D mode button, as shown in the following screenshot:

The 2D mode button is a toggle button; when turned on; it disables the z-axis of the view and show the game from 2D perspective. It is highly used option while creating 2D games in Unity. On the right side of the bar, there is a text box for search. This lets developers search the game objects from the current scene and allows them to quickly work.
Game View
The Game View is the final representation of how your game will look when published and deployed on the target devices, and it is rendered from the cameras of the scene. This view is connected to the Play Mode navigation bar at the top of the whole Unity workspace, as shown in the following screenshot:
When the game is played in the editor, this control bar gets changed into blue. A very interesting feature of Unity is that it allows developers to pause the game and code while running and developers can see and change the properties, transforms etc at runtime without recompiling whole game for quick workflow.
Game View control bar
Like scene view, game view also includes a control bar on top side of the view as shown in the following figure:

The options perform the actions as their names suggest. The Free Aspect drop-down on the left side of the bar lets developers choose any specific resolution to test their games. These resolutions and drop down options vary on the selected platform. Developers can also add their own custom resolutions and screen sizes for their targeted devices. Unity also allows developers to specify aspect ratios as well to have an idea of how the game will run on various devices with the same aspect ratio. Unity is quite powerful and easily gives cross-platform support to make their games run better on most types of devices writing code only once.
Hierarchy View
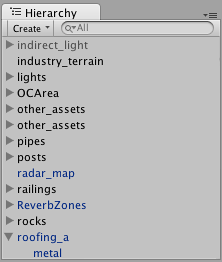
The Hierarchy View is the first point to select or handle any GameObject in the scene. This contains every game object in the current scene. This is tree-type structure allowing developers to utilize parent and child concepts on the game objects easily. The following screenshot shows a simple Hierarchy View:
Project browser panel
This looks like a view, but it is called the Project browser panel. This panel is an embedded files directory in Unity and contains all the files and folders included in the game project.
Following screenshot shows a simple Project browser panel:
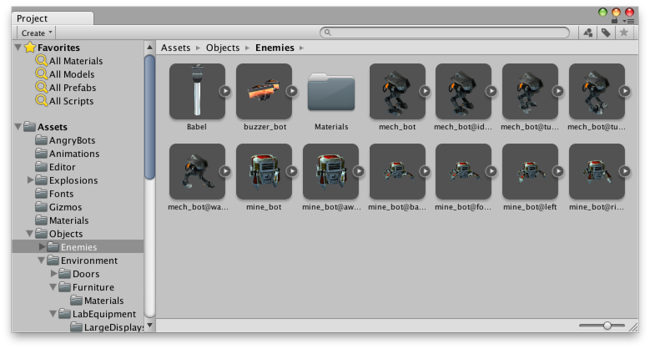
The left side of the panel shows a hierarchical directory, while rest of the panel is the files or as these are called assets in Unity. Unity represents these files with different icons to differentiate these according to their file types. These files can be sprite images, textures, model files, sounds and so on. You can search any specific file by typing in the search text box. On the right side of search box, there are button controls for further filters such as animation files, audio clip files, and so on.
Inspector panel
This is a most important panel for development in Unity. Unity structures the game in the form of game objects and assets. These game objects further contain components such as transforms, colliders, scripts, and meshes, and so on. Unity lets developers manage these components of each game object through the inspector panel.
The following screenshot shows a simple inspector panel of a game object:
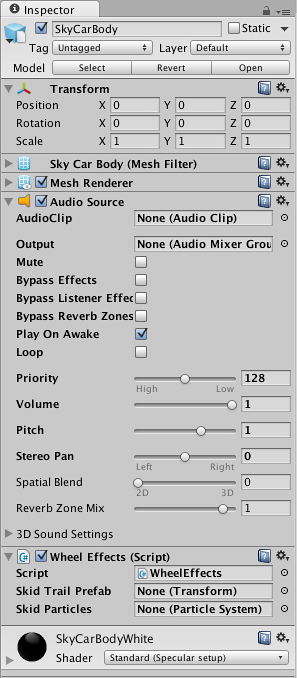
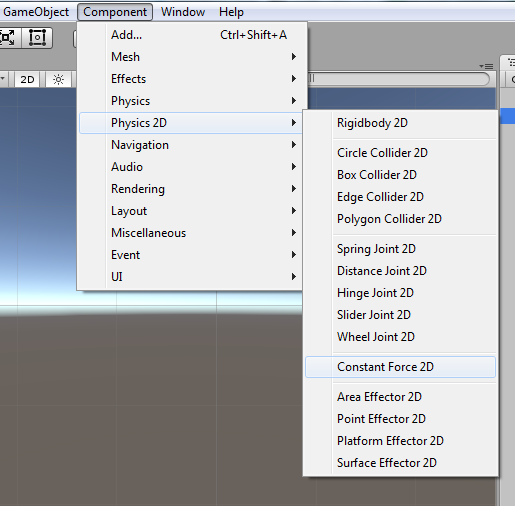
These components vary in type including physics, mesh, effects, audio, and user interface. These components can be added to any object by selecting it from the component menu. The following screenshot shows the Component menu:
After covering some of the basics of the Unity, let's move on to the very first task developers do when creating a game; and that is creating an empty project. Let's discuss the configuration of empty projects in Unity for 2D games in the next section.


