Part 3 – the Main scene
The Main scene is what ties all the pieces of the game together. It will manage the player, the coins, the clock, and all the other pieces of the game.
Node setup
Create a new scene and add a Node named Main. The simplest type of node is Node – it doesn’t do much at all on its own, but you’ll use it as the parent for all the game objects and add a script that will give it the functionality you need. Save the scene.
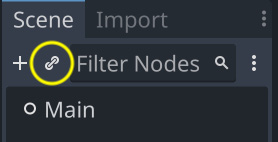
Add the player as a child of Main by clicking the Instantiate Child Scene button and choosing your saved player.tscn:

Figure 2.23: Instantiating a scene
Add the following nodes as children of Main:
- A
TextureRectnode namedBackground– for the background image - A
Timernode namedGameTimer– for the countdown timer
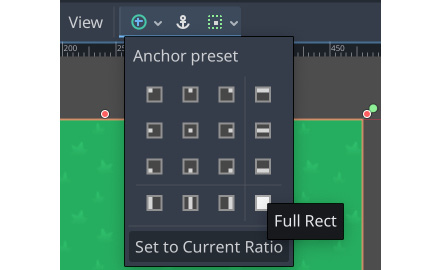
Make sure Background is the first child node by dragging it above the player in the node list. Nodes are drawn in the order shown in the tree, so if Background is first, that ensures it’s drawn behind the player. Add an image to the Background node by dragging the grass.png image from the assets folder into the Texture property. Change Stretch Mode to Tile, and then set the size to Full Rect by clicking the layout button at the top of the editor window:

Figure 2.24: Layout options
Main script
Add a script to the Main node and add the following variables:
extends Node
@export var coin_scene : PackedScene
@export var playtime = 30
var level = 1
var score = 0
var time_left = 0
var screensize = Vector2.ZERO
var playing = false
The Coin Scene and Playtime properties now appear in the Inspector window when you select the Main node. Drag coin.tscn from the FileSystem panel and drop it into the Coin Scene property.
Initializing
To start things off, add the _ready() function:
func _ready():
    screensize = get_viewport().get_visible_rect().size
    $Player.screensize = screensize
    $Player.hide()
Godot automatically calls _ready() on every node when it’s added. This is a good place to put code that you want to happen at the beginning of a node’s lifetime.
Note that you’re referring to the Player node by name using the $ syntax, allowing you to find the size of the game screen and set the player’s screensize variable. hide() makes a node invisible, so you won’t see the player before the game starts.
Starting a new game
The new_game() function will initialize everything for a new game:
func new_game():
    playing = true
    level = 1
    score = 0
    time_left = playtime
    $Player.start()
    $Player.show()
    $GameTimer.start()
    spawn_coins()
In addition to setting the variables to their starting values, this function calls the player’s start() function that you wrote earlier. Starting GameTimer will start counting down the remaining time in the game.
You also need a function that will create a number of coins based on the current level:
func spawn_coins():
    for i in level + 4:
        var c = coin_scene.instantiate()
        add_child(c)
        c.screensize = screensize
        c.position = Vector2(randi_range(0, screensize.x),
            randi_range(0, screensize.y))
In this function, you create multiple instances of the Coin object and add them as children of Main (in code this time, rather than by manually clicking on the Instantiate Child Scene button). Whenever you instantiate a new node, it must be added to the scene tree using add_child(). Lastly, you choose a random position for the coin, using the screensize variable so that they won’t appear off screen. You’ll call this function at the start of every level, generating more coins each time.
Eventually, you’ll want new_game() to be called when the player clicks the start button on the menu. For now, to test that everything is working, add new_game() to the end of your _ready() function and click Run Project (F5). When you are prompted to choose a main scene, select main.tscn. Now, whenever you play the project, the Main scene will be started.
At this point, you should see your player and five coins appear on the screen. When the player touches a coin, it disappears.
Once you’re done testing, remove new_game() from the _ready() function.
Checking for remaining coins
The main script needs to detect whether the player has picked up all the coins. Since the coins are all in the coins group, you can check the size of the group to see how many remain. Since it needs to be checked continuously, put it in the _process() function:
func _process(delta):
    if playing and
    get_tree().get_nodes_in_group("coins").size() == 0:
        level += 1
        time_left += 5
        spawn_coins()
If no more coins remain, then the player advances to the next level.
This completes the main scene. The most important thing you learned in this step was how to dynamically create new objects in code using instantiate(). This is something that you will use again and again in building many types of game systems. In the last step, you’ll create one more scene to handle displaying game information, such as the player’s score and the time remaining.


