Search icon CANCEL
Subscription
0
Cart icon
Your Cart (0 item)
Close icon
You have no products in your basket yet
Save more on your purchases! discount-offer-chevron-icon
Savings automatically calculated. No voucher code required.
Arrow left icon
Explore Products
Best Sellers
New Releases
Books
Videos
Audiobooks
Learning Hub
Newsletter Hub
Free Learning
Arrow right icon
timer SALE ENDS IN
0 Days
:
00 Hours
:
00 Minutes
:
00 Seconds
Arrow up icon
GO TO TOP
Design Made Easy with Inkscape

You're reading from   Design Made Easy with Inkscape A practical guide to your journey from beginner to pro-level vector illustration

Arrow left icon
Product type Paperback
Published in Apr 2023
Publisher Packt
ISBN-13 9781801078771
Length 360 pages
Edition 1st Edition
Concepts
Arrow right icon
Author (1):
Arrow left icon
Christopher Rogers Christopher Rogers
Author Profile Icon Christopher Rogers
Christopher Rogers
Arrow right icon
View More author details
Toc

Table of Contents (21) Chapters Close

Preface 1. Part 1: Finding Your Way Around
2. Chapter 1: The Inkscape Interface FREE CHAPTER 3. Chapter 2: Moving and Styling Shapes 4. Chapter 3: Drawing Shapes with the Shape Tools 5. Chapter 4: Automatic Shape Alignment in Inkscape 6. Chapter 5: Node Editing – Modifying Your Shapes with Nodes and Curves 7. Part 2: Advanced Shape Editing
8. Chapter 6: Fast Shape Editing with Path Operations and the Shape Builder Tool 9. Chapter 7: Using Text in Inkscape 10. Chapter 8: Advanced Shading and Coloring 11. Chapter 9: Clips and Masks 12. Chapter 10: Automation with Clones and Linked Files 13. Part 3: Inkscape’s Power Tools
14. Chapter 11: Organization Using Layers 15. Chapter 12: Live Path Effects 16. Chapter 13: Filters and Extensions 17. Chapter 14: Vectorizing with Trace Bitmap 18. Chapter 15: Document Properties, Pages, Exporting, and Printing 19. Index 20. Other Books You May Enjoy

The Desk and Page areas

This area, shown in Figure 1.14, is where you’ll be drawing with the various tools in the Tool bar. The Page area, by default, is an A4-sized page but can be changed by selecting File > Document Properties or pressing Ctrl + Shift + D:
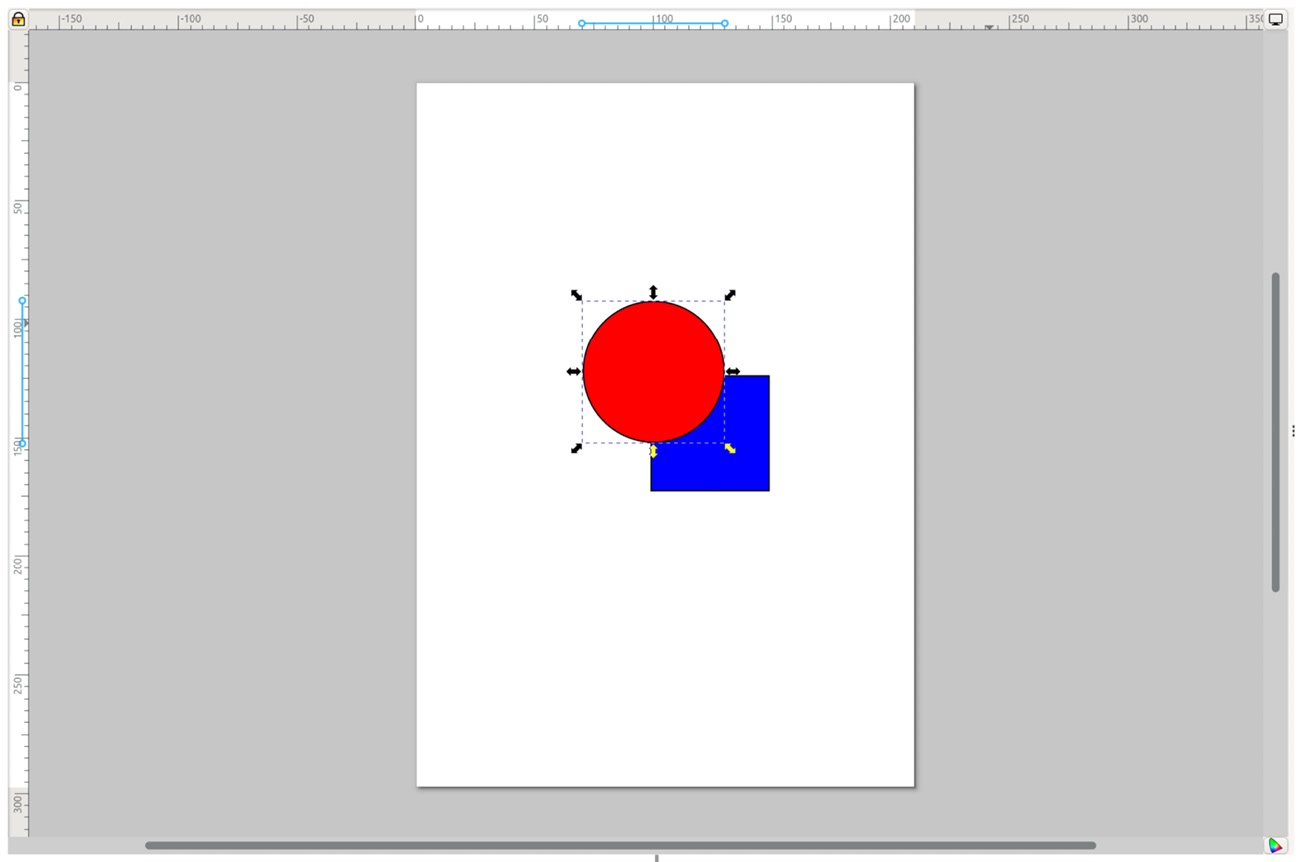
Figure 1.14 – The Desk area with a few shapes drawn on the Page area

Figure 1.14 – The Desk area with a few shapes drawn on the Page area

Although you can draw anywhere in the Desk area, the Page area is a good place to keep your main graphics. It’s what will appear in the thumbnail preview of your file browser and web browser, or what someone will see when they open that PDF you saved. It’s also the region that is exported when choosing the Page option in the PNG Export dialog (more on that later).

Here are some tips for navigating the Desk and Page areas:

  • Zoom in and out: Hold the Ctrl key and use the mouse wheel to zoom in and out. If your computer supports a touch screen, you can also pinch to zoom, or use the + and keys as well. There is also a Zoom tool in the Tool bar that looks like a magnifying glass, but with all these great ways to zoom without switching tools, I recommend the other methods.
  • Panning the view: Moving the view from side to side or up and down is called panning. Sure, you can drag the tiny scrollbars at the bottom and left-hand side of the canvas, but you could also just hold the spacebar down, which will grab the canvas and move it as you move the mouse.

Holding the middle mouse button also works if you have one, but once you get used to the spacebar method, it’s going to be your go-to method of panning. You will wish your other applications did the same after a while.

  • The context menu: What if you didn’t have to move your mouse off the canvas to access some of the Menu bar items? Even better, what if you could just right-click on the canvas, or an object on the canvas and instantly be offered a subset of actions just for that kind of object? Well, that’s exactly what the context menu is for! Simply right-click on the Desk, Page, or any selected object and you will be presented with a choice assortment of useful things, as you can see in Figure 1.15:
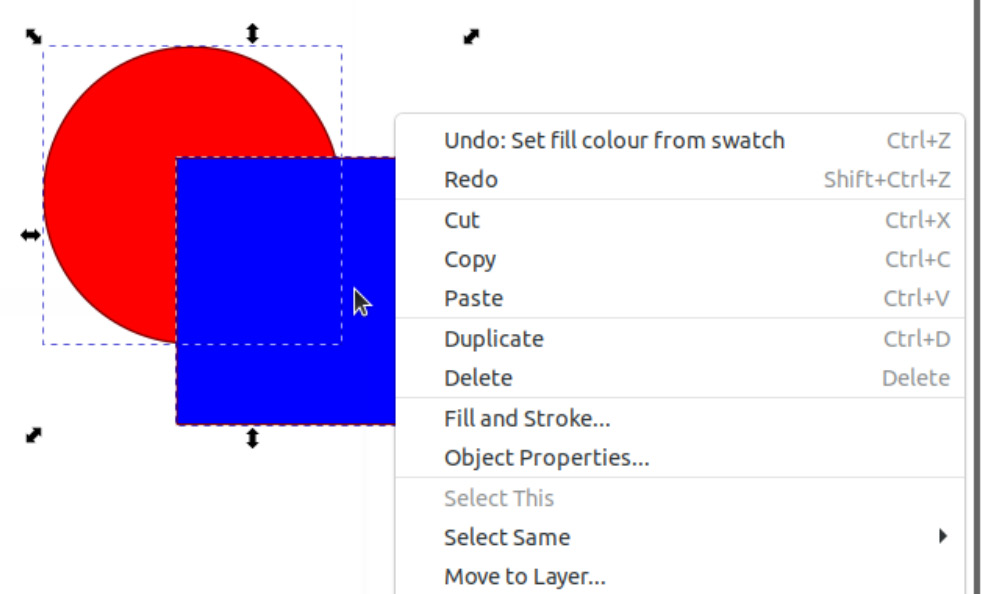
Figure 1.15 – Right-clicking this selection brings up the context menu for what is selected

Figure 1.15 – Right-clicking this selection brings up the context menu for what is selected

So, now that you know how to get around the Desk area, let’s have a look at some ways you can color your shapes with the Swatch Palette.

You have been reading a chapter from
Design Made Easy with Inkscape
Published in: Apr 2023
Publisher: Packt
ISBN-13: 9781801078771
Register for a free Packt account to unlock a world of extra content!
A free Packt account unlocks extra newsletters, articles, discounted offers, and much more. Start advancing your knowledge today.
Unlock this book and the full library FREE for 7 days
Get unlimited access to 7000+ expert-authored eBooks and videos courses covering every tech area you can think of
Renews at $19.99/month. Cancel anytime
Banner background image