Installing PAD
The installation files for PAD are not on the local Windows medium – you must download these from the Microsoft download center. Therefore, an active internet connection and a modern browser are required – Microsoft Edge version 80 or higher or Google Chrome. For this book, I am using a machine with Windows 11 Home edition and a freshly created personal Microsoft account. To install PAD, do the following:
- Open your browser and navigate to https://www.office.com. If you are not already logged in, do so with your Microsoft account.
- On the right-hand side, you should see a list of familiar icons such as those for Word, Excel, and more. Click on the last one, called Apps. Clicking this icon will make additional apps appear:
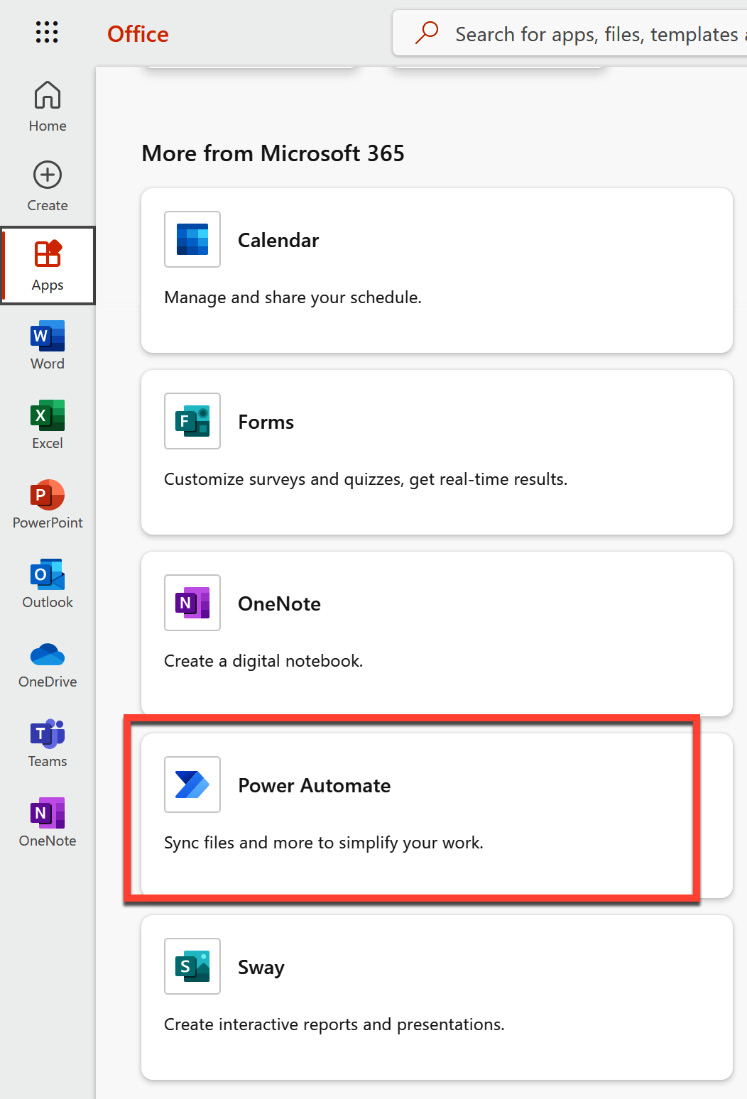
Figure 2.1 – Microsoft Office home page with additional apps
- Click on Power Automate. If you don’t see this icon, scroll down a bit. Next, you may see a little welcome screen that wants you to choose the right region or country. Please select the appropriate entry and press Get started.
- You will be redirected to the start screen of Power Automate, which is where the installation files are concealed. Click on My flows in the left navigation bar:
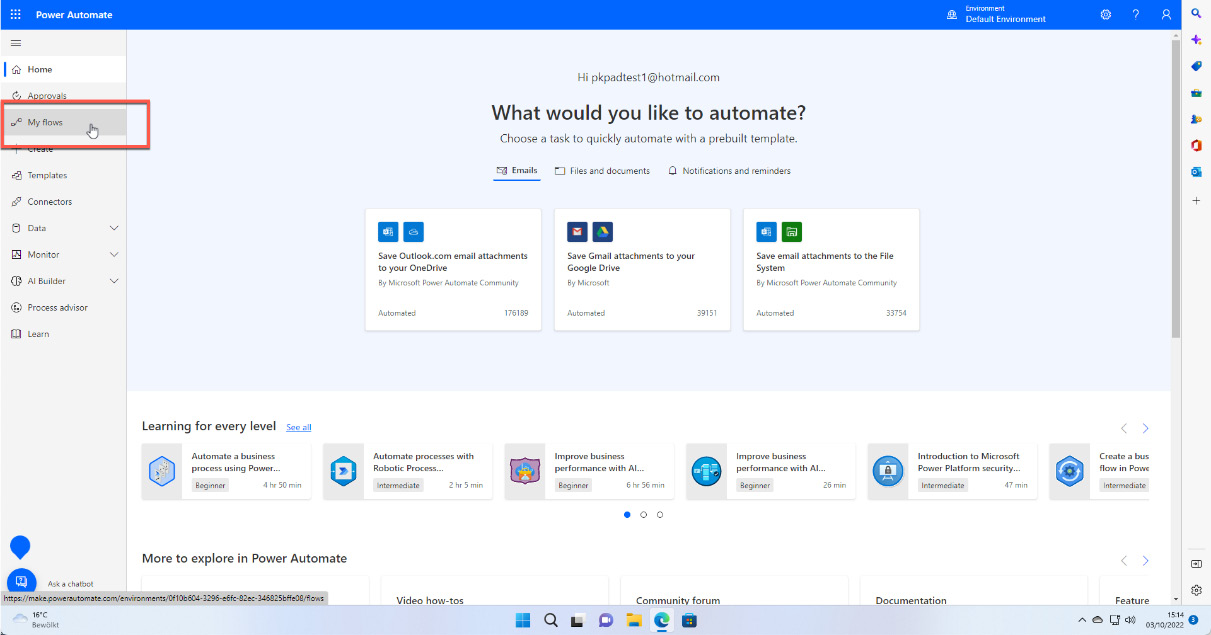
Figure 2.2 – Accessing My flows in Power Automate
- On the next screen, there is an Install button at the top right that reveals the installation files for PAD and the on-premises data gateway. Click on the first entry to start installing PAD:
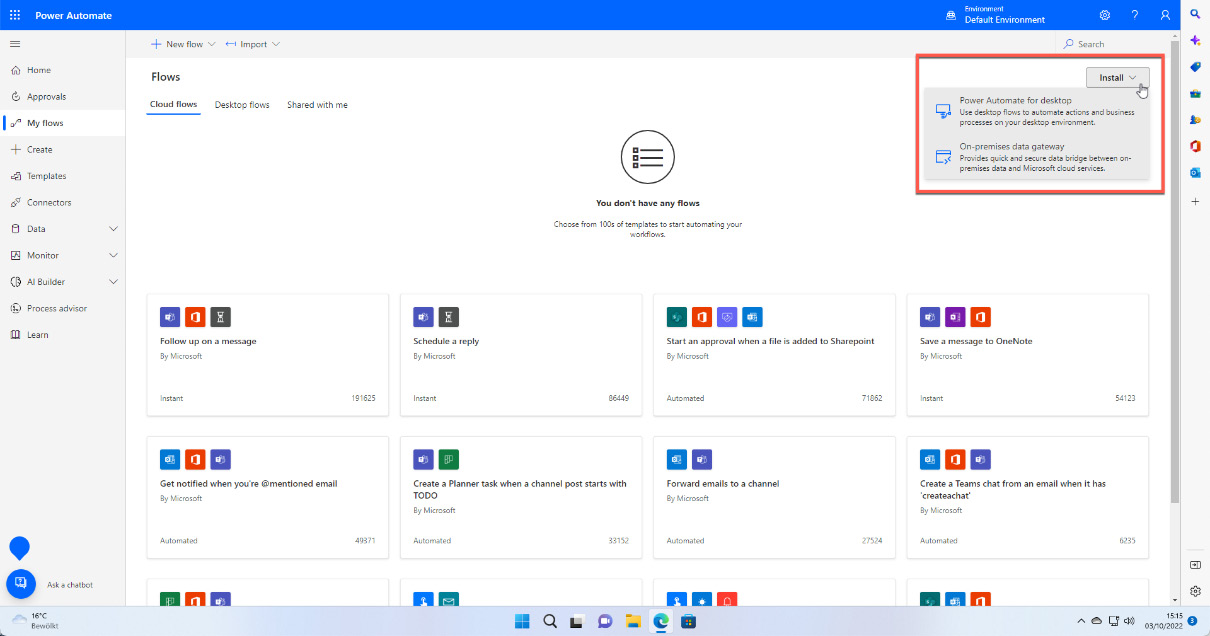
Figure 2.3 – Installation files for
Another way of installing PAD is via the Microsoft Store:
- Open the Microsoft Store app and type
Power Automatein the Search bar. - You will be presented with Power Automate as the first entry of the search result. Click the Install button to get the tool (I have already installed it, which is why I can open it):
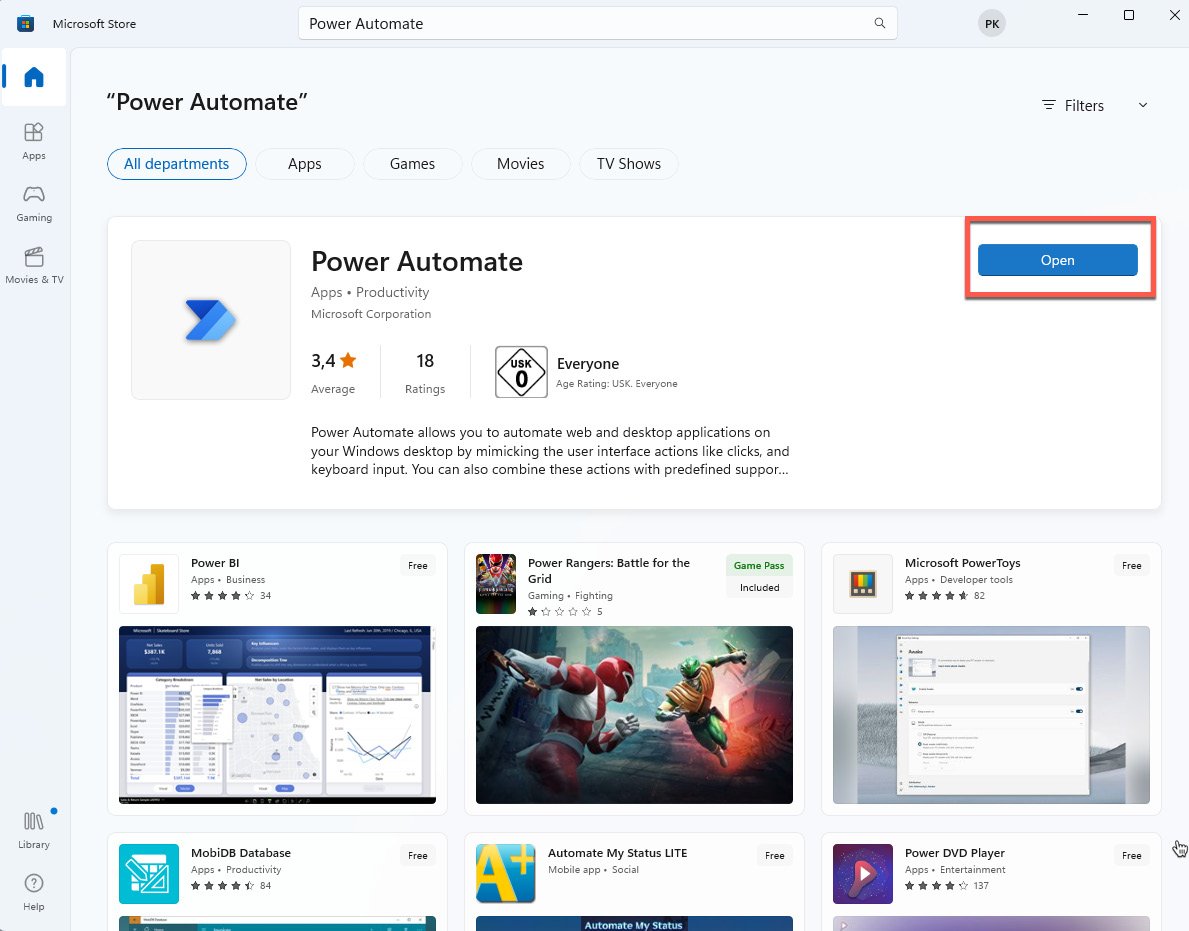
Figure 2.4 – Installing Power Automate from the Microsoft Store
- Whether it’s through the downloaded file or the store, run through the installation process; this is straightforward. You will get a message stating that the installation was successful.
- After that, click the Windows Start button and type
Power Automate. The installation procedure does not create any shortcuts, so it is a good idea to pin this program to the Start menu or the taskbar:
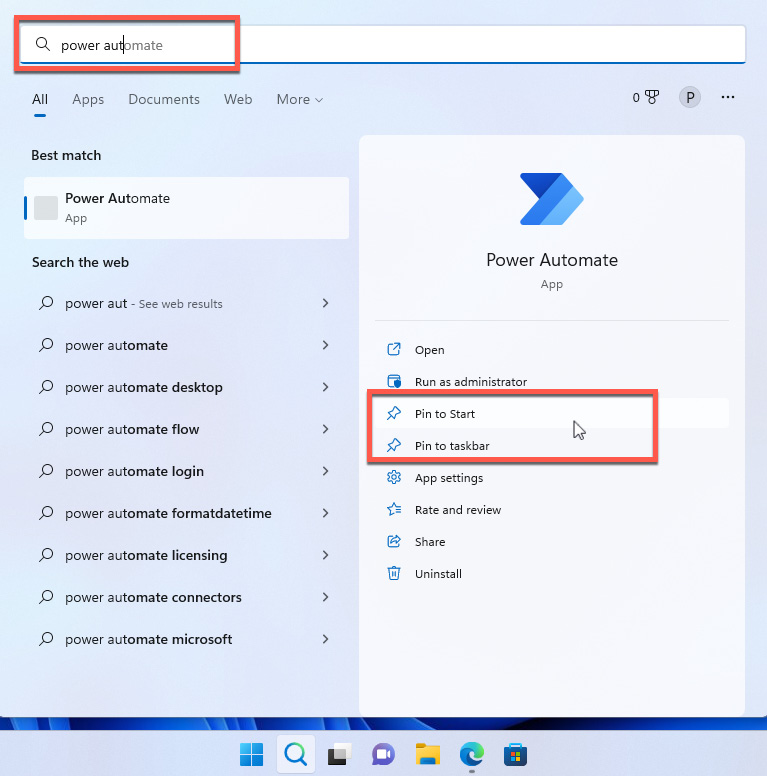
Figure 2.5 – Pinning and launching Power Automate locally
- Click on the Power Automate icon to start the program.
Important note
Please note that the program is called Power Automate and not Power Automate Desktop. Don’t be confused – we are in the right place. The program might find an updated version of the software and apply this automatically.
When the program finally starts, you will also need to log in with your Microsoft account. After this, you should choose a region again and go through the tour of Power Automate, which is also a confirmation that PAD has been successfully installed.


