Custom entity field
Let's focus on a custom entity field in our first exercise. We will add a new field on the contact record to save a contact's spouse's name.
Go to a contact record using Lists | Relationships | Contacts | New. Then, click on the Customize button on the top-right corner and choose New Field.
Add Spouse Name to the Label field:
- Add an
IDsuch as_hmspouse. - Choose
Free-Form Textfrom theTYPEfield. - Ensure that
STORE VALUEis checked. - Review the
Applies totab and ensure that the contact is selected:
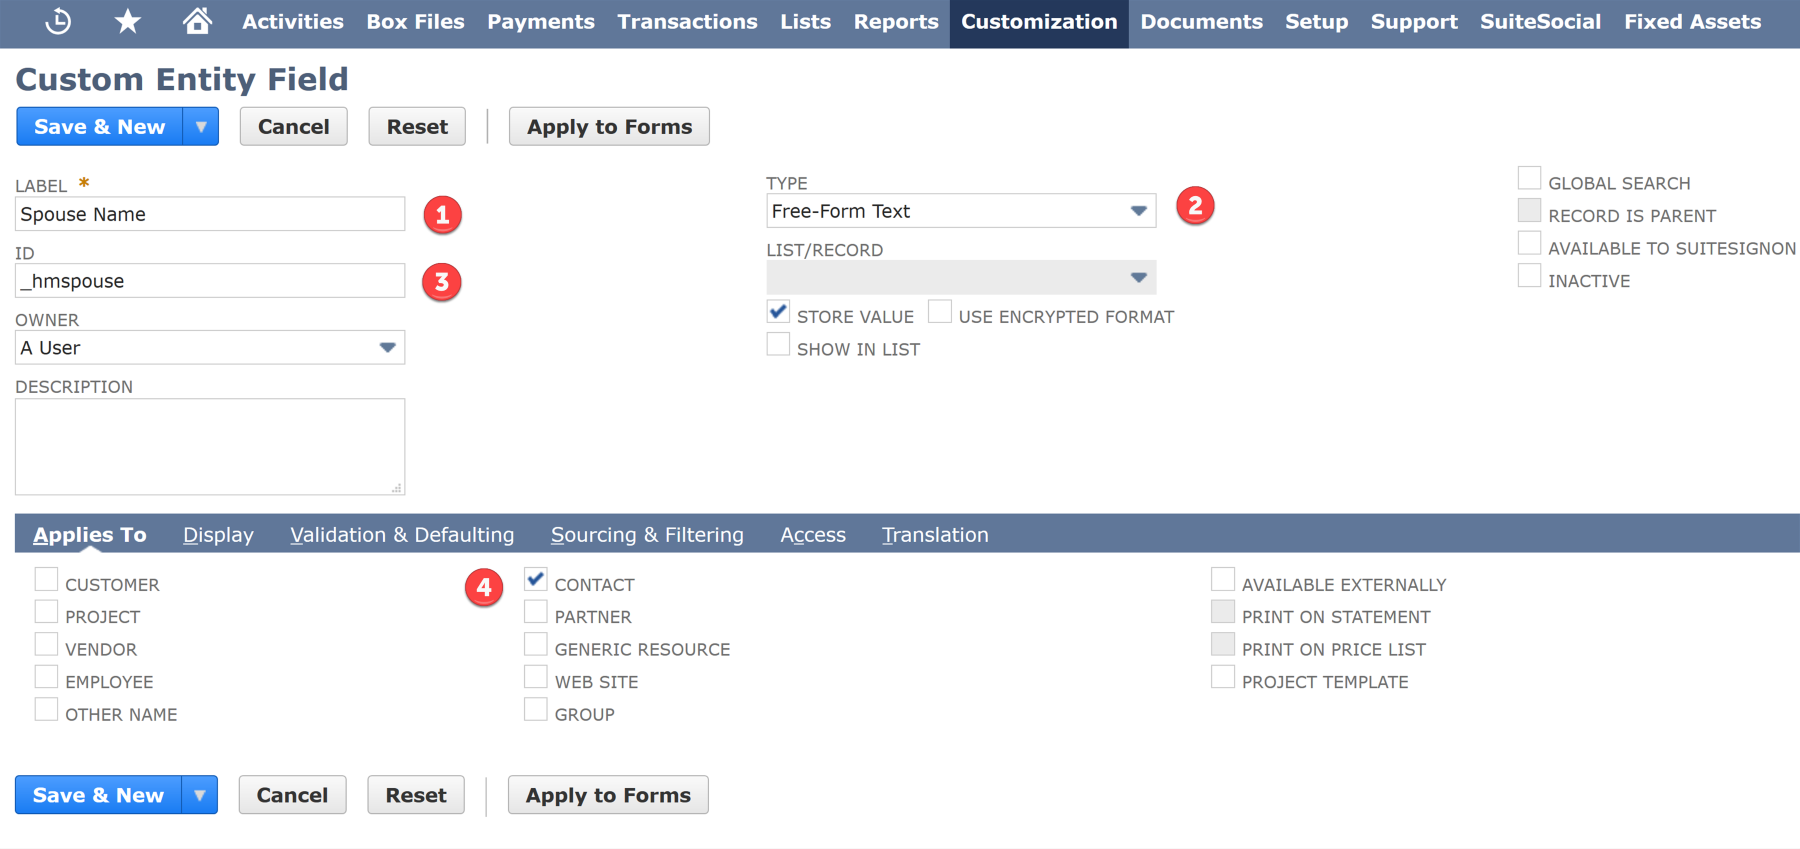
Configure Custom Entity Field
- Go to the
Displaytab and choose theMainsubtab. - Enter any applicable field-level help in the
Helpfield:
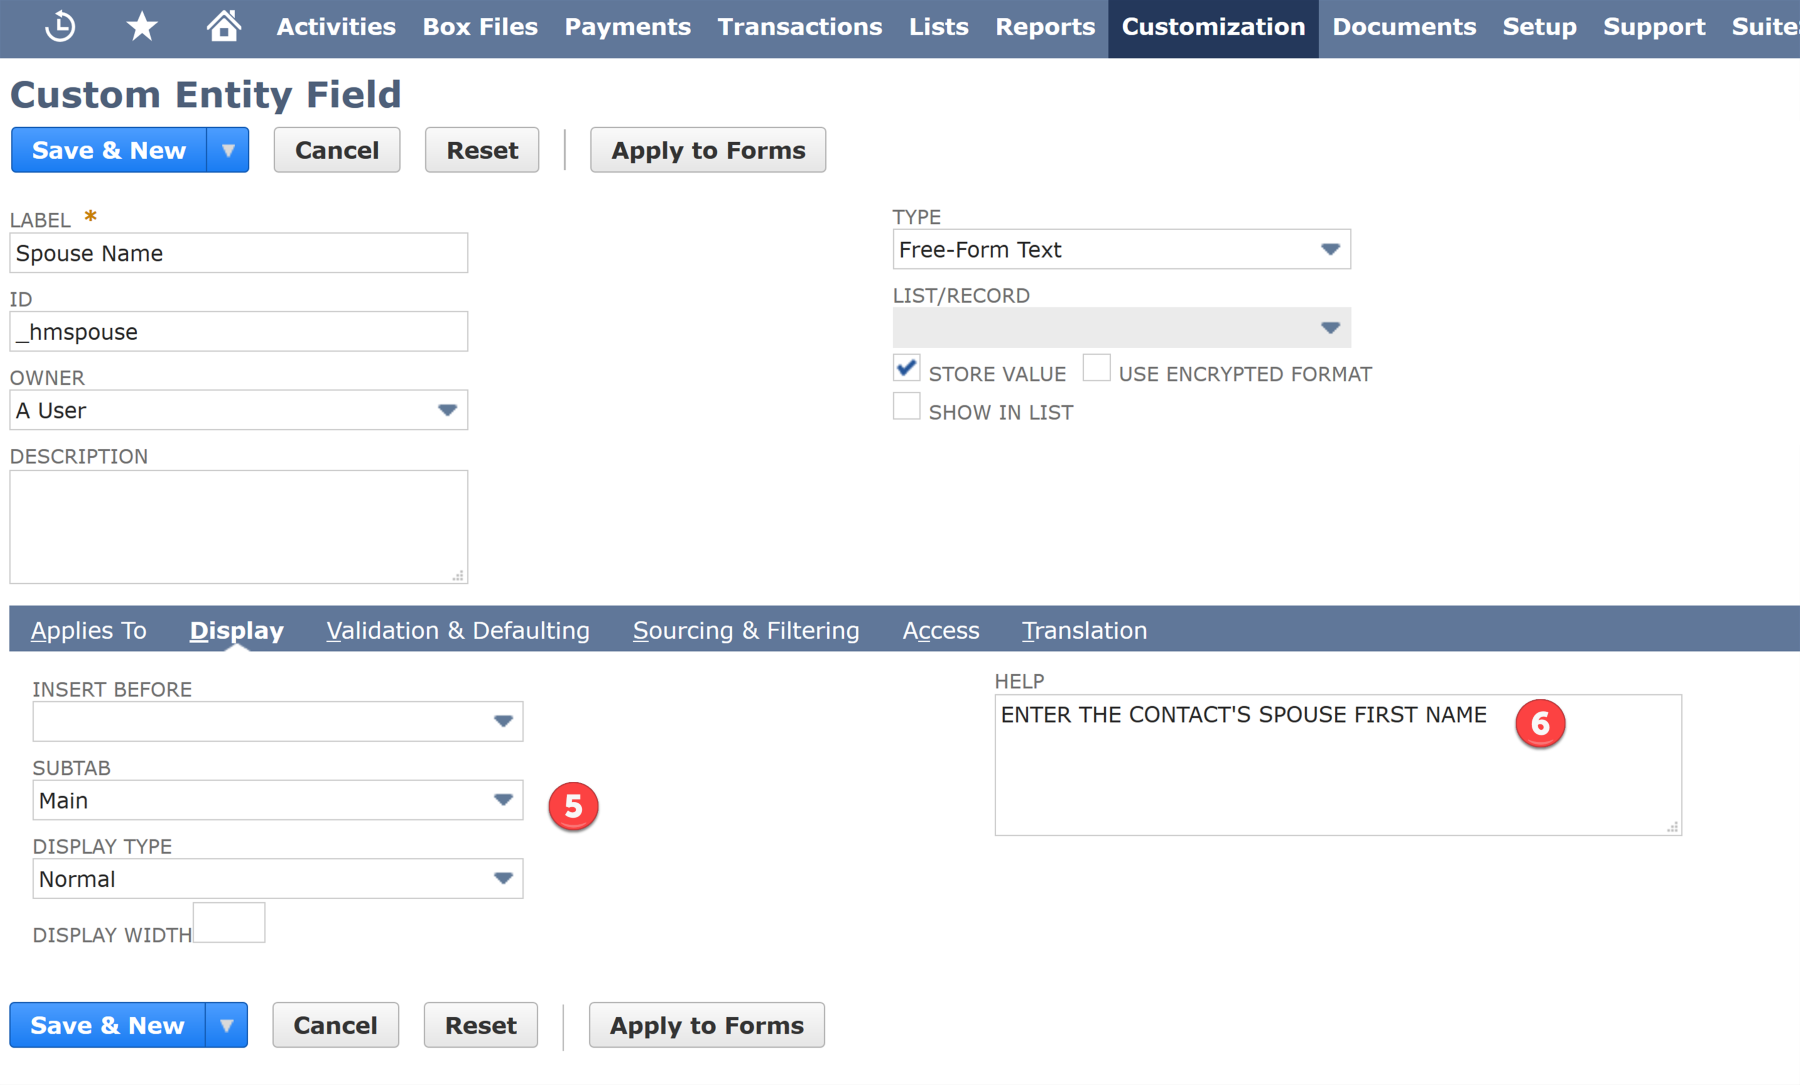
Determine the Display options for a custom field
- Click
Save. - Go to a contact record and verify that the new field is available. (This may require you to edit the form, which we will be discussing later in this chapter.)
- Test the new field by entering data into that field on a contact record:

Custom field on customer record