Getting started with the Unity Editor
Whether you are an independent game developer or work in a team for a company, you need to do two things before installing or even downloading Unity:
- Choose the right Unity release for you.
- Choose the right subscription plan for you.
Therefore, before introducing how to install Unity and exploring the Unity Editor, let's first introduce the Unity release and subscription plans. We hope that by reading these contents, you can find the right release for you and choose a suitable subscription plan.
Choosing the right Unity release for you
Nowadays, Unity offers two different release versions each year. They are as follows:
- Tech Stream releases
- Long-Term Support (LTS) releases:
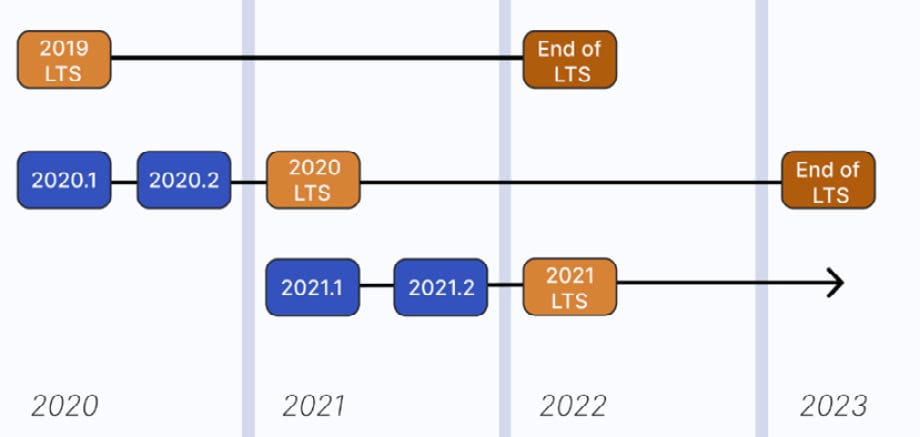
Figure 1.1 – Unity releases
You may not be quite sure which version of Unity is best to use in your project, so I will explain these two different releases so that you can get an idea of how to choose the right release for you.
LTS releases provide developers with maximum stability and full support for their projects, and they are the last Tech Stream releases of each year. With LTS releases, there are no new features or API changes. The updates of LTS releases address crashes, and fix bugs and any minor issues. As I mentioned at the beginning of this section, each year, Unity releases new versions of the LTS release, and each one is supported for 2 full years from the date of the announcement.
Therefore, if you are looking for performance and stability, or your project is already in production or in the middle of development, it is a good idea to use the latest LTS release version to ensure best performance and stability.
Note
At the time of writing (April 2022), there are two LTS releases, namely Unity 2020 LTS and Unity 2019.4. Unity 2020 LTS is the latest LTS release and has the same feature set as the Unity 2020.2 Tech Stream release. Alternatively, Unity 2019.4 is the legacy LTS release now.
The Tech Stream releases give developers who want to explore the latest in-progress features an option to use them to prepare for future projects. Unlike the LTS releases, a Tech Stream release will be released twice a year (typically published in the first and last quarters) and will only be supported until the next Tech Stream release is officially published.
Therefore, if you are preparing for your next project or working on prototyping and experimentation, you should try the Tech Stream releases.
Note
At the time of writing (April 2022), the latest Tech Stream release is Unity 2021.2.
By reading this section, I hope you have gained an understanding of the Unity releases, and you should be able to choose the right Unity release according to your situation.
When writing this book, I chose the latest LTS version, Unity 2020.3.
Choosing the right subscription plan for you
Unity is a widely used game engine, and many independent game developers use Unity to develop their games. But technically speaking, Unity is not a free game engine. In this section, I will introduce several different subscription plans offered by Unity. I hope that after reading this section, you can choose a subscription plan that suits your situation.
Unity offers a range of plans, from the free Personal plan for individual learners to Enterprise plans used by large organizations:
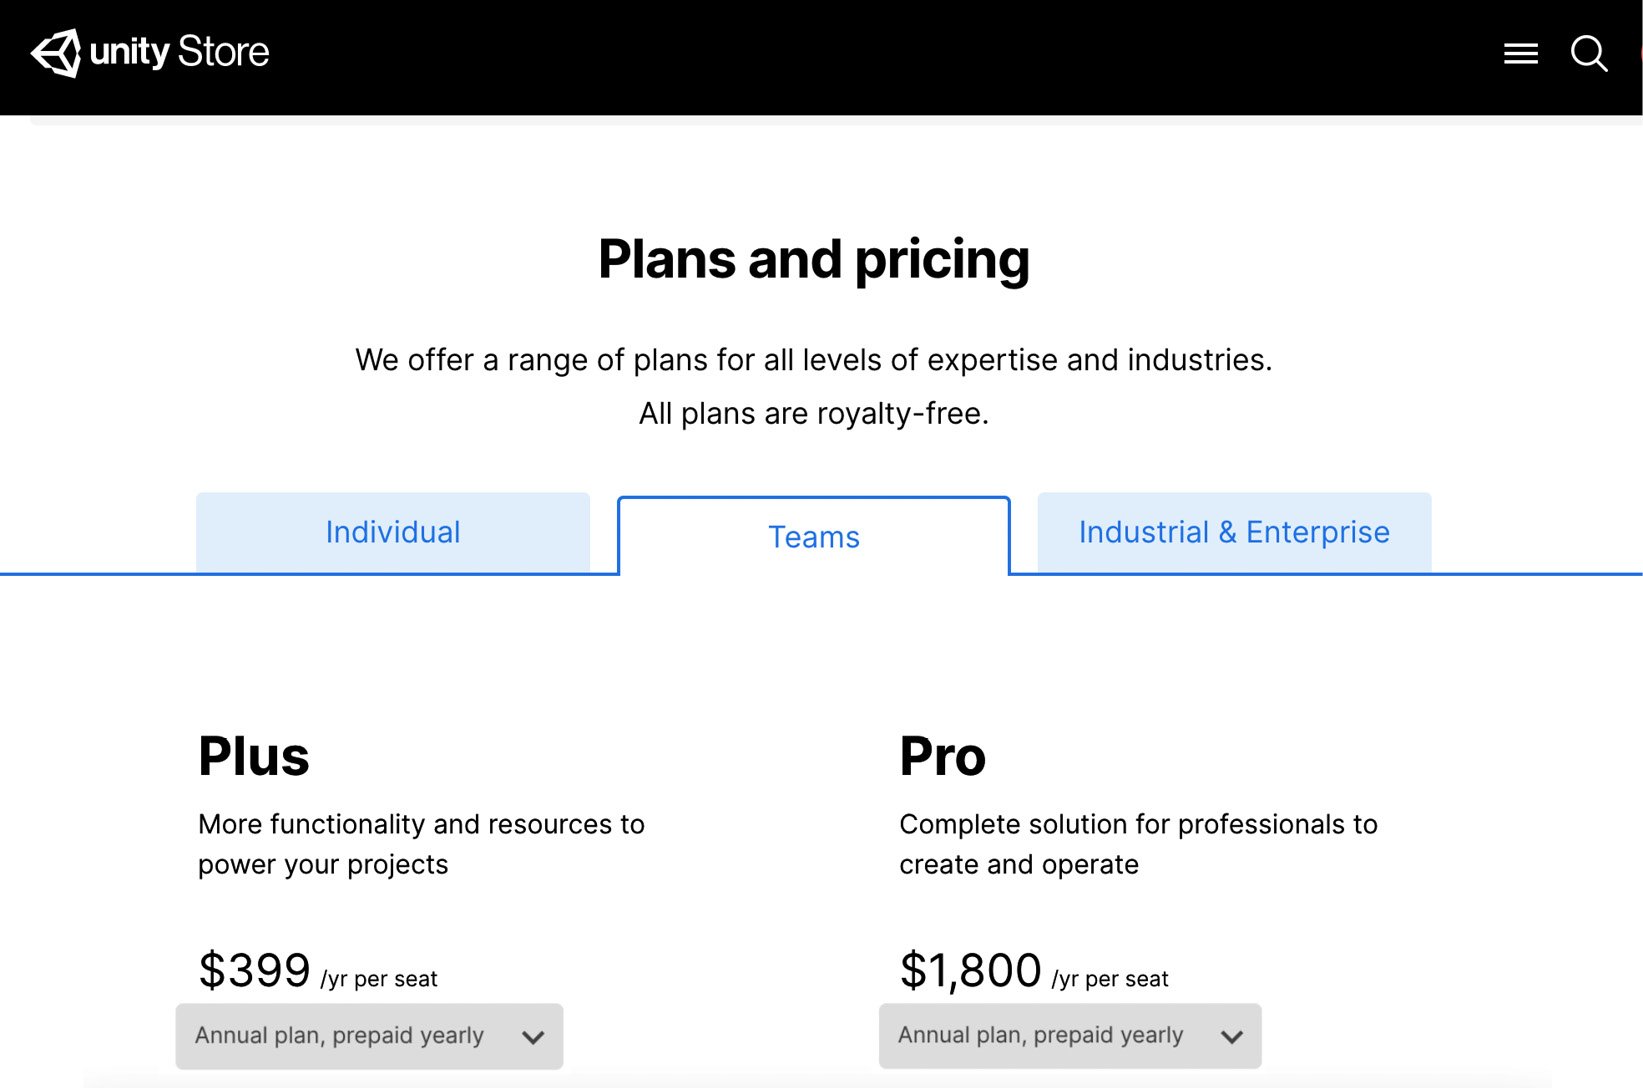
Figure 1.2 – The Plans and pricing page
Because each Unity plan has different eligibility requirements, you should choose the right plan for your project. Next, I will introduce the subscription plans:
- The Personal plan is free and includes all the basic functionality of Unity. You can choose this plan if you work as an individual and have earned less than $100,000 in revenue or funding for your Unity project in the past 12 months. In addition, if you are a student or educator, you can get additional benefits, but before that, you need to join the GitHub Student Developer Pack to be verified.
- The Plus plan is a paid plan and offers more functionality and training resources, such as advanced cloud diagnostics and splash screen customization. If you have earned more than $100,000 but less than $200,000 in revenue from using Unity in the past 12 months, you should choose this plan.
- The Pro plan is also a paid plan. Compared with the Plus plan, you can get more technical support from Unity by using the Pro plan. If your organization has earned more than $200,000 in the last 12 months from any source, you must use the Pro plan or the Enterprise plan.
- The Enterprise plan is specifically for teams with at least 20 members and provides more support than the Pro plan. For example, a customer success manager from Unity will be assigned to your organization to provide guidance, orchestrate resources, and serve as an internal advocate.
I hope this section was helpful for you in choosing the right Unity plan for your situation. Next, let's download and install the Unity Editor!
Downloading and installing the Unity Editor
There are two different ways to download and install the Unity Editor. The first and recommended way to download and install Unity is to use the Unity Hub.
The Unity Hub is a management tool that can be used to manage all your Unity projects and Unity installations. We can take the following steps to install the Unity Hub and the Unity Editor:
- To install the Unity Hub, visit the Download Unity page at https://unity3d.com/get-unity/download:
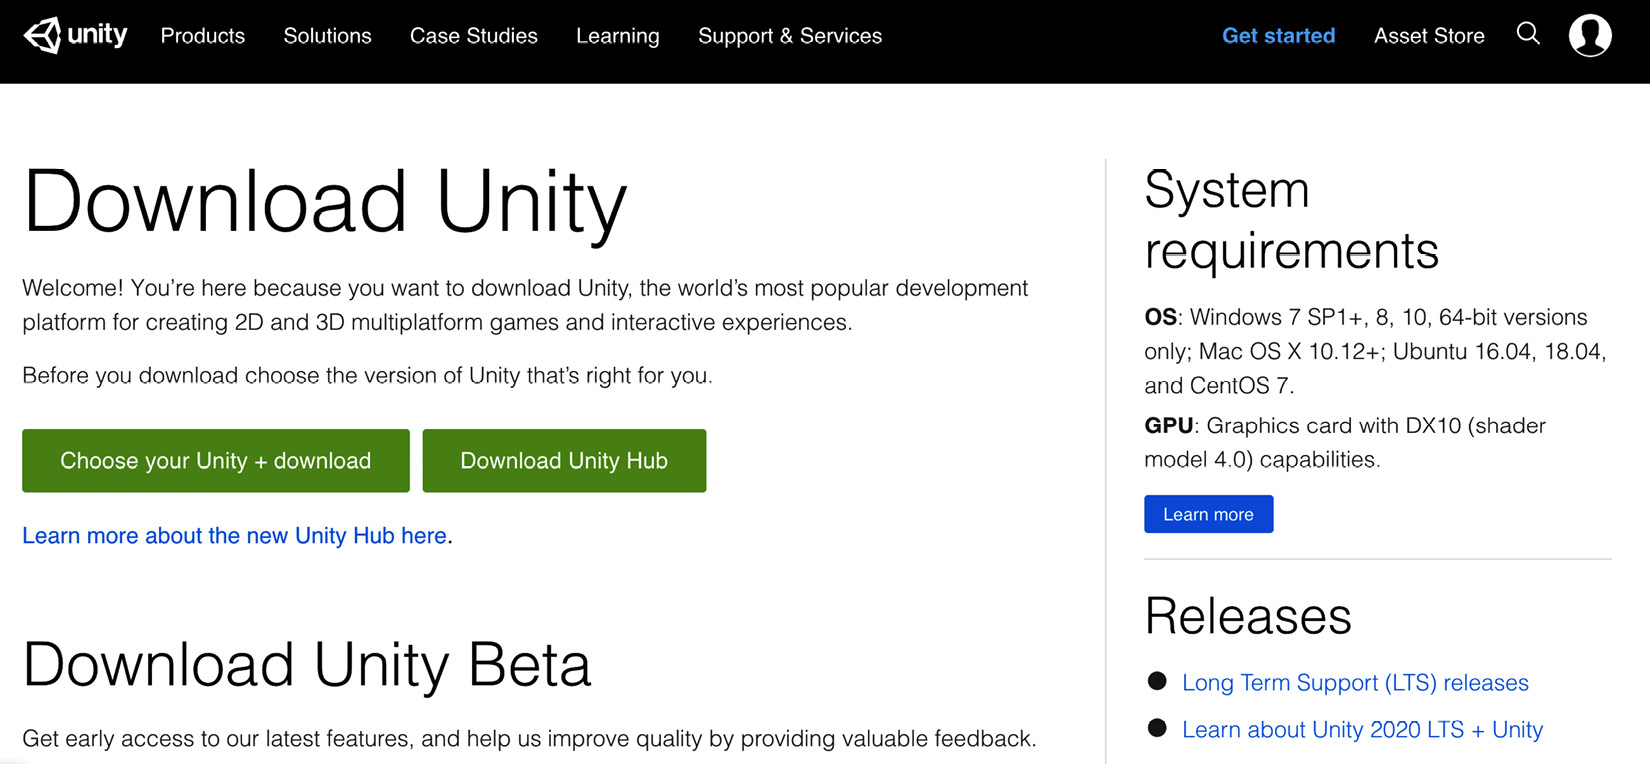
Figure 1.3 – The Download Unity page
As you can see in the System requirements section in the preceding screenshot, the Unity Hub supports Windows, Mac OS X, Ubuntu, and CentOS.
- Installing the Unity Hub is very easy; you just need to choose the folder where the Unity Hub is installed. Then, click on the Install button:
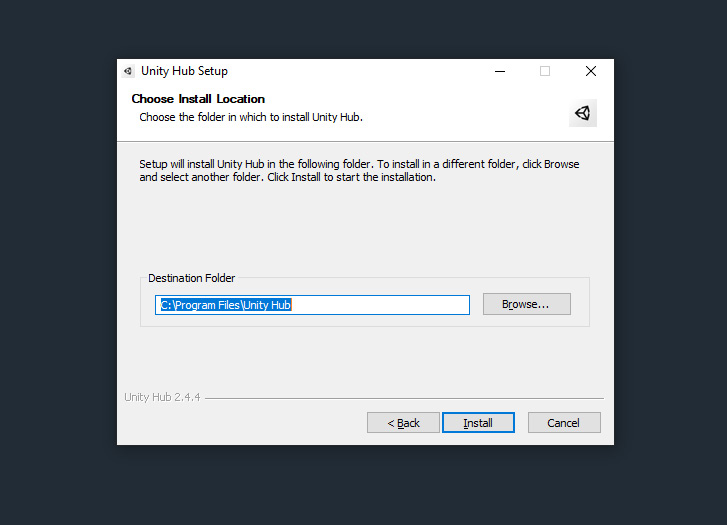
Figure 1.4 – Unity Hub Setup
- After installing the Unity Hub, select the Run Unity Hub option and click on the Finish button to launch the Unity Hub:
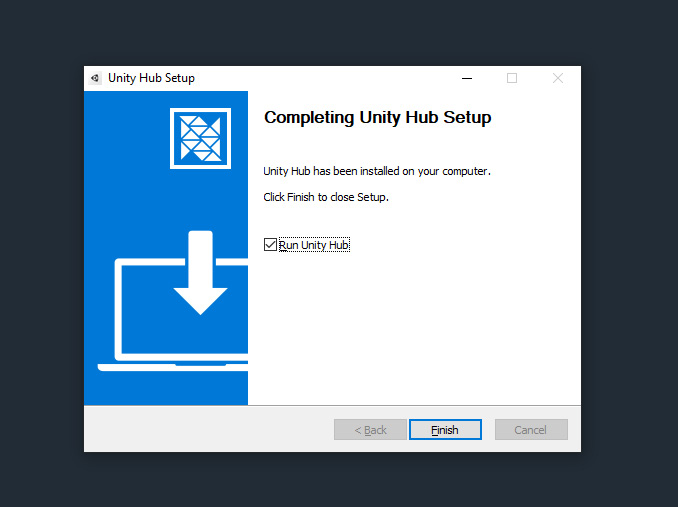
Figure 1.5 – Completing Unity Hub Setup
I am using the latest version of Unity Hub (version 3.0.0) at the time of writing. If you have used previous versions of Unity Hub, you will find that the launch page of the new version of Unity Hub is completely different.
- You need a Unity account to access the Unity Editor and the Unity Hub. If you don't have a Unity account yet, then you need to create a new one:
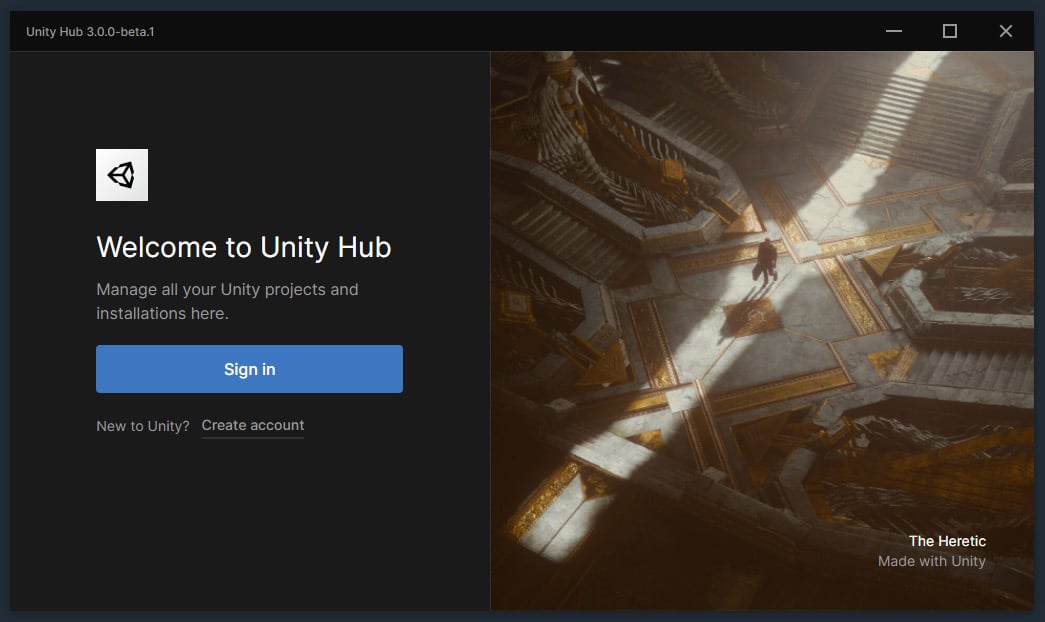
Figure 1.6 – Unity Hub
- When you sign into the Unity Hub for the first time, you will be asked to add an active license, as you can see at the top of the following screenshot. Click on the Manage licenses button to open the Licenses setting panel:
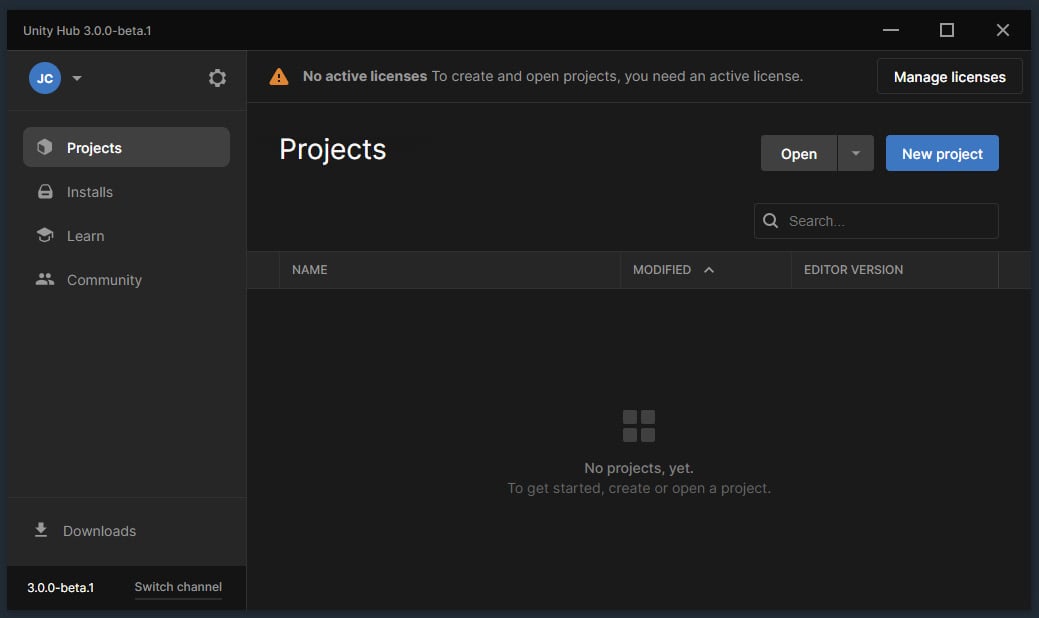
Figure 1.7 – Click the Manage licenses button
- There are two buttons available for you to add a new license. You can click either the Add button at the top-right corner or the Add license button:
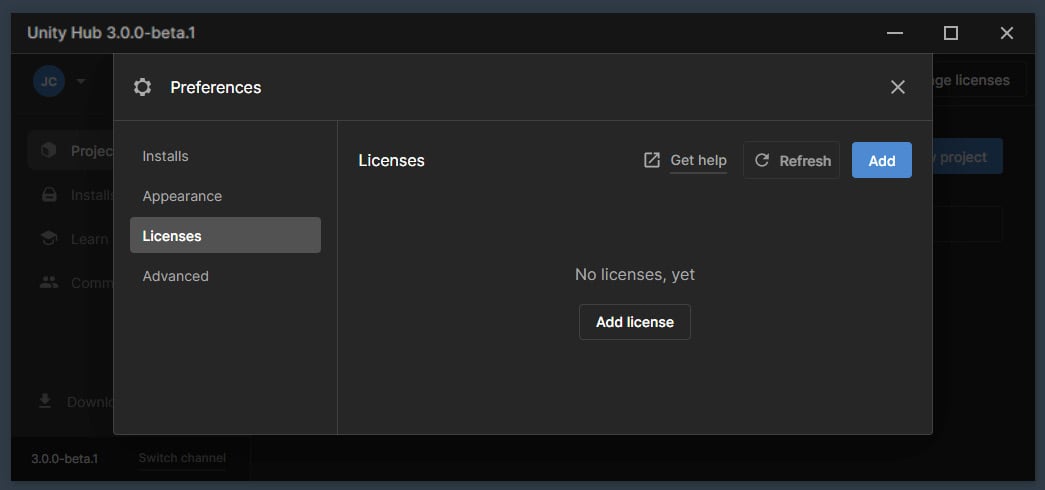
Figure 1.8 – The Licenses setting panel
Then, you have different options to activate the license. We have discussed the different Unity subscription plans in the previous section:
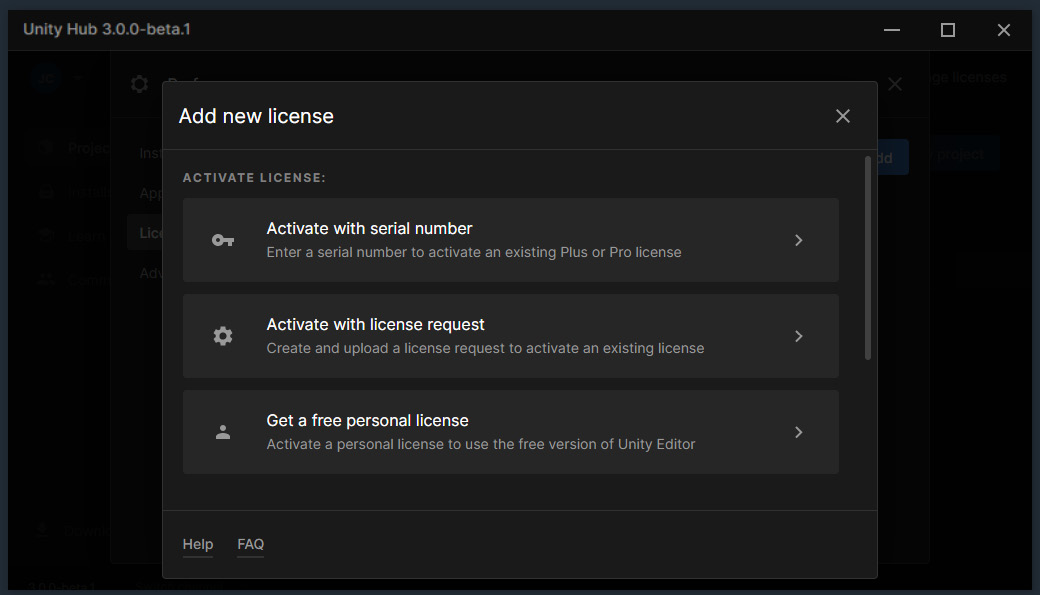
Figure 1.9 – Add new license
- After adding the new license, we can start exploring the Unity Hub. From the Projects view, you can find a list of Unity projects that are tracked by the Unity Hub. You can also create a brand-new project by clicking the New project button at the upper-right corner of the Projects view, or you can import an existing project by clicking the Open button:
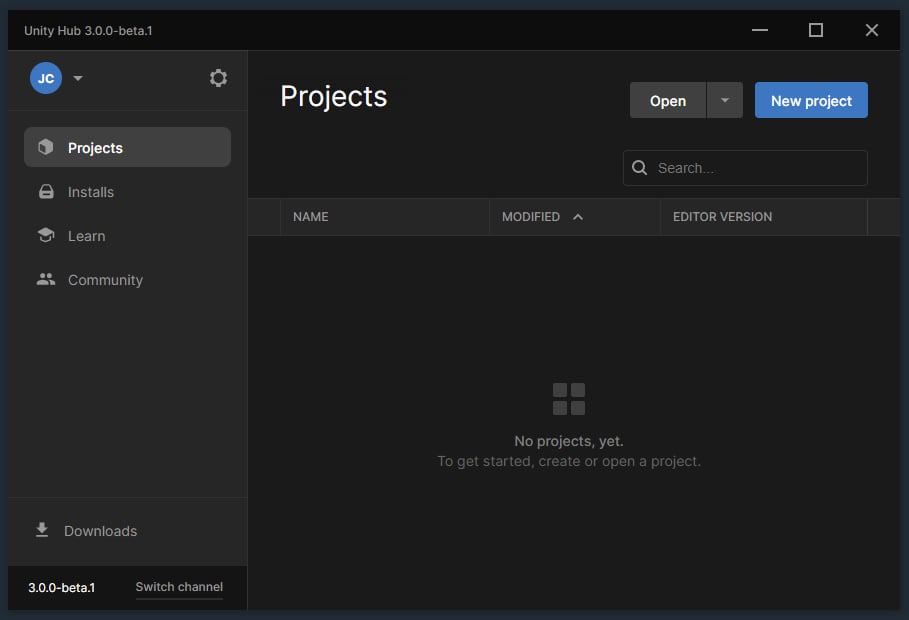
Figure 1.10 – The Projects view
- To install the Unity Editor, open the Installs view, where you can manage the installation of multiple versions of the Unity Editor:
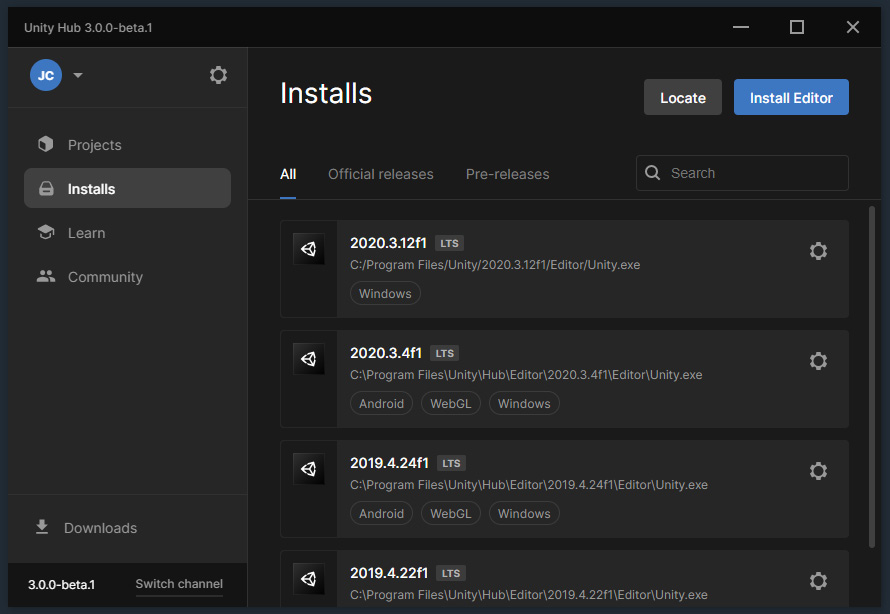
Figure 1.11 – The Installs view
There is a list of the Unity Editors that are installed and managed by the Unity Hub. Similar to the Projects view, you can download and install a new Unity Editor, or you can import an existing Unity Editor that is not managed by the Unity Hub, such as the Unity Editor that we installed using the Unity installer.
- Open the Install Unity Editor panel by clicking the Install Editor button on the Installs view. Then, you will see the latest version of each release:
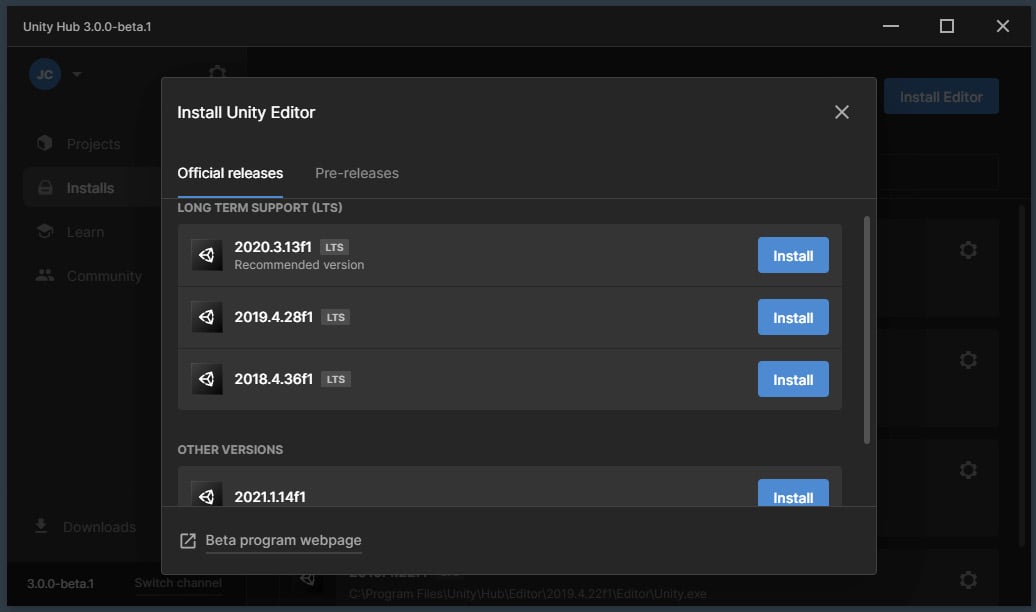
Figure 1.12 – Install Unity Editor
Note
Unity 2018 LTS has reached the end of its support cycle, so you should not install it.
We will use the latest version of the Unity 2020 LTS release, so we need to install Unity 2020.3.13f1 here:
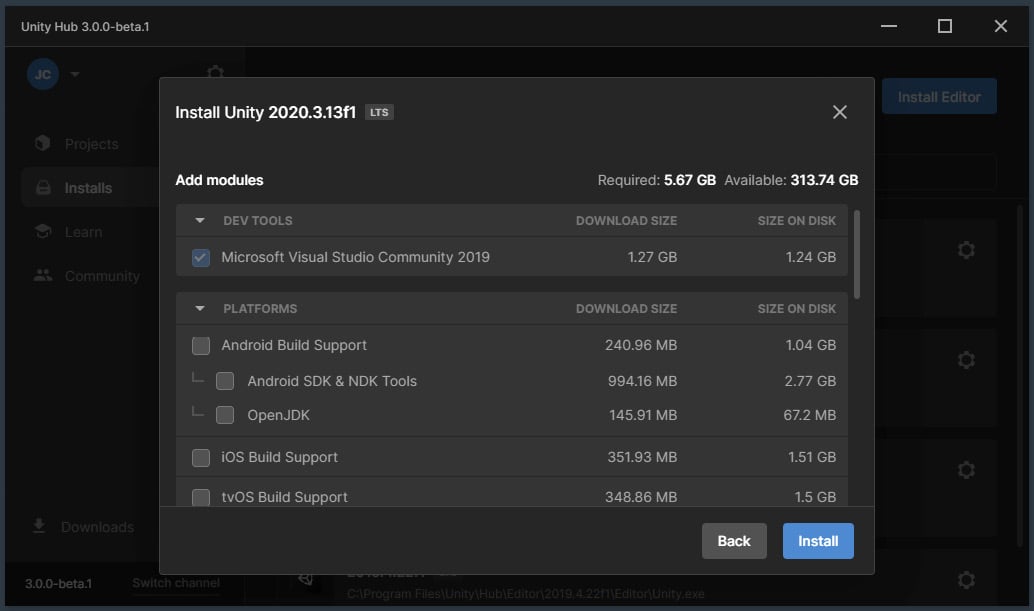
Figure 1.13 – Install Unity 2020.3.13f1
Then, we need to select the modules that need to be installed. As you can see in the preceding screenshot, Microsoft Visual Studio Community 2019 will be installed by default, which will be our Integrated Development Environment (IDE) to develop games in Unity.
Note
If you want to change the installation location, you can change it in the Installs settings of the Preferences panel.
Once it has been downloaded and installed, we are ready to start exploring the Unity Editor!
Sometimes, you may need a specific version that is not available through the Unity Hub, such as some older Unity versions. At this point, you can also install the Unity Editor a second way, which is through the Unity installer. You can use the Unity installer to download the previous versions of Unity:
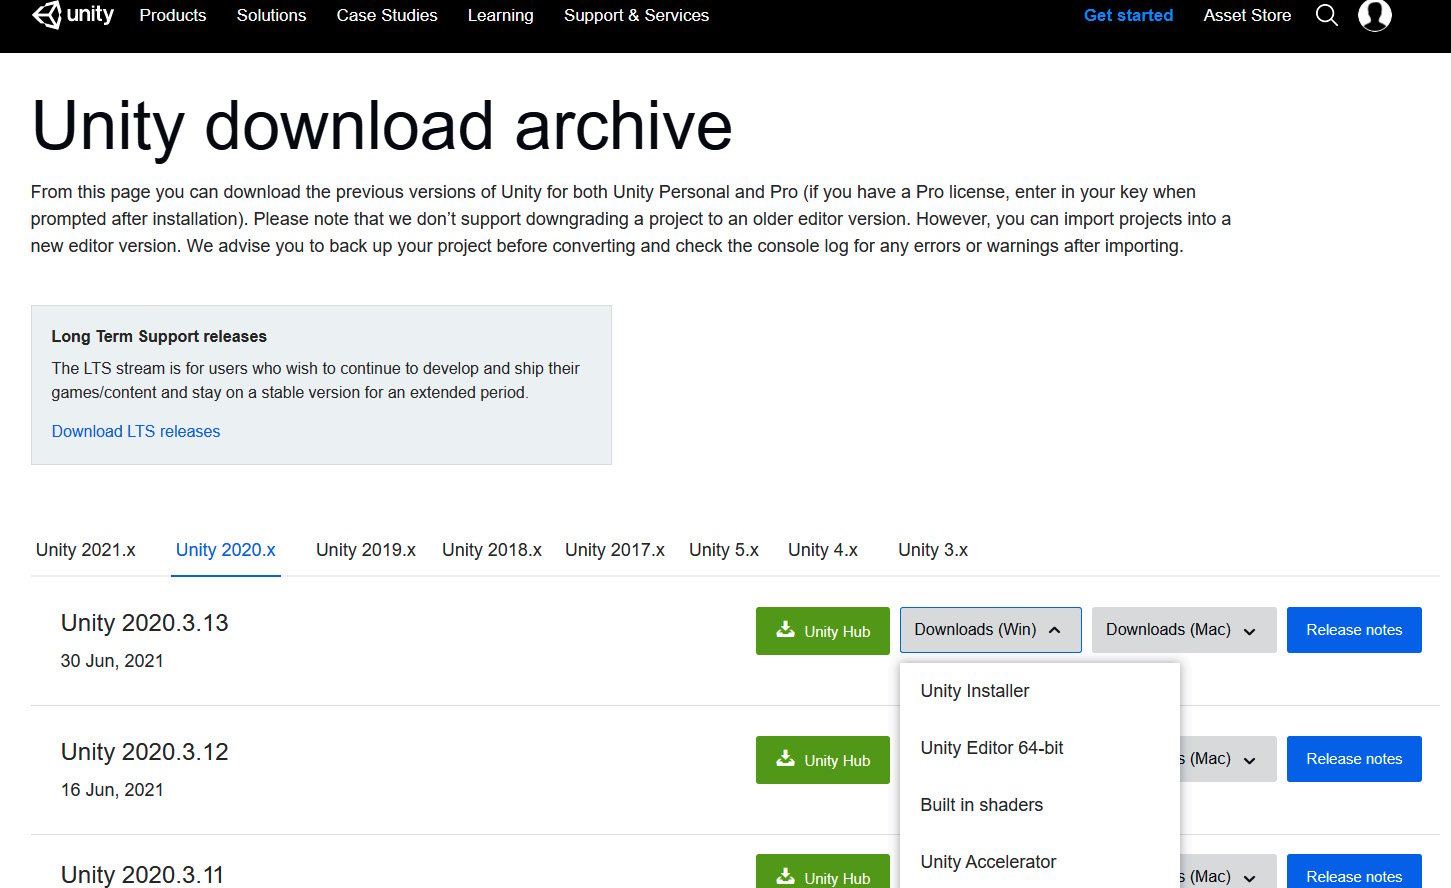
Figure 1.14 – The Unity download archive page
Now, follow these steps to install the Unity Editor through the Unity installer:
- To download a previous version of Unity, you should access the Unity download archive page at https://unity3d.com/get-unity/download/archive.
- Click on the Next button and choose the components of Unity that you want to download and install. The Unity installer should resemble the following screenshot:
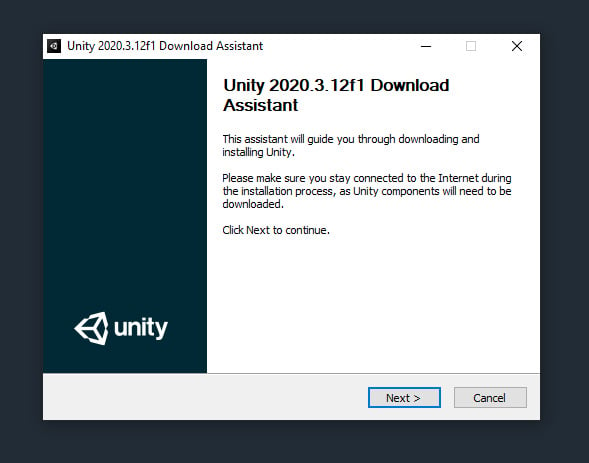
Figure 1.15 – The Unity installer
- The Unity Editor is selected by default; in order to build games for different platforms, you also need to select the corresponding build support components. For example, if you want to build an Android game running on Android devices, you need to download and install the Android Build Support component:
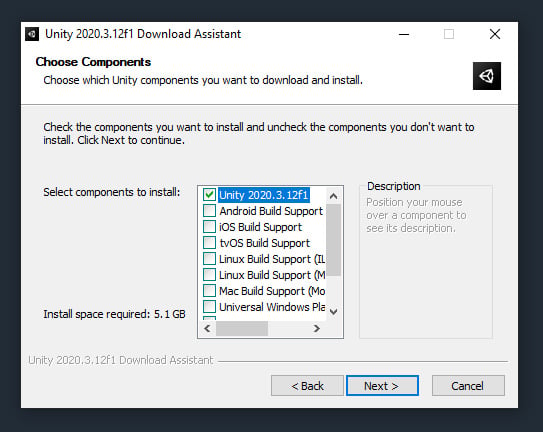
Figure 1.16 – Choosing components
- Click the Next button, and then you need to choose download and install locations:
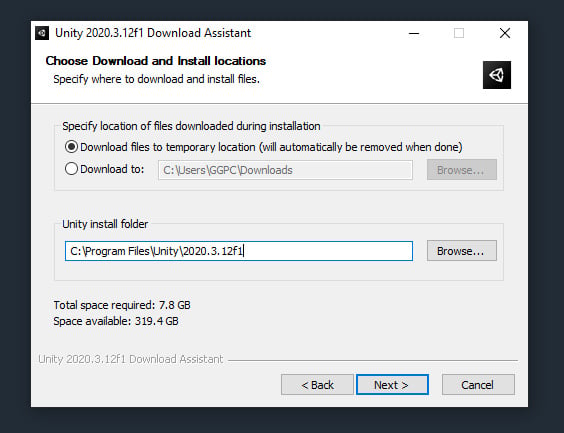
Figure 1.17 – Choose Download and Install locations
- After specifying where to download and install these files, click the Next button to download Unity:
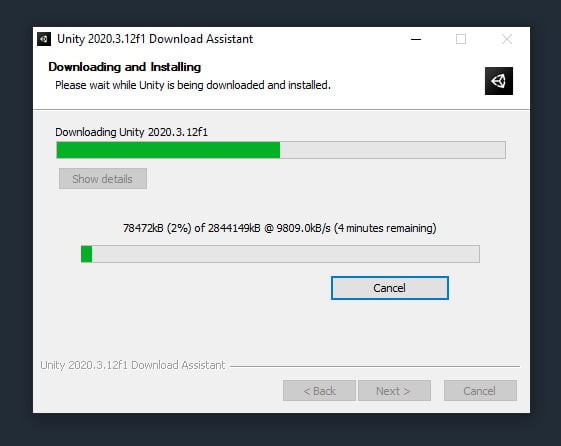
Figure 1.18 – Downloading and Installing
After the download and installation are complete, the Unity Editor icon will appear on your desktop.
Exploring the Unity Editor
The first thing we need to do is use the Unity Hub to create a new Unity project. As I mentioned in the previous section, we will create a brand-new project by clicking the New Project button at the upper-right corner of the Projects view.
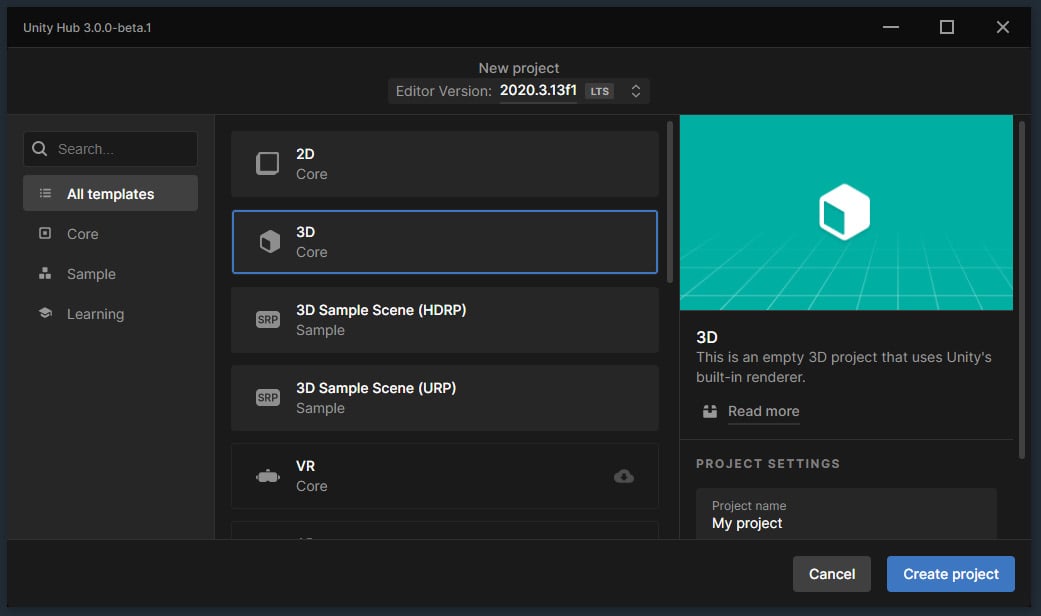
Figure 1.19 – Creating a new project
As shown in the preceding screenshot, we can choose different Unity Editor versions for this new project, and Unity provides us with some built-in project templates, such as the 2D, 3D, HDRP, and URP templates. You can also download and install more templates from Unity, such as the VR template and the AR template. In the PROJECT SETTINGS section, you can set the name of the project and the location of the project.
Here, we will choose the default 3D project template and name our project UnityBook. Then, click on the Create project button. After that, the Unity Editor you previously selected will launch and open a new project for you:
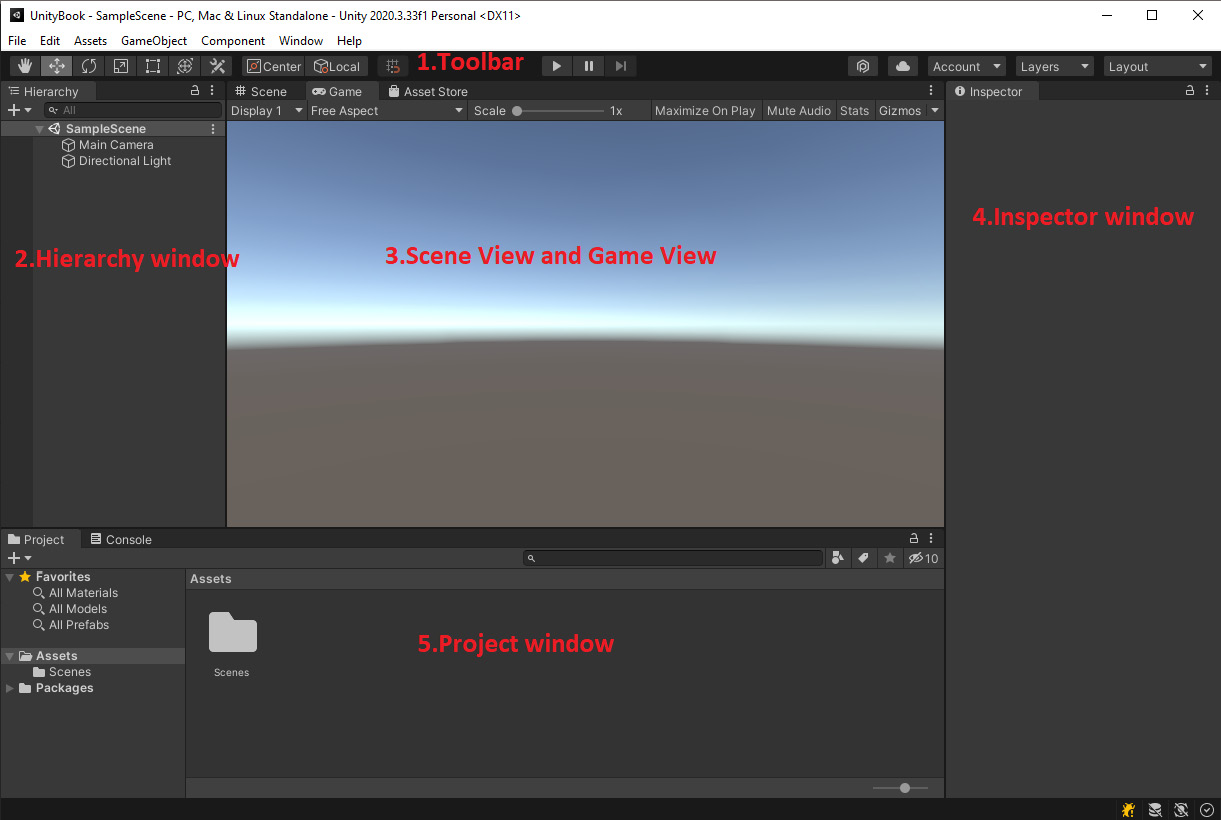
Figure 1.20 – The Unity Editor
As you can see in the preceding screenshot, the Unity Editor layout organizes the most important windows for you. Specifically, the default layout divides the editor interface into five key areas. From top to bottom, they are as follows:
- Toolbar
- Hierarchy window
- Scene view and Game view
- Inspector window
- Project window
Next, I will introduce these UI areas in order.
The Toolbar
The Toolbar is always at the top of the Unity Editor interface, and it consists of several groups of controls:

Figure 1.21 – The Toolbar
From left to right, the first tool in the Toolbar is the transform tools set. The transform tools are used in the Scene view and allow you to pan around the Scene and move, rotate, and scale individual GameObjects in the Scene:

Figure 1.22 – The transform tools set
The next tool is the Gizmo handle position toggles set, which is used to define the position of any transform tool Gizmo in the Scene view:

Figure 1.23 – The Gizmo handle position toggles set
Then, you can find the Play, Pause, and Step buttons in the center. You can use these buttons in the Game view:

Figure 1.24 – The Play, Pause, and Step buttons
On the right side, let's take a look at the Unity Plastic SCM button first, which allows you to access the Plastic SCM version control and source code management tool in the Unity Editor directly. You can click the cloud button to open the Unity Services window, where you are able to access a lot of cloud services provided by Unity, such as the Cloud Build service, the Analytics service, and the Ads service.
You can also access your Unity account from the Account drop-down menu. There are two other drop-down menus on the right, namely Layers and Layout; you can control which objects in the Scene view appear using the Layers drop-down menu and change or create a new layout of your Unity Editor using the Layout drop-down menu:

Figure 1.25 – The Unity Collaborate and Unity Services buttons and the Unity Account, Layers, and Layout dropdowns
The Hierarchy window
The second area is the Hierarchy window. As you can see in the following screenshot, the Hierarchy window in the Unity Editor displays everything in a Scene; the things in the Scene, such as Main Camera, Directional Light, and the 3D cube, are called GameObjects.
We can also organize all the objects in the game world in the Hierarchy window:
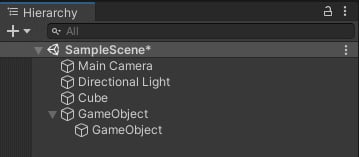
Figure 1.26 – The Hierarchy window
It is very easy to create a new GameObject in a Scene. You only need to right-click on the Hierarchy window, and a menu will pop up where you can select the object you want to create:
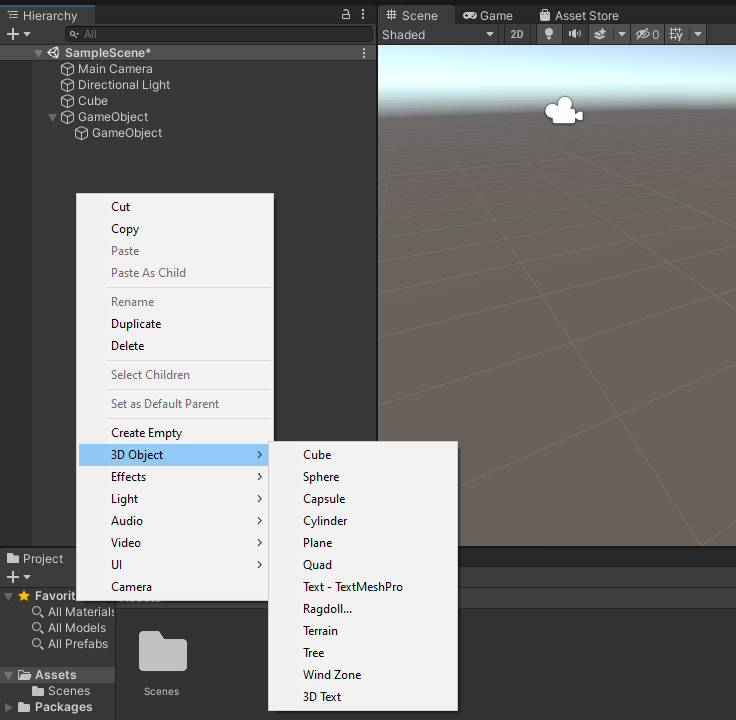
Figure 1.27 – Creating a new GameObject
It is worth noting that Unity uses parent-child hierarchies to organize GameObjects, so you can create one object as a child of another. If you want to create a new GameObject as a child of another GameObject, then you only need to select the parent GameObject first and then right-click to create the child GameObject:
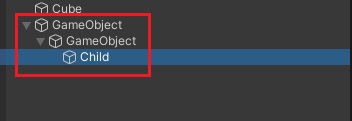
Figure 1.28 – The parent-child hierarchy
Another way to create a parent-child hierarchy is to directly drag an existing GameObject onto the parent GameObject in the Hierarchy window:
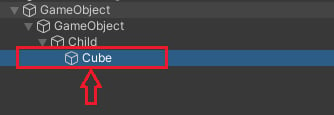
Figure 1.29 – The parent-child hierarchy
As you can see in the preceding screenshot, we dragged the GameObject named Cube onto the GameObject named Child to create a parent-child hierarchy.
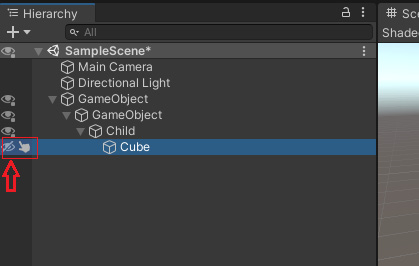
Figure 1.30 – Hiding and showing GameObjects
Another feature of the Hierarchy window is that it allows you to hide and show GameObjects in the Scene view without changing their visibility in the Game view or the final application.
The Scene view and the Game view
The center of the default Unity Editor layout is the Scene view and the Game view, which is the most important window in the Unity Editor. The Scene view is an interactive view of the game world you are creating:
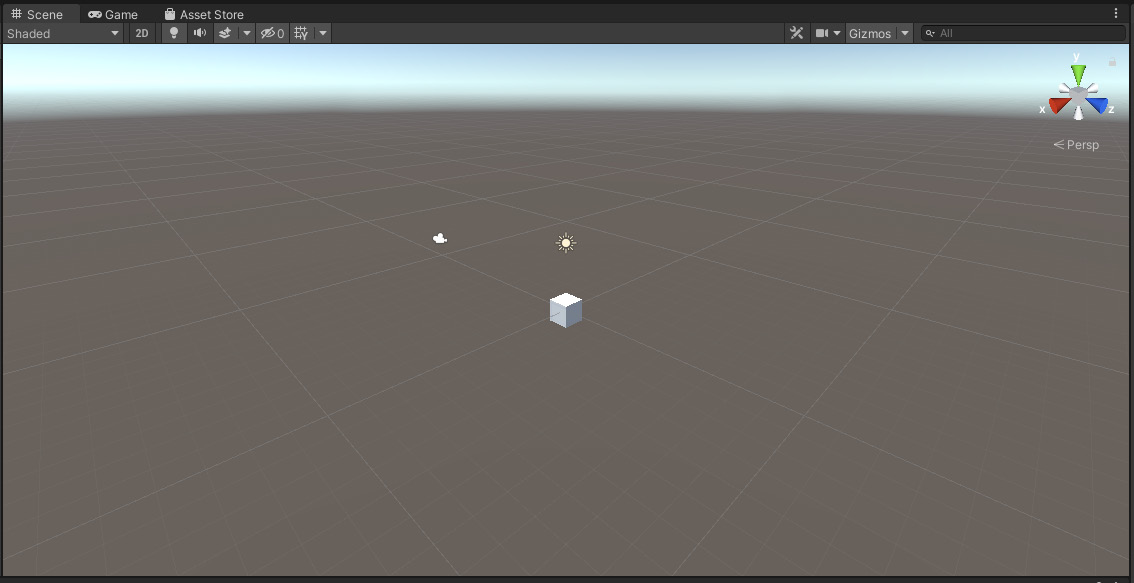
Figure 1.31 – The Scene view
You can use the Scene view to manipulate GameObjects and view them from various angles. Also, there are some useful tools available in the Scene view, such as the Scene Gizmo tool at the upper-right corner of the Scene view:
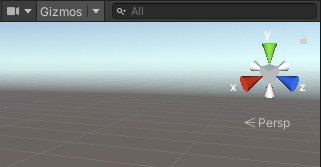
Figure 1.32 – The Scene Gizmo tool
It shows the current orientation of the Scene view camera and allows you to quickly modify the angle of the view and projection mode.
If you want to modify the settings of the Scene view camera, you can click the Camera button next to the Gizmos button to open the Scene Camera settings window:
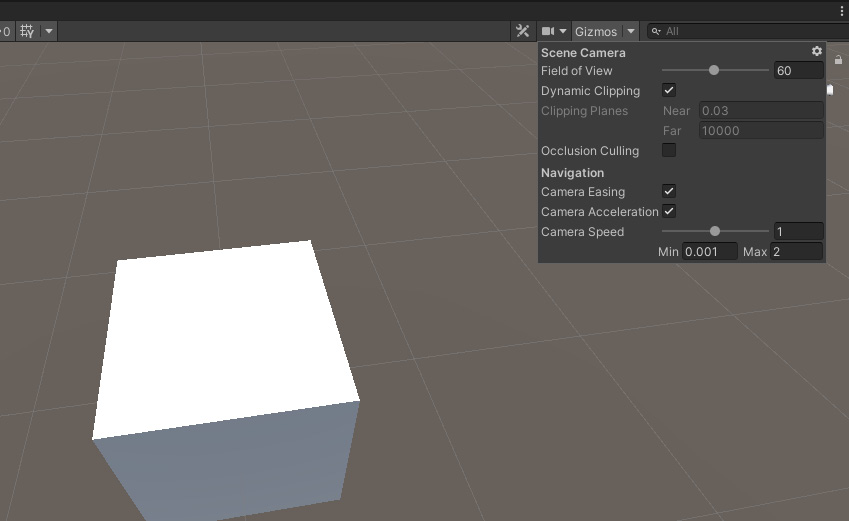
Figure 1.33 – The Scene Camera settings
Here, you can adjust some settings of the Scene view camera, such as Field of View and Camera Speed.
A visual grid is another useful tool that you can use in the Scene view to help you align GameObjects by moving them to the nearest grid location:
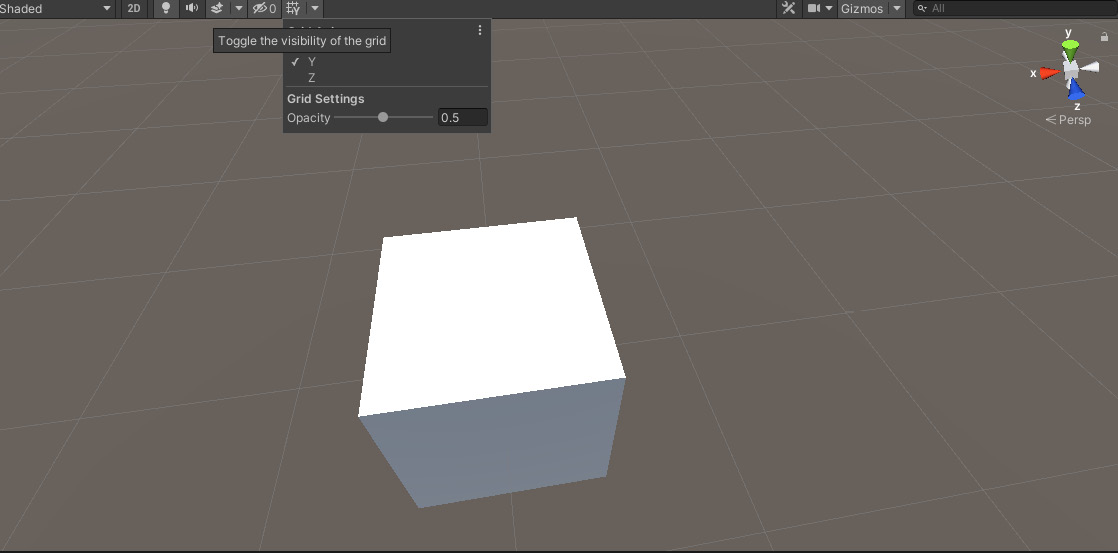
Figure 1.34 – Toggle the visibility of the grid
As you can see in the preceding screenshot, you can also move a GameObject to a grid projected along the X, Y, or Z axes.
The last useful tool in the Scene view that I want to introduce is draw mode used in the Scene:
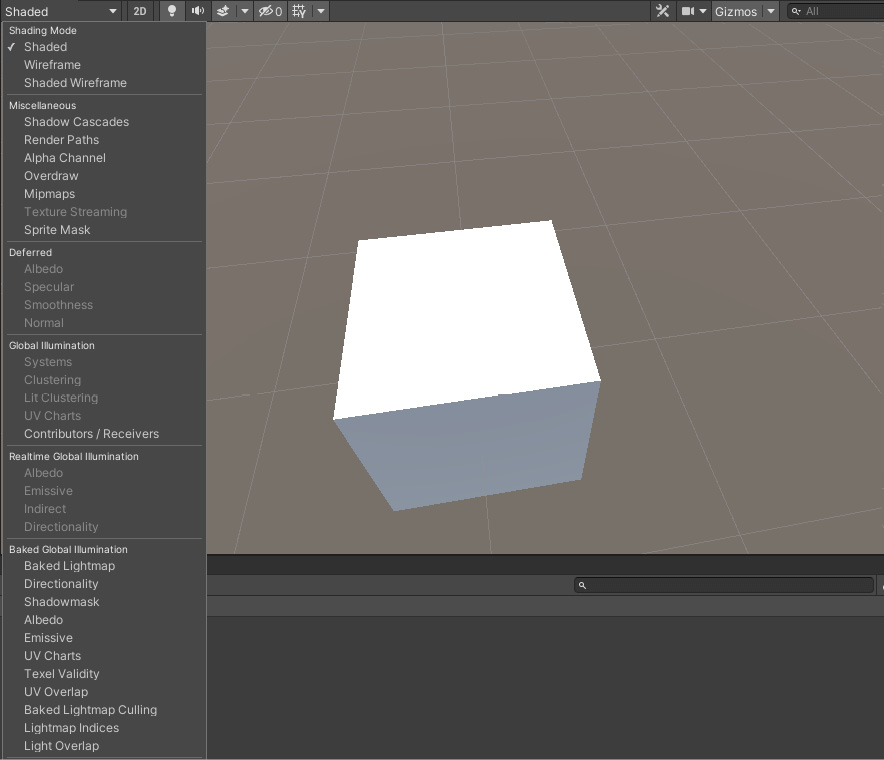
Figure 1.35 – The draw mode in the Scene
This is useful if your project uses the built-in render pipeline of Unity because a different draw mode in the Scene can help you understand and debug the lighting in it.
In the default layout, the Game view also appears in the same area as the Scene view. You can click the Game button to switch to the Game view from the Scene view:
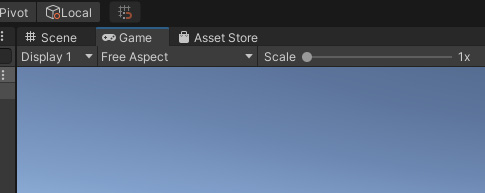
Figure 1.36 – Click the Game button to switch to the Game view
The Game view represents your final published game. The content of the Game view is rendered from the camera(s) in your game. In the Game view, you cannot modify the viewing angle and projection mode at will, as with the Scene view. You need to modify the settings of the camera object to achieve this function:
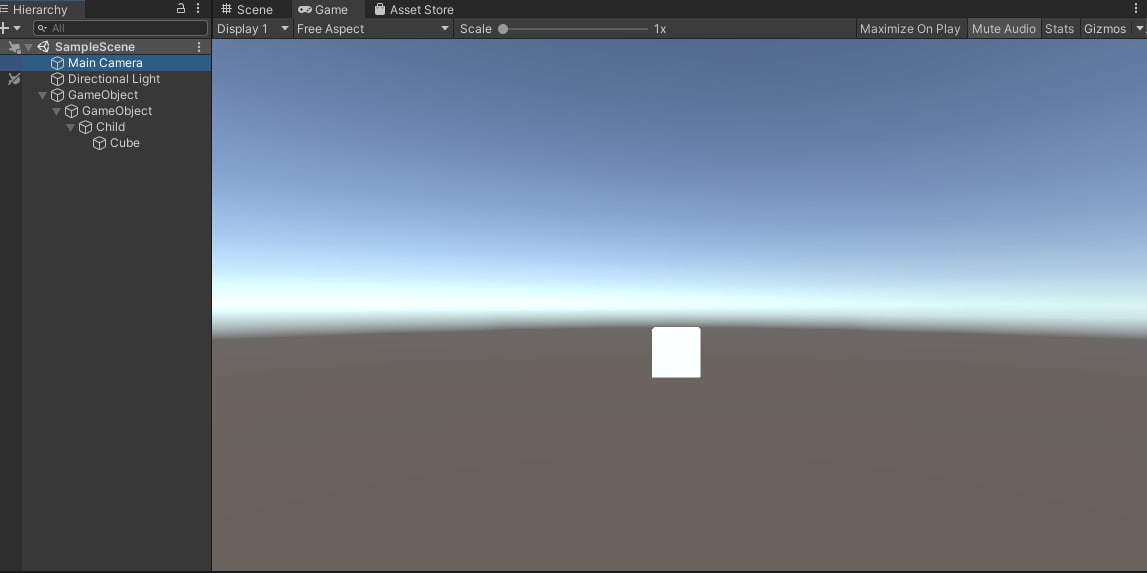
Figure 1.37 – The Game view
You can run your game directly inside the Game view by clicking the Play button on the Toolbar. It's important to note that in Play mode, any changes you make are temporary and will be reset when you exit it; therefore, it is not a good idea to make lots of changes in play mode.
I want to introduce three tools in the Game view, namely Aspect, Maximize On Play, and Stats.
The Aspect drop-down menu is very useful when you develop games for different screens with different aspect ratios. You can select different values to test how your game looks on these screens, and you even can add custom values by clicking the plus button at the bottom of the menu:
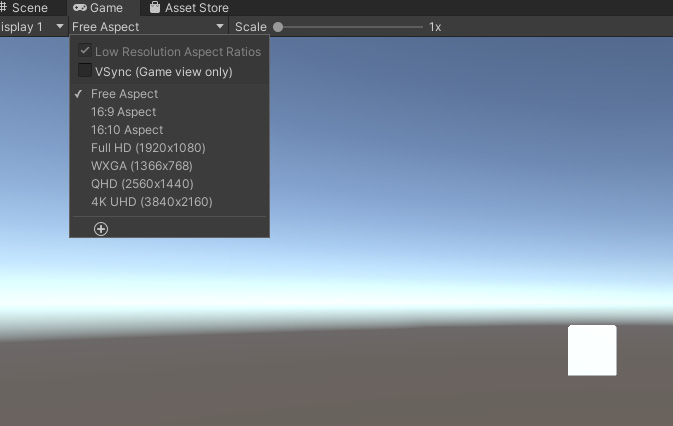
Figure 1.38 – The Free Aspect drop-down menu
The second feature is called Maximize On Play, which can maximize the Game view for a full-screen preview when you enter play mode:
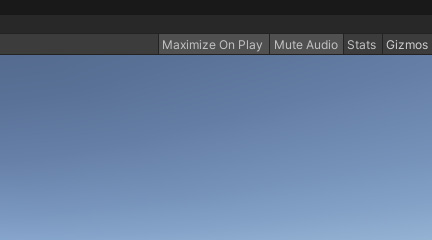
Figure 1.39 – The Maximize On Play button
The third feature is called Stats. This feature is useful because it can display the rendering statistics about your game's audio and graphics. Therefore, you can use it for monitoring the performance of your game while in play mode:
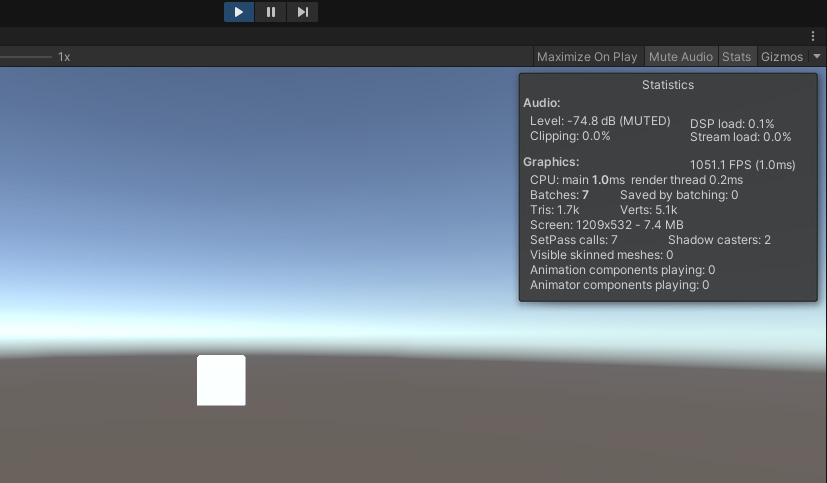
Figure 1.40 – The Stats window
In the Scene view, you can view and adjust the game world you are creating. In the Game view, you can see your final game. So, this area is very important in the Editor. Next, let's take a look at the UI area related to a specific GameObject in the Scene.
The Inspector window
If you want to modify the properties of a GameObject or a component on a GameObject, you need to use the Inspector window.
You can select a GameObject in the Scene view or the Hierarchy window, and then you will see the properties and the components of it in the Inspector window:
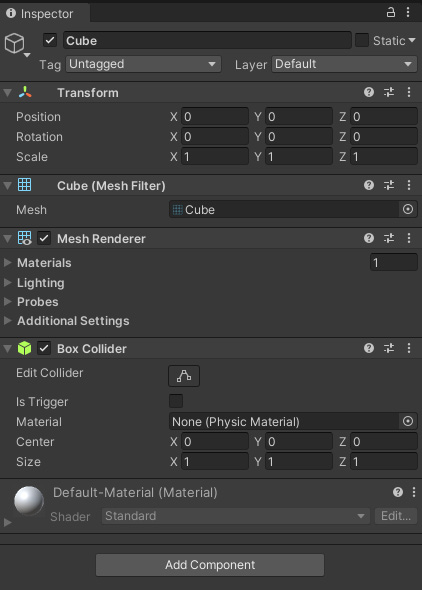
Figure 1.41 – The Inspector window of a GameObject
You can modify these properties directly in the Inspector window, which also provides some useful tools that can help you modify your GameObjects.
For example, if you want to copy the values of a component on a GameObject, you can right-click on the component, and then a menu will pop up; from there, you can select the Copy Component command:
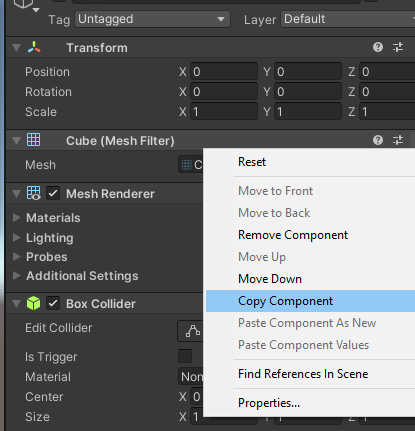
Figure 1.42 – Copy Component
Not only can the GameObjects in the Scene view be inspected but also the digital assets in the Project window. You can select a digital asset in the Project window, and the Inspector window will display the settings that control how Unity imports and uses the asset at runtime:
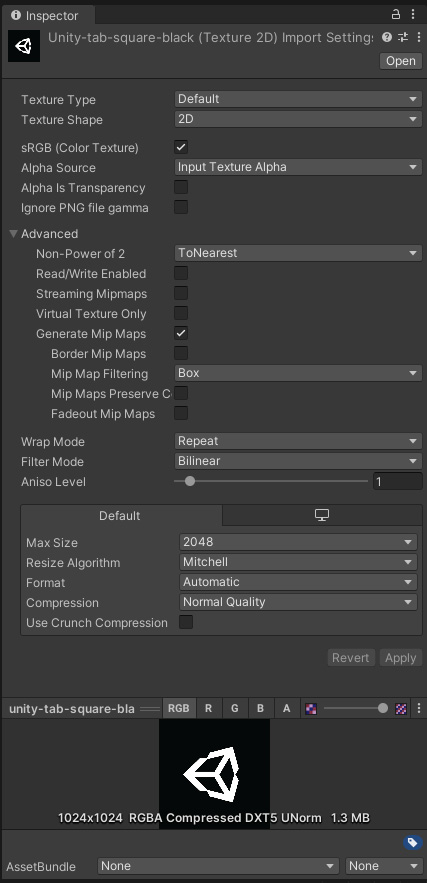
Figure 1.43 – The Inspector window of an asset
In this section, we learned how to view and modify the properties of a GameObject and asset through the Inspector window.
The Project window
The final window I will introduce is the Project window. In the Project window, you can find all the digital assets of your project. The Project window works like a file browser, organizing assets files in folders:

Figure 1.44 – The Project window
The Project window is the main way to navigate and find assets in your game. It provides two ways to search assets, by type or label:
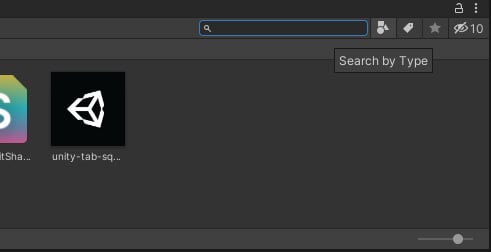
Figure 1.45 – Searching assets by type
It is very easy to import external digital assets or create an asset inside the Unity Editor directly. You just need to right-click on the Project window and a menu will pop up where you can create a new asset or import an existing asset:
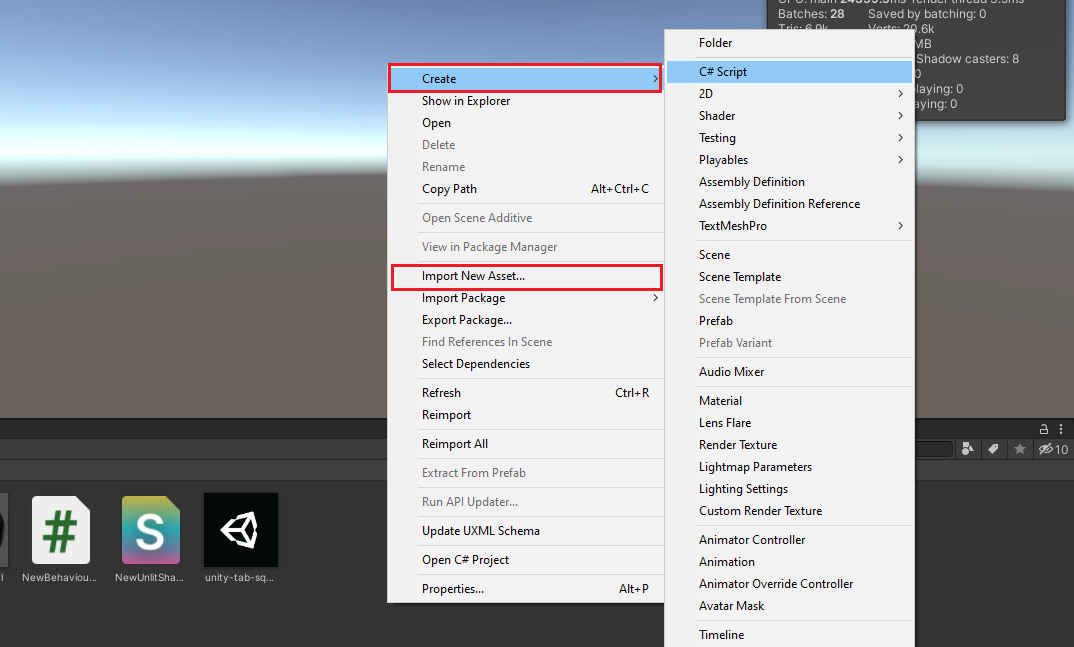
Figure 1.46 – Creating an asset
I hope you now have a good understanding of the Unity Editor by reading this section. Next, I will introduce what a game engine is and what important features Unity provides as a game engine.


