In-file editing with QuickTime Player on macOS
On macOS, it’s possible to make quite a lot of edits within a video file – meaning that if you just need to (re)move a few sections of your video to tidy it up, you don’t need to go through the much longer import, edit, export workflow that we’ll cover in later chapters.
Using Trim mode
Trimming is the first editing action we’re going to look at. Like most editing terms, it comes from the days of physically cutting bits of film and refers to what you might do with a pair of scissors. Because you’re cutting bits off of a clip, the action of trimming is all about removing the parts of a video you don’t need. Follow these steps to trim a video file in QuickTime Player:
- Double-click to open the video file (
Chapter-One_the-timeline.movif you’re following along) and use ⌘ + T to open Trim mode (to access this through the menu bar, it’s Edit | Trim…). Trim mode will bring up a video strip – a basic timeline – that shows your whole video. There is a border highlighting the strip and trim handles at either end. In editing, a handle is something on the timeline you can select and move by dragging left or right. - In Trim mode, you can drag the trim handles inward as far as you like to make the video start later or end sooner. When you drag the handle, a tooltip appears above the handle showing the timecode at which you have trimmed the video start or end. If you’re following along with the The Timeline video, drag the trim handle so that the video starts at the title card, as shown in Figure 1.2, not at the color bars before it.
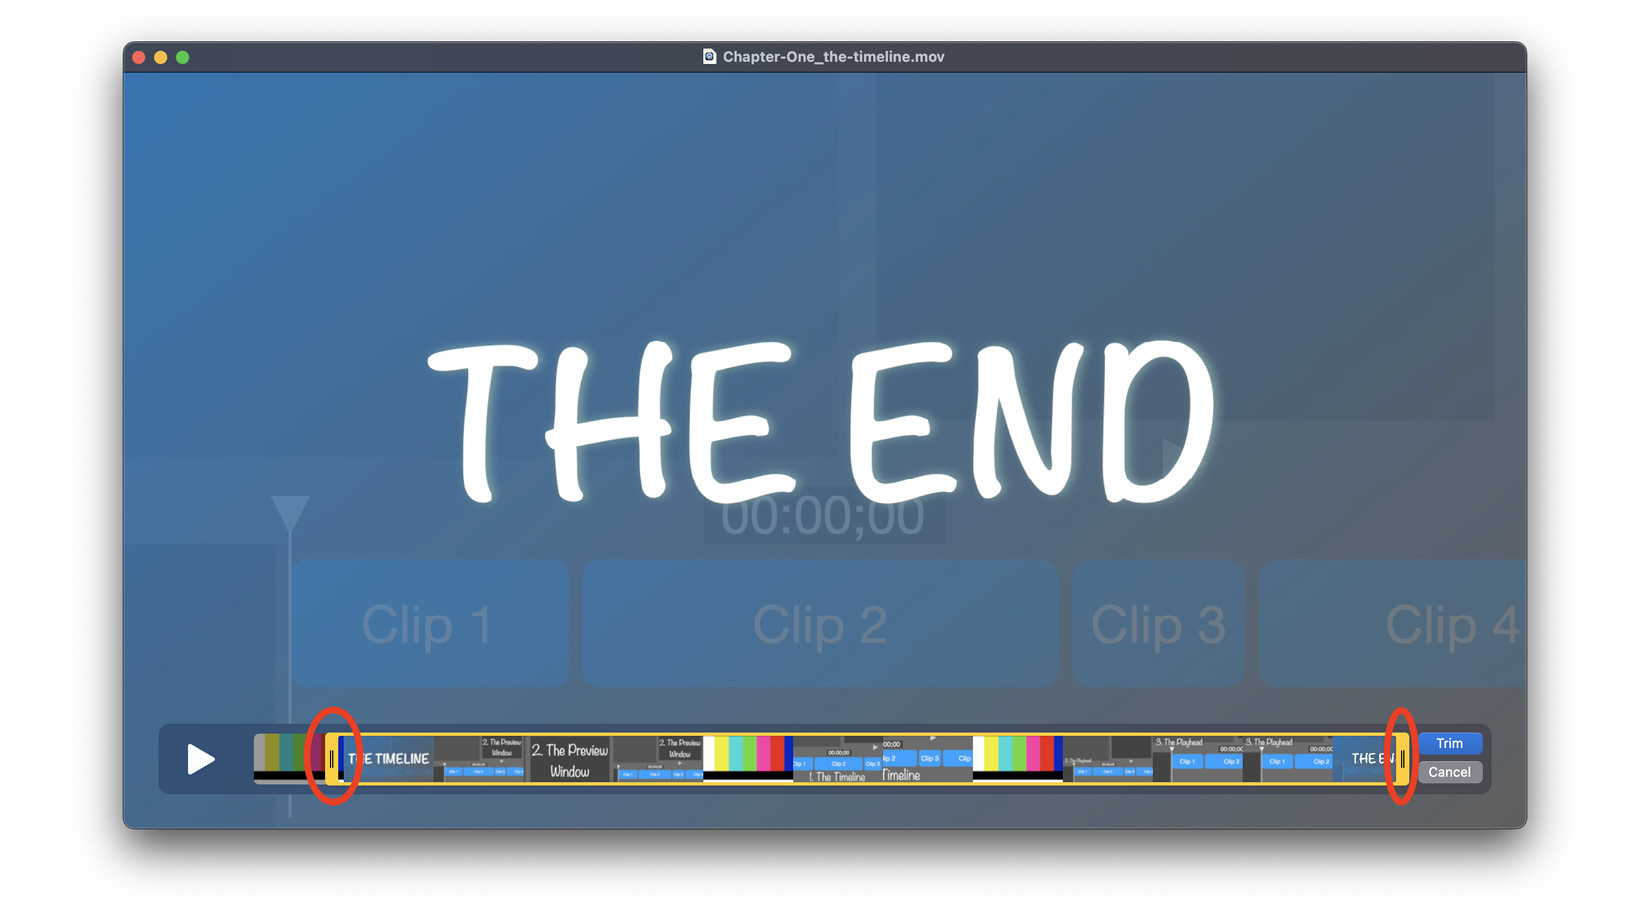
Figure 1.2 – The Timeline video with the trim handles (circled) in the correct place
- To make more precise edits in Trim mode, drag a trim handle slowly until the video strip shows a zoomed-in section of the video. Unfortunately, this feature isn’t very well-realized in macOS; it can be difficult to prompt the zoom change because there is no menu command to activate it. If you need to make edits that require you to be pinpoint accurate, you should use Clips mode. We will discuss Clips mode in the next section.
- When you’re happy, click Trim or press Enter to save the trim changes you’ve made.
Using Clips mode
The other command you can use to make edits in QuickTime, ⌘ + E, allows you to do even more than in Trim mode. Clips mode shows a translucent border around the clip. Instead of using trim handles, the tool used to make changes in this mode is the playhead, shown as a thin, red, vertical line. Take the following steps to see how Clips mode works:
- When you play the video (which you can do by pressing the L key or the space bar), the playhead moves along the timeline as the video plays.
- To stop the playhead, press the space bar again or the K key. It’s good to get into the habit of using the letter keys, because the three main shortcut keys, J (play in reverse), K, and L, allow you to edit more efficiently.
- To make fine adjustments to the playhead's position, make sure the video is paused. Click on the video strip and use the keyboard arrow keys (← and →) to move left and right. One key press moves the playhead one frame at a time, which can help you to make very precise edits.
- Alternatively, if you need to move the playhead a larger distance, move your cursor to hover over the thin red line, and its shape will change to that shown in Figure 1.3. You can then click and drag the playhead to your desired location on the video strip.
- If the playhead ever disappears, press the space bar or L again, and it should reappear.

Figure 1.3 – The playhead adjustment cursor icon
Extra tip – frames
A frame is the smallest unit of time in a video: each second of a video is usually made up of between 24 and 60 frames. In Chapter 5, we’ll look at frame rates and how to check them in an iMovie project on the Mac.
Splitting clips
The main advantage of Clips mode is that it also allows you to split clips. Splitting cuts a clip into two separate pieces, at the playhead’s position. Here’s how to do that in Clips mode:
- The ⌘ + Y keyboard shortcut will split the clip at the playhead's position. If you’re following along, use ⌘ + Y twice to cut out one of the color bar sections from the middle of the video.
- When a split has been made you can select the two pieces of video separately by clicking on either of them. Selected clips are highlighted with a border, as seen in Figure 1.4.
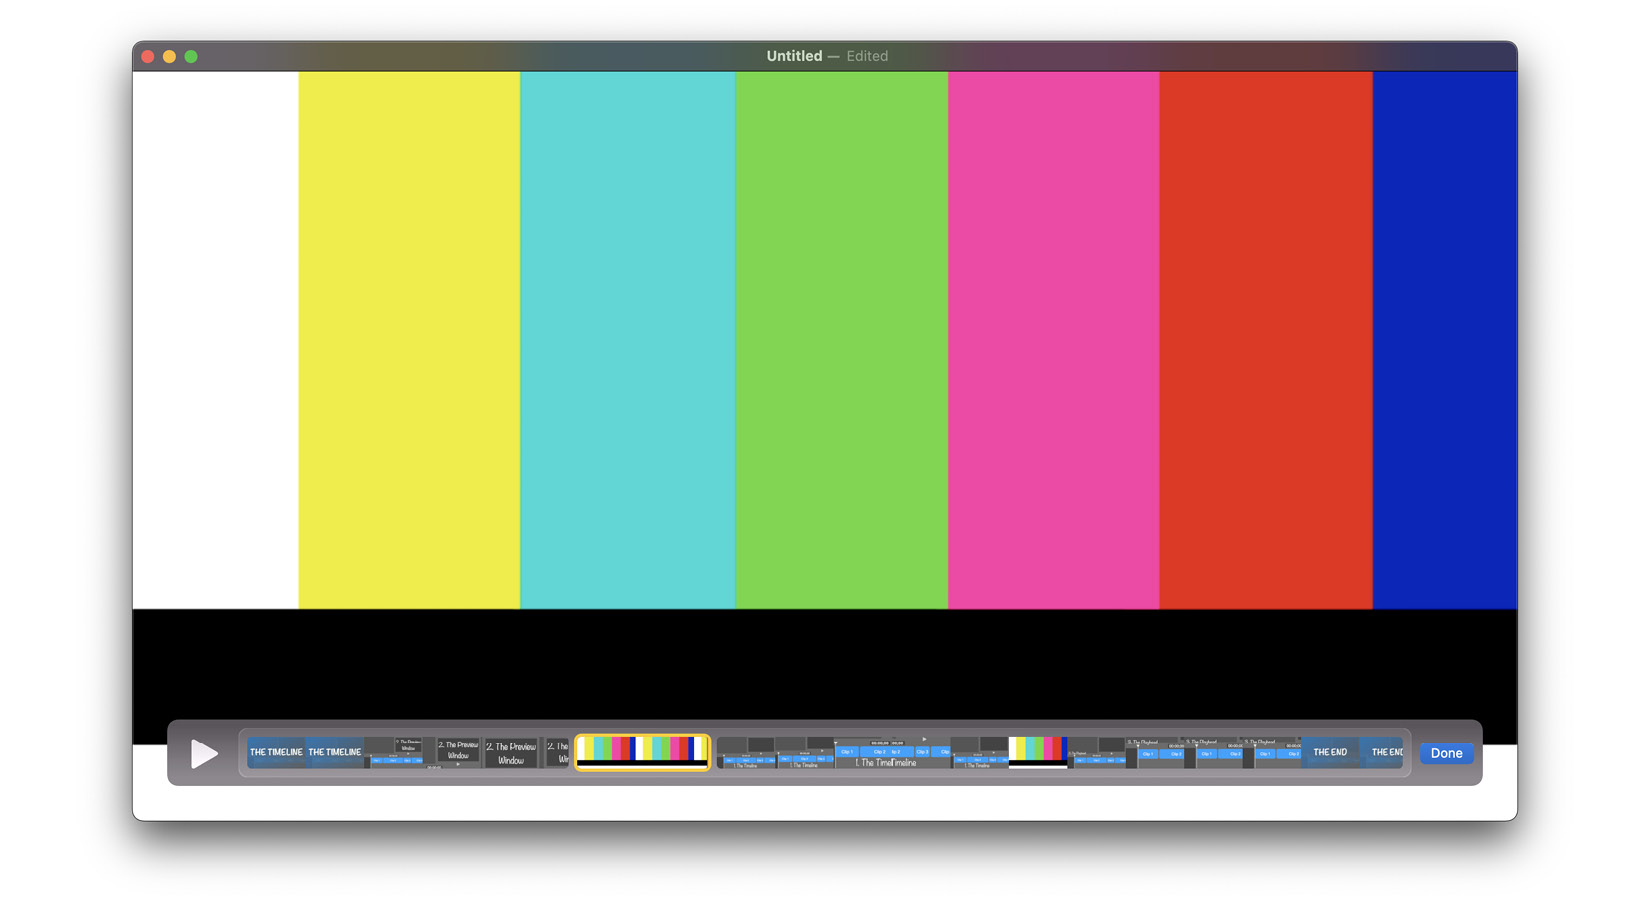
Figure 1.4 – Two splits have been made on either side of the color bars, isolating the bars into their own clip. That clip has been selected
- You can delete a clip with the backspace key. If you’re following along, do that for the color bars.
- If you’re following along, use steps 1-3 again to remove the other section of the video that’s just color bars.
So why use splitting instead of trimming? Trimming only lets you manipulate the in and out points of the video – where the edited version of the video will start and end. Splitting allows you to cut out sections in the middle of your video, like the trick you learn where folding a piece of paper lets you cut a shape out of the middle. Splitting can be helpful if, for example, you misspeak and have to repeat something in the middle of a clip.
Adding video and audio
You thought Clips mode stopped there? Oh no. Not only can you split and reorder your original video, but you can even add other videos and an additional audio track. This is what makes the QuickTime Player genuinely capable as a basic NLE. If you’re following along, you’ve made your The Timeline video coherent and concise; now, you can add meaning with an extra video clip and a voiceover:
- To add clips, make sure you’re in Clips mode (⌘ + E). If you’re following along, get the extra clip (
extra-clip_part-4_The-Media-Bin.mov) ready next to the QuickTime window (this is why I suggest having the file on your desktop). - To add the file to your video, click and drag the file over the video strip. The strip will move to make space for that file on the right or left of the clip, depending on which side you hover the video. Hover the extra clip between the third and fourth clips, as shown in Figure 1.5.
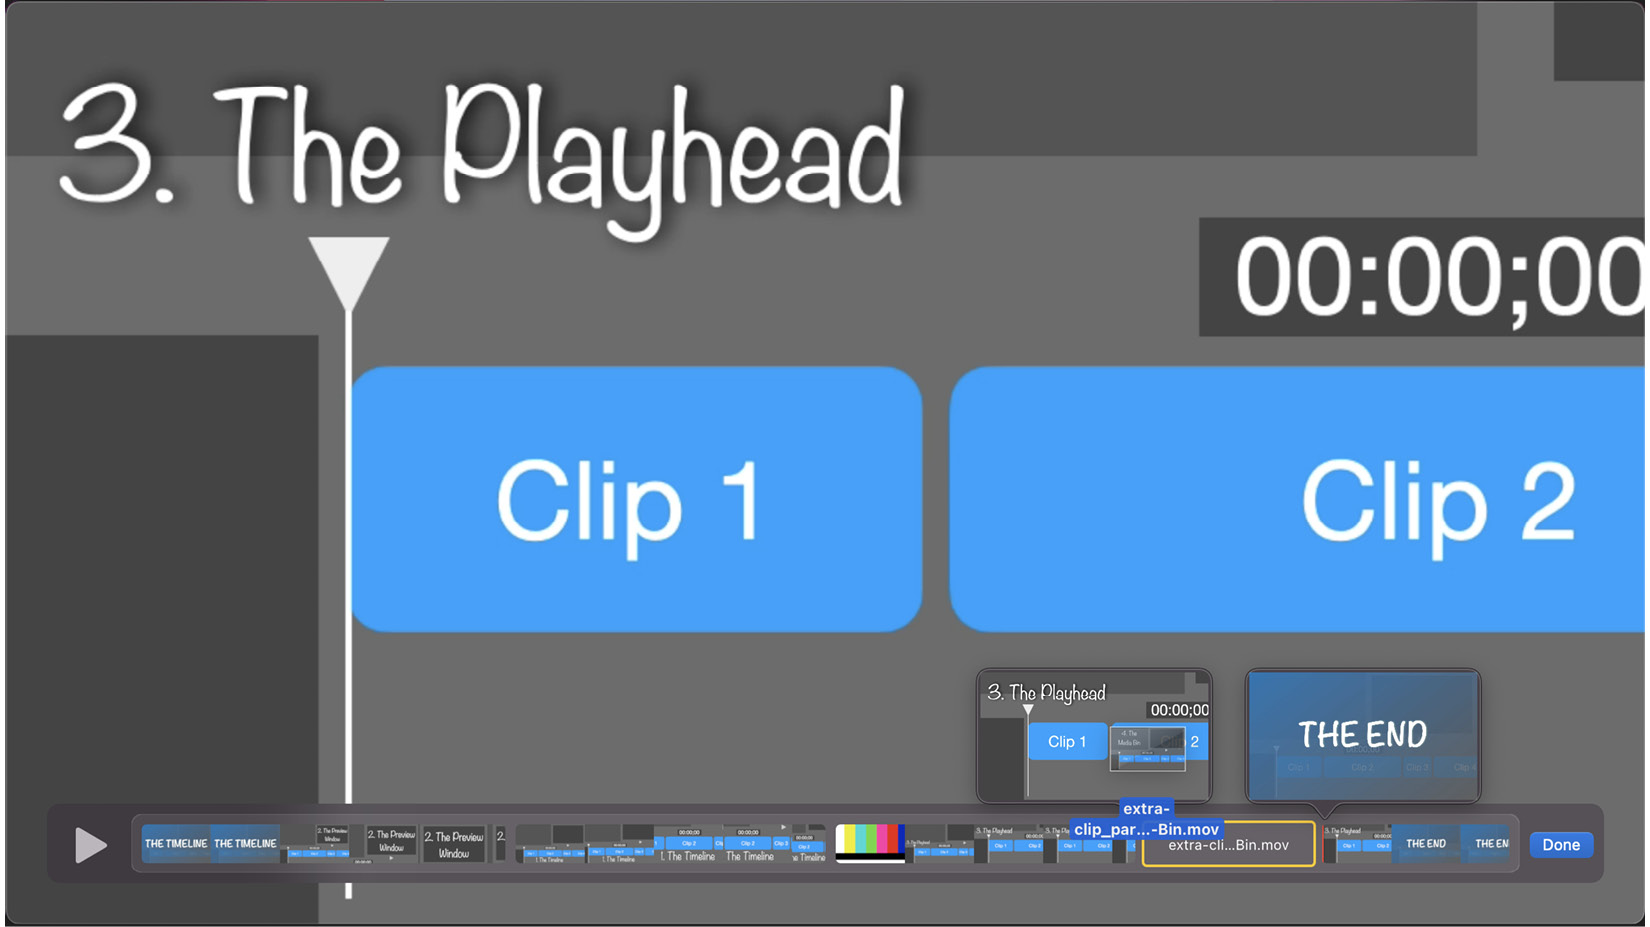
Figure 1.5 – If you hover the clip for long enough, little preview windows will show what’s in the clips on either side
- Simply drop the file to place the video – it’s now been added.
As promised, you can also add your own audio track underneath the video. You might do this to complement a vlog with music or to enhance a tutorial with a how-to explanation. Let’s finish off the interactive task by adding this audio:
- Drag an audio file (
The-Timeline_Audio.mp3if you’re following along) over the video strip. A new space will appear underneath the video for the audio to go into. - Drop the file: you now have an audio track underneath your video that will play at the same time. Figure 1.6 shows how this should look.
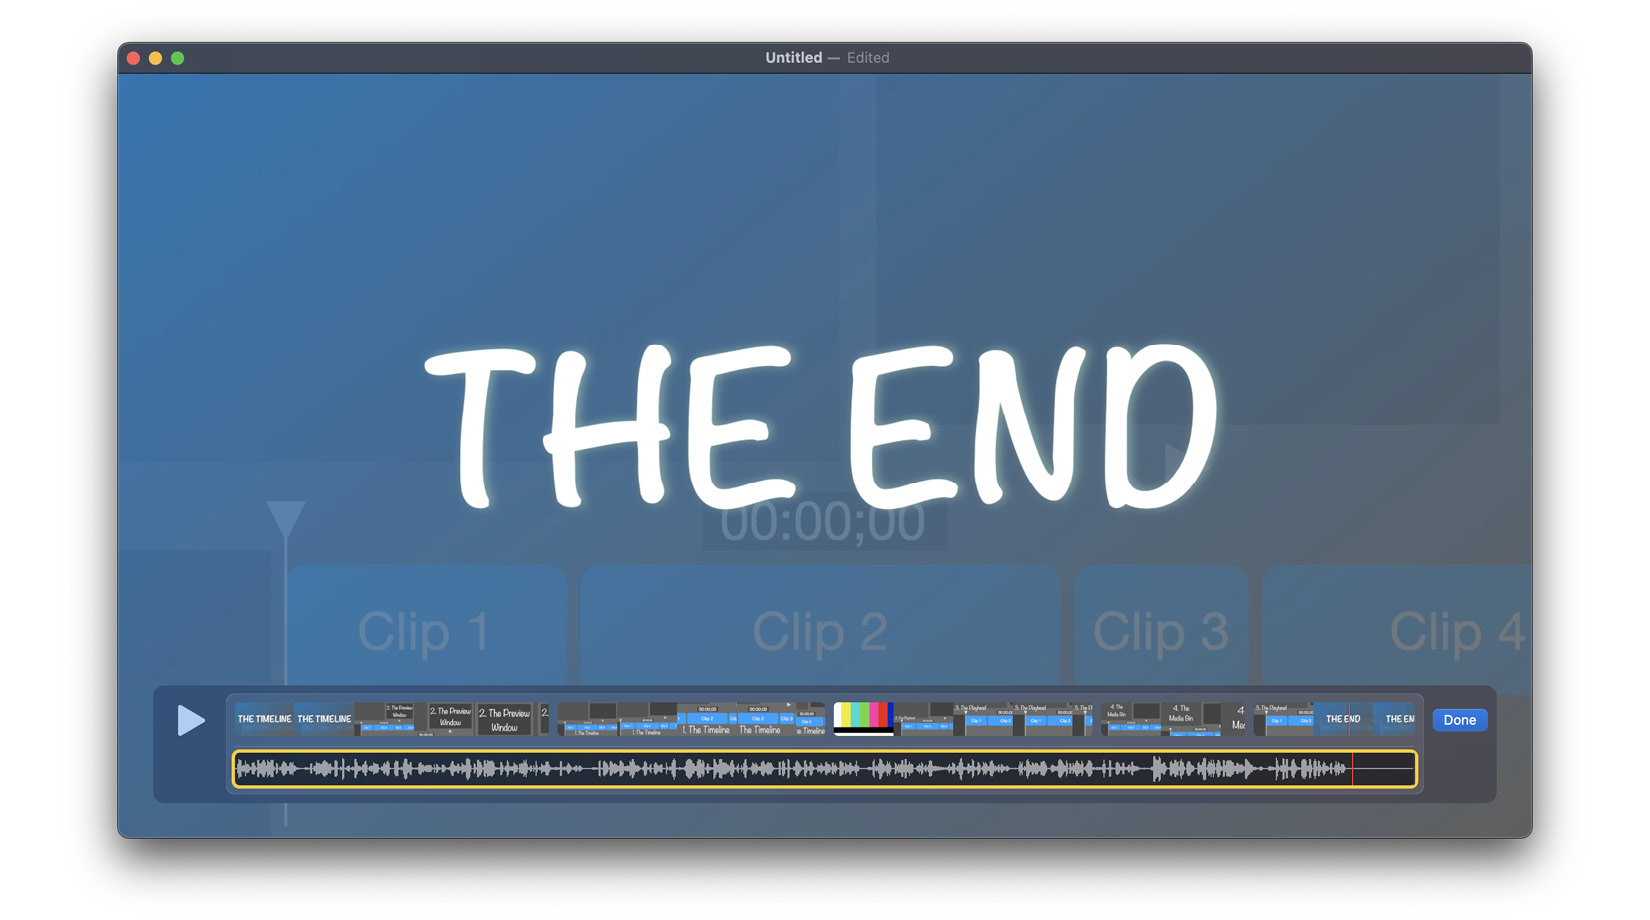
Figure 1.6 – Audio added below the QuickTime video strip
When you add the audio, it shows up as a waveform, which is how the clip’s loudness changes over time. Big, relatively consistent waveforms usually mean human speech or loud environmental noise. That’s what you can see in the waveform in Figure 1.6.
Do be aware that if your audio file is longer than the video, it will not stay at its original length; audio will always fit the size of the video in QuickTime by trimming off part of the end. Fear not, though, because you can trim audio files in the same way as video files:
- Right-click or ⌃ + click on an audio file and select Open With | QuickTime Player.
- Type ⌘ + T and use the trim handles to change the in and out points of the clip.
- Click Done when you’re happy.
- Save your changes by going to File | Export As | Audio only….
- Add the new audio clip to the original video.
Check how you’ve done
If you’re following along and have removed the right sections, you don’t need to worry about trimming the audio with QuickTime Player. The The Timeline audio (a mix of voiceover and music) will fit snugly from the beginning to the end of the video.
When you’re done, check The-Timeline_correct-video-audio to see how the final video is intended to look. Remember, editing isn’t an exact science – it’s about making audiences informed and entertained. So don’t worry if your video looks a little different!
Saving your finished video
When you make any changes to a video file, the name of the file will change to Untitled. This is because macOS likes to preserve the original file; your changes automatically become a new file. When you’re happy with your changes and additions, here’s how to save them:
- Click Trim (Trim mode), Done (Clips mode), or press Enter to save your changes.
- Save the new file by going to File | Export As | 1080p… in the menu bar, or save via the prompt when you click the red circle to close the QuickTime Player window.
If you want to only save the audio portion of the video, or remove the audio from a video, you can do this with QuickTime too, by going to Edit | Remove Video (or Audio) in the toolbar. You might want to do this if you have a screen recording with background noise that you don’t want to share.
Why choose QuickTime Player to make edits?
So why would you choose this limited set of tools instead of going straight into iMovie? Well, quite simply, the simpler the system, the smoother it is, and the less that can go wrong. When you make changes as part of QuickTime Player, you can save the file and – usually within a few seconds – have a finished, edited video.
When you edit in an NLE, the process is a lot more complex. First, you need to import footage, which will fill up extra space on your Mac’s hard drive. When you finish editing, you then have to render your changes, which is the process of the NLE turning your timeline into a playable video file. That process can take anywhere from minutes to hours, exponentially longer than just saving changes to a file. So if you’re only planning on making simple changes such as cutting out mistakes and adding audio, or you have to make small edits to tens or hundreds of individual videos, editing within a file via QuickTime Player can save you a huge amount of time.
But, of course, not all edits are going to be that simple. You’ll often need to add extra information through titles or graphics or direct the audience’s attention by zooming into a specific part of the video frame to effectively tell the story you want to. You may have noticed that this happens in the The Timeline video you followed along with. For these kinds of changes, you’ll need to use a proper NLE workflow, which we’ll cover starting in Chapter 3 through to Chapter 6.
What about iOS and iPadOS?
Because QuickTime Player is only available on macOS, unfortunately, you can’t split and combine videos using iOS or iPadOS as you would with QuickTime Player. However, you can trim media in the Photos app. The following steps show you how:
- Open the Photos app on your device.
- Tap a video and select Edit at the top right. There you can move the trim handles to change the in and out points of the video, as shown in Figure 1.7.
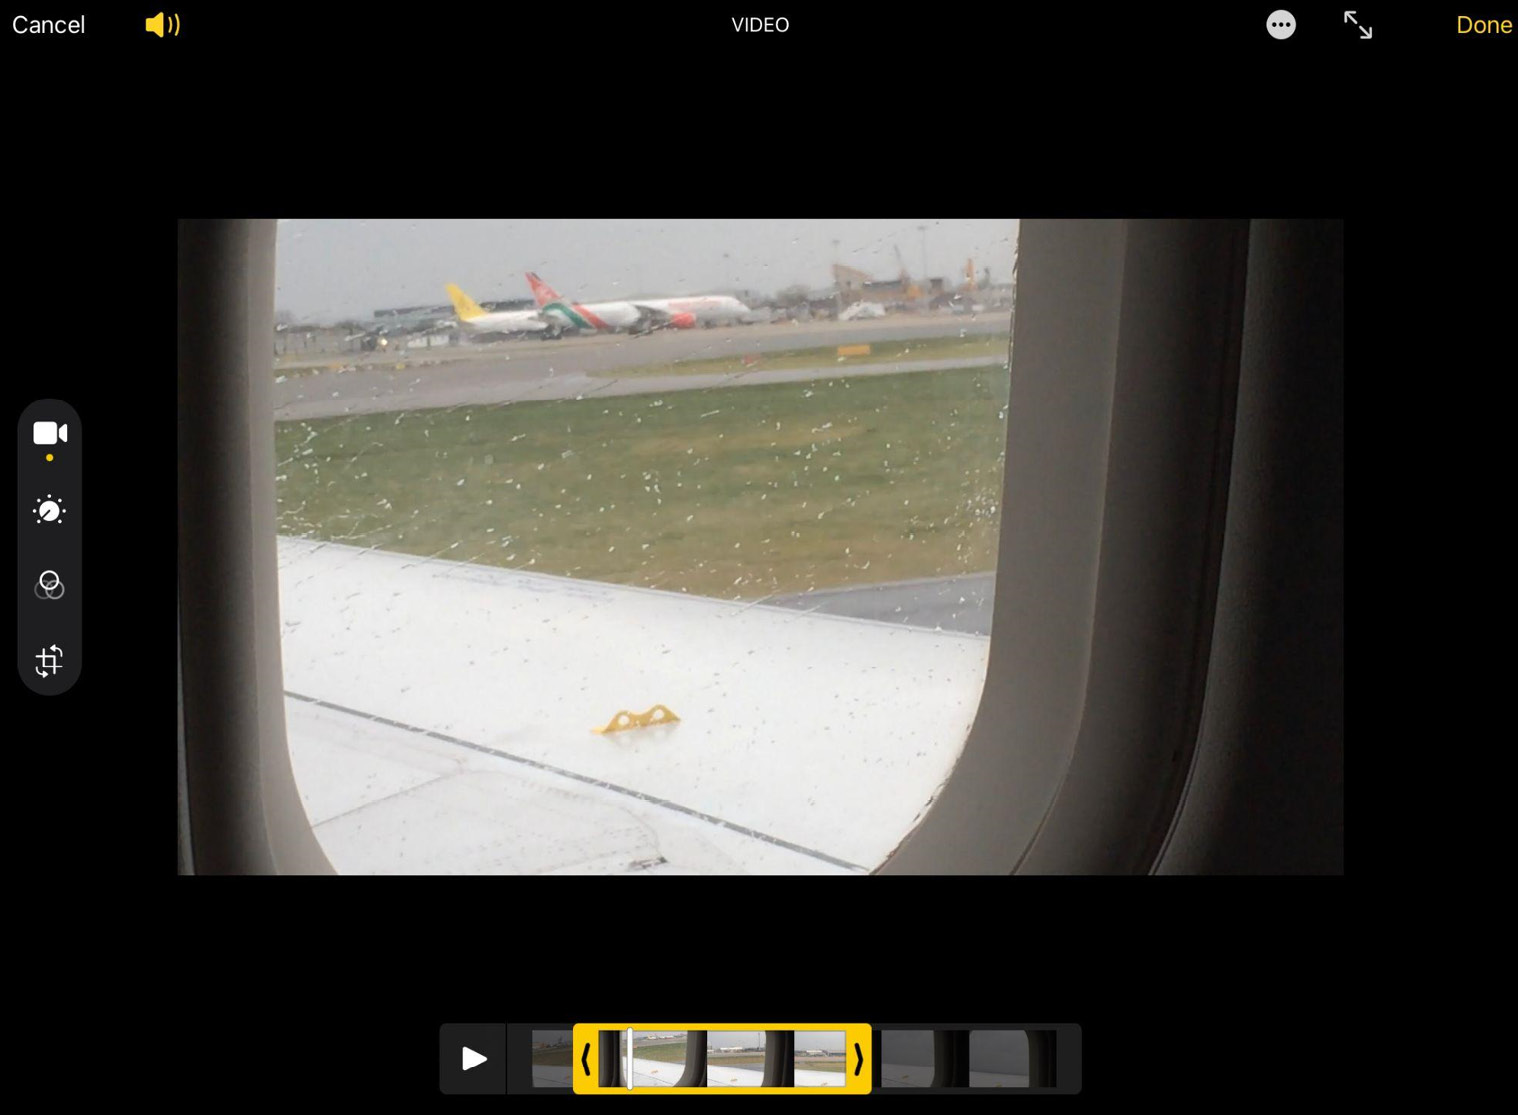
Figure 1.7 – Trimming video using the Edit menu in the iOS/iPadOS Photos app
- Tap Done, and you are given two options: Save Video or Save Video as New Clip. Here’s a bit about each to help you choose:
- Saving the video lets you play your shortened video in Photos and exports the shortened version if you share the video, but keeps the whole video preserved in case you go back into the
Editmenu later or you want to import the whole video to iMovie. - Saving the video as a new clip permanently removes the grayed-out footage beyond the trim handles in the new video. The original is saved separately with no changes.
- Saving the video lets you play your shortened video in Photos and exports the shortened version if you share the video, but keeps the whole video preserved in case you go back into the
Unfortunately, there is no Clips mode in Photos, meaning that you can’t cut out a section in the middle of your video. Although in-file splitting and combining of clips aren’t possible on mobile devices, there are convenient alternatives within iMovie for iOS and iPadOS. Splitting and combining clips using Magic Movie (which we’ll look at in Chapter 2) is a reasonably quick and easy alternative.


