Setting up the Eclipse IDE
Eclipse is an IDE, which is used mostly for Java development. In order to avoid switching screens between Eclipse and your browser, you can simply install the AWS plugin for Eclipse. In this recipe, we are going to see how to set up this plugin, and how to use it to perform various DynamoDB operations.
Getting ready
The first thing you need to do is install Eclipse on your laptop/desktop. The latest version from Eclipse can be downloaded from https://eclipse.org/downloads/. You need to select the Eclipse IDE for Java developers. Simply extract the ZIP file, and you are ready to go.
How to do it…
To install the AWS Explore plugin in Eclipse, we need to perform the following steps:
- Open Eclipse, and go to Help | Install New Software.
- In the Work with box, type http://aws.amazon.com/eclipse, and press Enter.
- Select AWS Toolkit for Eclipse, and install the plugin:

- Once done, it will prompt you to restart Eclipse. On restart, it will give you a popup to enter your AWS Access Key and Secret Key. We have already seen how to get the AWS Access Key and Secret Key for your account. Enter this information, and you are ready to use the AWS Explorer.
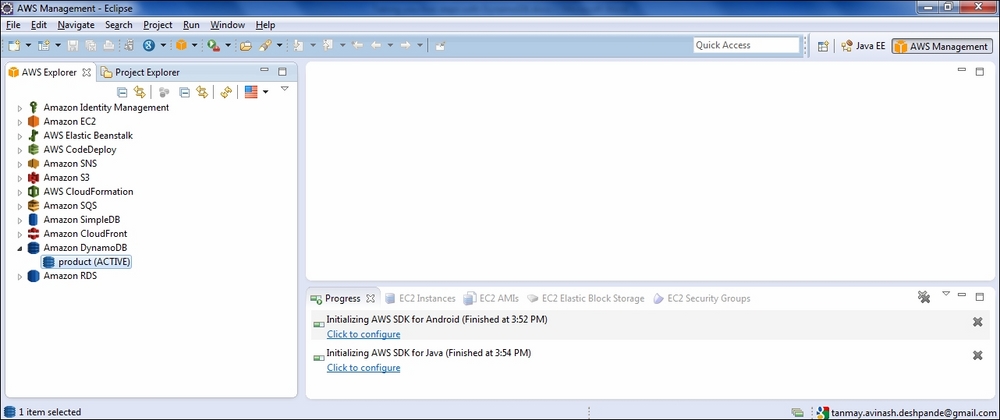
- Now, you can open the AWS Explorer. By selecting Amazon DynamoDB, you will be able to see the table that we created earlier:

- Now, we can perform the Scan operation by specifying the conditions. For example, to get all the items of the type
book, we can do something like this:
Now you can perform the various queries using this AWS Explorer.
How it works…
The AWS Explorer for Eclipse uses the Java SDK internally to make calls to DynamoDB and shows the results to us. It authenticates each call using the Access Key and Secret Key that we provided at the time of configuration.


