Search icon CANCEL
Subscription
0
Cart icon
Your Cart (0 item)
Close icon
You have no products in your basket yet
Arrow left icon
Explore Products
Best Sellers
New Releases
Books
Videos
Audiobooks
Learning Hub
Free Learning
Arrow right icon
Arrow up icon
GO TO TOP
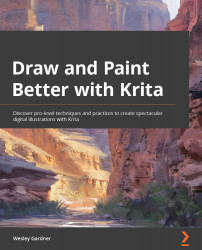
Draw and Paint Better with Krita

You're reading from   Draw and Paint Better with Krita Discover pro-level techniques and practices to create spectacular digital illustrations with Krita

Arrow left icon
Product type Paperback
Published in May 2022
Publisher Packt
ISBN-13 9781801071765
Length 426 pages
Edition 1st Edition
Tools
Arrow right icon
Author (1):
Arrow left icon
Wesley Gardner Wesley Gardner
Author Profile Icon Wesley Gardner
Wesley Gardner
Arrow right icon
View More author details
Toc

Table of Contents (18) Chapters Close

Preface 1. Part 1: Intro to Krita and Digital Art Terminology Review
2. Chapter 1: Getting Started with Krita FREE CHAPTER 3. Chapter 2: Reviewing Canvas Properties and Color 4. Chapter 3: Utilizing Layers and Layer Groups 5. Chapter 4: Utilizing Brushes and Tools 6. Part 2: Methods of Visual Communication within Krita
7. Chapter 5: Implementing Layer Blending Modes 8. Chapter 6: Composing Using Krita's Toolbox 9. Chapter 7: Changing the Feel with Painting, Values, and Sliders 10. Chapter 8: Controlling Chaos – Organizing Your Workflow 11. Part 3: Projects Unleashing Your Inner Artist with Krita
12. Chapter 9: Setting Up a Still-Life Study 13. Chapter 10: Enforcing Fundamentals 14. Chapter 11: Working with Concept Art 15. Chapter 12: Refining and Creating Cinematic Concept Art 16. Chapter 13: Going beyond These Pages 17. Other Books You May Enjoy

Summary

During this chapter, we used a variety of tools to clean up and refine not only our image but our decision-making process as well.

First, we learned about masks and used the Transparency Mask feature to mask out weird visual information from our photograph layers. We then used some selection tools to further clarify our shapes, adding some sheets of ice and sharpening up some of the jagged edges of our mountains. Once our composition was a little cleaner, we then discovered the Assistant Tool to overlay a perspective grid for our reference when creating sheets of ice on our lake. Then, we created a merged copy of what we had and applied some rich brushwork, blending our hues and value control, pushing our piece to more of a "painterly" feel.

In Chapter 7, Changing the Feel with Painting, Values, and Sliders, we're going to take our painting to the finish! We will learn about color toning, color gamuts, brightness and contrast filters, and some tricks we...

lock icon The rest of the chapter is locked
Register for a free Packt account to unlock a world of extra content!
A free Packt account unlocks extra newsletters, articles, discounted offers, and much more. Start advancing your knowledge today.
Unlock this book and the full library FREE for 7 days
Get unlimited access to 7000+ expert-authored eBooks and videos courses covering every tech area you can think of
Renews at $19.99/month. Cancel anytime
Banner background image