Configuring the navbar
In this section, we'll set up the navbar items for our site pages, and we'll also go ahead and add the markup for the navbar.
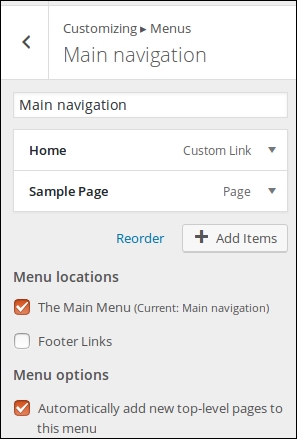
Click on the Customize button on the theme page again. Under Menus create a new menu called Main navigation, Check both The main menu as location and Automatically add new top-level pages to this menu under menu options:

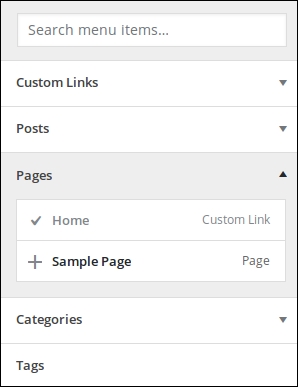
Then add some items under the menu. Select both the Home and Sample Page under the Pages option:

Now press the Save & Publish button and close the customizer after that.
The main navigation of our example template has four menu links and a photo in the middle, so we'll have to add two more pages. We'll add the photo later on.
In your WordPress Dashboard, navigate to Pages | Add new and add two new pages.
Finally, the Navigation bar should look like that shown in the following screenshot:

In the next section, you will reuse the HTML and Sass code from Chapter 3, Customizing Your Blog with Bootstrap and Sass.


