


Using fullscreen shaders in URP
Before we get to actually creating fullscreen shaders, let’s take a second to see how this kind of shader works in URP, and in particular how this render pipeline evolved to gradually make this feature easier and easier to use.
In this first section, we’re going to have a quick look at the old way of doing things with the built-in render pipeline, and then we’ll see how the URP pipeline changed over the years to eventually incorporate fullscreen shaders as a readily available tool.
The case of the built-in render pipeline
In the past, any shader creator who worked with the built-in render pipeline was fairly pleased to create a fullscreen effect shader, because it was simple. You would just need to do three things:
- Prepare your screen shader.
- Create a new material asset using this shader.
- Add a
MonoBehaviourscript to your scene camera object containing theOnRenderImagefunction, to essentially apply this material on the scene render, thanks toGraphics.Blitbeing built in, with a structure such as the following:using UnityEngine; [ExecuteInEditMode] public class CameraPostProcessing : MonoBehaviour { public Material postProcessingMaterial; public void OnRenderImage(RenderTexture src, RenderTexture dest) { Graphics.Blit(src, dest, postProcessingMaterial); } }
Note that here, the [ExecuteInEditMode] attribute allows us to preview the result of the shader on the scene render live in the editor, without having to start Play mode first.
This meant that in just a few minutes, you could prepare and set up your scene with a nice fullscreen effect totally customizable via your shader code, and you would only manipulate basic shaders, materials, and scripts – or in other words, classic graphics-related objects that you were used to.
But then, the new SRP pipelines arrived, and people started switching over to the URP as time went by... and got a bit stuck when it came to creating screen effect shaders. You could still find some workarounds with custom renderer features (which we studied in Chapter 5 and Chapter 8, for example), yet there wasn’t a straightforward built-in tool to handle this use case anymore.
That is, until version 14 of URP came out.
Switching our fullscreen effects over to URP
In the most recent versions of Unity, starting with Unity 2022.2, the Universal RP package (which, as you might remember from Chapter 2, defines all the core objects necessary for using the URP pipeline in your project) now contains very cool features that make it easy to create custom postprocessing effects using shaders.
In short, ever since version 14 of the Universal RP package, we’ve had two new objects at our disposal in our technical artist’s URP toolbox – the Full Screen Pass Renderer Feature object and the associated Fullscreen Shader Graph template.
First, ensure that you are using the Universal RP 14+ version in your Package Manager window, as shown in Figure 14.1:
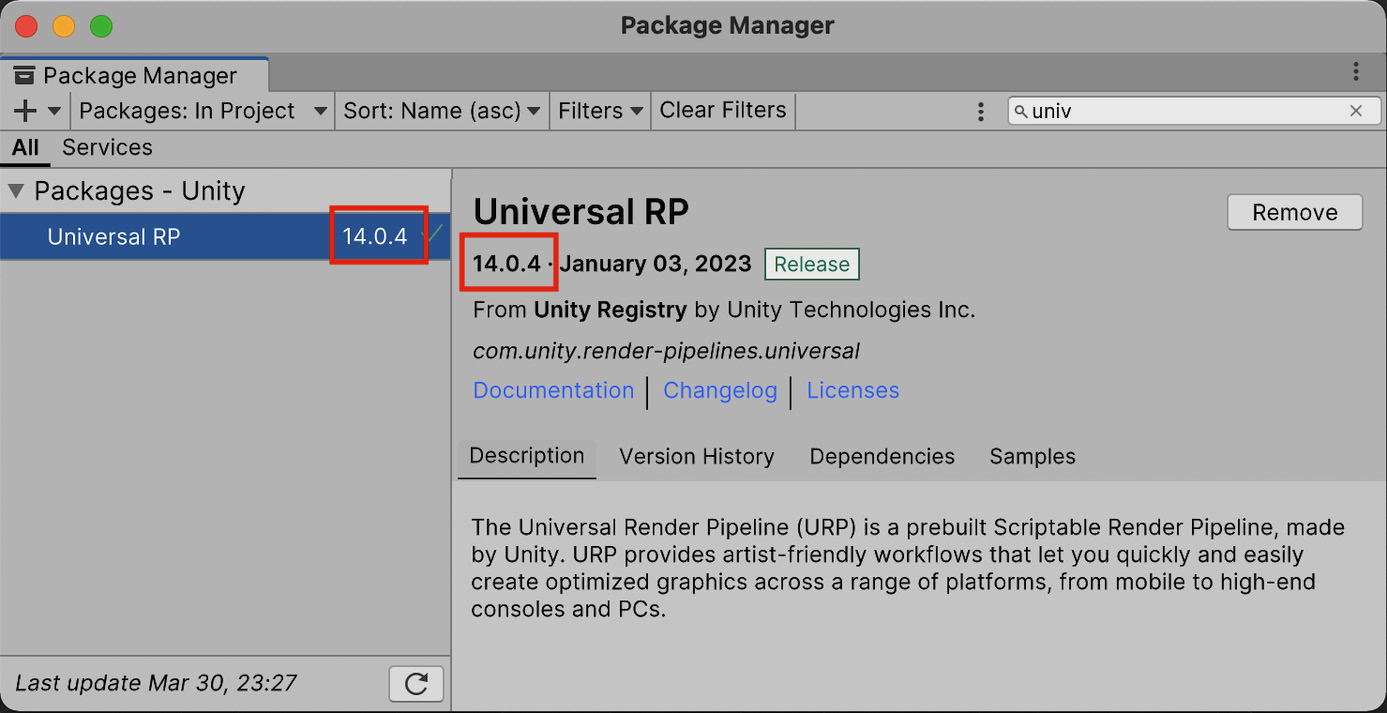
Figure 14.1 – Universal RP package in the Package Manager in version 14.0.4
Then, you will have access to a new URP shader template, called Fullscreen Shader Graph, in the contextual Create | Shader Graph | URP menu:
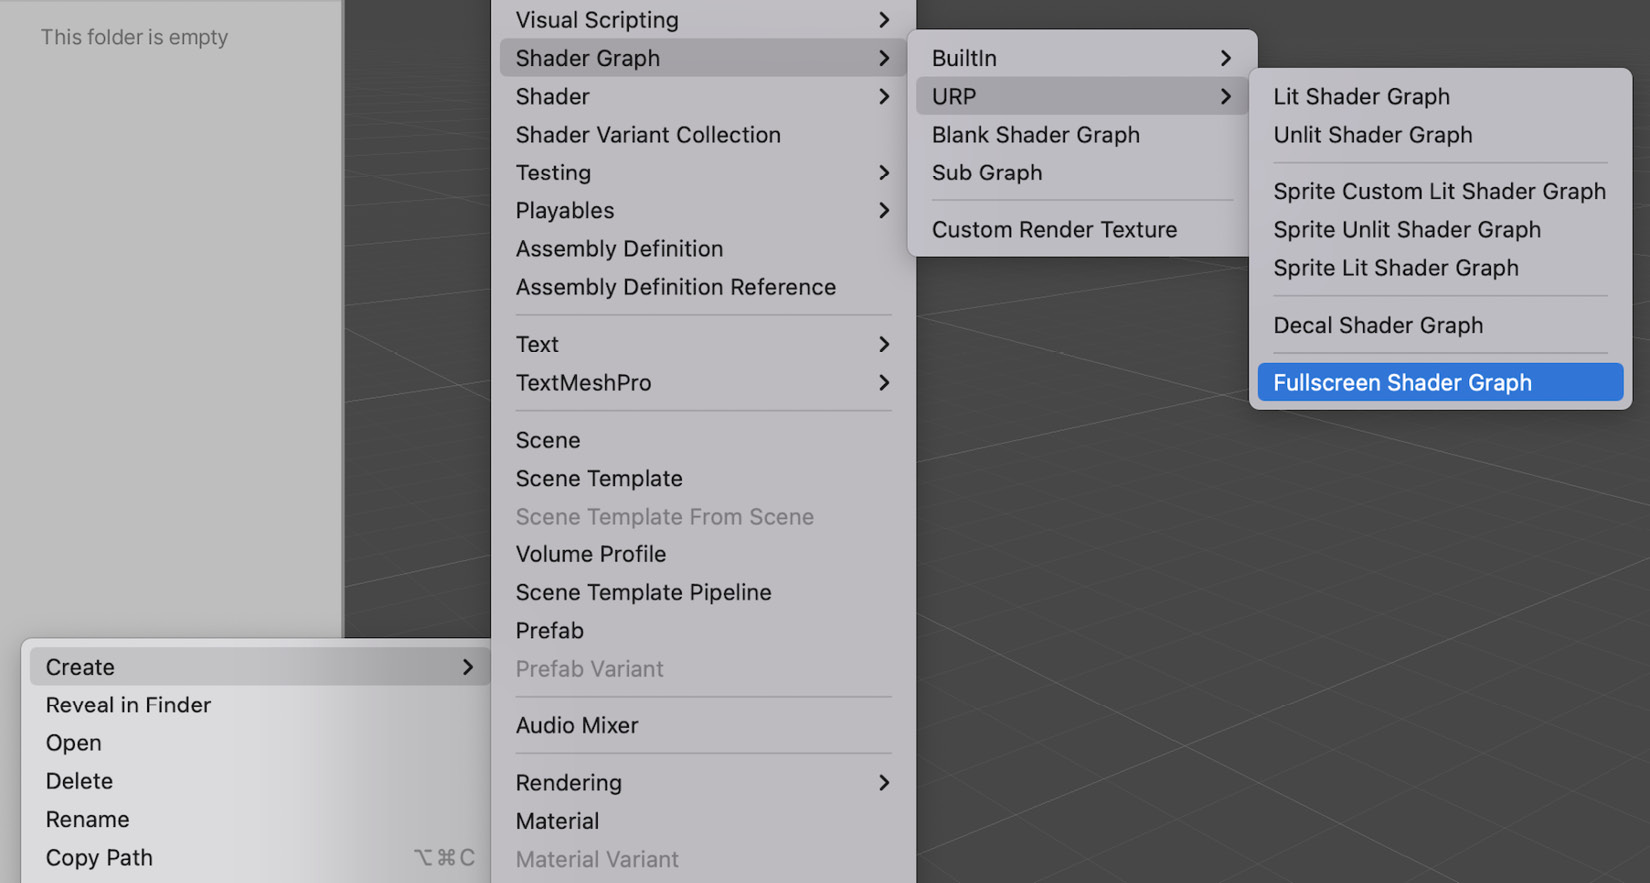
Figure 14.2 – New contextual menu item for the Fullscreen Shader Graph URP template
If you click on this menu item to instantiate a new Shader Graph in your project using this template, and you open it in the Shader Graph editor, you’ll see in the Graph Settings window that the type of this shader is set to Fullscreen, and we just have two outputs in the Fragment context – Base Color and Alpha.
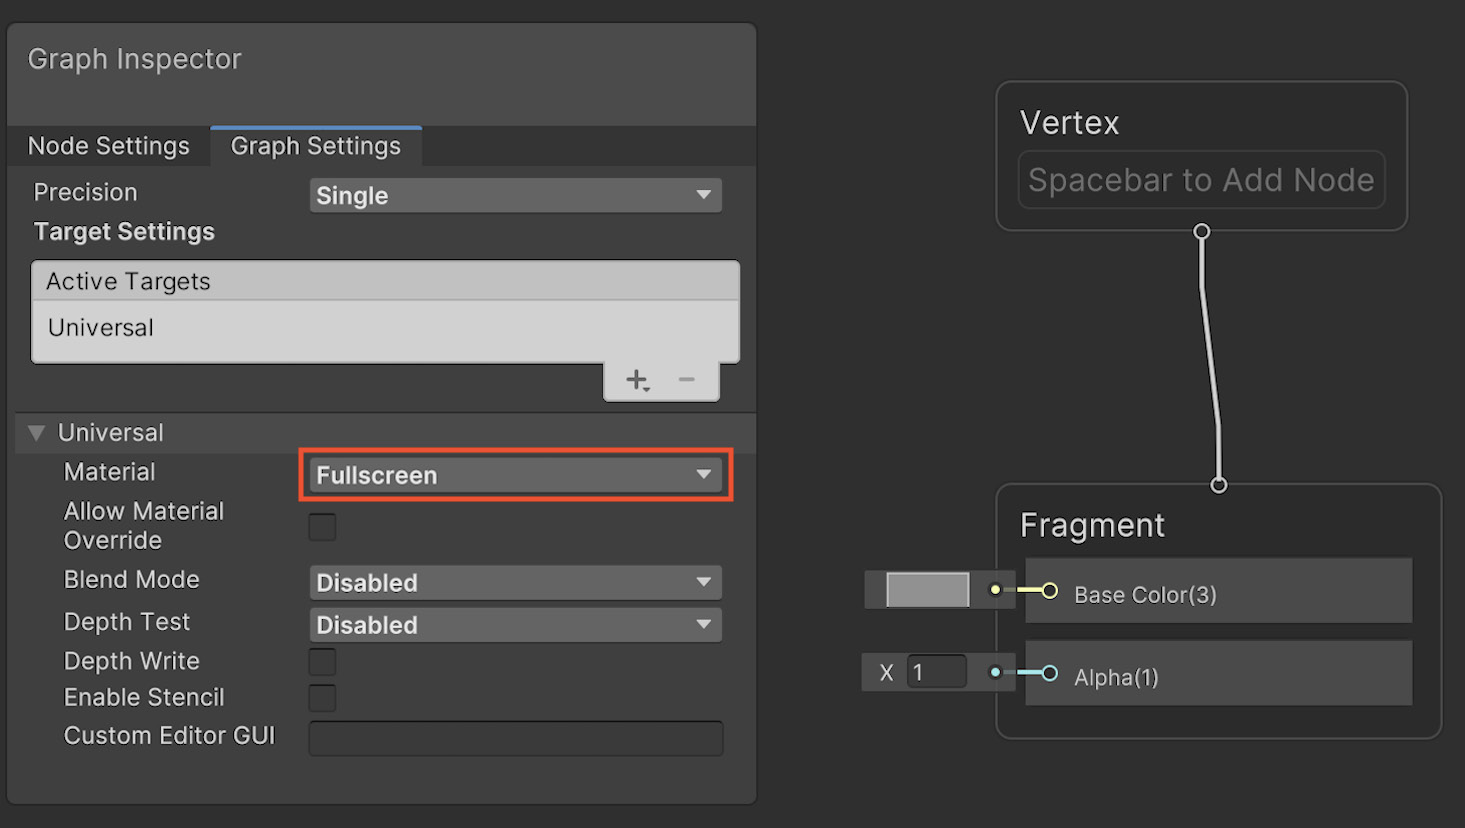
Figure 14.3 – Base graph for a Shader Graph asset based on the Fullscreen Shader Graph template
To put it in another way, in just one click, we created a new URP shader that can be edited via the beginner-friendly node graph system and works perfectly as a fullscreen effect shader.
Except that, to really apply this shader to our scene render, we’re going to need the second feature in our toolbox – the Full Screen Pass Renderer Feature object.
For this example, and the rest of the chapter, we’ll assume that we have a simple 3D scene containing three primitives and a default skybox, like this one:
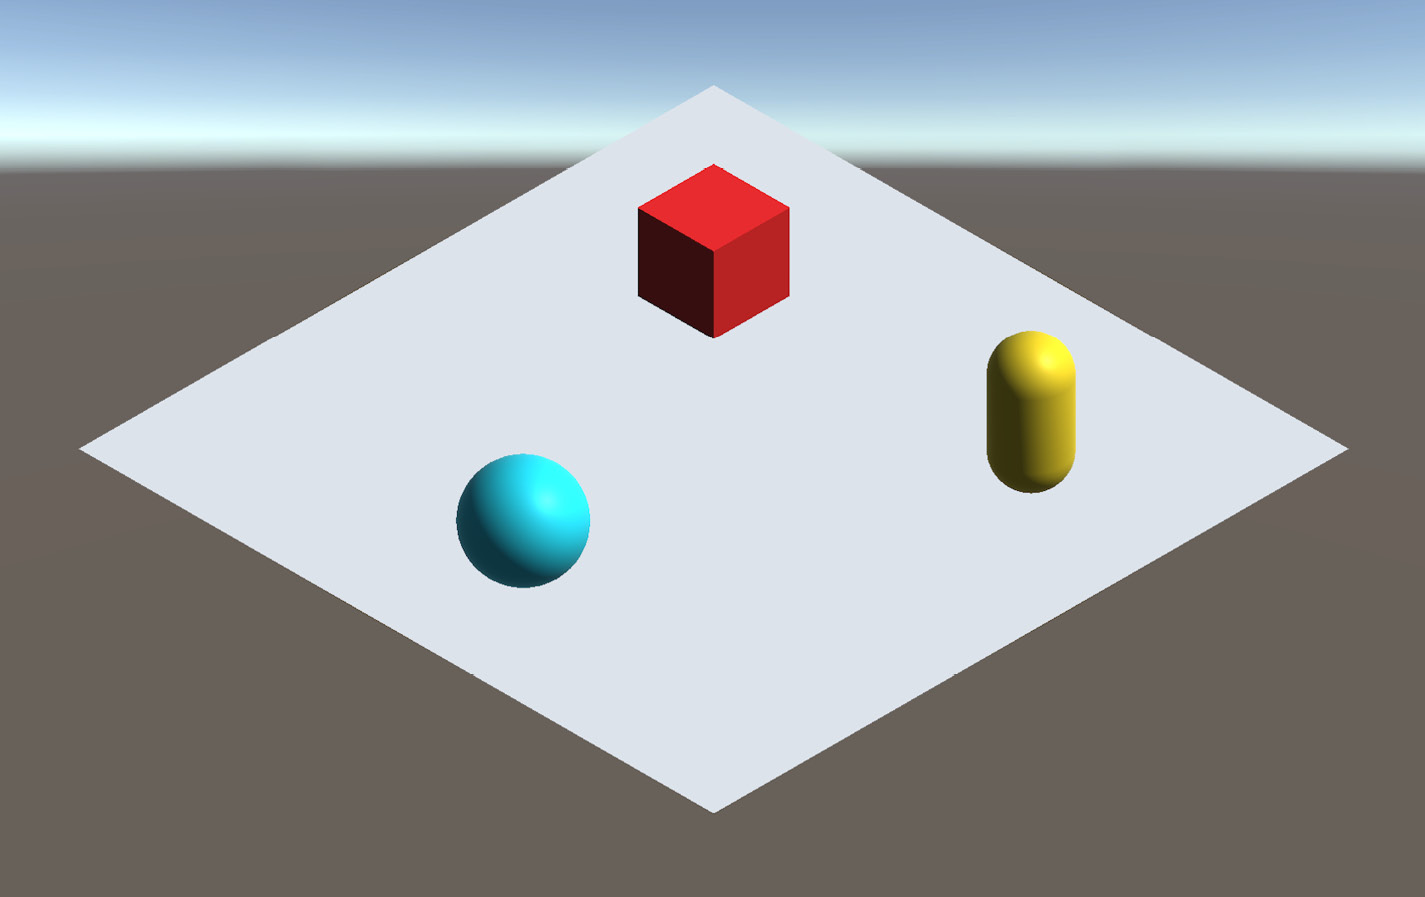
Figure 14.4 – Demo scene with a few primitives and a default skybox
Moreover, something neat is that the Universal RP 14+ package actually comes bundled with a FullscreenInvertColors material (based on a basic color invert fullscreen effect URP shader), which we can use directly to test the feature and check everything works properly.
So, just like any other custom URP renderer feature, we just have to add the Full Screen Pass Renderer Feature object to the settings asset of the project’s URP pipeline. This is done by selecting the asset and examining its Inspector – here is the updated asset with the new renderer feature added and the FullscreenInvertColors material loaded in as the custom postprocessing fullscreen effect:
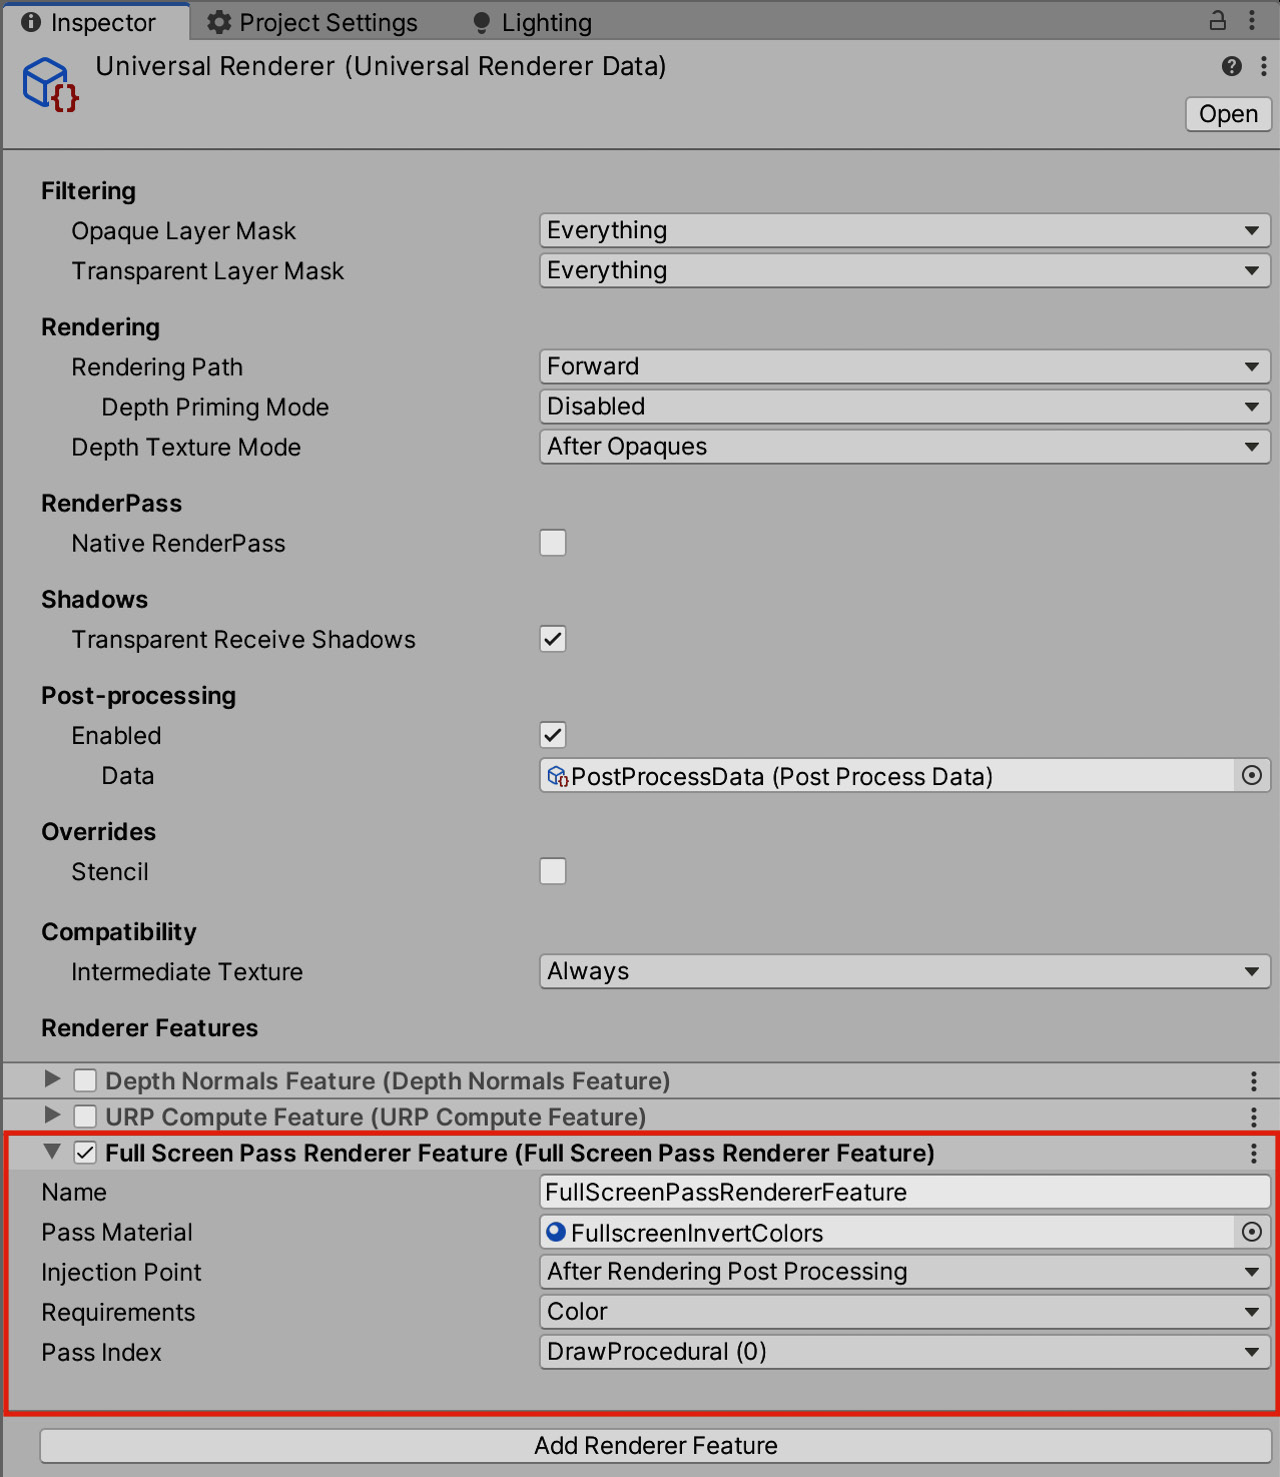
Figure 14.5 – URP settings asset to use the FullscreenInvertColors material as a fullscreen effect
Figure 14.5 shows that the Full Screen Pass Renderer Feature object relies on a material asset – which is equivalent to the postProcessingMaterial variable used in the previous snippet, in the case of the built-in render pipeline – and offers a few interesting options (for more information, see the official documentation at https://docs.unity3d.com/Packages/com.unity.render-pipelines.universal@14.0/manual/renderer-features/renderer-feature-full-screen-pass.html):
- Injection Point: This determines when the effect will be rendered in the render process
- Requirements: This selects some additional passes necessary to the shader logic used by this renderer feature
- Pass Index: This selects a specific pass inside the material used by this renderer feature
And that’s it! If you look back at your Scene or Game view (both get updated instantly when you enable the renderer feature, and both get the screen effect applied), you’ll notice that the colors are now inverted, thanks to the FullscreenInvertColors-based custom postprocessing:
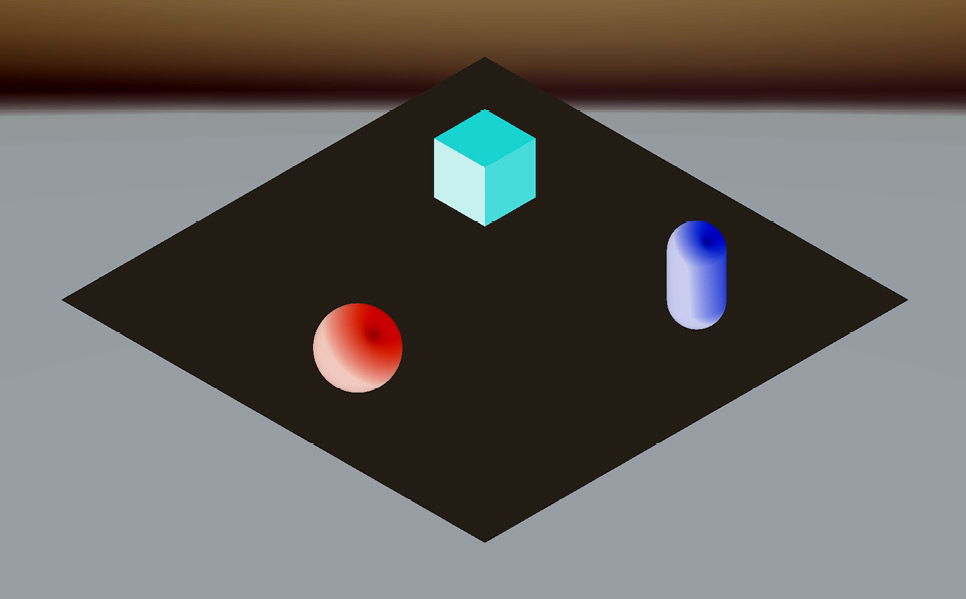
Figure 14.6 – Demo scene with the fullscreen color inversion effect applied
This is great because it allows us to keep our usual shader creation workflow. Simply picking the right shader type in our Graph Settings panel inside the Shader Graph editor makes assets that can be used in this renderer feature instantly work as fullscreen effects.
Of course, the next step is to see how to truly create our own effects, instead of just using a ready-made color inversion filter. That’s why we’re going to study a similar effect in more detail and discuss how to use these tools to desaturate the scene render.
A little example – turning our render grayscale
Alright – now that we’re a bit more familiar with the process of making a URP fullscreen shader, let’s apply this in practice. The first effect will be extremely simple: we’ll just reduce the saturation of the output frame to 0 in order to make the image black and white.
This will allow us to explore how to set up a fullscreen shader in URP step by step and configure the pipeline to use it; plus, we’ll have a look at the base Shader Graph node for fullscreen effects.
To start off, let’s create our Grayscale shader asset. It will be a Shader Graph asset like all the others except, this time, it uses the new Fullscreen Shader Graph URP template (see Figure 14.2). If we open it in the Shader Graph editor, we get back the default fullscreen shader graph shown in Figure 14.3.
The first step is to get back the initial render frame – this is the original image produced by Unity based on the current scene camera properties that is displayed by default if we don’t apply any screen effect shader.
To get this image, we can use the built-in URP Sample Buffer node with the Source Buffer dropdown set to the BlitSource value:
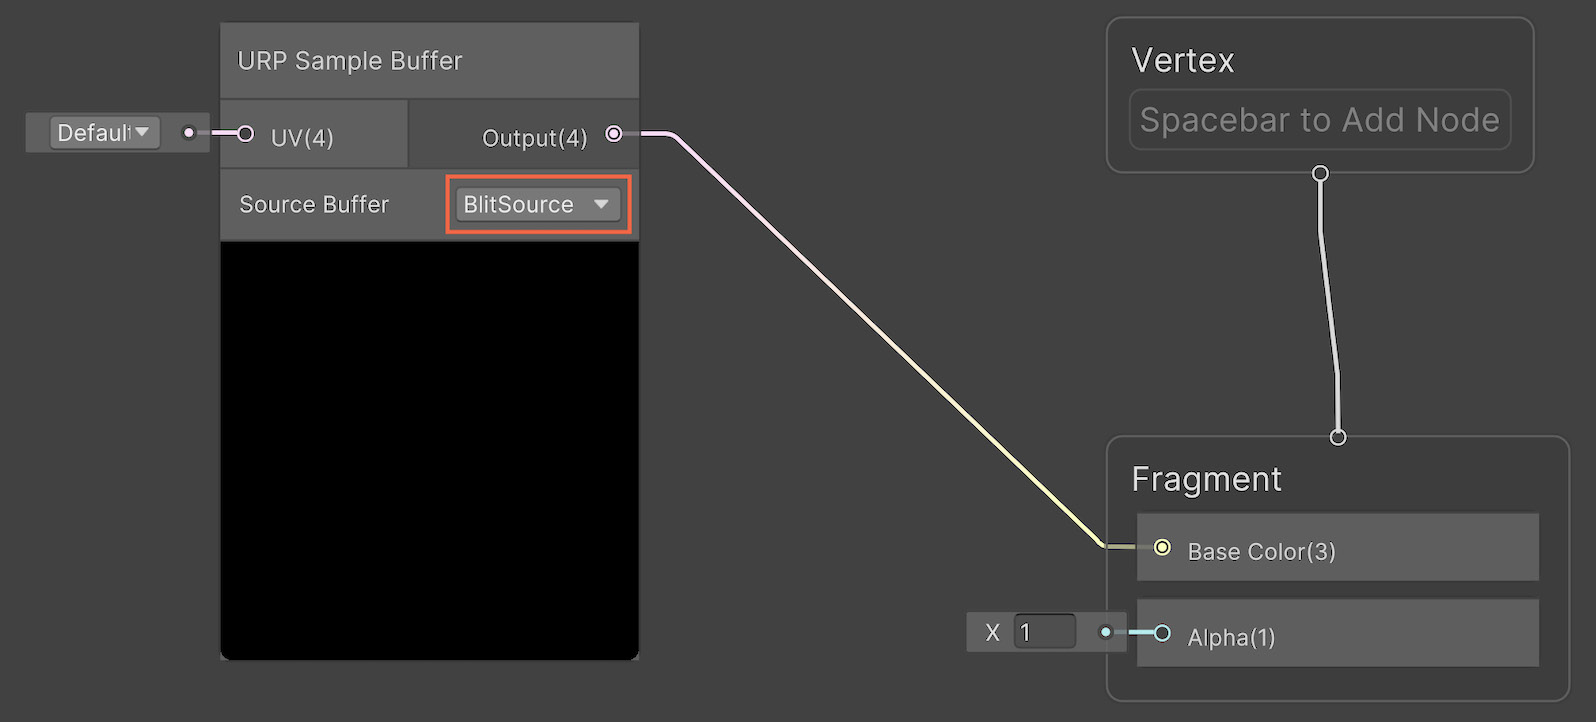
Figure 14.7 – Basic URP fullscreen shader using a URP Sample Buffer node
If we connect the output of this node to the Base Color output of our shader (in the Fragment context), then we’re basically transferring the original render as is.
So, let’s say that we create a material from our Grayscale shader and use it in our Full Screen Pass Renderer Feature, inside our URP settings asset:

Figure 14.8 – URP settings asset to use the Grayscale material as a fullscreen effect
As you can see in Figure 14.8, I have kept the other properties, such as Injection Point and Requirements, at their default values, After Rendering Post Processing and Color, respectively.
For now, the Scene and Game views remain exactly the same, but we’ve actually included our effect in the render process.
So now, we can integrate a Saturation node in our Grayscale shader graph, change the Saturation input to 0, and save the asset, like this:
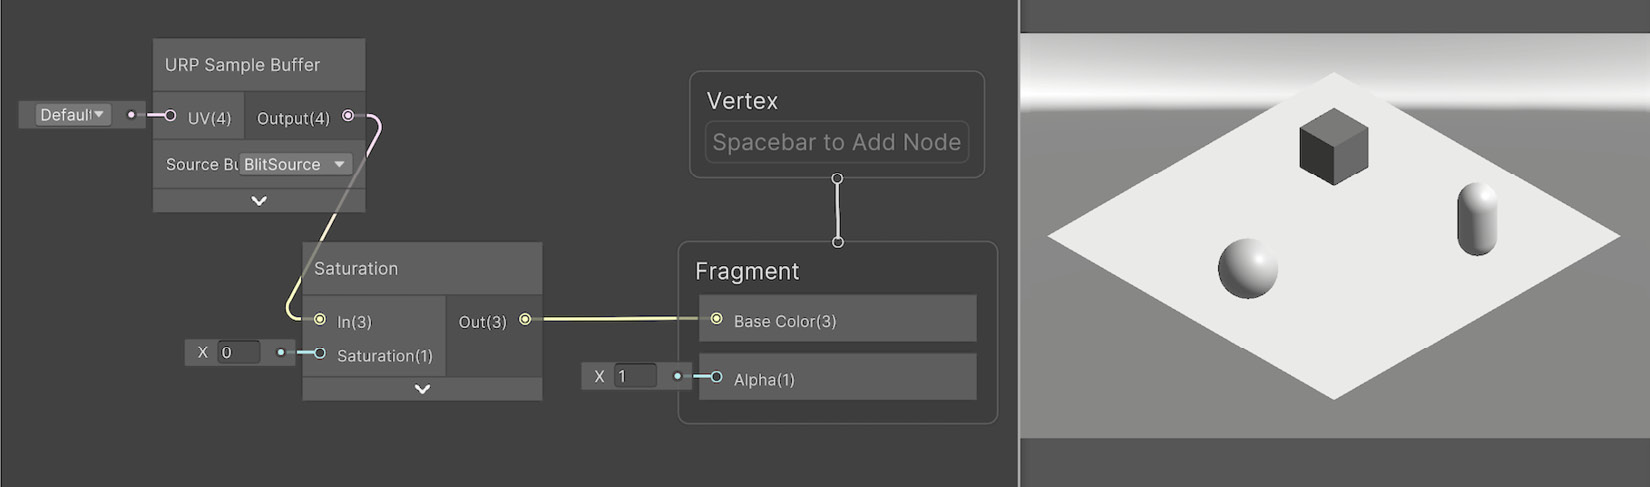
Figure 14.9 – Result and graph of the Grayscale shader
Then, as shown in Figure 14.9, our final image in the Scene and Game views indeed gets transformed into a black-and-white version.
We’ve thus successfully included our very own screen effect shader in Unity’s render process and discovered the URP Sample Buffer node, which makes it easy to retrieve the current original render image.
With this in mind, it is time to level up and set up a more interesting fullscreen URP shader – a security camera effect.


