Building with windows and views
We're going to start off with the very basic building blocks of all Titanium applications: windows and views. By the end of this recipe, you'll have understood how to implement a window and add views to it, as well as the fundamental differences between the two, which are not as obvious as they may seem at first glance.
If you are intending to follow the entire chapter and build the LoanCalc app, then pay careful attention to the first few steps of this chapter, as you'll need to perform these steps again for every subsequent app in the book.
Note
Note
We are assuming that you have already downloaded and installed Appcelerator Studio, along with XCode and iOS SDK or Google's Android SDK, or both.
Getting ready
To follow along with this recipe, you'll need Titanium installed plus the appropriate SDKs. All the examples generally work on either platform unless specified explicitly at the start of a particular recipe.
The quickest way to get started is by using Appcelerator Studio, a full-fledged Integrated Development Environment (IDE) that you can download from the Appcelerator website.
If you prefer, you can use your favorite IDE, such as TextMate, Sublime Text, Dashcode, Eclipse, and so on. Combined with the Titanium CLI, you can build, test, deploy, and distribute apps from the command line or terminal. However, for the purposes of this book, we're assuming that you'll be using Appcelerator Studio, which you can download from https://my.appcelerator.com/auth/signup/offer/community.
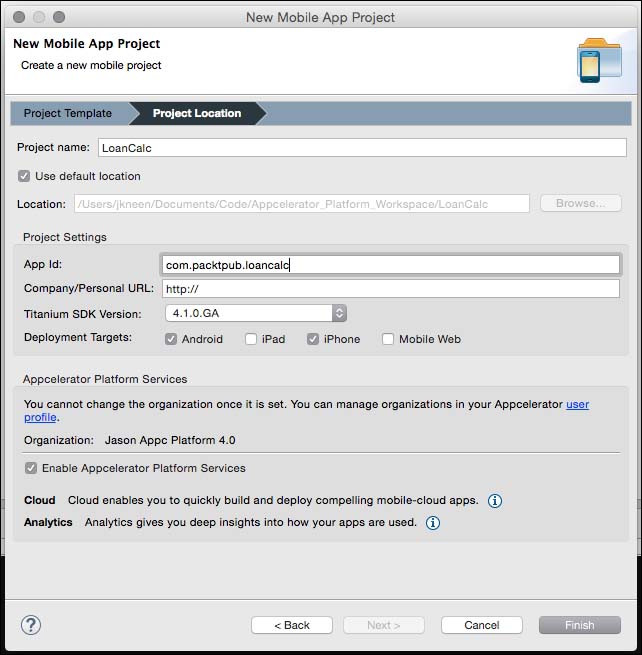
To prepare for this recipe, open Appcelerator Studio and log in if you have not already done so. If you need to register a new account, you can do so for free from within the application. Once you are logged in, navigate to File | New | Mobile App Project and select the Classic category on the left (we'll come back to Alloy later on), then select Default Project and click on Next. The details window for creating a new project will appear. Enter LoanCalc, the name of the app, and fill in the rest of the details with your own information, as shown in the following screenshot. We can also uncheck the iPad and Mobile Web options, as we'll be building our application for the iPhone and Android platforms only:

Note
Pay attention to the app identifier, which is written normally in backwards domain notation (for example, com.packtpub.loancalc). This identifier cannot be changed easily after the project has been created, and you'll need to match it exactly when creating provisioning profiles to distribute your apps later on. Don't panic, however: you can change it.
How to do it...
First, open the Resources/app.js file in your Appcelerator Studio. If this is a new project, the studio creates a sample app by default, containing a couple of Windows inside of a TabGroup; certainly useful, but we'll cover tabgroups in a later recipe, so we go ahead and remove all of the generated code. Now, let's create a Window object, to which we'll add a view object. This view object will hold all our controls, such as textfields and labels.
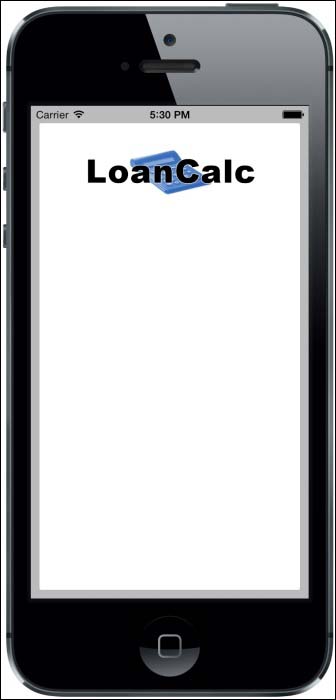
In addition to creating our base window and view, we'll also create an imageview component to display our app logo before adding it to our view (you can get the images we have used from the source code for this chapter; be sure to place them in the Resources folder).
Finally, we'll call the open() method on the window to launch it:
//create a window that will fill the screen
var win1 = Ti.UI.createWindow({
  backgroundColor: '#BBB'
});

//create the view, this will hold all of our UI controls
//note the height of this view is the height of the window //minus 20 points for the status bar and padding
var view = Ti.UI.createView({
  top: 20,
bottom: 10,
  left: 10,
  right: 10,
  backgroundColor: '#fff',
  borderRadius: 2
});


//now let's add our logo to an imageview and add that to our //view object. By default it'll be centered.
var logo = Ti.UI.createImageView({
  image: 'logo.png',
  width: 253,
  height: 96,
  top: 10
});
view.add(logo);

//add the view to our window
win1.add(view);

//finally, open the window to launch the app
win1.open();

How it works…
Firstly, it's important to explain the differences between windows and views, as there are a few fundamental differences that may influence your decision on using one compared to the other. Unlike views, windows have some additional abilities, including the open() and close() methods.
If you are coming from a desktop development background, you can imagine a Window as the equivalent of a form or screen; if you prefer web analogies, then a window is more like a page, whereas views are more like a Div.
In addition to these methods, windows have display properties such as full screen and modal; these are not available in views. You'll also notice that while creating a new object, the create keyword is used, such as Ti.UI.createView() to create a view object. This naming convention is used consistently throughout the Titanium API, and almost all components are instantiated in this way.
Windows and views can be thought of as the building blocks of your Titanium application. All your UI components are added to either a window, or a view (which is the child of a Window). There are a number of formatting options available for both of these objects, the properties and syntax of which will be very familiar to anyone who has used CSS in the past. Note that these aren't exactly like CSS, so the naming conventions will be different. Font, Color, BorderWidth, BorderRadius, Width, Height, Top, and Left are all properties that function in exactly the same way as you would expect them to in CSS, and apply to windows and almost all views.
Note
It's important to note that your app requires at least one window to function and that window must be called from within your entry point (the app.js file).
You may have also noticed that we have sometimes instantiated objects or called methods using Ti.UI.createXXX, and at other times, we have used Ti.UI.createXXX. Ti. This is simply a shorthand namespace designed to save time during coding, and it will execute your code in exactly the same manner as the full Titanium namespace does.


