Creating user groups
To log in to the Zabbix frontend, we are going to need users. Right now, we are logged in with the default user, which is logical because we need a user to create users. This isn't a safe setup though, because we don't want to keep using zabbix as a password. So, we are going to learn how to create new users and group them accordingly.
It's important to choose how you want to manage users in Zabbix before setting up user accounts. If you want to use something such as LDAP or SAML, it's a smart idea to make the choice to use one of those authentication methods right away, so you won't have any migration trouble.
Getting ready
Now that we know how the Zabbix UI is structured and we know how to navigate it, we can start doing some actual configuration. We'll start out by creating some user groups to get familiar with the process and start using them. This way, our Zabbix setup gets not only more structured but also more secure.
To get started with this, we'll need a Zabbix server like the one we used in the previous recipes and the knowledge we've acquired there to navigate to the correct frontend sections.
Looking at the following figure, we can see how our example company, Cloud Hoster, is set up. We will create the users seen in the diagram to create a structured and solid user setup:

Figure 2.1 – Cloud Hoster department diagram
So, Cloud Hoster has some departments that need access to the Zabbix frontend and others who don't need it at all. Let's say we want to give the following departments access to the Zabbix frontend:
- Networking: To configure and monitor their network devices
- Infrastructure: To configure and monitor their Linux servers
- Buying and Inventory: To look at inventory information and compare it to other internal tools
How to do it…
Let's get started with creating these three groups in our Zabbix UI:
- To do this, navigate to Administration | User groups, which will show you the following page:
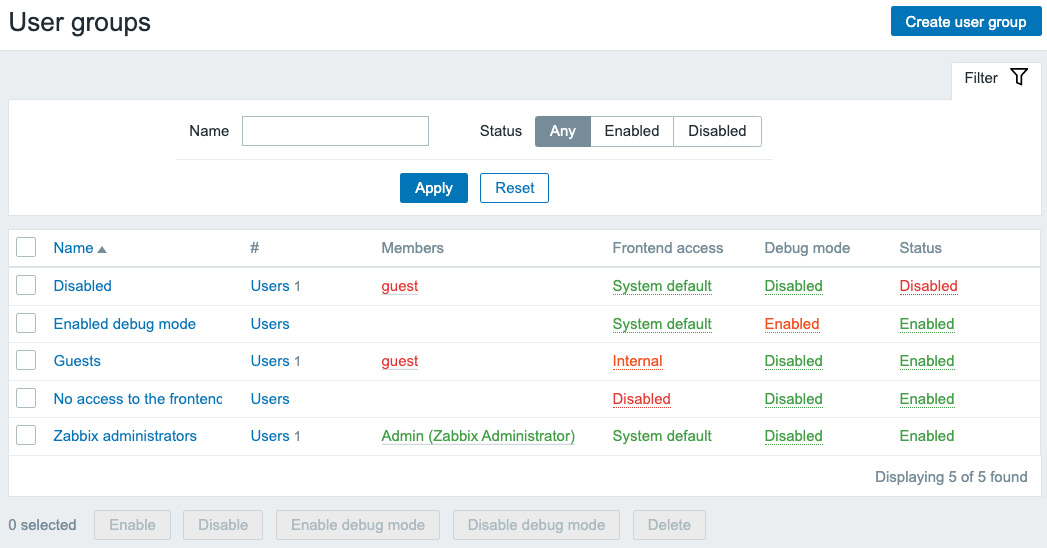
Figure 2.2 – The Zabbix User groups window
- Now, let's start by creating the Networking group by clicking Create user group in the top-right corner. This will bring you to the following screen:
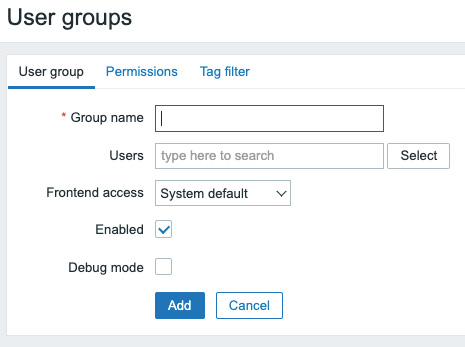
Figure 2.3 – The Zabbix User groups configuration window
We will need to fill in the information, starting with Group name, which of course will be Networking. There are no users for this group yet, so we'll skip that one. Frontend access is the option to provide us with authentication; if you select LDAP here, LDAP authentication will be used for authenticating. We will keep it as System default, which is the internal Zabbix authentication.
- Now, let's navigate to the next tab on this page, which is Permissions:
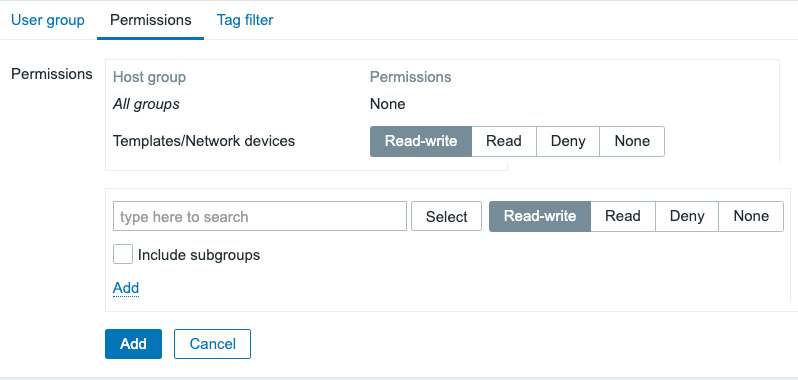
Figure 2.4 – The Zabbix User groups Permissions configuration window
Here, we can specify what host groups our group will have access to. There's a default host group for Networking already, which we will use in this example.
- Click Select to take you to a pop-up window with host groups available. Select Templates/Network devices here and it'll take you back to the previous window, with the group filled in.
- Select Read-write and click the smaller-text Add button to add these permissions.
- We won't be adding anything else, so click the bigger blue Add button to finish creating this host group.
Tip
When using Zabbix authentication such as HTTP, LDAP, or SAML, we still need to create our users internally with the right permissions. Configure your users to match your authentication method's username in Zabbix and use the authentication method for password management.
Now we will have a new host group called Networking that is only allowed to read and write to the Templates/Network devices host group:
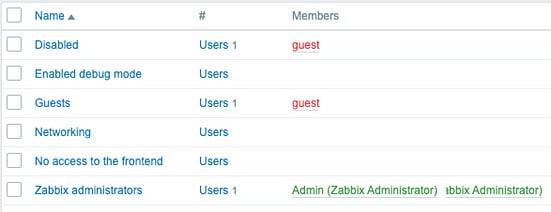
Figure 2.5 – The Zabbix User groups window
- Let's repeat this process for the Infrastructure host group, except instead of adding the Templates/Network devices host group, we'll add the Linux servers host group, like this:
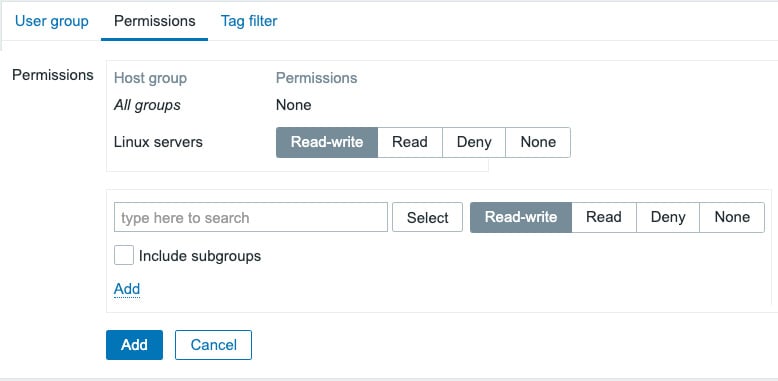
Figure 2.6 – The Zabbix User groups Permissions configuration window with one host group
- Click Add to save this host group.
- Repeat the steps again and to add Buying and Inventory, we'll do something differently. We'll repeat the process we've just done except for the part with the permissions. We want Buying and Inventory to be able to read our inventory data, but we don't want them to actually change our host configuration. Add both Templates/Network devices and Linux servers to the group, but with only Read permissions like this:

Figure 2.7 – The Zabbix User groups Permissions configuration window with two host groups
Congratulations! Finishing this means you've ended up with three different host groups and we can continue to create our first new users! Let's get to it.
There's more...
Zabbix user groups are quite extensive and there is a lot more to it than there seems at first. As the entire permission system is based on what user group(s) and user role(s) you are part of, it is always a good idea to read the Zabbix documentation first: https://www.zabbix.com/documentation/current/en/manual/config/users_and_usergroups/usergroup.


