
Creating the admin frontend
Now that we have the backend app done, we can move on to working on the frontend. Since we have already created the Vue 3 project earlier for the admin frontend in the admin-frontend folder, we just have to install packages that we need and then work on the code. We need the graphql-request GraphQL package and the GraphQL client library, and the VeeValidate, Vue Router, Axios, and Yup packages.
To install them, we run the following command in the admin-frontend folder:
npm i vee-validate@next vue-router@4 yup graphql graphql-request
After installing the packages, we can start working on the code.
Working with components
First, we start working on the components. In the components folder, we add the TopBar component into the components/TopBar.vue file to hold the route links and the Log Out button by writing the following code:
<template>
  <p>
    <router-link to="/orders">Orders</router-link>
    <router-link to="/shop-items">Shop Items</router-link>
    <button @click="logOut">Log Out</button>
  </p>
</template>
<script>
export default {
  name: "TopBar",
  methods: {
    logOut() {
      localStorage.clear();
      this.$router.push("/");
    },
  },
};
</script>
<style scoped>
a {
  margin-right: 5px;
}
</style>
We add the Vue Router router-link components to let the admin user click on them to go to different pages.
The Log Out button runs the logOut method when it is clicked to clear local storage with localStorage.clear and redirects back to the login page with this.$router.push. The / path will map to the login page, as we will see later.
Next, in the src/plugins folder, we add the router.js file. To do this, we write the following code:
import { createRouter, createWebHashHistory } from 'vue-router'
import Login from '@/views/Login'
import Orders from '@/views/Orders'
import ShopItems from '@/views/ShopItems'
const beforeEnter = (to, from, next) => {
  try {
    const token = localStorage.getItem('token')
    if (to.fullPath !== '/' && !token) {
      return next({ fullPath: '/' })
    }
    return next()
  } catch (error) {
    return next({ fullPath: '/' })
  }
}
const routes = [
  { path: '/', component: Login },
  { path: '/orders', component: Orders, beforeEnter },
  { path: '/shop-items', component: ShopItems, beforeEnter },
]
const router = createRouter({
  history: createWebHashHistory(),
  routes,
})
export default router
We added the beforeEnter route guard to check if the authentication token is stored in local storage. If it is stored already and we are going to an authenticated route, then we proceed to the page by calling next with no arguments. Otherwise, we redirect back to the login page by calling next with an object with the fullPath property set to '/'. If there is any error, we also go back to the login page.
Next, we have the routes array with the route mappings. We map the path to the component so that when we type in the Uniform Resource Locator (URL) in the browser or click a router link on the page, we go to the page we mapped to. We add the beforeEnter route guard to the route that requires authentication.
Then, we call createRouter to create the router object, and we call createWebHashHistory to use hash mode. With hash mode, the hostname and the rest of the URL will be separated by a # sign. We also add the routes array into the object we pass into createRouter, to add the route mappings.
Then, we export the router object so that we can add it to our app later.
Next, we create the login page component. To do this, we create the views folder, add the Login.vue file to it, and then write the following code:
<template>
  <h1>Admin Login</h1>
  <Form :validationSchema="schema" @submit="submitForm">
    <div>
      <label for="name">Username</label>
      <br />
      <Field name="username" type="text"
        placeholder="Username" />
      <ErrorMessage name="username" />
    </div>
    <br />
    <div>
      <label for="password">Password</label>
      <br />
      <Field name="password" placeholder="Password"
        type="password" />
      <ErrorMessage name="password" />
    </div>
    <input type="submit" />
  </Form>
</template>
We add the Form component with the validationSchema prop set to the yup schema. We listen for the submit event, which is emitted when all the fields are valid, and we click the Submit button. The submitForm method will have the form field values we entered, and the Field component lets us create a form field.
ErrorMessage displays the error message with the form field. If the name prop values of Field and ErrorMessage match, then any form validation for the field with the given name will be automatically displayed. The placeholder attribute lets us add a form placeholder, and the type attribute sets the form input type.
Next, we add the script portion of our component. To do this, we write the following code:
<script>
import { GraphQLClient, gql } from "graphql-request";
import * as yup from "yup";
import { Form, Field, ErrorMessage } from "vee-validate";
const APIURL = "http://localhost:3000/graphql";
const graphQLClient = new GraphQLClient(APIURL, {
  headers: {
    authorization: "",
  },
});
const schema = yup.object({
  name: yup.string().required(),
  password: yup.string().required(),
});
...
</script>
We create the GraphQL client object with the GraphQLClient constructor. This takes the GraphQL endpoint URL and various options that we can pass in. We will use it to pass in the required request headers in components that require authentication.
The schema variable holds the yup validation schema, which has the name and password fields. Both fields are strings and they are both required, as indicated by the method calls. The property names must match the name prop value of the Field and ErrorMessage components for the validation to trigger for the field.
Adding the login logic and making our first GraphQL request
Next, we add the login logic by writing the following code:
<script>
...
export default {
  name: "Login",
  components: {
    Form,
    Field,
    ErrorMessage,
  },
  data() {
    return {
      schema,
    };
  },
...
        } = await graphQLClient.request(mutation, variables);
        localStorage.setItem("token", token);
        this.$router.push('/orders')
      } catch (error) {
        alert("Login failed");
      }
    },
  },
};
</script>
We register the Form, Field, and ErrorMessage components imported from the VeeValidate package. We have the data method, which returns an object with the schema so that we can use it in the template. Finally, we have the submitForm method, to get the username and password values from the Field components and make the login mutation GraphQL request.
We pass the $username and $password values into the parentheses to pass them into our mutation. The values will be obtained from the variablesvariables object, which we pass into the graphQLClient.request method. If the request is successful, we then get back the token from the request. Once we get the token, we put it in localStorage.setItem to put it into local storage.
The gql tag is a function that lets us convert the string into a query JSON object that can be sent to the server.
If the login request failed, we then display an alert. The following screenshot shows the login screen:
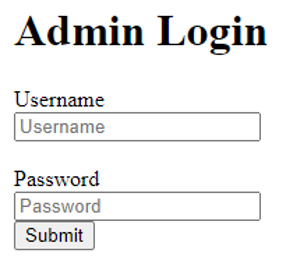
Figure 7.2 – Admin login screen
Creating the orders page
Next, we create an orders page by creating a views/Orders.vue file. To do this, we update the following code:
<template>
  <TopBar />
  <h1>Orders</h1>
  <div v-for="order of orders" :key="order.order_id">
    <h2>Order ID: {{ order.order_id }}</h2>
    <p>Name: {{ order.name }}</p>
    <p>Address: {{ order.address }}</p>
    <p>Phone: {{ order.phone }}</p>
    <div>
      <h3>Ordered Items</h3>
      <div
        v-for="orderedItems of order.ordered_items"
        :key="orderedItems.shop_item_id"
      >
        <h4>Name: {{ orderedItems.name }}</h4>
        <p>Description: {{ orderedItems.description }}</p>
        <p>Price: ${{ orderedItems.price }}</p>
      </div>
    </div>
    <p>
      <b>Total: ${{ calcTotal(order.ordered_items) }}</b>
    </p>
    <button type="button" @click="deleteOrder(order)">Delete
      Order</button>
  </div>
</template>
We add TopBar and loop through the orders with v-for to render the entries. We also loop through ordered_items. We show the total price of the ordered items with the calcTotal method. We also have the Delete Order button, which calls the deleteOrder method when we click it. The key prop must be specified so that Vue 3 can identify the items.
Next, we create a script with the GraphQL client by writing the following code:
<script>
import { GraphQLClient, gql } from "graphql-request";
import TopBar from '@/components/TopBar'
const APIURL = "http://localhost:3000/graphql";
const graphQLClient = new GraphQLClient(APIURL, {
  headers: {
    authorization: localStorage.getItem("token"),
  },
});
...
</script>
This is different from the login page since we set the authorization header to the token we obtained from local storage. Next, we create the component object by writing the following code:
<script>
...
export default {
  name: "Orders",
  components: {
    TopBar
...
        {
          getOrders {
            order_id
            name
            address
            phone
            ordered_items {
              shop_item_id
              name
              description
              image_url
              price
            }
          }
        }
      `;
...
      await graphQLClient.request(mutation, variables);
      await this.getOrders();
    },
  },
};
</script>
We register the TopBar component with the components property. We have the data method to return an object with the orders reactive property. In the beforeMount hook, we call the getOrders method to get the orders when the component is mounting. The calcTotal method calculates the total price of all the ordered items by getting the price from all the orderedItems objects with map and then calling reduce to add all the prices together.
The getOrders method makes a GraphQL query request to get all the orders. We specify the fields we want to get with the request. We specify the fields for the nested objects we also want to get, so we do the same with ordered_items. Only the fields that are specified will be returned.
Then, we call graphQlClient.request with the query to make the query request, and assign the data returned to the orders reactive property.
The deleteOrder method takes an order object and makes a removeOrder mutation request to the server. orderId is in the variables, so the correct order will be deleted. We call getOrders to get the latest orders again after deleting them.
The following screenshot shows the orders page that the admin sees:

Figure 7.3 – Orders page: admin view
Now that we have added the orders page, we will move on to add a page to let admins add and remove items they want to sell in the shop.
Adding and removing shop items for sale
Next, we add a shop items page to let us add and remove shop items. To do this, we start with the template. We render the shop items by writing the following code:
<template>
  <TopBar />
  <h1>Shop Items</h1>
  <button @click="showDialog = true">Add Item to Shop</button>
  <div v-for="shopItem of shopItems"
    :key="shopItem.shop_item_id">
    <h2>{{ shopItem.name }}</h2>
    <p>Description: {{ shopItem.description }}</p>
    <p>Price: ${{ shopItem.price }}</p>
    <img :src="shopItem.image_url" :alt="shopItem.name" />
    <br />
    <button type="button" @click="deleteItem(shopItem)">
      Delete Item from Shop
    </button>
  </div>
  ...
</template>
We add the TopBar component as we did before and we render shopItems, as we did with the orders.
Next, we add a dialog box with the HTML dialog element to let us add shop items. To do this, we write the following code:
<template>
  ...
  <dialog :open="showDialog" class="center">
    <h2>Add Item to Shop</h2>
    <Form :validationSchema="schema" @submit="submitForm">
      <div>
...
        <Field name="imageUrl" type="text" placeholder=" Image
          URL" />
        <ErrorMessage name="imageUrl" />
      </div>
      <br />
      <div>
        <label for="price">Price</label>
        <br />
        <Field name="price" type="text" placeholder="Price" />
        <ErrorMessage name="price" />
      </div>
      <br />
      <input type="submit" />
      <button @click="showDialog = false" type="button">
        Cancel</button>
    </Form>
  </dialog>
</template>
We set the open prop to control when the dialog box is opened, and we set the class to center so that we can apply styles to center the dialog box and display it above the rest of the page later.
Inside the dialog box, we have the form created in the same way as with the login page. The only difference is the fields that are in the form. At the bottom of the form, we have a Cancel button to set the showDialog reactive property to false to close the dialog, since it's set as the value of the open prop.
Next, we create the script with the GraphQL client and form validation schema (as we did before), as follows:
<script>
import { GraphQLClient, gql } from "graphql-request";
import * as yup from "yup";
import TopBar from "@/components/TopBar";
import { Form, Field, ErrorMessage } from "vee-validate";
const APIURL = "http://localhost:3000/graphql";
const graphQLClient = new GraphQLClient(APIURL, {
  headers: {
    authorization: localStorage.getItem("token"),
  },
});
const schema = yup.object({
  name: yup.string().required(),
  description: yup.string().required(),
  imageUrl: yup.string().required(),
  price: yup.number().required().min(0),
});
...
</script>
Then, we add the component options object by writing the following code:
<script>
...
export default {
  name: "ShopItems",
  components: {
    Form,
    Field,
    ErrorMessage,
    TopBar,
  },
  data() {
    return {
      shopItems: [],
      showDialog: false,
      schema,
    };
  },
  beforeMount() {
    this.getShopItems();
  },
  ...
};
</script>
We register components and create a data method to return the reactive properties we use. The beforeMount hook calls the getShopItems method to get the shop items from the API.
Next, we add the getShopItems method by writing the following code:
<script>
...
export default {
  ...
  methods: {
    async getShopItems() {
      const query = gql`
        {
          getShopItems {
            shop_item_id
            name
            description
            image_url
            price
          }
        }
      `;
      const { getShopItems: data } = await
        graphQLClient.request(query);
      this.shopItems = data;
    },
    ...
  },
};
</script>
We just make a getShopItems query request to get the data with the fields in the braces returned.
Next, we add the submitForm method to make a mutation request to add a shop item entry, by writing the following code:
<script>
...
export default {
  ...
  methods: {
    ...
    async submitForm({ name, description, imageUrl, price:
      oldPrice }) {
      const mutation = gql`
        mutation addShopItem(
          $name: String
          $description: String
          $image_url: String
          $price: Float
        ) {
...
        description,
        image_url: imageUrl,
        price: +oldPrice,
      };
      await graphQLClient.request(mutation, variables);
      this.showDialog = false;
      await this.getShopItems();
    },
    ...
  },
};
</script>
We get all the form field values by destructuring the object in the parameter, then we call graphQLClient.request to make the request with the variables set from the destructured properties from the parameter. We convert price to a number since price should be a float, according to the schema we created in the backend.
Once the request is done, we set showDialog to false to close the dialog and we call getShopItems again to get the shop items.
The last method we'll add is the deleteItem method. The code for this can be seen in the following snippet:
<script>
...
export default {
  ...
  methods: {
    ...
    async deleteItem({ shop_item_id: shopItemId }) {
      const mutation = gql`
        mutation removeShopItem($shopItemId: Int) {
          removeShopItem(shopItemId: $shopItemId) {
            status
          }
        }
      `;
      const variables = {
        shopItemId,
      };
      await graphQLClient.request(mutation, variables);
      await this.getShopItems();
    },
    ...
  },
};
</script>
We make the removeShopItem mutation request to delete a shop item entry. When the request is done, we call getShopItems again to get the latest data.
The admin's view of the shop items page can be seen in the following screenshot:
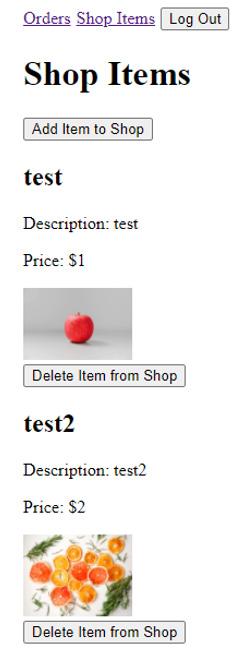
Figure 7.4 – Shop items page: admin view
In src/App.vue, we write the following code to add the router-view component to show the route component content:
<template>
  <router-view></router-view>
</template>
<script>
export default {
  name: "App",
};
</script>
In src/main.js, we write the following code to add the router to our app:
import { createApp } from 'vue'
import App from './App.vue'
import router from '@/plugins/router'
const app = createApp(App)
app.use(router)
app.mount('#app')
Finally, in package.json, we change the server script to serve the app from a different port so that it won't conflict with the frontend. To do this, we write the following code:
{
  ...
  "scripts": {
    "serve": "vue-cli-service serve --port 8090",
    ...
  },
  ...
}
We are now finished with the admin frontend and will move on to the final part of this project, which is a frontend for the customer so that they can order items.