Search icon CANCEL
Subscription
0
Cart icon
Your Cart (0 item)
Close icon
You have no products in your basket yet
Save more on your purchases! discount-offer-chevron-icon
Savings automatically calculated. No voucher code required.
Arrow left icon
Explore Products
Best Sellers
New Releases
Books
Videos
Audiobooks
Learning Hub
Free Learning
Arrow right icon
Arrow up icon
GO TO TOP
The Complete Guide to DAZ Studio 4

You're reading from   The Complete Guide to DAZ Studio 4 Bring your 3D characters to life with DAZ Studio

Arrow left icon
Product type Paperback
Published in Oct 2013
Publisher Packt
ISBN-13 9781849694087
Length 348 pages
Edition 1st Edition
Languages
Arrow right icon
Author (1):
Arrow left icon
Paolo Ciccone Paolo Ciccone
Author Profile Icon Paolo Ciccone
Paolo Ciccone
Arrow right icon
View More author details
Toc

Table of Contents (15) Chapters Close

Preface 1. Quick Start – Our First 3D Scene FREE CHAPTER 2. Customizing Studio 3. Posing Figures 4. Creating New Characters with Morphs 5. Rendering 6. Finding and Installing New Content 7. Navigating the Studio Environment 8. Building a Full Scene 9. Lighting 10. Hyper-realism – the Reality Plugin 11. Creating Content 12. Animation A. Installing DAZ Studio Index

Polygons – the building blocks of our scenes


Up to this point, we focused on using figures such as Genesis for creating scenes. Every 3D asset is built upon elementary elements called polygons. A polygon is basically a facet of an object, a plane that is formed by at least three points called vertices, but more often based on four vertices. Each vertex is a point in space, which is represented by three coordinates: x, y, and z.

In Studio the x axis runs horizontally, the y axis runs vertically, and the z axis runs in the depth dimension. Other programs use different conventions. For example, in Blender the z axis runs vertically, while the y axis defines the depth.

In the following screenshot, we can see the Genesis figure showing its polygons. The polygons are curved so that they create a smooth surface.
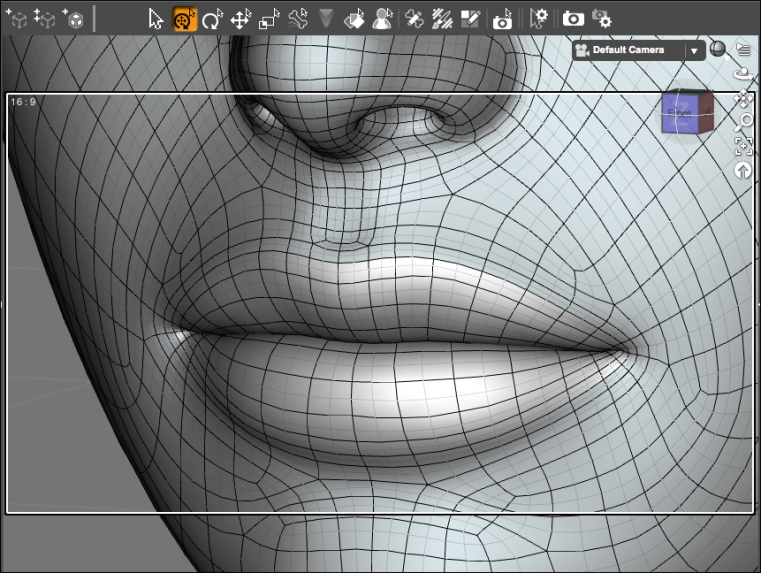
To switch to this type of view, click on the Drawstyle icon in the top-right corner of the 3D Viewport and select Wire Shaded.
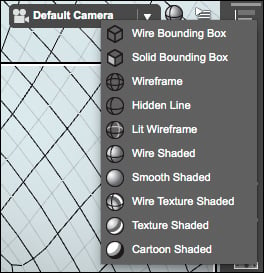
The Wire Shaded view is excellent for faster workflow and for...

lock icon The rest of the chapter is locked
Register for a free Packt account to unlock a world of extra content!
A free Packt account unlocks extra newsletters, articles, discounted offers, and much more. Start advancing your knowledge today.
Unlock this book and the full library FREE for 7 days
Get unlimited access to 7000+ expert-authored eBooks and videos courses covering every tech area you can think of
Renews at $19.99/month. Cancel anytime
Banner background image