Downloading and installing AdventureWorks
We are almost finished with establishing our business intelligence data warehouse. We are now at the stage where we will extract and load data into our data warehouse. The last part is to download and install the AdventureWorks database from Microsoft. The zipped file for AdventureWorks 2014 is located at the following link:
https://msftdbprodsamples.codeplex.com/downloads/get/880661.
Once the file is downloaded and unzipped, you will find a file named AdventureWorks2014.bak.
Copy the aforementioned file and paste it in the following folder, where it will be incorporated with your Microsoft SQL Server 2014 Express Edition: C:\Program Files\Microsoft SQL Server\MSSQL12.SQLBI\MSSQL\Backup.
Also note that the MSSQL12.SQLBI subfolder will vary from user to user depending on how you named your SQL instance when you were installing MS SQL Server 2014.
Once that has been copied over, we can fire up Management Studio for SQL Server 2014 and start up a blank new query by going to File | New | Query with Current Connection.
Once you have a blank query set up, copy and paste the following code and execute it:
use [master]
Restore database AdventureWorks2014

from disk = 'C:\Program Files\Microsoft SQL Server\MSSQL12.SQLBI\MSSQL\Backup\AdventureWorks2014.bak'

with move 'AdventureWorks2014_data'

to 'C:\Program Files\Microsoft SQL Server\MSSQL12.SQLBI\MSSQL\DATA\AdventureWorks2014.mdf',

Move 'AdventureWorks2014_log'

to 'C:\Program Files\Microsoft SQL Server\MSSQL12.SQLBI\MSSQL\DATA\AdventureWorks2014.ldf'
, replace
Once again, note that the MSSQL12.SQLBI subfolder will vary from user to user depending on how you named your SQL instance when you were installing MS SQL Server 2014.
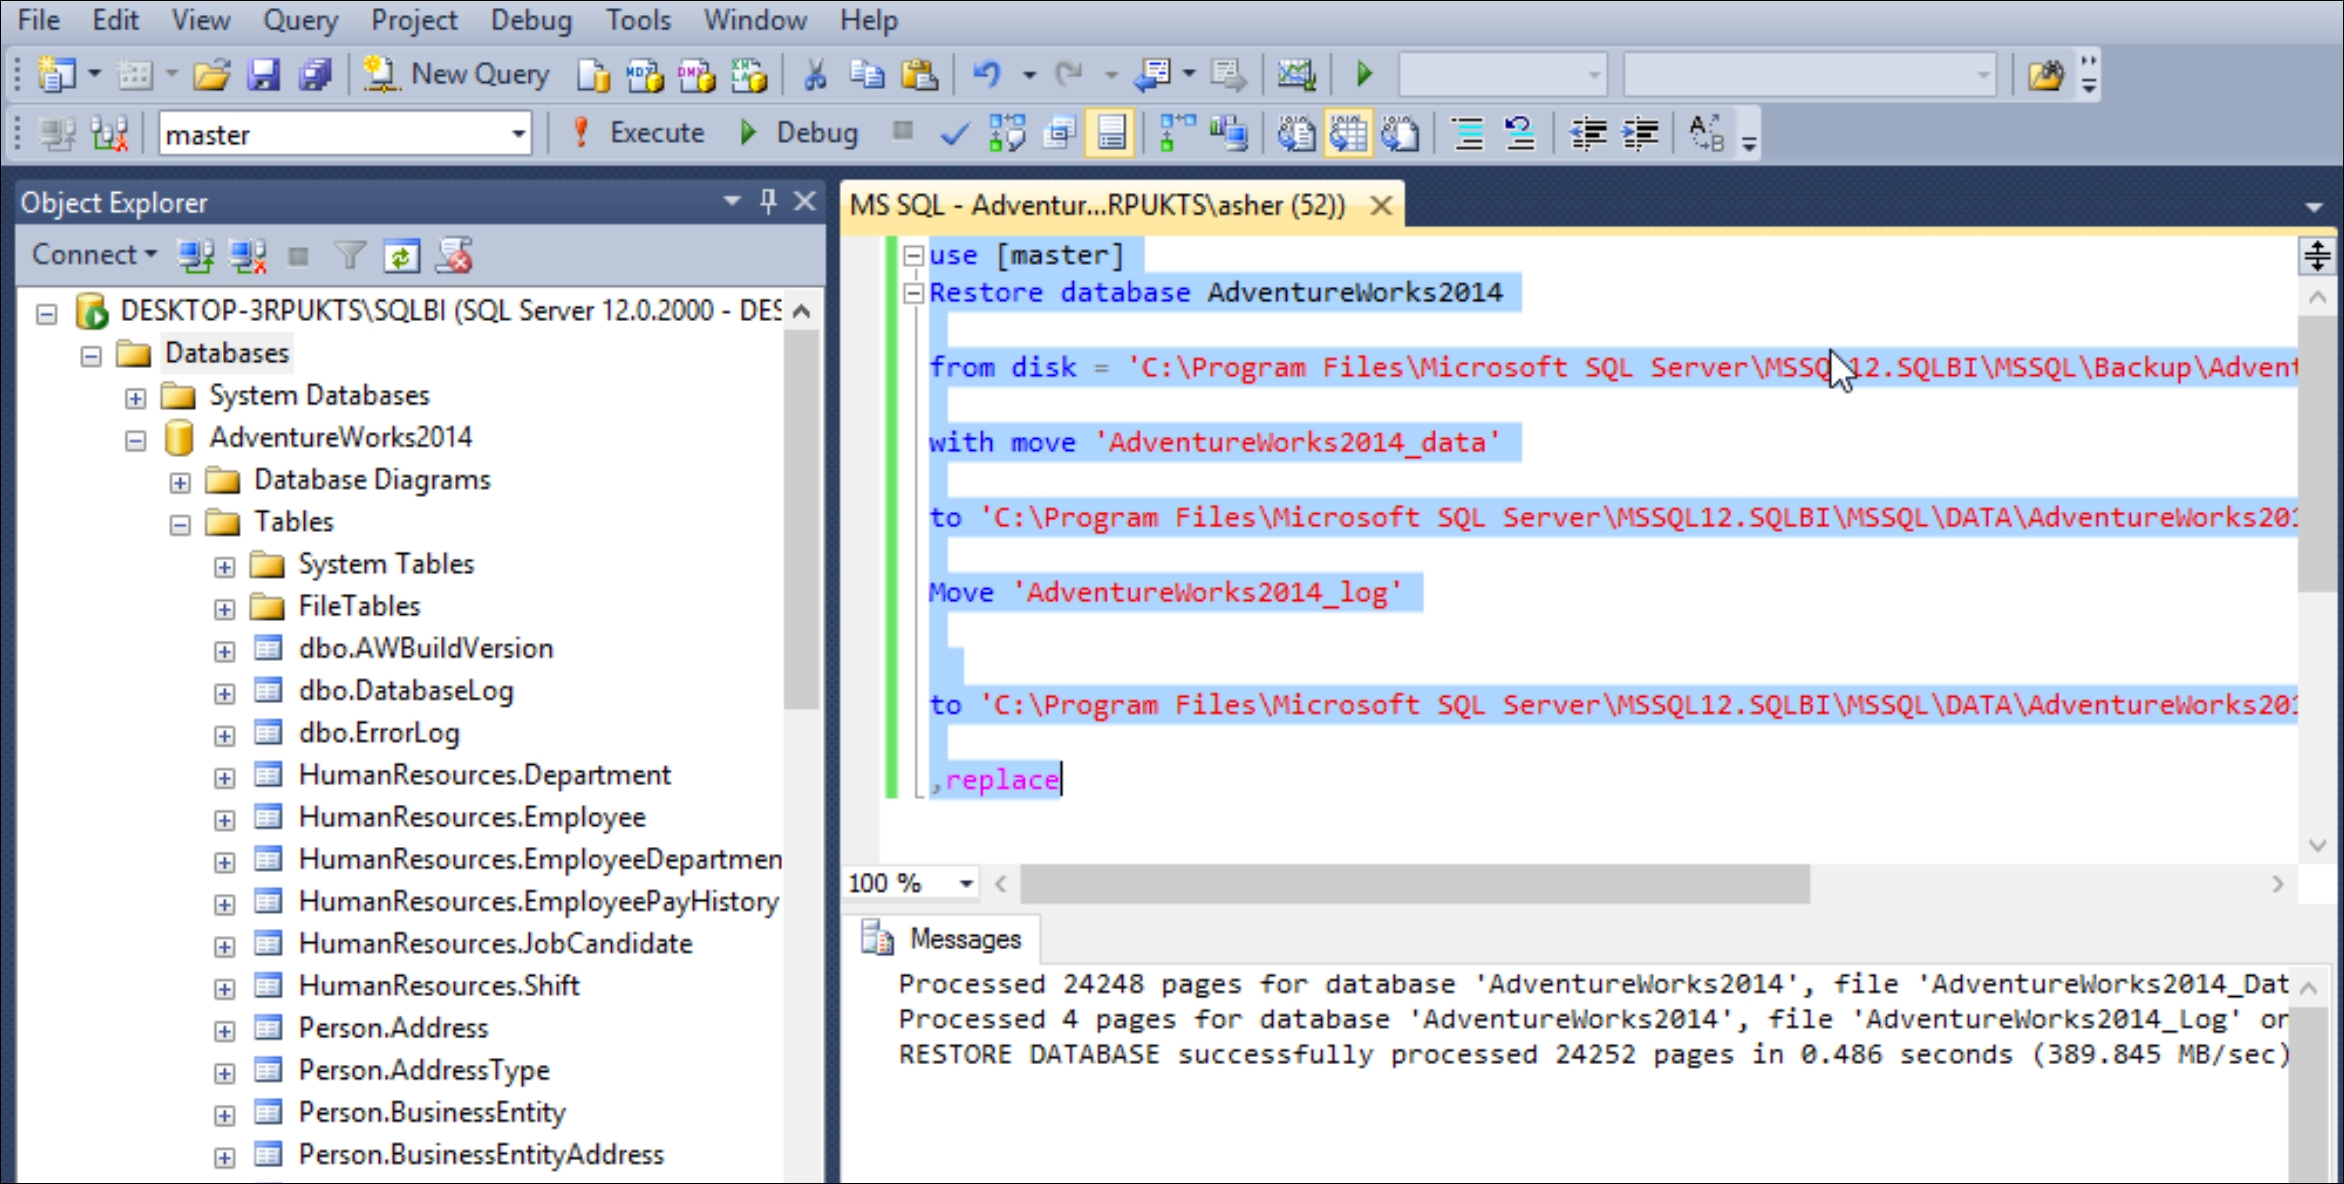
At this point, within the database you should have received a message saying that Microsoft SQL Server has Processed 24248 pages for database 'AdventureWorks2014'. Once you have refreshed your database tab in the upper-left corner of SQL Server, the AdventureWorks database will become visible, and so will all the appropriate tables, as shown in this screenshot:

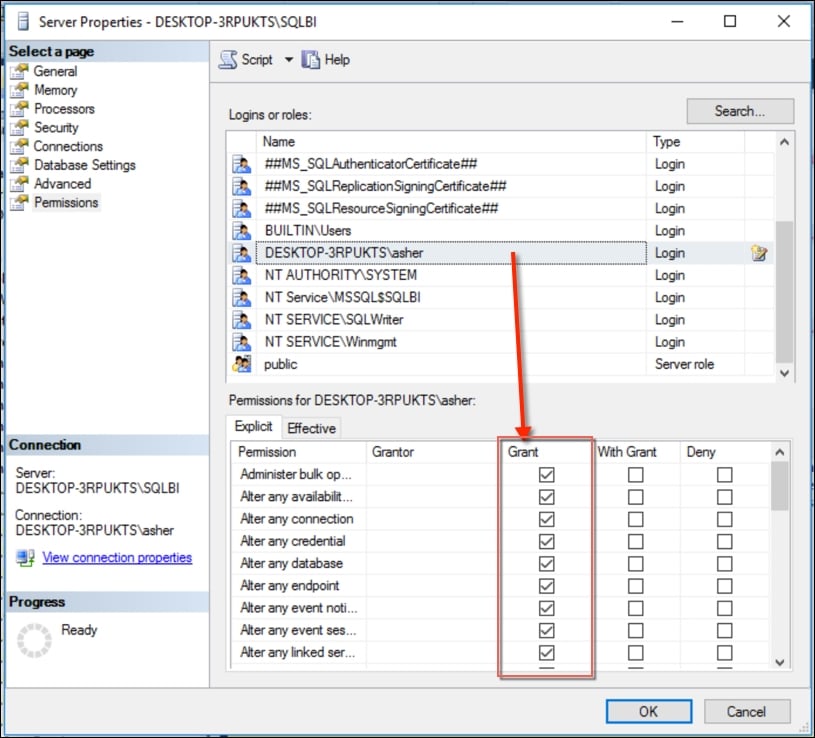
One more step that we will need is to verify that our login account has all the appropriate server settings. We right-click on the SQL Server name in the upper-left portion of Management Studio, select the properties, and then select Permissions inside Properties.
Find your username and check all the rights under the Grant column, as shown in the following screenshot:

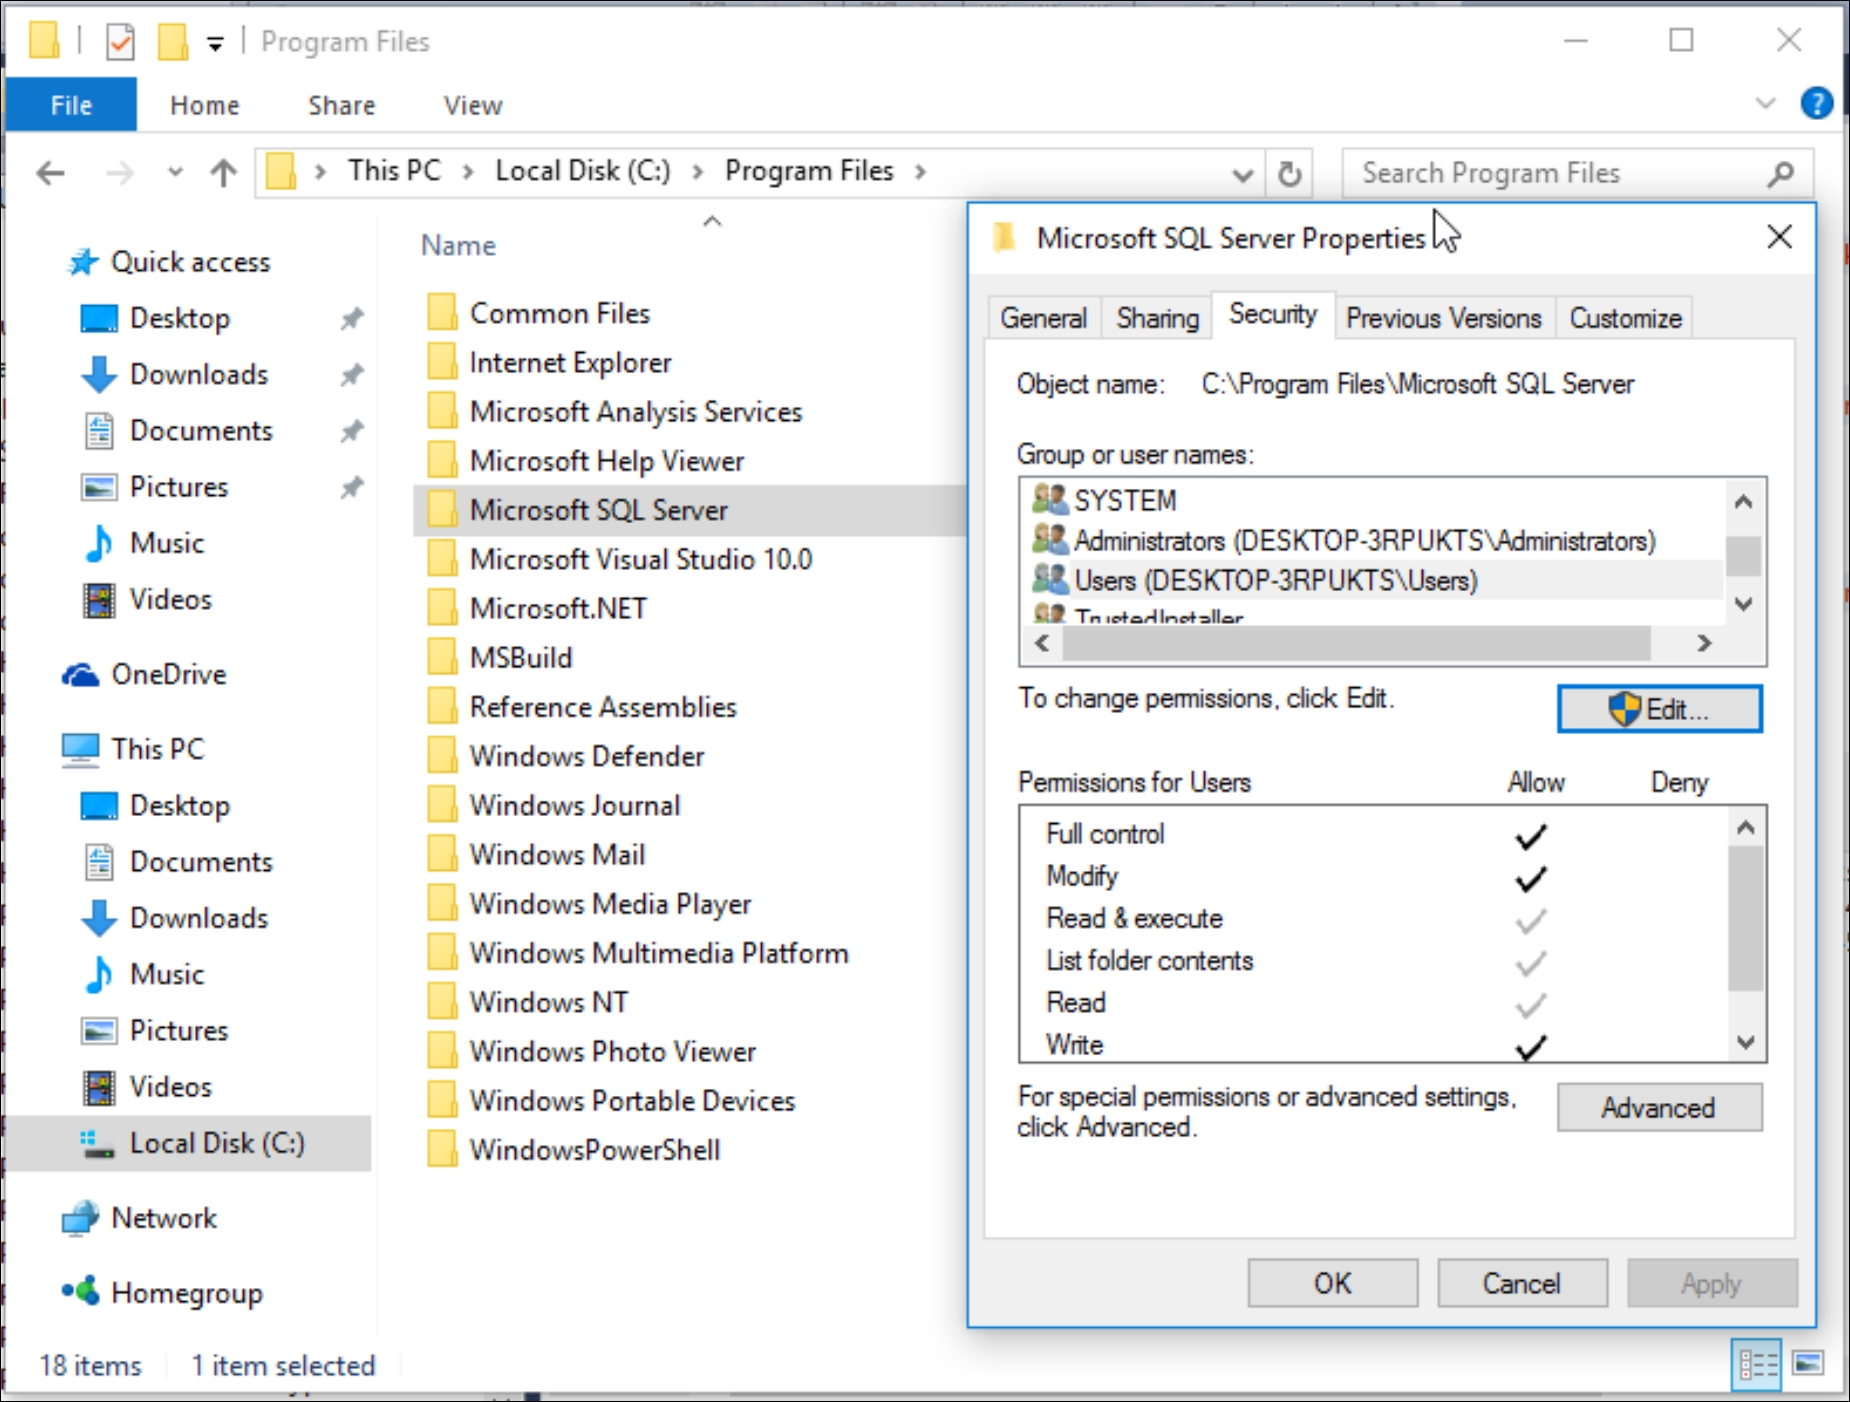
Finally, we need to ensure that the folder that houses Microsoft SQL Server 2014 also has the appropriate rights enabled for our current user. That specific folder is located at C:\Program Files\Microsoft SQL Server\.
For the purposes of our exercises, we will assign all rights for the user or group that will connect to SQL Server to the following folder:

We are finished with installing our data warehouse infrastructure as well as adding our AdventureWorks database to our data warehouse. We are now ready to connect our data warehouse directly to our BI tools.


