Setting up the environment
On our machines (MacBook Pro), this is the latest Python version:
>>> import sys
>>> print(sys.version)
3.12.2 (main, Feb 14 2024, 14:16:36) [Clang 15.0.0 (clang-1500.1.0.2.5)]
So, you can see that the version is 3.12.2, which was out on October 2, 2023. The preceding text is a little bit of Python code that was typed into a console. We will talk about this in a moment.
All the examples in this book will be run using Python 3.12. If you wish to follow the examples and download the source code for this book, please make sure you are using the same version.
Installing Python
The process of installing Python on your computer depends on the operating system you have. First of all, Python is fully integrated and, most likely, already installed in almost every Linux distribution. If you have a recent version of macOS, it is likely that Python 3 is already there as well, whereas if you are using Windows, you probably need to install it.
Regardless of Python being already installed in your system, you will need to make sure that you have version 3.12 installed.
To check if you have Python already installed on your system, try typing python --version or python3 --version in a command prompt (more on this later).
The place you want to start is the official Python website: https://www.python.org. This website hosts the official Python documentation and many other resources that you will find very useful.
Useful installation resources
The Python website hosts useful information regarding the installation of Python on various operating systems. Please refer to the relevant page for your operating system.
Windows and macOS:
For Linux, please refer to the following links:
- https://docs.python.org/3/using/unix.html
- https://ubuntuhandbook.org/index.php/2023/05/install-python-3-12-ubuntu/
Installing Python on Windows
As an example, this is the procedure to install Python on Windows. Head to https://www.python.org/downloads/ and download the appropriate installer according to the CPU of your computer.
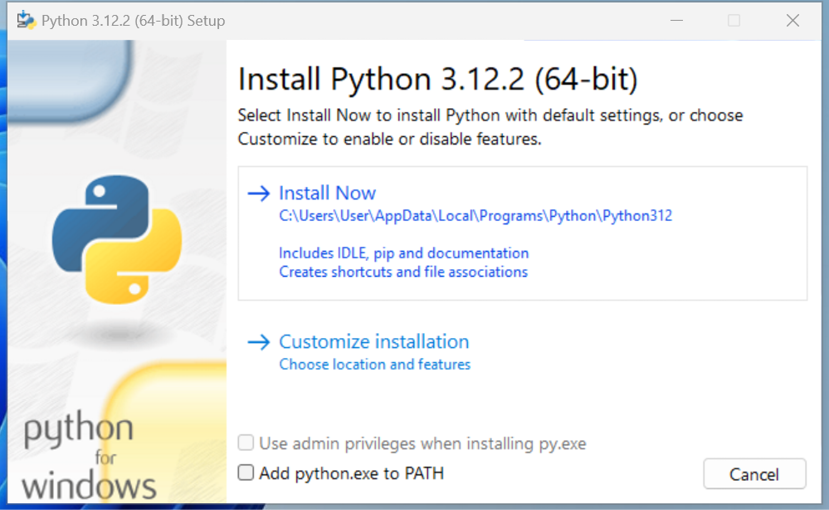
Once you have it, you can double-click on it in order to start the installation.

Figure 1.1: Starting the installation process on Windows
We recommend choosing the default install, and NOT ticking the Add python.exe to PATH option to prevent clashes with other versions of Python that might be installed on your machine, potentially by other users.
For a more comprehensive set of guidelines, please refer to the link indicated in the previous paragraph.
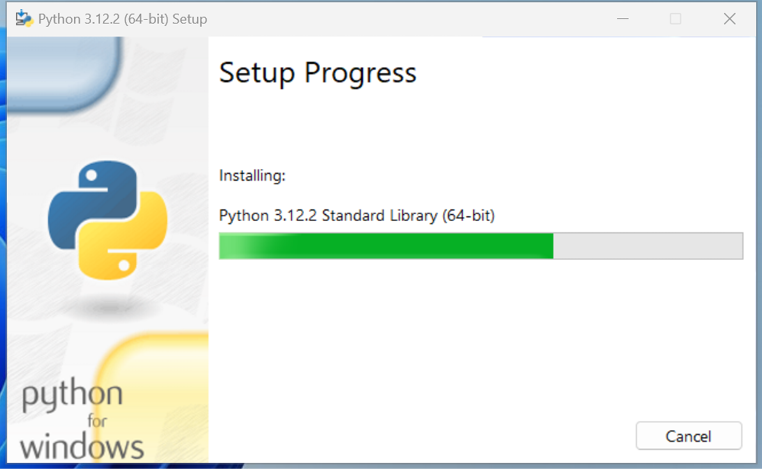
Once you click on Install Now, the installation procedure will begin.

Figure 1.2: Installation in progress
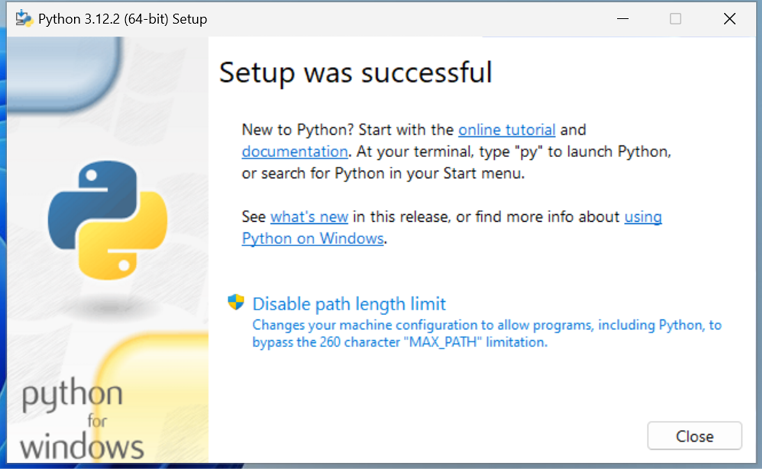
Once the installation is complete, you will land on the final screen.

Figure 1.3: Installation complete
Click on Close to finish the installation.
Now that Python is installed on your system, open a command prompt and run the Python interactive shell by typing py. This command will select the latest version of Python installed on your machine. At the time of writing, 3.12 is the latest available version of Python. If you have a more recent version installed, you can specify the version with the command py -3.12.
To open the command prompt in Windows, go to the Start menu and type cmd in the search box to start your terminal up. Alternatively, you can also use Powershell.
Installing Python on macOS
On macOS, the installation procedure is similar to that of Windows. Once you have downloaded the appropriate installer for your machine, complete the installation steps, and then start a terminal by going to Applications > Utilities > Terminal. Alternatively, you can install it through Homebrew.
Once in the terminal window, you can type python. If that launches the wrong version, you can try and specify the version with either python3 or python3.12.
Installing Python on Linux
The process of installing Python on Linux is normally a bit more complex than that for Windows or macOS. The best course of action, if you are on a Linux machine, is to search for the most up-to-date set of steps for your distribution online. These will likely be quite different from one distribution to another, so it is difficult to give an example that would be relevant for everyone. Please refer to the link in the Useful installation resources section for guidance.
The Python console
We will use the term console interchangeably to indicate the Linux console, the Windows Command Prompt or Powershell, and the macOS Terminal. We will also indicate the command-line prompt with the default Linux format, like this:
$ sudo apt-get update
If you are not familiar with that, please take some time to learn the basics of how a console works. In a nutshell, after the $ sign, you will type your instructions. Pay attention to capitalization and spaces, as they are very important.
Whatever console you open, type python at the prompt (py on Windows) and make sure the Python interactive shell appears. Type exit() to quit. Keep in mind that you may have to specify python3 or python3.12 if your OS comes with other Python versions preinstalled.
We often refer to the Python interactive shell simply as the Python console.
This is roughly what you should see when you run Python (some details will change according to the version and OS):
$ python
Python 3.12.2 (main, Feb 14 2024, 14:16:36)
[Clang 15.0.0 (clang-1500.1.0.2.5)] on darwin
Type "help", "copyright", "credits" or "license" for more information.
>>>
Now that Python is set up and you can run it, it is time to make sure you have the other tool that will be indispensable to follow the examples in the book: a virtual environment.
About virtual environments
When working with Python, it is very common to use virtual environments. Let us see what they are and why we need them by means of a simple example.
You install Python on your system, and you start working on a website for client X. You create a project folder and start coding. Along the way, you also install some libraries, for example, the Django framework. Let us say the Django version you installed for Project X is 4.2.
Now, your website is so good that you get another client, Y. She wants you to build another website, so you start Project Y and, along the way, you need to install Django again. The only issue is that now the Django version is 5.0 and you cannot install it on your system because this would replace the version you installed for Project X. You do not want to risk introducing incompatibility issues, so you have two choices: either you stick with the version you have currently on your machine, or you upgrade it and make sure the first project is still fully working correctly with the new version.
Let us be honest; neither of these options is very appealing, right? Definitely not. But there is a solution: virtual environments!
Virtual environments are isolated Python environments, each of which is a folder that contains all the necessary executables to use the packages that a Python project would need (think of packages as libraries for the time being).
So, you create a virtual environment for Project X, install all the dependencies, and then you create a virtual environment for Project Y, and install all its dependencies without the slightest worry because every library you install ends up within the boundaries of the appropriate virtual environment. In our example, Project X will hold Django 4.2, while Project Y will hold Django 5.0.
It is of great importance that you never install libraries directly at the system level. Linux, for example, relies on Python for many different tasks and operations, and if you fiddle with the system installation of Python, you risk compromising the integrity of the entire system. So, take this as a rule: always create a virtual environment when you start a new project.
When it comes to creating a virtual environment on your system, there are a few different methods to carry this out. Since Python 3.5, the suggested way to create a virtual environment is to use the venv module. You can look it up on the official documentation page (https://docs.python.org/3/library/venv.html) for further information.
If you are using a Debian-based distribution of Linux, for example, you will need to install the venv module before you can use it:
$ sudo apt-get install python3.12-venv
Another common way of creating virtual environments is to use the virtualenv third-party Python package. You can find it on its official website: https://virtualenv.pypa.io.
In this book, we will use the recommended technique, which leverages the venv module from the Python standard library.
Your first virtual environment
It is very easy to create a virtual environment, but depending on how your system is configured and which Python version you want the virtual environment to run on, you need to run the command properly. Another thing you will need to do when you want to work with it is to activate it. Activating virtual environments produces some path juggling behind the scenes so that when you call the Python interpreter from that shell, it will come from within the virtual environment, instead of the system. We will show you a full example on macOS and Windows (on Linux, it will be very similar to that of macOS). We will:
- Open a terminal and change into the folder (directory) we use as root for our projects (our folder is
code). We are going to create a new folder calledmy-projectand change into it. - Create a virtual environment called
lpp4ed. - After creating the virtual environment, we will activate it. The methods are slightly different between Linux, macOS, and Windows.
- Then, we will make sure that we are running the desired Python version (3.12.X) by running the Python interactive shell.
- Finally, we will deactivate the virtual environment.
Some developers prefer to call all virtual environments with the same name (for example, .venv). This way, they can configure tools and run scripts against any virtual environment by just knowing their location. The dot in .venv is there because in Linux/macOS, prepending a name with a dot makes that file or folder “invisible.”
These steps are all you need to start a project.
We are going to start with an example on macOS (note that you might get a slightly different result, according to your OS, Python version, and so on). In this listing, lines that start with a hash, #, are comments, spaces have been introduced for readability, and an arrow, →, indicates where the line has wrapped around due to lack of space:
fab@m1:~/code$ mkdir my-project  # step 1
fab@m1:~/code$ cd my-project
fab@m1:~/code/my-project$ which python3.12  # check system python
/usr/bin/python3.12  # <-- system python3.12
fab@m1:~/code/my-project$ python3.12 -m venv lpp4ed  # step 2
fab@m1:~/code/my-project$ source ./lpp4ed/bin/activate  # step 3
# check python again: now using the virtual environment's one
(lpp4ed) fab@m1:~/code/my-project$ which python
/Users/fab/code/my-project/lpp4ed/bin/python
(lpp4ed) fab@m1:~/code/my-project$ python  # step 4
Python 3.12.2 (main, Feb 14 2024, 14:16:36)
→ [Clang 15.0.0 (clang-1500.1.0.2.5)] on darwin
Type "help", "copyright", "credits" or "license" for more information.
>>> exit()
(lpp4ed) fab@m1:~/code/my-project$ deactivate  # step 5
fab@m1:~/code/my-project$
Each step has been marked with a comment, so you should be able to follow along quite easily.
Something to notice here is that to activate the virtual environment, we need to run the lpp4ed/bin/activate script, which needs to be sourced. When a script is sourced, it means that it is executed in the current shell, and its effects last after the execution. This is very important. Also notice how the prompt changes after we activate the virtual environment, showing its name on the left (and how it disappears when we deactivate it).
On a Windows 11 PowerShell, the steps are as follows:
PS C:\Users\H\Code> mkdir my-project  # step 1
PS C:\Users\H\Code> cd .\my-project\
# check installed python versions
PS C:\Users\H\Code\my-project> py --list-paths
 -V:3.12 *
→ C:\Users\H\AppData\Local\Programs\Python\Python312\python.exe
PS C:\Users\H\Code\my-project> py -3.12 -m venv lpp4ed  # step 2
PS C:\Users\H\Code\my-project> .\lpp4ed\Scripts\activate  # step 3
# check python versions again: now using the virtual environment's
(lpp4ed) PS C:\Users\H\Code\my-project> py --list-paths
  *
→ C:\Users\H\Code\my-project\lpp4ed\Scripts\python.exe
 -V:3.12
→ C:\Users\H\AppData\Local\Programs\Python\Python312\python.exe
(lpp4ed) PS C:\Users\H\Code\my-project> python  # step 4
Python 3.12.2 (tags/v3.12.2:6abddd9, Feb  6 2024, 21:26:36)
→ [MSC v.1937 64 bit (AMD64)] on win32
Type "help", "copyright", "credits" or "license" for more
→ information.
>>> exit()
(lpp4ed) PS C:\Users\H\Code\my-project> deactivate  # step 5
PS C:\Users\H\Code\my-project>
Notice how, on Windows, after activating the virtual environment, you can either use the py command or, more directly, python.
At this point, you should be able to create and activate a virtual environment. Please try and create another one on your own. Get acquainted with this procedure—it is something that you will always be doing: we never work system-wide with Python, remember? Virtual environments are extremely important.
The source code for the book contains a dedicated folder for each chapter. When the code shown in the chapter requires third-party libraries to be installed, we will include a requirements.txt file (or an equivalent requirements folder with more than one text file inside) that you can use to install the libraries required to run that code. We suggest that when experimenting with the code for a chapter, you create a dedicated virtual environment for that chapter. This way, you will be able to get some practice in the creation of virtual environments, and the installation of third-party libraries.
Installing third-party libraries
In order to install third-party libraries, we need to use the Python Package Installer, known as pip. Chances are that it is already available to you within your virtual environment, but if not, you can learn all about it on its documentation page: https://pip.pypa.io.
The following example shows how to create a virtual environment and install a couple of third-party libraries taken from a requirements file:
fab@m1:~/code$ mkdir my-project
fab@m1:~/code$ cd my-project
fab@m1:~/code/my-project$ python3.12 -m venv lpp4ed
fab@m1:~/code/my-project$ source ./lpp4ed/bin/activate
(lpp4ed) fab@m1:~/code/my-project$ cat requirements.txt
django==5.0.3
requests==2.31.0
# the following instruction shows how to use pip to install
# requirements from a file
(lpp4ed) fab@m1:~/code/my-project$ pip install -r requirements.txt
Collecting django==5.0.3 (from -r requirements.txt (line 1))
  Using cached Django-5.0.3-py3-none-any.whl.metadata (4.2 kB)
Collecting requests==2.31.0 (from -r requirements.txt (line 2))
  Using cached requests-2.31.0-py3-none-any.whl.metadata (4.6 kB)
  ... more collecting omitted ...
Installing collected packages: ..., requests, django
Successfully installed ... django-5.0.3 requests-2.31.0
(lpp4ed) fab@m1:~/code/my-project$
As you can see at the bottom of the listing, pip has installed both libraries that are in the requirements file, plus a few more. This happened because both django and requests have their own list of third-party libraries that they depend upon, and therefore pip will install them automatically for us.
Using a requirements.txt file is just one of the many ways of installing third-party libraries in Python. You can also just specify the names of the packages you want to install directly, for example, pip install django.
You can find more information in the pip user guide: https://pip.pypa.io/en/stable/user_guide/.
Now, with the scaffolding out of the way, we are ready to talk a bit more about Python and how it can be used. Before we do that, though, allow us to say a few words about the console.
The console
In this era of GUIs and touchscreen devices, it may seem a little ridiculous to have to resort to a tool such as the console, when everything is just about one click away.
But the truth is every time you remove your hand from the keyboard to grab your mouse and move the cursor over to the spot you want to click on, you’re losing time. Getting things done with the console, counter-intuitive though it may at first seem, results in higher productivity and speed. Believe us, we know—you will have to trust us on this.
Speed and productivity are important, and even though we have nothing against the mouse, being fluent with the console is very good for another reason: when you develop code that ends up on some server, the console might be the only available tool to access the code on that server. If you make friends with it, you will never get lost when it is of utmost importance that you do not (typically, when the website is down, and you have to investigate very quickly what has happened).
If you are still not convinced, please give us the benefit of the doubt and give it a try. It is easier than you think, and you will not regret it. There is nothing more pitiful than a good developer who gets lost within an SSH connection to a server because they are used to their own custom set of tools, and only to that.
Now, let us get back to Python.


