Creating your first application
I am going to walk you through how to create an application as it currently requires a couple steps that you need to do from a terminal shell. Then, we will show you how it looks.
Creating the application in easy steps
Creating a project is actually a fairly simple process; we are going to start by creating the application we will develop throughout this book.
- Make sure you are at a terminal shell and then type:
nativescript create crossCommunicator - This will create
crossCommunicatoras a subdirectory of the current directory you are running thenativescriptcommand in. This new project directory will have all the required files for developing your project. - Next, you will need to switch to that new
crossCommunicatordirectory that it created for you by typing:cd crossCommunicator - Then, type:
nativescript platform add androidAnd/or:
nativescript platform add ios - To add each of the target environment(s), you will be compiling your app from this machine:

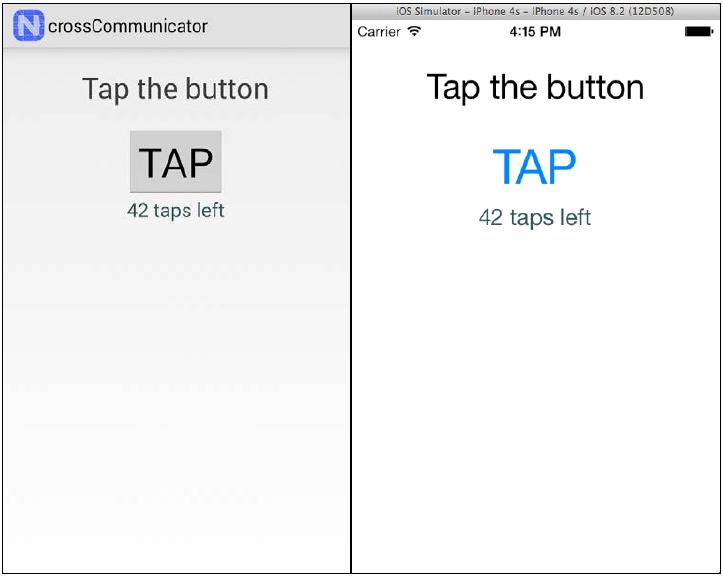
If everything worked properly, you should see something like the preceding image results.
Now, I personally do all my development on the Windows platform using JetBrain's wonderful cross-platform PHPStorm development environment. You are free to use any JavaScript editor you are comfortable with. Since I am using the Windows platform, I do the majority of my testing and debugging on the Android platform and emulator. The Android emulator is basically a full Android in your computer, so it behaves like an actual device. However, since I am also targeting iOS, every so often I also copy or sync the code from my Windows app folder to a Macintosh and then verify that everything looks good and works as expected on the iOS emulator and eventually an iOS device. The very first time when I copy my code over to a Macintosh, I use the nativescript platform add ios command as I need to add the iOS target on the Macintosh.
Note
First time requirements
The very first time you create a project or add a platform, you do need an active Internet connection so the nativescript tool can download the current version of the runtime and platform libraries that it uses. In any future executions, it will first try to download the newest version, but if it fails, it will then use the currently cached version.
Running the app
With those simple steps, NativeScript creates a framework for an application that you can already run on your mobile device. Now, to run the project, we execute:
nativescript run android --emulator
Or:
nativescript run ios –-emulator
NativeScript will then copy your application to the emulator, automatically start it up, and then you should see your first application running on the emulator screen like this:


