Starting with a new programming language or framework typically involves creating a program that displays the famous "Hello World" message, and we will follow this convention. Our app will have just one button. When you press the button, a Delphi Hello World! message will be displayed. Later in this chapter, we are going to put this app on an iPhone and on an Android device.
Click on the Multi-Device Application - Delphi option in the File | New menu, as shown in the following screenshot:
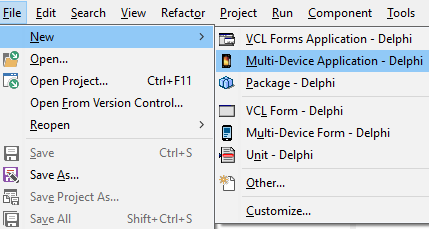
This will display the wizard with different multi-device project templates, as shown in the following screenshot:
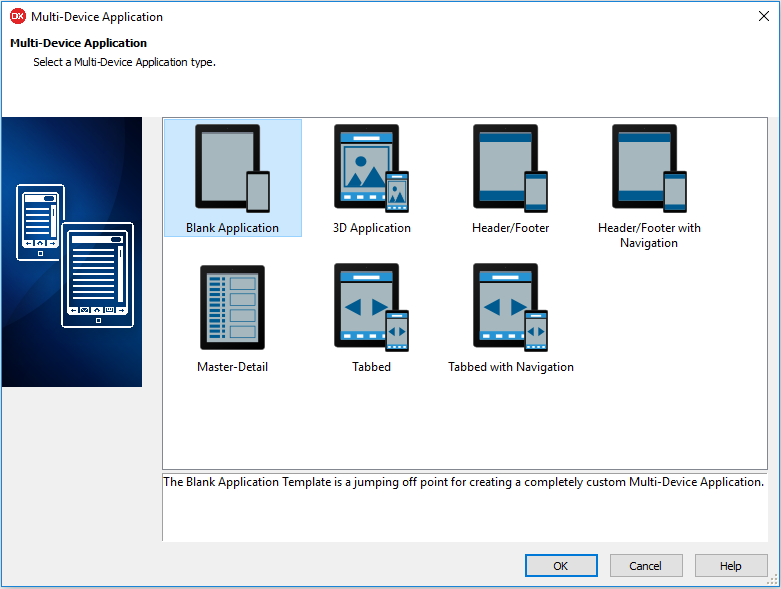
Double-click on the Blank Application project template.
The first thing after creating a new project is to save it all. The Delphi project is made of multiple files that are managed by the IDE. The IDE will also create subfolders in the project directory for managing different artifacts such as compiled executable files, editor history, and recovery files, so it is always a good idea to save a new project into an empty directory.
Click on the Save All button in the Delphi toolbar just below the main menu to save all files in the project, as shown in the following screenshot:
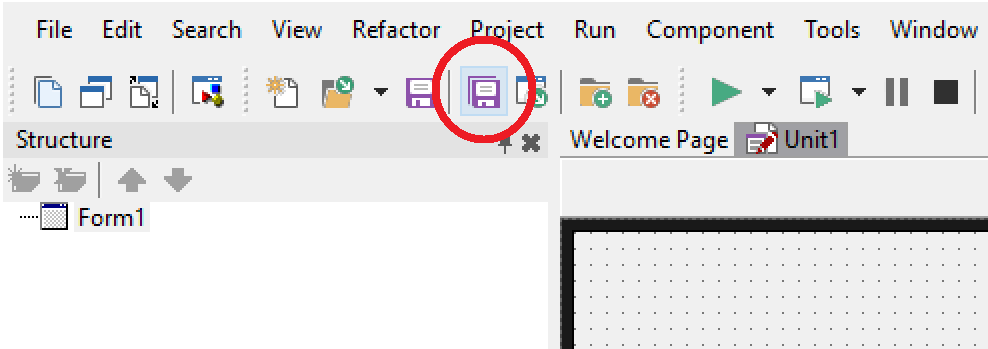
Clicking from time to time on the Save All button is something that you do almost automatically.
First, we will be asked to save the main form of our application. Enter uFormHelloWorld in the file save dialog and click on Save. Then, the second file save dialog is displayed. Here we need to give our project a name. Enter DelphiHelloWorld and click on Save.
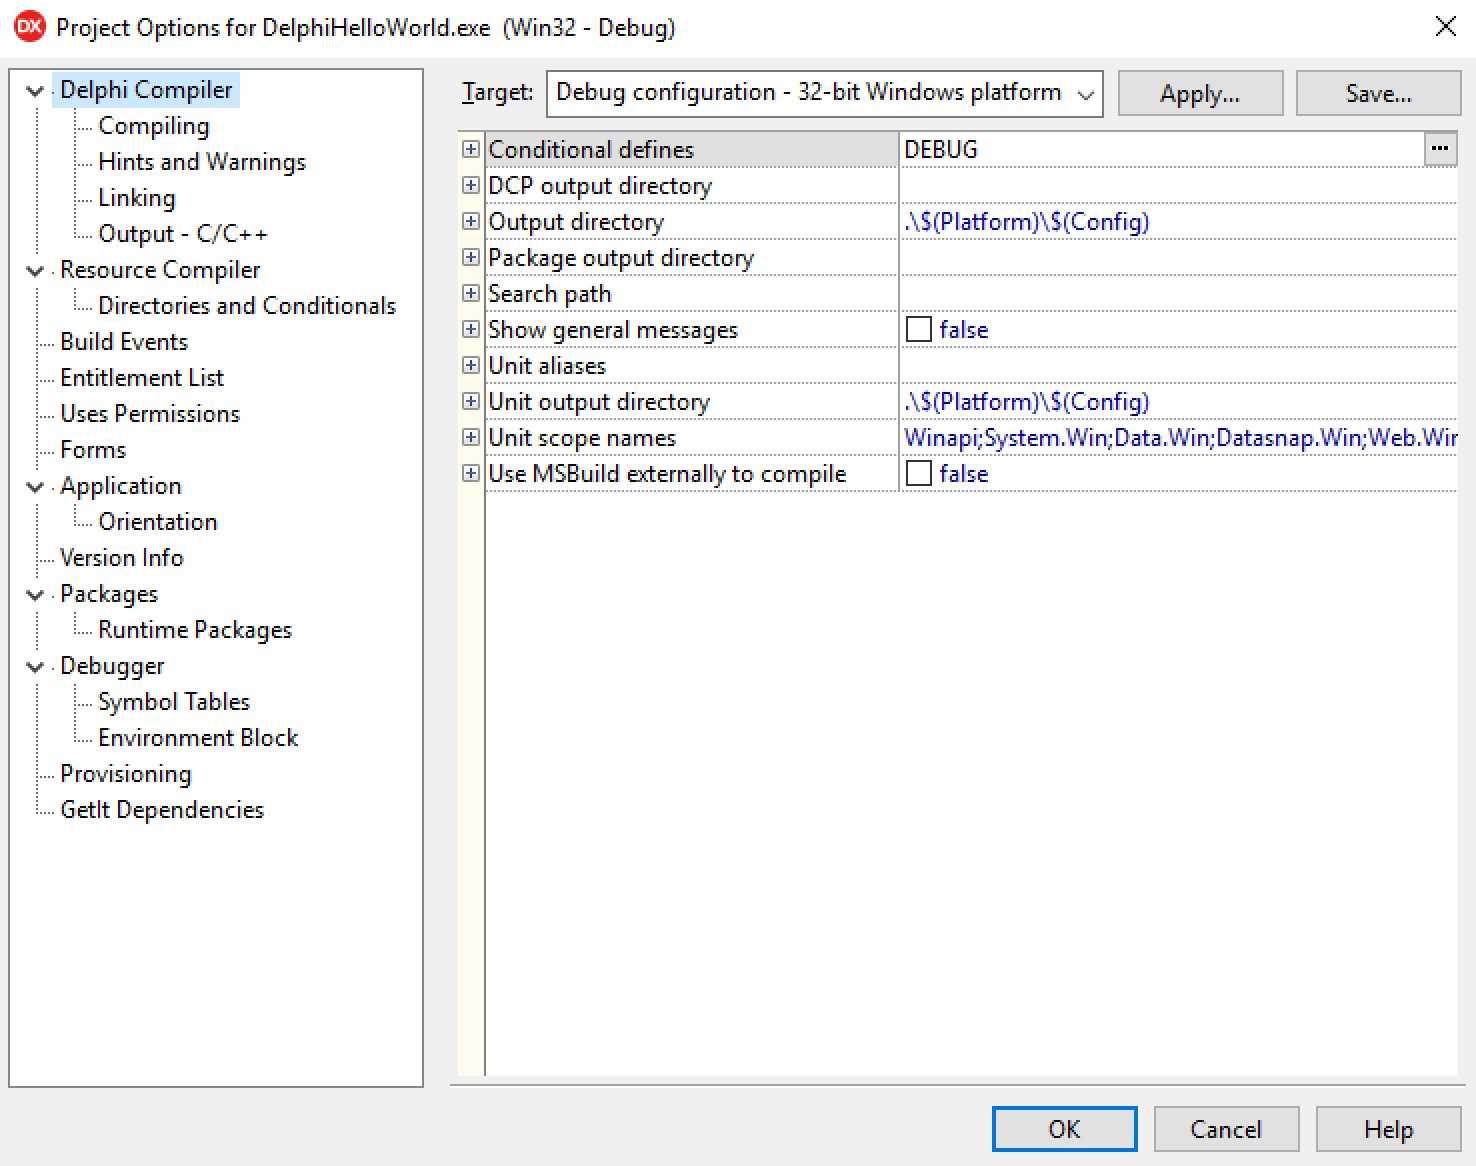
Delphi organizes all files necessary to build an app into a Project. The Delphi IDE contains a number of windows that help us work on our projects. There are different project types. It is possible to create a project group inside the IDE, but at any given moment of time there can be only one project active. You can see the name of the active Delphi project in the very top left corner of the Delphi window. Its name is also displayed in bold font in the Project Manager. Delphi IDE is context sensitive, so the contents of different windows and dialogs can vary. An example of a context sensitive dialog is Project Options. Select the Options item from the bottom of the Project menu. All options related to the current project opened in the IDE will be displayed, as shown in the following screenshot:
Let's add a button to the form. The fastest way to work in the IDE is to use the IDE Insight. There are hundreds of different options, components, and windows in the IDE. If you know what you are looking for, you can just press F6 or Ctrl and . keys at the same time. The IDE Insight combobox will receive focus. You can also just click on the IDE Insight combobox in the top corner of the IDE window. We want to add a button to the form. Just start typing what you are looking for and notice how, with every keystroke, the list of available items in the IDE Insight combobox is changing. Type b, u, and t and, after three keystrokes, the TButton component is the first on the list. Refer to the following screenshot:
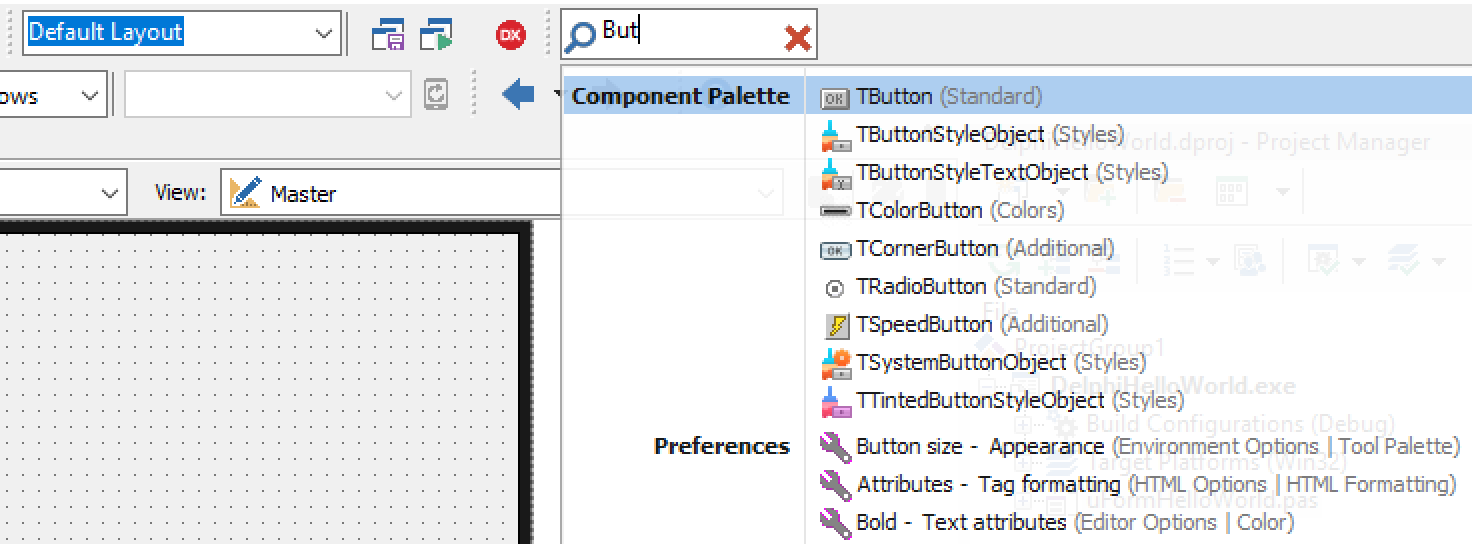
Just press Enter and a button is added to the form. It is probably one of the single most useful productivity features of the IDE. Six keystrokes are needed to get the component added to the form. Alternatively, we could locate the TButton component in the Tool Palette window and double-click it to add it to the form. Over time, you will find that you press Ctrl + almost subconsciously, very much like clicking on Save All. In fact, you can click on Save All right now. :)
We have a button in the middle of an empty form. Let's start working on how our app will look--that's form design. What our app is going to do--that's coding. Click on the button and move it more toward the window's top left corner. In the left bottom part of the IDE there is the Object Inspector window. Here we can modify properties and events of components. We need to change the text that is displayed on the button. Make sure that TButton1 is selected in the Object Inspector and find its Text property. Replace the default Button1 with Hello World. Now, find the Name property of the button and change it to btnHelloWorld. Notice that the new name of the component has been immediately reflected in the Structure view above the Object Inspector. Now select the form. You can click somewhere on the form in the Form Designer to select it or just click on the form's node in the Structure view above Object Inspector. That's how the IDE works. Different windows are synchronized with each other, so selecting a component, changes the current component selection in other views as well. Find the Name property of the main form and change the default Form1 to FormHelloWorld. Now, find the Caption property of the form and change it to Delphi Hello World. Save all.
It is always good practice to give components and their properties meaningful names. There are different naming conventions. One of the most popular ones is to give components such name, that, just from the name itself, we could understand what the type of this particular component is. You also want to keep names short. If names are too long, you need to type more. Long names in the source code also tend to be less readable. It is up to you to decide what naming convention you use, but once you have decided, it is important to stick to it.
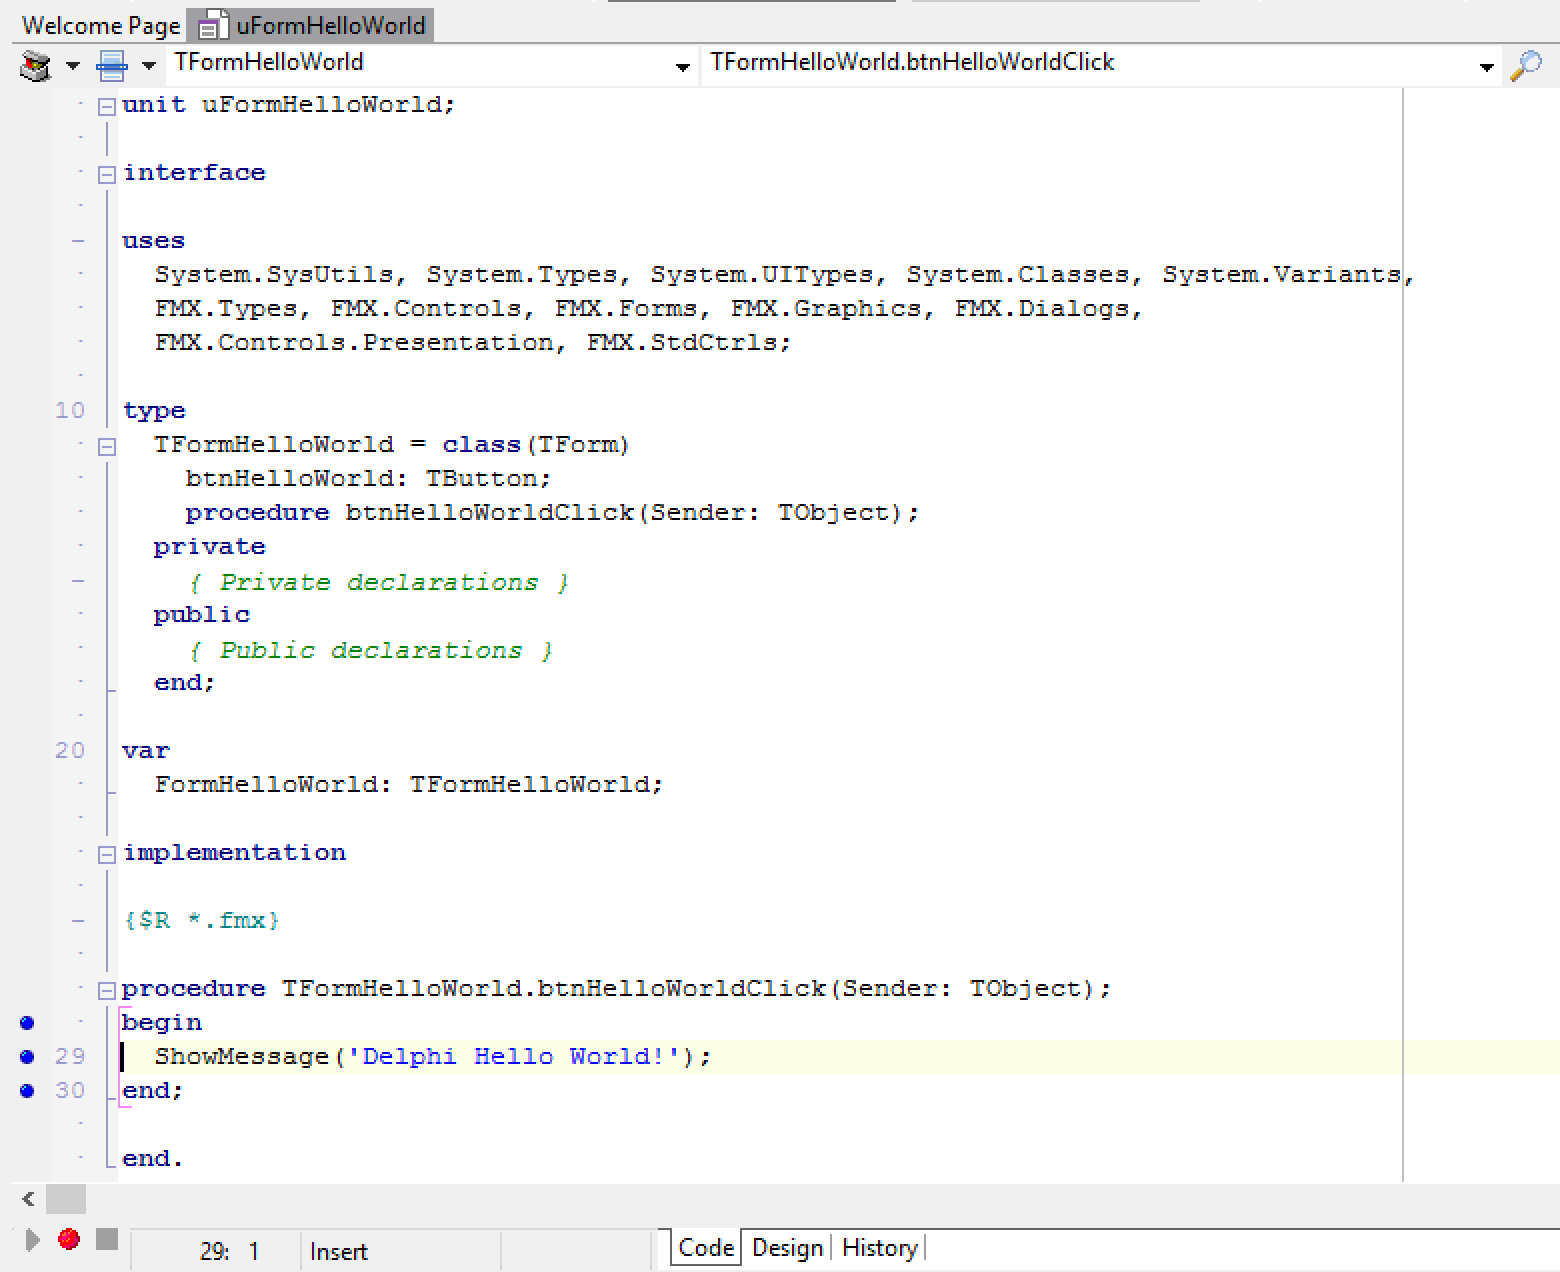
Now we need to define what will happen when the user of our app clicks on the button. For this, we need to attach an event handler to the OnClick event, of the btnHelloWorld button. We could switch to the Events tab in the Object Inspector, locate the OnClick event and double-click on the space next to it to generate an empty event handler. Let's do it faster. Just double-click on the button on the form. The IDE will switch from the Form Designer to Code Editor, and the cursor will be placed just at the beginning of an empty line between begin and end where we need to enter some code in the Object Pascal language. This code will be executed by our app in response to the click event. It could be misleading that this event is called OnClick, as you can use the mouse on desktop computers only. Fear not! If we compile our app to mobile targets, this event will be triggered in response to touching the button on the mobile device screen. In the code, we will invoke the built-in ShowMessage function and pass to it Delphi Hello World! as the string that we want to display in the message.
Click on Save All again. Now let's run the application. Refer to the following screenshot:

Click on the Run green arrow icon under the main menu to build and run the project. You will get the following output:
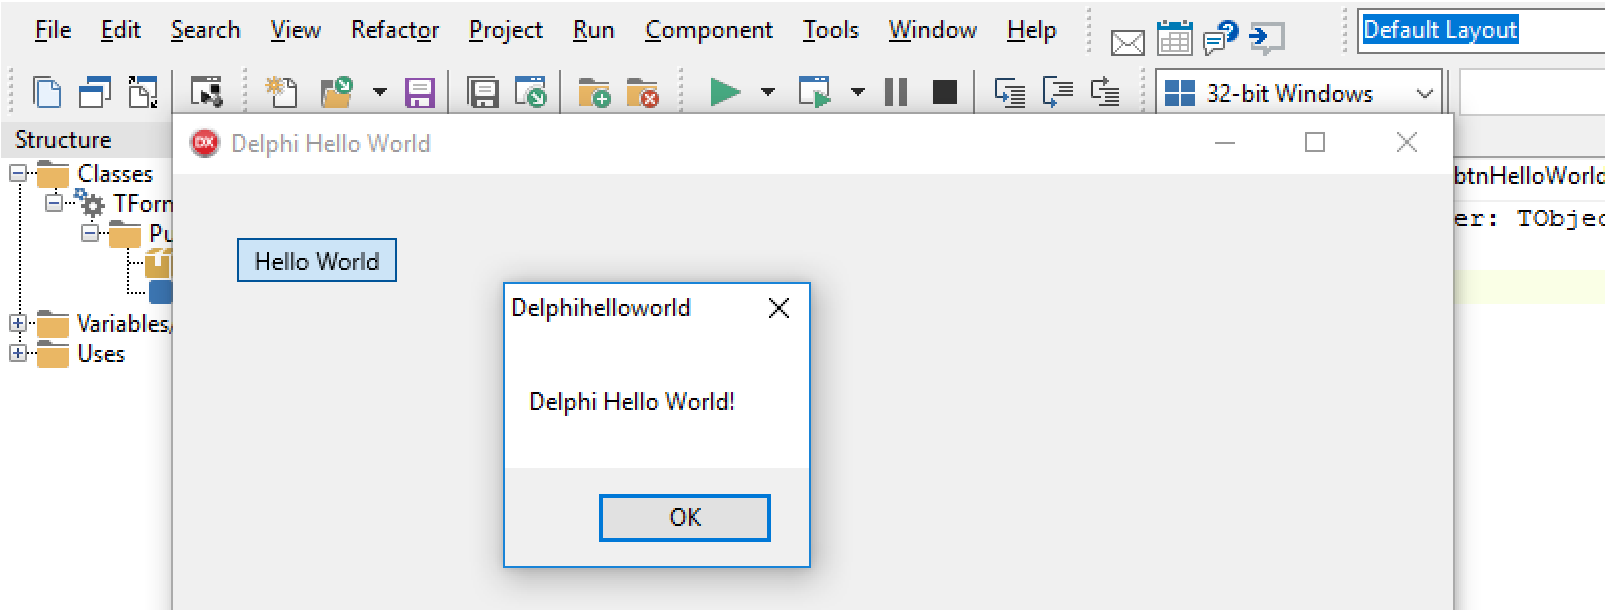
We are on Windows and by default, we will compile our multi-device app as a Windows 32-bit executable. This is very useful during the developement of mobile apps with Delphi. During the development it is quicker to run our multi-device app on Windows to see that it does not contain any mistakes. If it compiles fine on Windows, then there is a big chance that it will also compile OK with mobile compilers. Building and deploying to a mobile device typically takes longer.
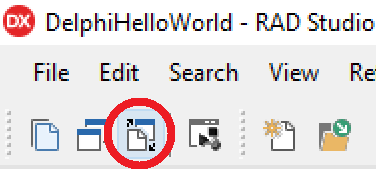
Every Delphi form is made of two source code files. You can switch between these files by clicking on the third button from the left in the toolbar with the Toggle Form/Unit (F12) hint or at the bottom of the screen using the Code and Design tabs. When we entered uFormHelloWorld as the name of the main form of our app, the IDE created two files: uFormHelloWorld.pas and uFormHelloWorld.fmx. The first file we can see in the Code tab is the source code, and the following is the screenshot of the toolbar with the toggle button to switch between the files:
The Code Editor is where we edit Delphi source files with the pas filename extension. We can see directly the contents of the file in the editor, as shown in the following screenshot:
The contents of the fmx file are managed by the Form Designer and we do not edit it directly. Every time we change something in the Object Inspector or in the Form Designer, these changes are stored in the fmx file. The Form Designer gives us a what you see is what you get user experience, so we can see how our app will look even before we run it. Refer to the following screenshot:
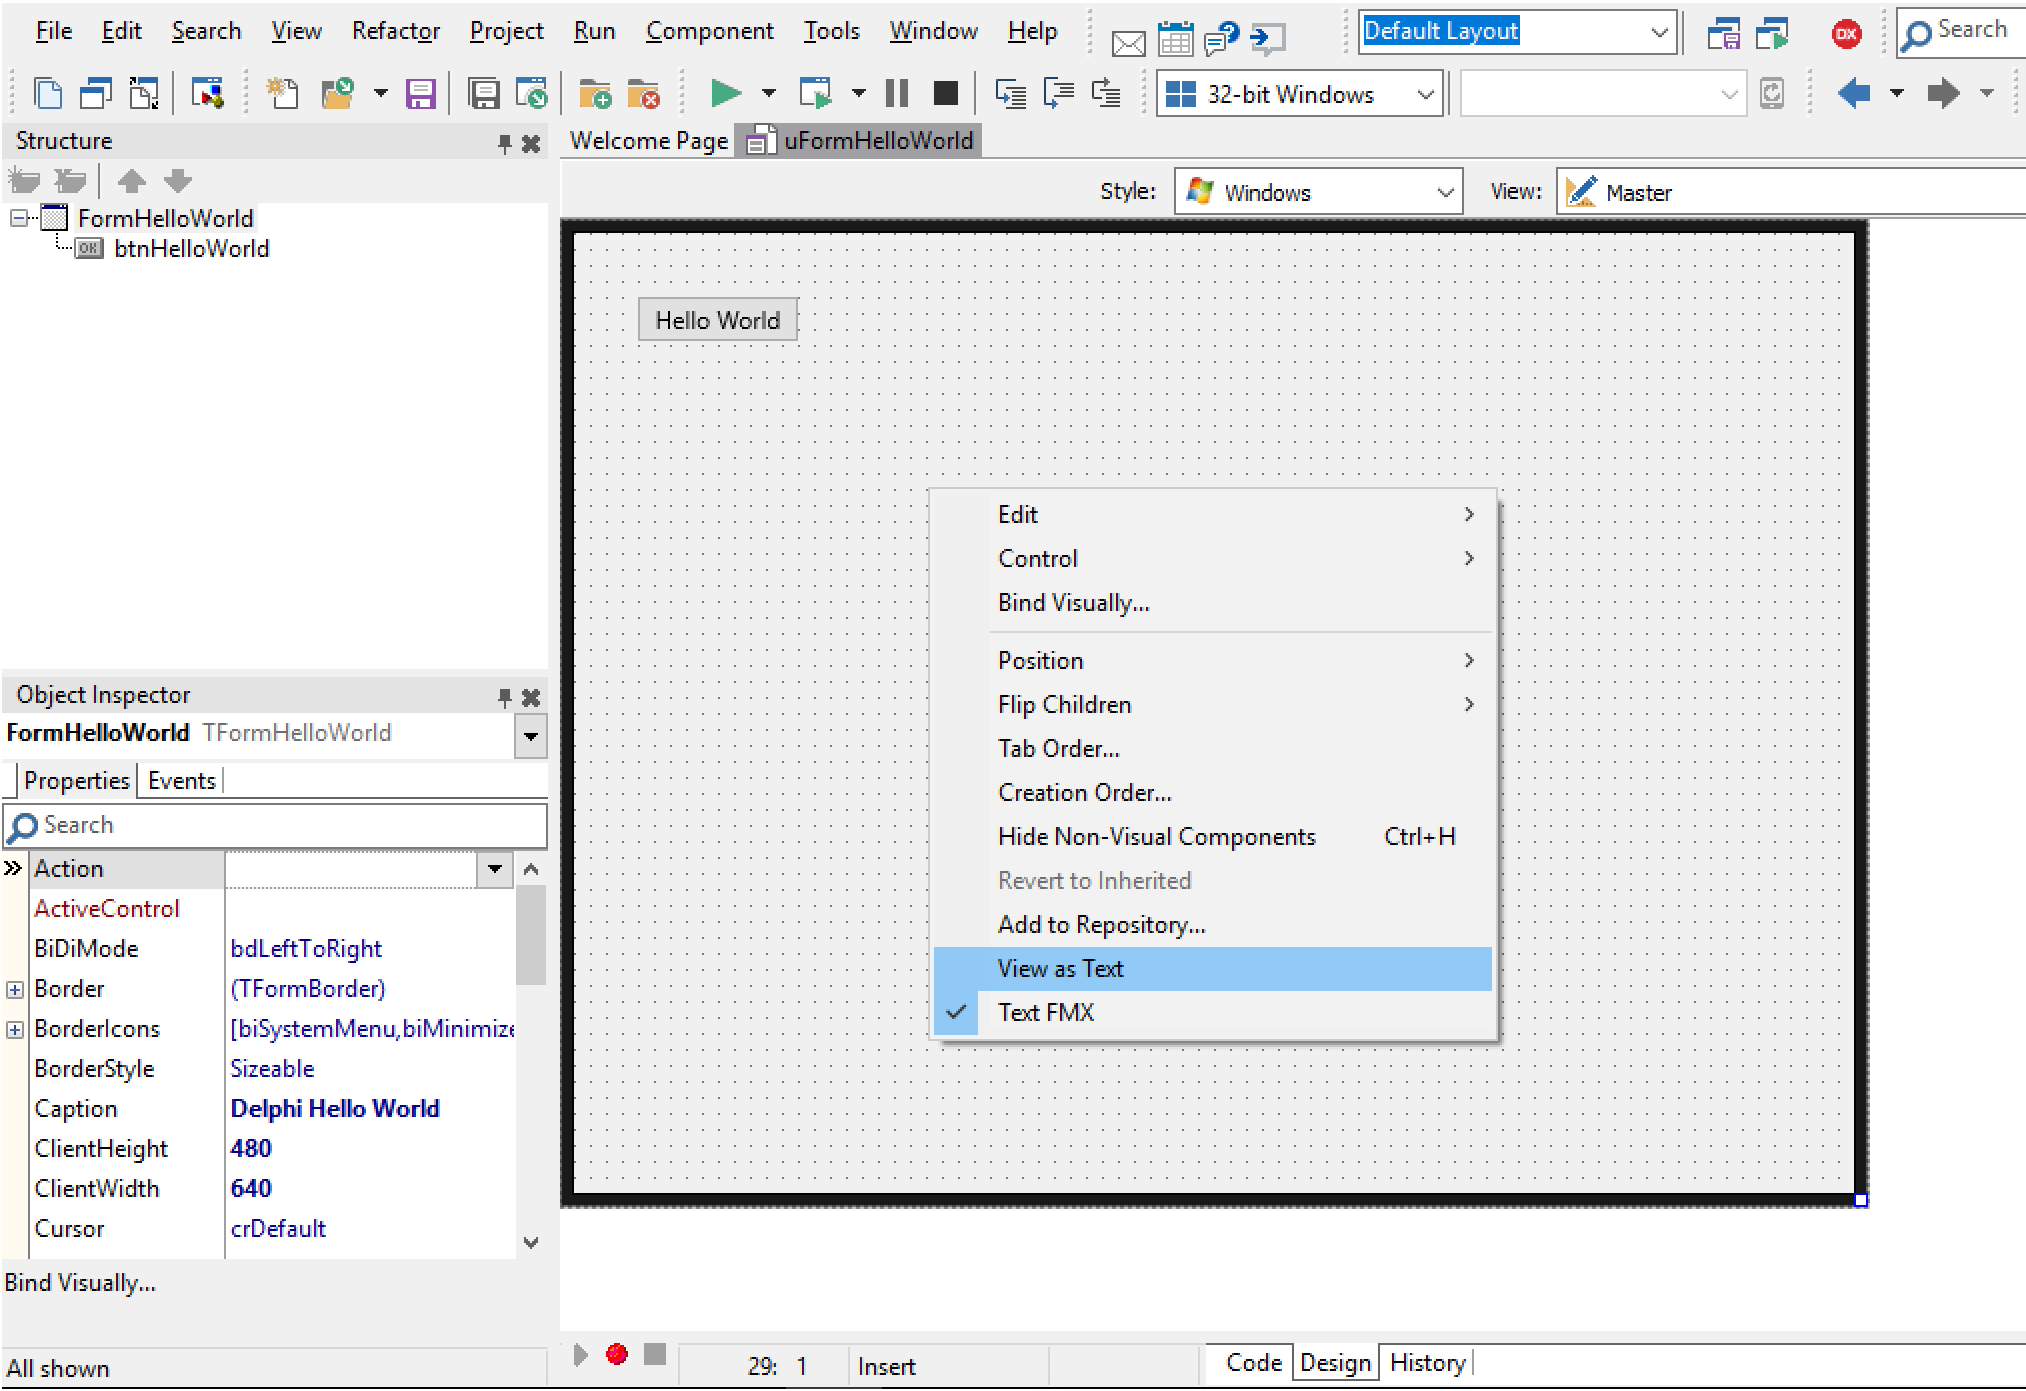
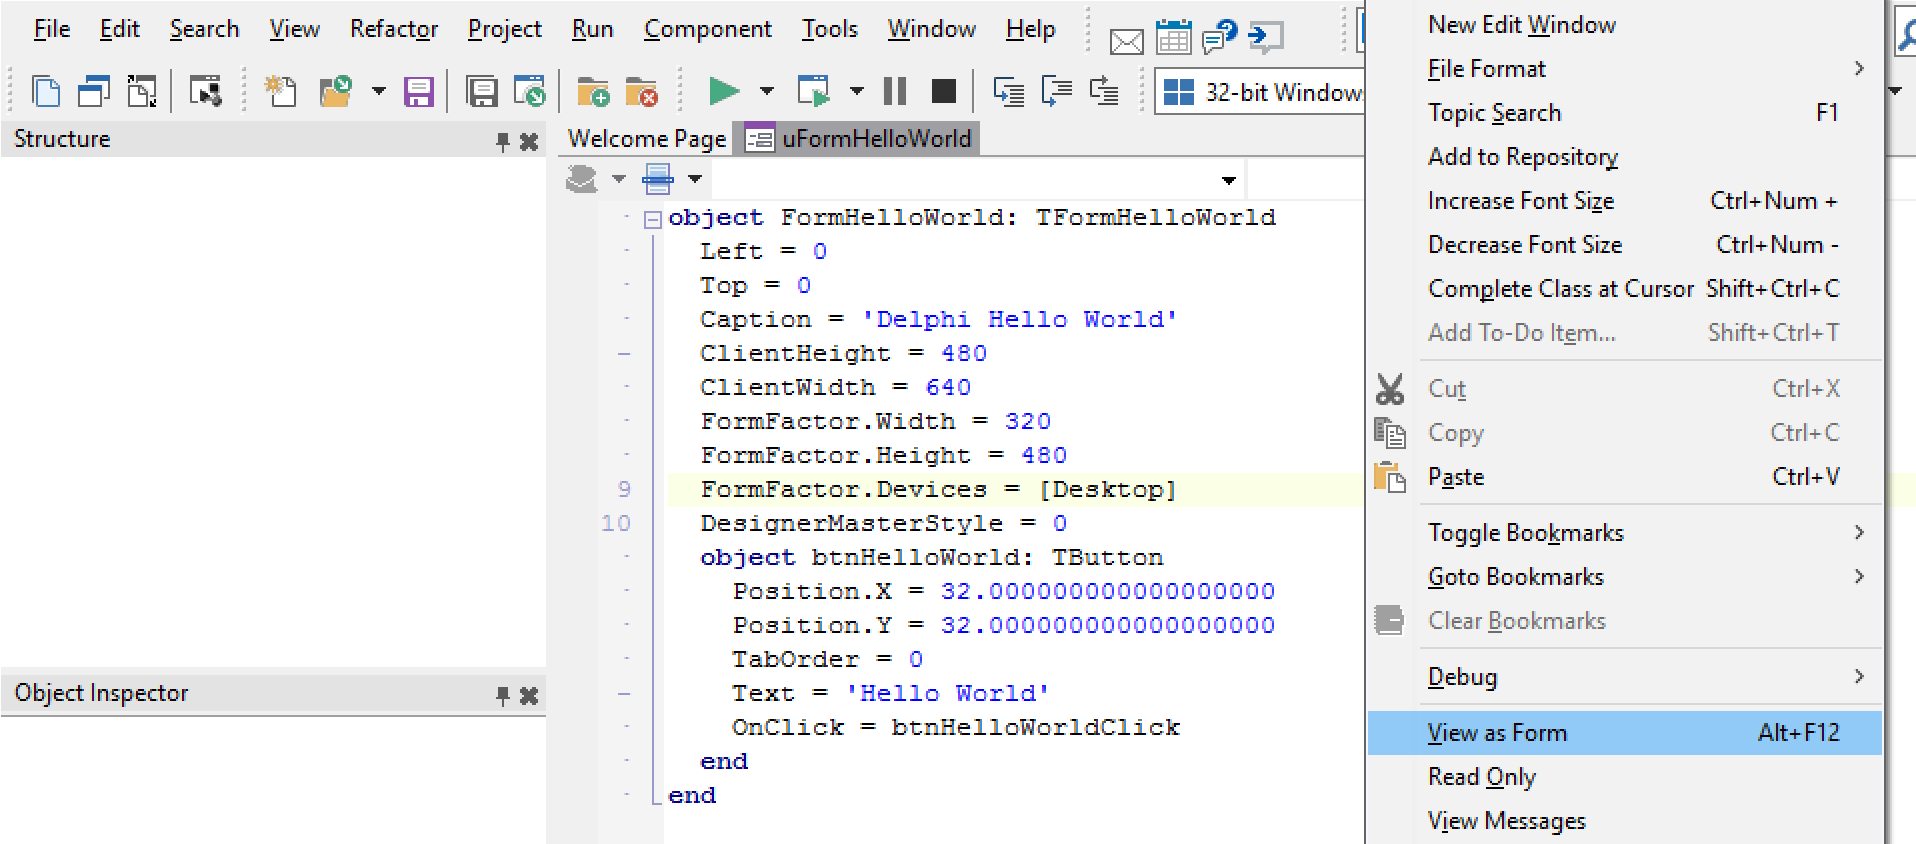
You can preview the text of the form file by right-clicking somewhere on the form and selecting the View As Text option from the context menu.
To return to the form view, just right-click on the editor again and select View As Form from the context menu, as shown in the following screenshot:
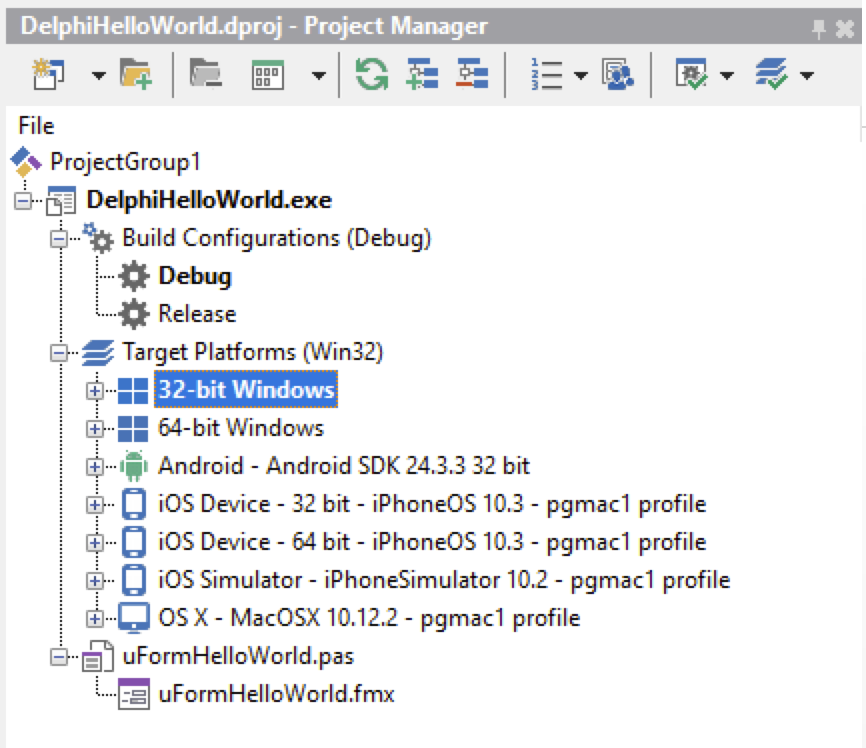
The most important window in the IDE is the Project Manager. It provides a graphical interface to work with all files that make up our projects and lets us switch between different compilers and build configurations. You can build your applications in either debug or release mode. The debug mode is used during the development of an app. The resulting binary file will have additional binary information embedded that is used by a debugger. When our app is ready to be built for distributing to an app store, then we can switch to release mode.
This will generate an app in the form that is suitable for distribution. Take a look at the following screenshot:
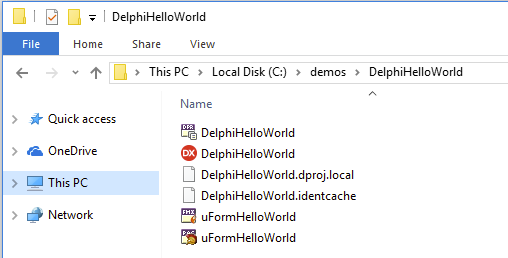
Let's have a look at different files that make up a Delphi project. If you want to quickly find the folder where the current project is located, you can do it easily. Click on the name of the project in the Project Manager. In the Object Inspector, you should now see, Full Name and Full Path properties. Copy the content of the Full Path property to the clipboard, paste it into Windows Explorer, and then hit Enter, as shown in the following screenshot:

You should now see all the files and folders that make up our DelphiHelloWorld project:
Alternatively, you could also right-click on the project name in the Project Manager and select the Show in Explorer option.
Among others, you will see here two files named uFormHelloWorld and two project files with the same name as our project DelphiHelloWorld, but with different extensions. The first one has the extension dpr, which stands for Delphi Project and contains the main program file of our application. We can preview this file inside the IDE by going to the Project | View Source menu, as shown in the following screenshot:
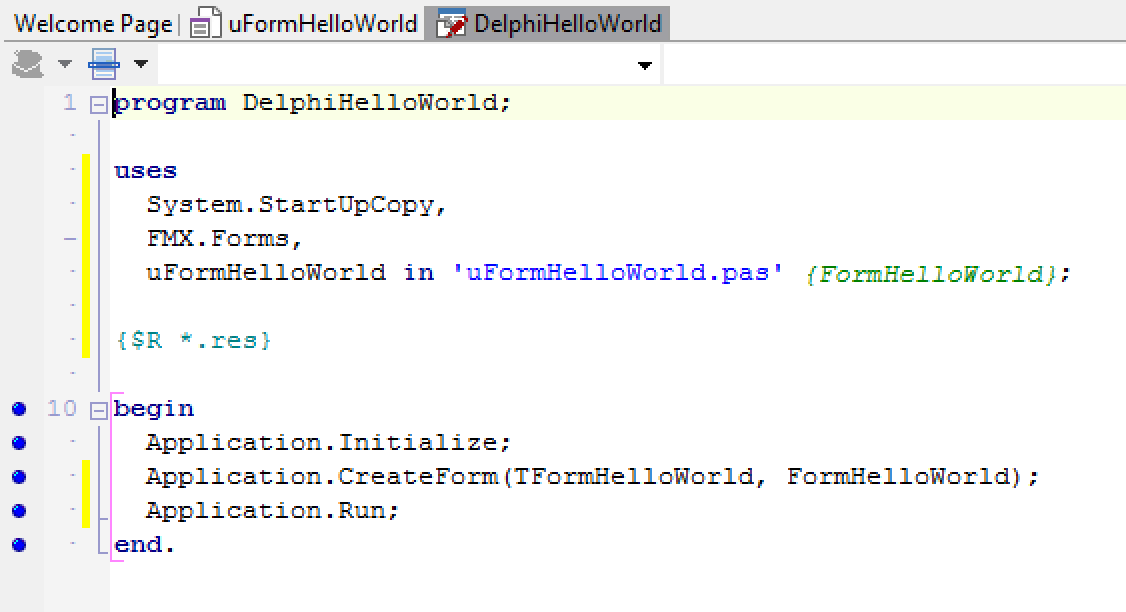
It is the application main program file which is managed by the IDE and most of the time, we need to change anything there. The second project file has a dproj extension. If we open it in Notepad, we will see that it contains XML code with build instruction, for the MSBuild engine that is used by Delphi to manage all files and resources that are needed to build our project for different targets and configurations, as shown in the following screenshot:
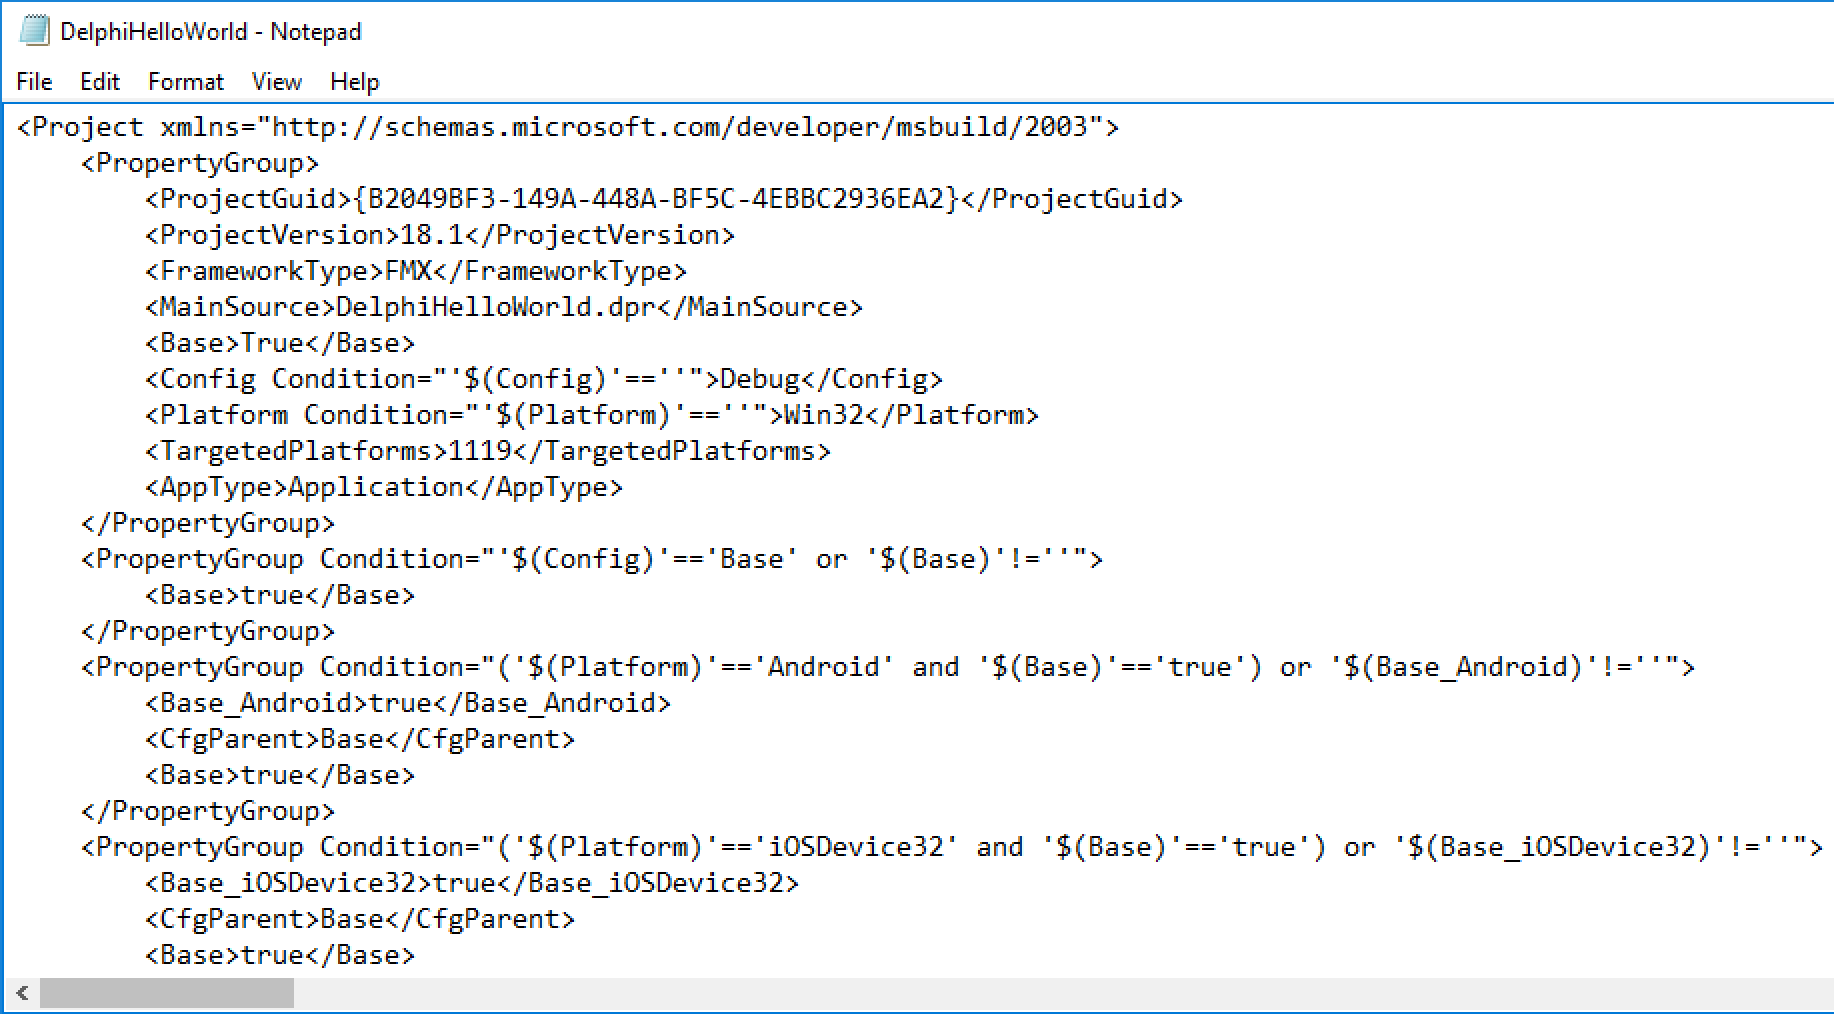
There is also a win32 subfolder here. It contains a subfolder called debug and two files: DelphiHelloWorld.exe and uFormHelloWorld.dcu. The first file is a regular Windows 32-bit executable program that we have just built. It does very little. It only has a button and displays a message. The second file is the product of compiling a form file and is only useful for the IDE during the build process. You can safely delete the win32 folder and its contents. The next time you run the application, all folders and files will be recreated. That's where the difference between building and compiling the project comes. The very first time, both commands do exactly the same--they generate all binary files in the output folder. In fact, dcu files are generated first and the exe file is generated next. If we select Build every time, all binary files are recreated. If we select Compile, only those dcu files are recreated that have changes. This really speeds up running a project inside of the IDE.


