Adding items to the CiviCRM navigation menu
As you begin to use CiviCRM, you will want to provide administrative shortcuts. You can do this by adding custom menu blocks within your CMS or editing the navigation menu in CiviCRM.
How to do it…
CiviCRM has a fully customizable navigation menu. You can edit this menu to get one-click access to the features you use most.
- Navigate to a page that you want to use as the link destination for a menu item. For example, you could navigate to Contacts | Manage Groups, and then select a suitable group.
- Copy the page URL in the browser location. In this example, it would be as follows:
civicrm/group/search?reset=1&force=1&context=smog&gid=2
- Navigate to Administer | Customize Data and Screens | Navigation Menu. This displays the CiviCRM navigation menu in tree form.
- Click on the left arrow on each Parent menu item to expand it. You can now explore all the child menu items.
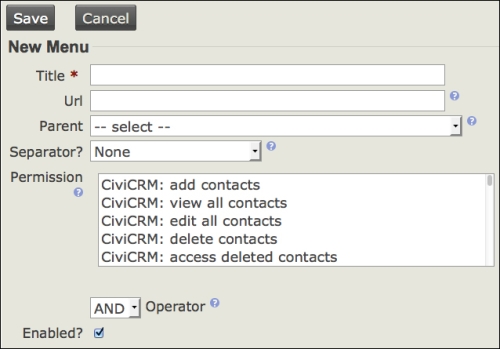
- Click on the Add Menu item button at the top of this screen. This brings up the Add Menu Item edit screen.

- Enter the name of the menu item in the Title field.
- Enter the URL (that you copied) into the URL field.
- Select a parent to make the menu item appear as the child of another menu item. If you don't select a parent, the item will appear on the main CiviCRM menu bar.
- Select one or more permissions in the Permission field to control who can use the menu item. These are CMS permissions, so we must ensure that these are set correctly in our CMS for the menu item to behave properly.
How it works…
CiviCRM stores new menu items, and displays them according to where they are placed in the menu tree and what permissions a user may have to use them.
See also
- You can fully explore CiviCRM customization at http://book.civicrm.org/user/current/initial-set-up/customizing-the-user-interface/


