Slicing the models with Slic3r
It's fair to assume that if you are new to 3D printing and have limited experience, you've probably been using Slic3r. Slic3r has been in development since November 2011 and has become one of the most popular slicers in use. It has an easy user interface, good documentation, regular updates, and good user support on many forums.
Getting ready
You need a RepRap-based 3D printer and have the basic skills to operate it. If you are using Repetier-Host or another host that has Slic3r built in, use the standalone version. This can be found at http://slic3r.org/download.
Note
This book uses Slic3r release v0.9.9. If you would like to use older versions, they can be downloaded at http://dl.slic3r.org/win/old/.
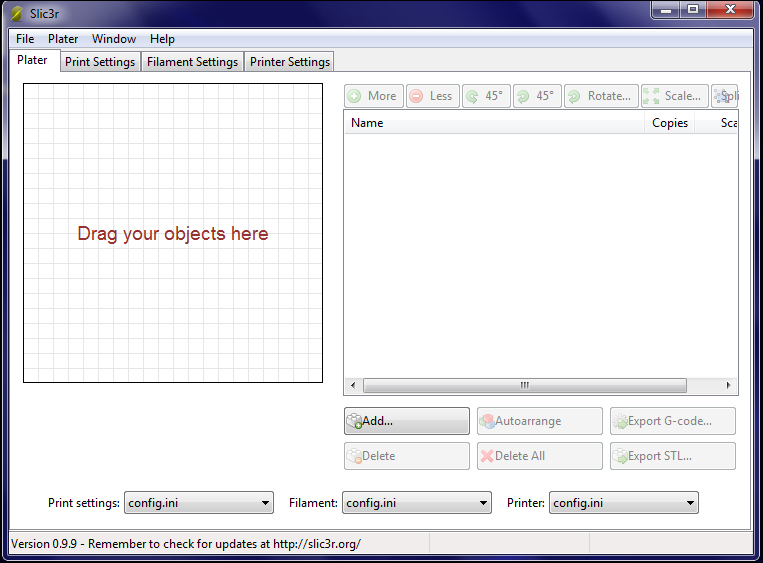
Download the application for your operating system (available for Windows, Mac, and Linux) and follow the installation instructions. This version will have a Plater window, as illustrated in the following screenshot:

How to do it...
If you are presently a Slic3r user, you can ignore the configuration part of this recipe. Open Slic3r and proceed as follows:
- When Slic3r is initially started, a configuration wizard will prompt you to supply some basic information about your printer. There are six settings in this configuration. They are as follows:
- Firmware Type: This indicates the type of firmware to be used. Most RepRap kits will be using Marlin/Sprinter. This is the default setting in Slic3r. Check with the builder of your machine if you are not sure what firmware your printer is using.
- Bed Size: This is the length of travel along the x and y axes. For most RepRap printers, this will be 200 mm by 200 mm. This is the default setting in Slic3r.
- Nozzle Diameter: This size should be specified by markings on the nozzle, by the extruder manufacturer or the builder of your printer. Common sizes are 0.35 mm and 0.5 mm. The default setting in Slic3r is 0.5 mm.
- Filament Diameter: This is the precise diameter size of the filament you are extruding. The two available sizes are 3 mm and 1.75 mm, but it can vary in size between manufacturers. Take multiple measurements and an average of the total. The default setting in Slic3r is 3 mm.
- Extrusion Temperature: Different filament materials require different extrusion temperatures. Enter the correct temperature for the material you are using. The default temperature in Slic3r is 200 degrees Celsius.
- Bed Temperature: Different filament materials require different bed temperatures. Enter the correct temperature for the material you are using. The default temperature in Slic3r is 0 degrees.
- Choose one of your models to start. Take the STL file and drag-and-drop it on the Plater. The shape of the model's bottom can be seen when it is fully loaded. This is illustrated in the following screenshot:

- To generate the G-code, select Export G-code. A pop-up window appears, allowing you to name and save the G-code file. Choose a place to store the file. There's a progress bar in the lower-right corner of the Plater. When the G-code is complete, a message at the bottom of the window will show that the G-code has been exported.
- Open your host and load the G-code. Your model is now ready to be printed.
How it works...
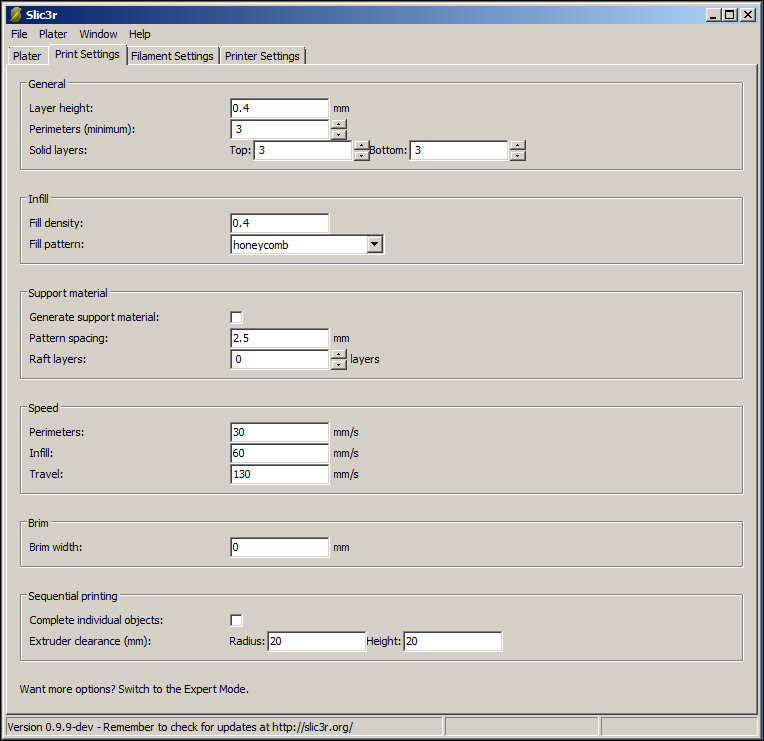
When you open Slic3r for the first time, a simplified interface version is presented. All of the configuration selections you made earlier are stored under the Filament Settings and Printer Settings tabs. Any changes you may need to make to your configuration can be done there.
The Print Settings tab has six sections where slicer settings can be made. We can see the options available in the following screenshot:

For this recipe, we used the default values as a starting point. This will become our reference point for all the future changes. Later, in the following chapters, we will open the expert mode and experiment with the various settings.
Note
A manual created by Gary Hodgson can be found at http://wiki.techstories.de/download/attachments/7143623/Slic3r-Manual2.pdf.


