Creating our first Blazor application
Throughout the book, we will create a blog engine. There won’t be a lot of business logic that you’ll have to learn; the app is simple to understand but will touch base on many of the technologies and areas you will be faced with when building a Blazor app.
The project will allow visitors to read blog posts and search for them. It will also have an admin site where you can write a blog post, which will be password-protected.
We will make the same app for both Blazor Server and Blazor WebAssembly, and I will show you the steps you need to do differently for each platform.
IMPORTANT NOTE
This guide will use Visual Studio 2022 from now on, but other platforms have similar ways of creating projects.
Exploring the templates
In .NET 7, we got more templates. We will explore them further in Chapter 4, Understanding Basic Blazor Components. This chapter will give you a quick overview. In .NET 7 we have 4 Blazor templates, two Blazor Server, and two Blazor WebAssembly. We also have one Blazor Hybrid (.NET MAUI), but we will get back to it in Chapter 18, Visiting .NET MAUI.
Blazor Server App
The Blazor Server App template gives us (as the name implies) a Blazor Server app. It contains a couple of components to see what a Blazor app looks like and some basic setup and menu structure. It also contains code for adding Bootstrap, Isolated CSS, and things like that (See Chapter 9, Sharing Code and Resources).
This is the template we will use in the book to understand better how things go together.
Blazor WebAssembly App
The Blazor WebAssembly App template gives us (as the name implies) a Blazor WebAssembly app. Just like the Blazor Server App template, it contains a couple of components to see what a Blazor app looks like and some basic setup and menu structure. It also contains code for adding Bootstrap, Isolated CSS, and things like that (See Chapter 9, Sharing Code and Resources).
This is the template we will use in the book to understand better how things go together.
Blazor Server App Empty
The Blazor Server App Empty template is a basic template that contains what is essential to run a Blazor Server App.
It doesn’t contain Isolated CSS and things like that. When starting an actual project, this is probably the template to use. But it does require us to implement things we might need that the non-empty templates will give us.
Blazor WebAssembly App Empty
The Blazor WebAssembly App Empty template is a basic template that contains what is essential to run a Blazor WebAssembly App.
It doesn’t contain Isolated CSS and things like that. When starting an actual project, this is probably the template to use. But it does require us to implement things we might need that the non-empty templates will give us.
Creating a Blazor Server application
To start, we will create a Blazor Server application and play around with it:
- Start Visual Studio 2022, and you will see the following screen:
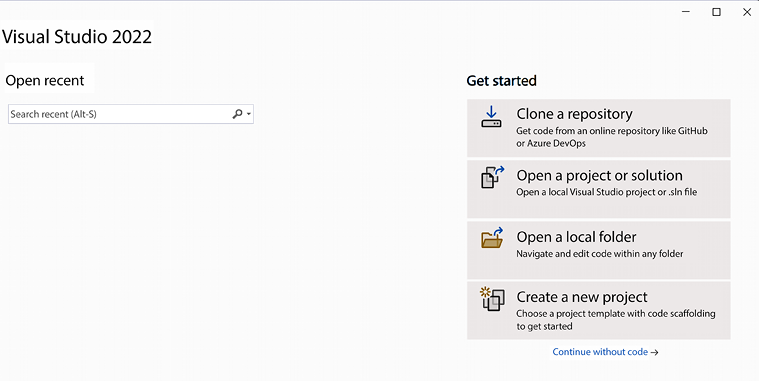
Figure 2.3: Visual Studio startup screen
- Press Create a new project, and in the search bar, type
blazor. - Select Blazor Server App from the search results and press Next:
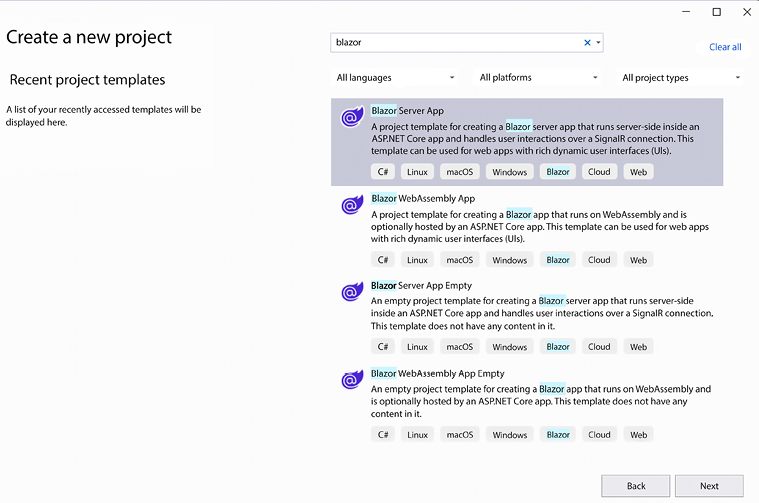
Figure 2.4: The Visual Studio Create a new project screen
- Now name the project (this is the hardest part of any project, but fear not, I have done that already!). Name the application
BlazorServer, change the solution name toMyBlog, and press Next:
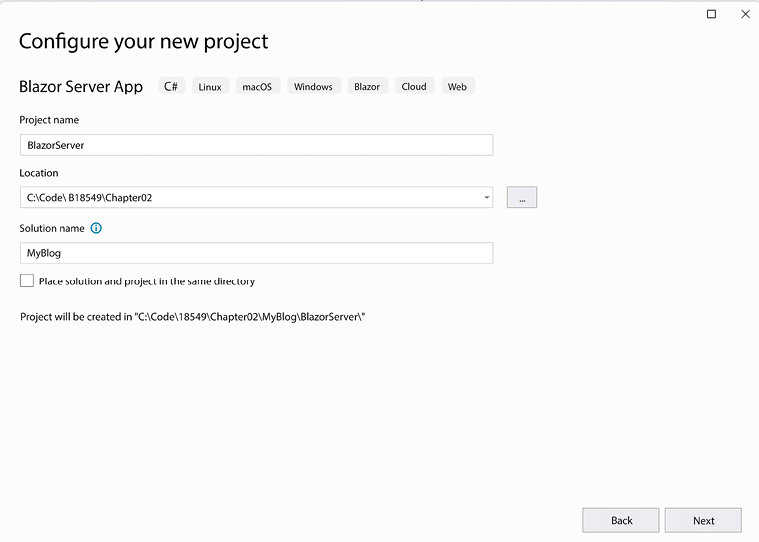
Figure 2.5: The Visual Studio Configure your new project screen
- Next, choose what kind of Blazor app we should create. Select .NET 7.0 (Standard Term Support) from the dropdown menu and press Create:
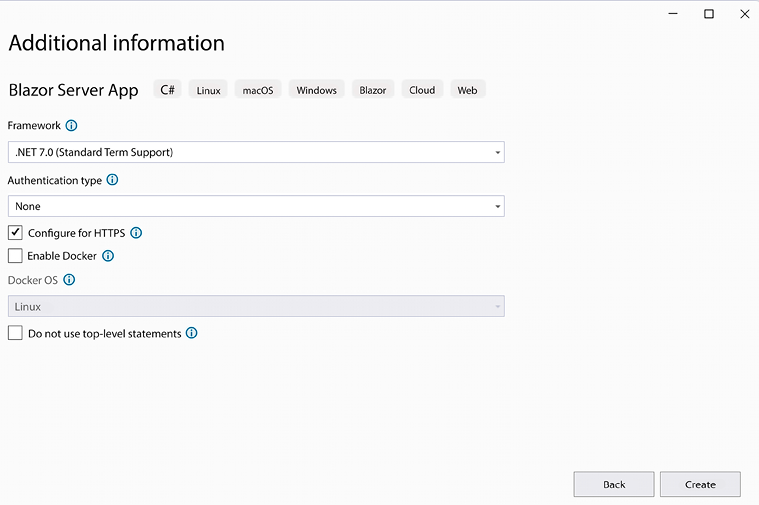
Figure 2.6: Visual Studio screen for creating a new Blazor app
- Now run the app by pressing Ctrl + F5 (we can also find it under Debug | Start without debugging).
Congratulations! You have just created your first Blazor Server application. The site should look something like in Figure 2.7:

Figure 2.7: A new Blazor Server server-side application
Explore the site a bit, navigate to Counter and Fetch data to get a feeling for the load times, and see what the sample application does.
The sample application has some sample data ready for us to test.
This is a Blazor Server project, which means that for every trigger (for example, a button press), a command will be sent via SignalR over to the server. The server will rerender the component, send the changes back to the client, and update the UI.
Press F12 in your browser (to access the developer tools), switch to the Network tab and then reload the page (F5). You’ll see all the files that get downloaded to the browser.
In Figure 2.8, you can see some of the files that get downloaded:
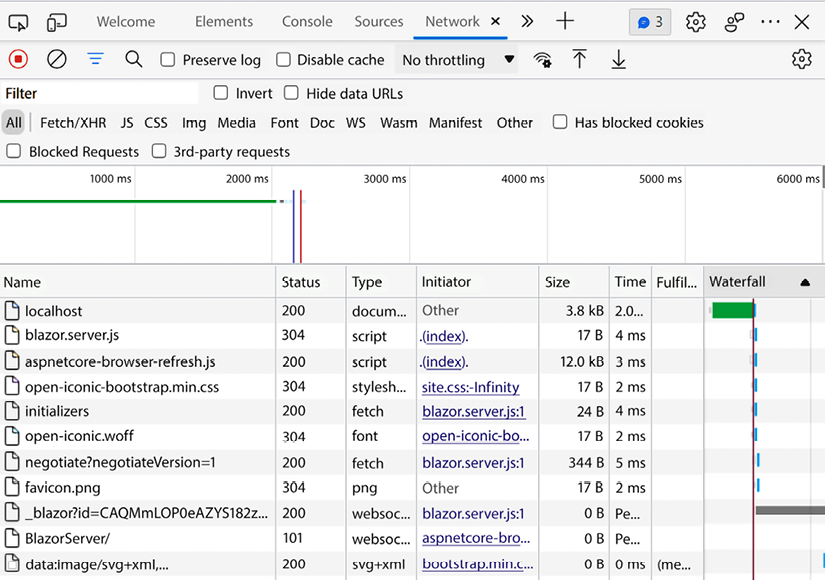
Figure 2.8: The Network tab in Microsoft Edge
The browser downloads the page, some CSS, and then blazor.server.js, which is responsible for setting up the SignalR connection back to the server. It then calls the negotiate endpoint (to set up the connections).
The call to _blazor?id= (followed by a bunch of letters) is a WebSocket call, which is the open connection that the client and the server communicate through.
If you navigate to the Counter page and press the Click me button, you will notice that the page won’t be reloaded. The trigger (click event) is sent over SignalR to the server, and the page is rerendered on the server and gets compared to the render tree, and only the actual change is pushed back over the WebSocket.
For a button click, three calls are being made:
- The page triggers the event (for example, a button click).
- The server responds with the changes.
- The page then acknowledges that the Document Object Model (DOM) has been updated.
In total, 600 bytes (this example is from the Counter page) are sent back and forth for a button click.
We have created a solution and a Blazor Server project and tried them out. Next up, we will add a Blazor WebAssembly app to that solution.
Creating a WebAssembly application
Now it is time to take a look at a WebAssembly app. We will create a new Blazor WebAssembly app and add it to the same solution as the Blazor Server app we just created:
- Right-click on the MyBlog solution and select Add | New Project.
- Search for
blazor, select Blazor WebAssembly App in the search results, and press Next:
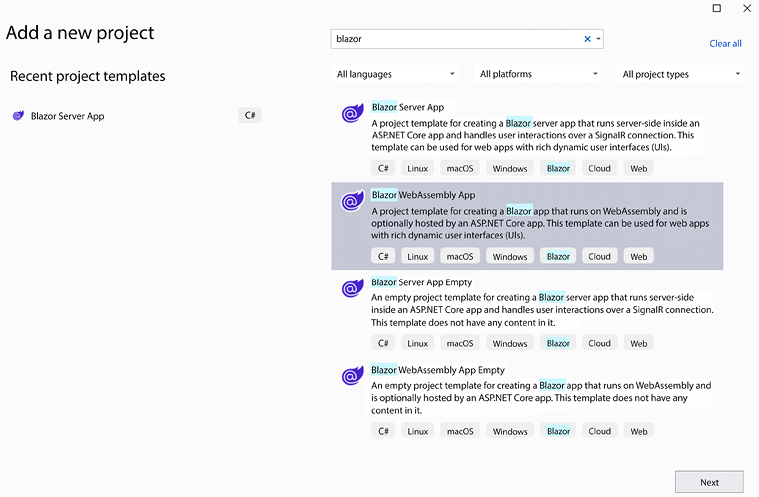
Figure 2.9: The Visual Studio Add a new project screen
- Name the app
BlazorWebAssembly. Leave the location as is (Visual Studio will put it in the correct folder by default) and press Create:
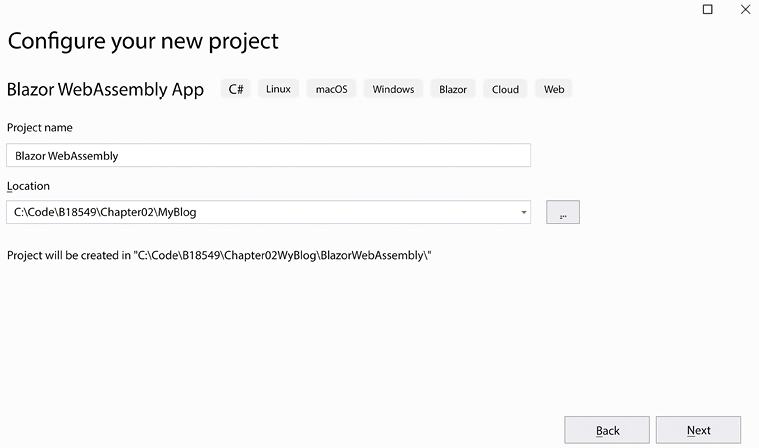
Figure 2.10: The Visual Studio Configure your new project screen
- On the next screen, select .NET 7.0 (Standard Term Support) from the dropdown.
- In this dialog box, two new choices that were not available in the Blazor Server template appear. The first option is ASP.NET Core hosted, which will create an ASP.NET backend project and will host the WebAssembly app, which is good if you want to host web APIs for your app to access; you should check this box.
- The second option is Progressive Web Application, which will create a
manifest.jsonfile and aservice-worker.jsfile that will make your app available as a Progressive Web Application (PWA). Make sure the Progressive Web Application option is checked as well, and then press Create:
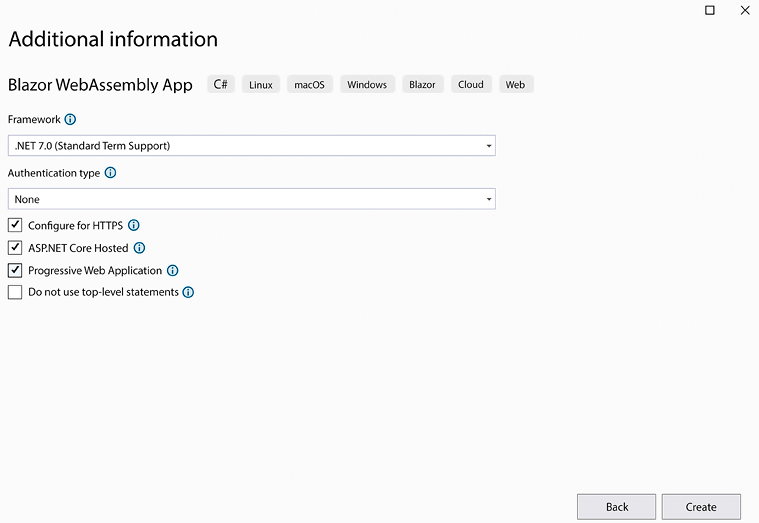
Figure 2.11: Visual Studio screen for creating a new Blazor app
- Right-click on the WebAssembly.Server project and select Set as Startup Project.
NOTE:
It can be confusing that this project also has
Serverin the name.Since we chose ASP.NET Core hosted when we created the project, we are hosting the backend for our client-side (WebAssembly) in WebAssembly.Server, and it is not related to Blazor Server.
Remember that if you want to run the WebAssembly app, you should run the WebAssembly.Server project; that way, we know the backend ASP.NET Core project will also run.
- Run the app by pressing Ctrl + F5 (start without debugging).
Congratulations! You have just created your first Blazor WebAssembly application, as shown in Figure 2.12:

Figure 2.12: A new Blazor WebAssembly app
Explore the site by clicking the Counter and Fetch data links. The app should behave in the same way as the Blazor Server version.
Press F12 in your browser (to access the developer tools), switch to the Network tab, and reload the page (F5); you’ll see all the files downloaded to the browser.
In Figure 2.13, you can see some of the files that got downloaded:
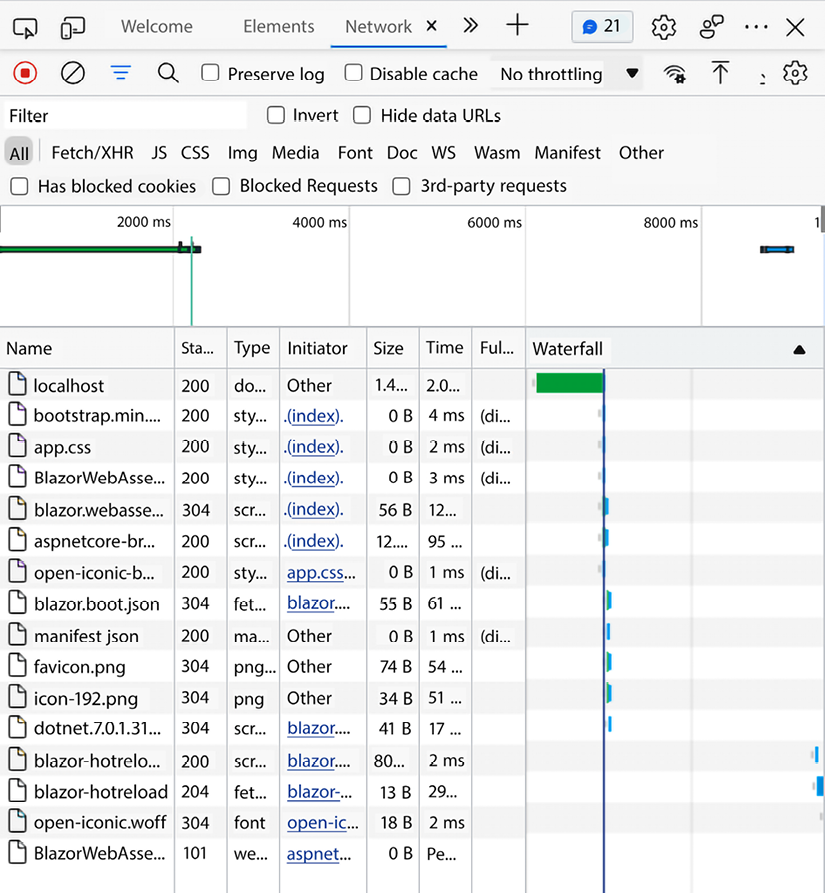
Figure 2.13: The Network tab in Microsoft Edge
In this case, when the page gets downloaded, it will trigger a download of the blazor.webassembly.js file. Then, blazor.boot.json gets downloaded. Figure 2.14 shows an example of part of blazor.boot.json:
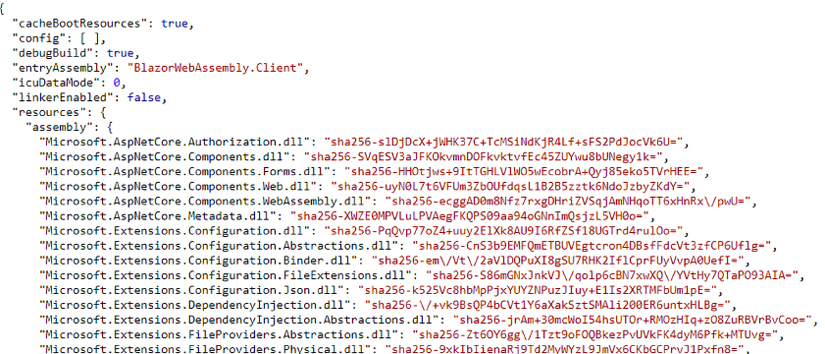
Figure 2.14: Part of the blazor.boot.json file
The most important thing blazor.boot.json contains is the entry assembly, which is the name of the DLL the browser should start executing. It also includes all the framework DLLs the app needs to run. Now our app knows what it needs to start up.
The JavaScript will then download dotnet.7.0.*.js, which will download all the resources mentioned in blazor.boot.json: this is a mix of your code compiled to a .NET Standard DLL, Microsoft .NET Framework code, and any community or third-party DLLs you might use. The JavaScript then downloads dotnet.wasm, the Mono runtime compiled to WebAssembly, which will start booting up your app.
If you watch closely, you might see some text when you reload your page saying Loading. Between Loading showing up and the page finishing loading, JSON files, JavaScript, WebAssembly, and DLLs are downloaded, and everything boots up. According to Microsoft Edge, it takes 1.8 seconds to run in debug mode and with unoptimized code.
Now we have the base for our project, including a Blazor WebAssembly version and a Blazor Server version. Throughout this book, we will use Visual Studio, but there are other ways to run your Blazor site, such as using the command line. The command line is a super powerful tool, and in the next section, we will take a look at how to set up a project using the command line.


