Creating your C++ Shooter project from a template
Now, it’s the time to get your hands dirty working on a UE5 C++ project yourself. We will go through the steps to create a new C++ project from scratch based on the First Person template.
The First Person template is one of the default game templates that come with UE. When you want to create a new project, you can pick this template from the Unreal Project Browser window. Our new MyShooter game will derive all the features from the template game, and we don’t have to do any additional work.
To get started with C++ scripting, we first need to install an IDE. In this book, we will use MS Visual Studio 2022 as an example.
Installing Visual Studio 2022
Visual Studio (VS) is an Integrated Development Environment (IDE) from Microsoft. It is a tool used to create, edit, debug, and compile code. In order to do C++ scripting, you need to go to the official website at https://visualstudio.microsoft.com/vs/ and download the Community 2022 version installation package (see Figure 1.1).
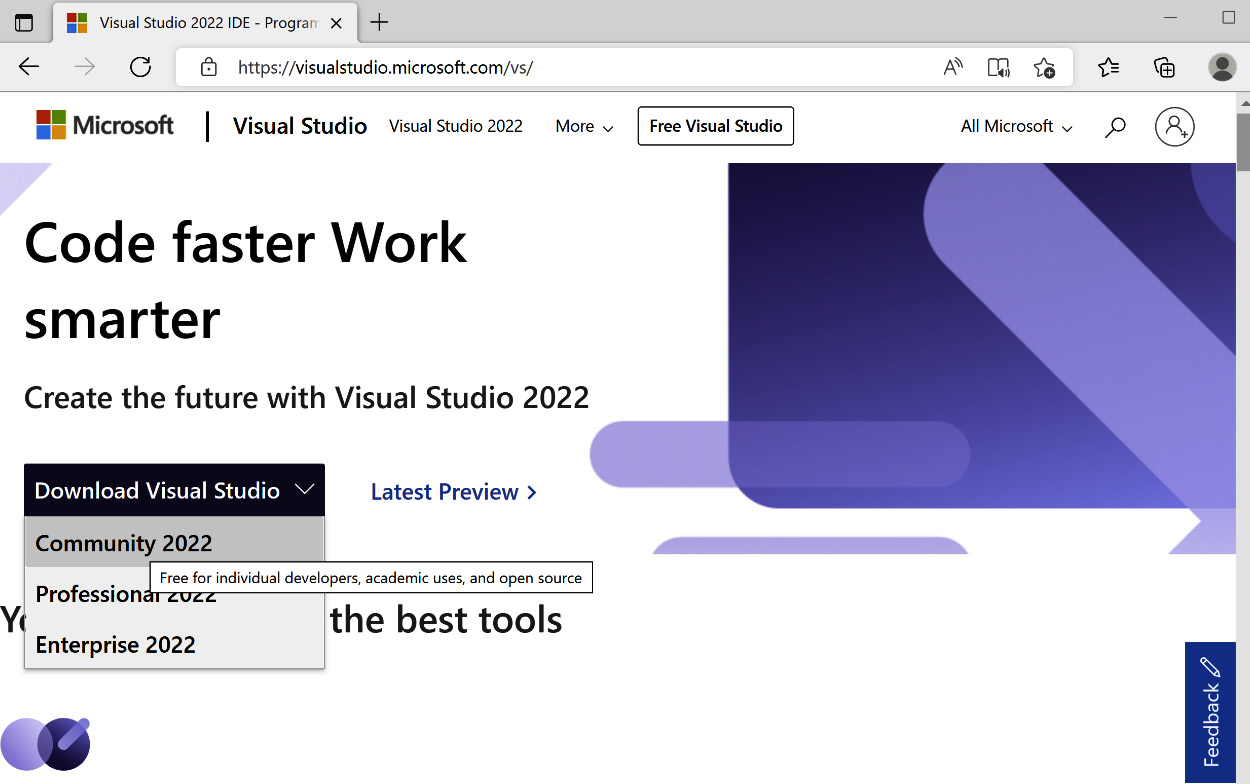
Figure 1.1 – Downloading VS 2022
Note
To install VS, a Microsoft account is typically required. If you don’t have a Microsoft account, you can register using the following page: https://account.microsoft.com/account/.
Next, launch VisualStudioSetup.exe inside the folder where you downloaded the VS installer (the \Downloads folder, for example).
Enable the two Game development with C++ and Desktop development with C++ checkboxes – these two options tell the installer to install the C++ compiler and the professional game development support for UE (see Figure 1.2).
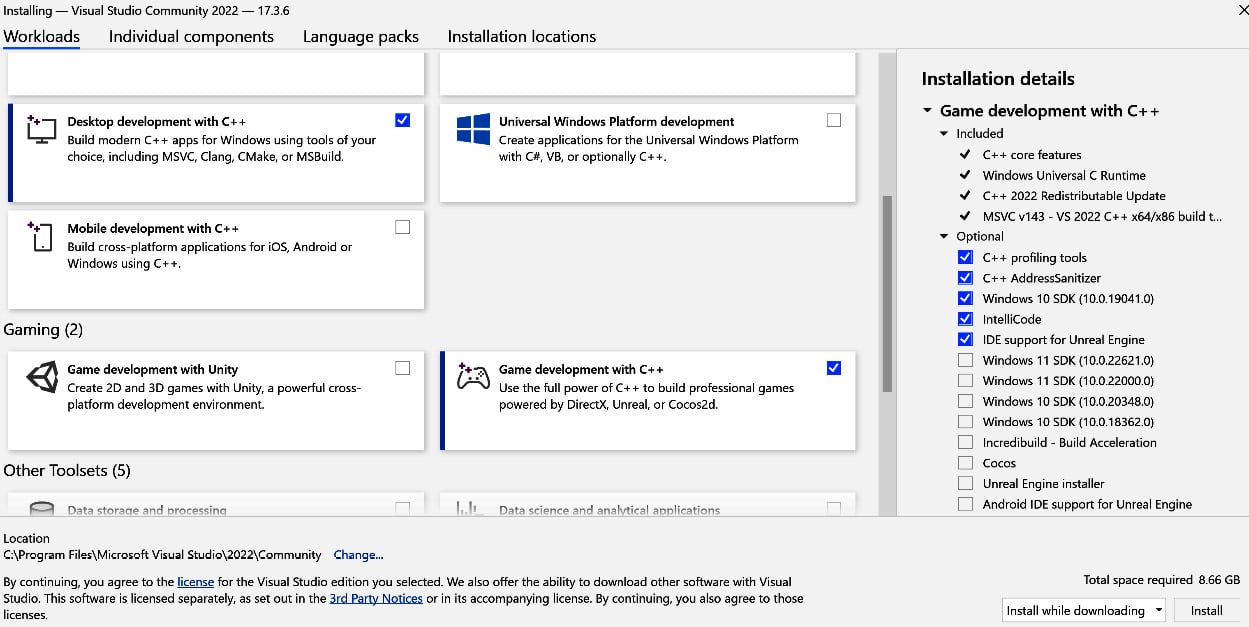
Figure 1.2 – Picking workloads for the VS installation
Also, keep an eye on the following options on the Installation details panel that belongs to the Desktop development with C++ group, and make sure the following are checked:
- C++ profiling tools
- C++ AddressSanitizer
- Windows 10 SDK
- IntelliCode
- IDE support for Unreal Engine
Then, click the Install button to install the workloads and reboot the system, and then you will see a prompt from the dialog popup (see Figure 1.3):

Figure 1.3 – The VS Done installing dialog box
The next thing we need to do is to confirm that we have installed the engine source code together with the UE5 editor. The reason why we need this is that when we generate a new project, the engine source code can be integrated into the new project; under certain circumstances, we may need to modify or customize the engine for the game’s specific needs.
Ensuring your UE has the source code installed
Before launching the UE5 editor, we first need to check whether Engine Source is installed for the editor. By doing this check, we make sure that the UE5 source code is integrated with the C++ projects we are going to create.
The three steps to check or install the engine source code are as follows:
- Click the downward arrow button and choose Options from the drop-down menu.
- Make sure that the Engine Source option is checked.
- Press the Apply button:
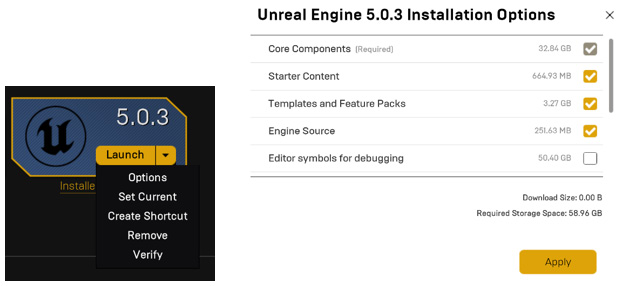
Figure 1.4 – The UE5 Options menu
UE is an ongoing development product, with bugs and defects that may need to be fixed by its users. Also, professional developers sometimes modify the engine source code to adapt to their specific needs. An example of this is when we face an issue with geometry instancing (or instanced rendering) working only in the game’s development build but not in the release build, which is subsequently resolved by our engineer modifying the engine’s source code.
Note
Geometry instancing is a rendering technique that renders multiple instances of a visual object in a single draw call and provides each instance with some unique attributes: https://en.wikipedia.org/wiki/Geometry_instancing.
We are now ready to start the UE editor through the Epic Games Launcher.
Launching the UE5 editor through the Epic Games Launcher
Launching the UE5 editor is pretty straightforward. You simply click the Launch button on the 5.03 engine card to start the editor (see Figure 1.5).
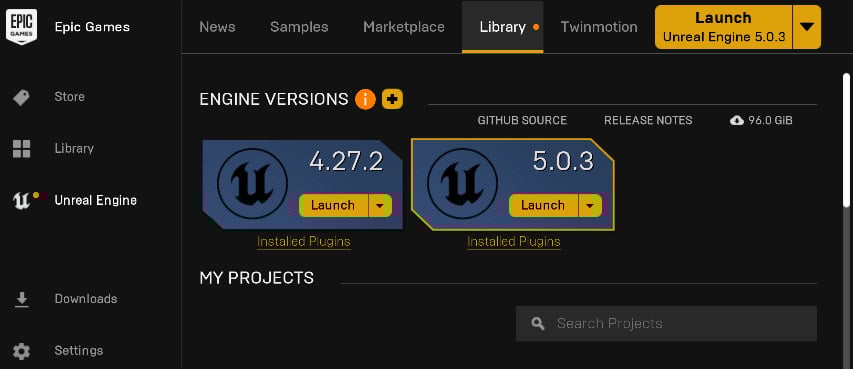
Figure 1.5 – Launching the UE5 editor from the Epic Games Launcher
The next thing we want to do is to create a new game project. Let’s name the new project MyShooter.
Creating the MyShooter C++ project
To create the project, follow these steps (and see Figure 1.6 for reference):
- In the Unreal Project Browser window, choose the GAMES tab on the left side.
- Select the First Person template.
- Select the C++ button.
- Choose the project location (for example,
C:\UEProjects) and typeMyShooterin the Project Name field. - Click the Create button.
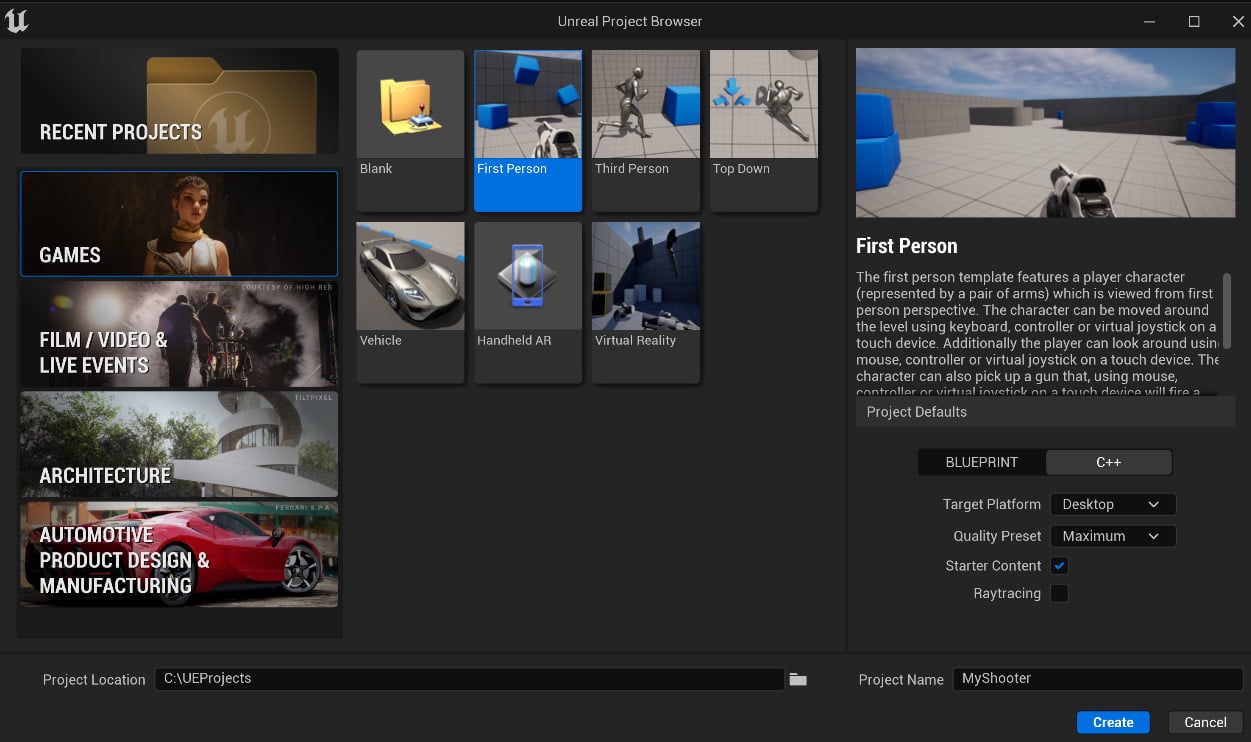
Figure 1.6 – Creating the MyShooter project
The created game project also includes the starter content, which is packaged with assets and resources that can be used to prototype the game.
The engine will do some initialization work and then open the editor when things are ready. If you look at the project tree panel’s MyShooter tab in the bottom-left corner of the editor window, you should see the C++ Classes node on the same layer as the Content node (see Figure 1.7).
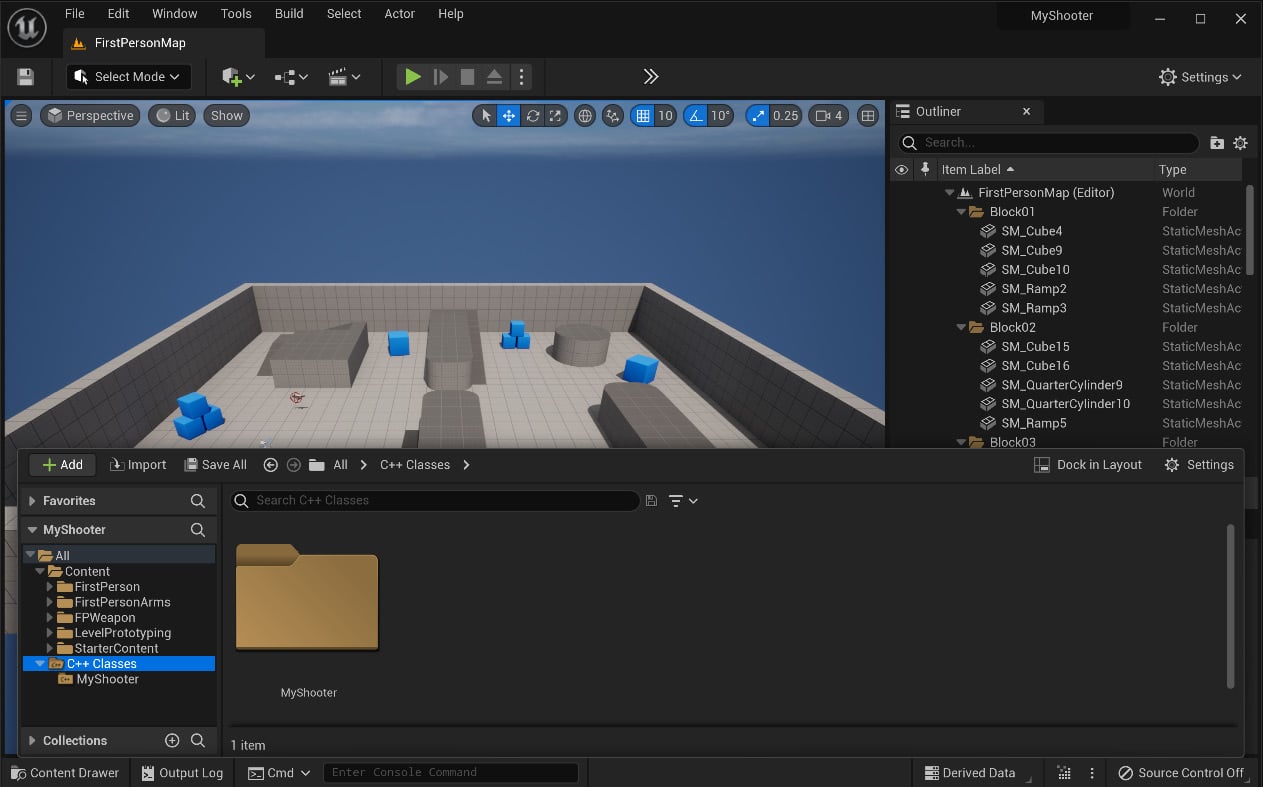
Figure 1.7 – The MyShooter C++ project opened in the UE5 editor
Associating VS with UE5 as the default source code editor
Since we created the C++, project, all the C++ source code for the game was already generated. To open the source files directly in the UE5 editor, we want to associate VS as the engine editor’s default IDE.
On the UE5 Editor’s main menu, select Edit | Editor Preferences to open the preference window, then find the General | Source Code item on the left panel, and finally, pick Visual Studio 2022 from the Source Code Editor dropdown (see Figure 1.8).
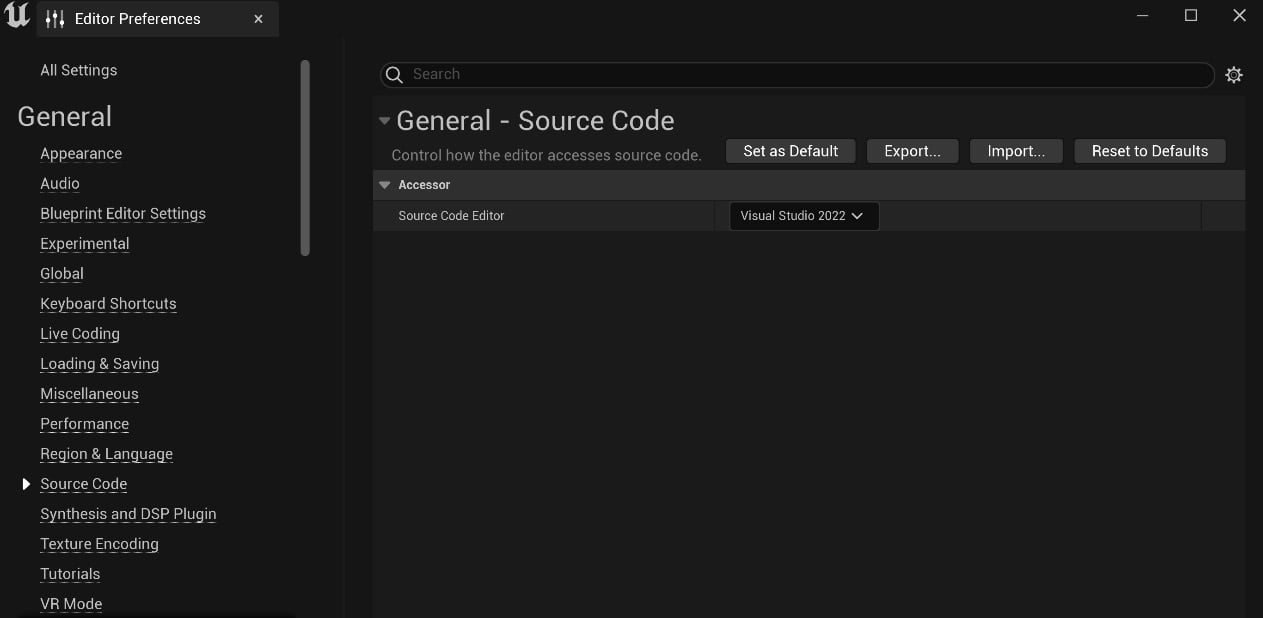
Figure 1.8 – Making VS the default source code editor
You can now use VS to open the source code files.
Opening the C++ source code in VS (optional)
If you want to open and view the C++ source code in VS, you can find the source code file (for example, C++/MyShooter/MyShooterCharacter.cpp) in the project and simply double-click on it (see Figure 1.9).

Figure 1.9 – Opening MyShooterCharacter.cpp source code in VS
The system will automatically launch VS, and the VS editor will open the MyShooterCharacter.cpp file (see Figure 1.10).
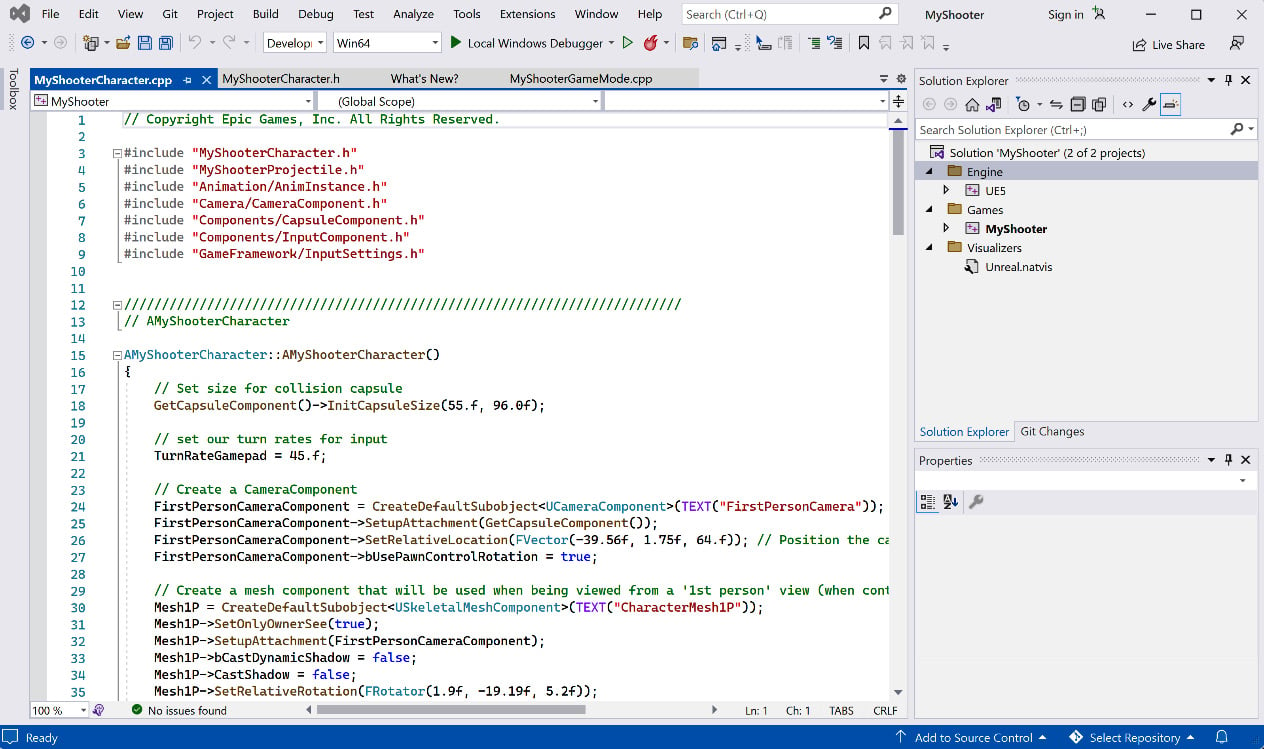
Figure 1.10 – Viewing the MyShooterCharacter.cpp source code in VS
Back in the Unreal editor, click the Play (![]() ) button to start the game. While playing the game on the battlefield, you can control your character, move them around, and pick up the gun in front of them (see Figure 1.11).
) button to start the game. While playing the game on the battlefield, you can control your character, move them around, and pick up the gun in front of them (see Figure 1.11).
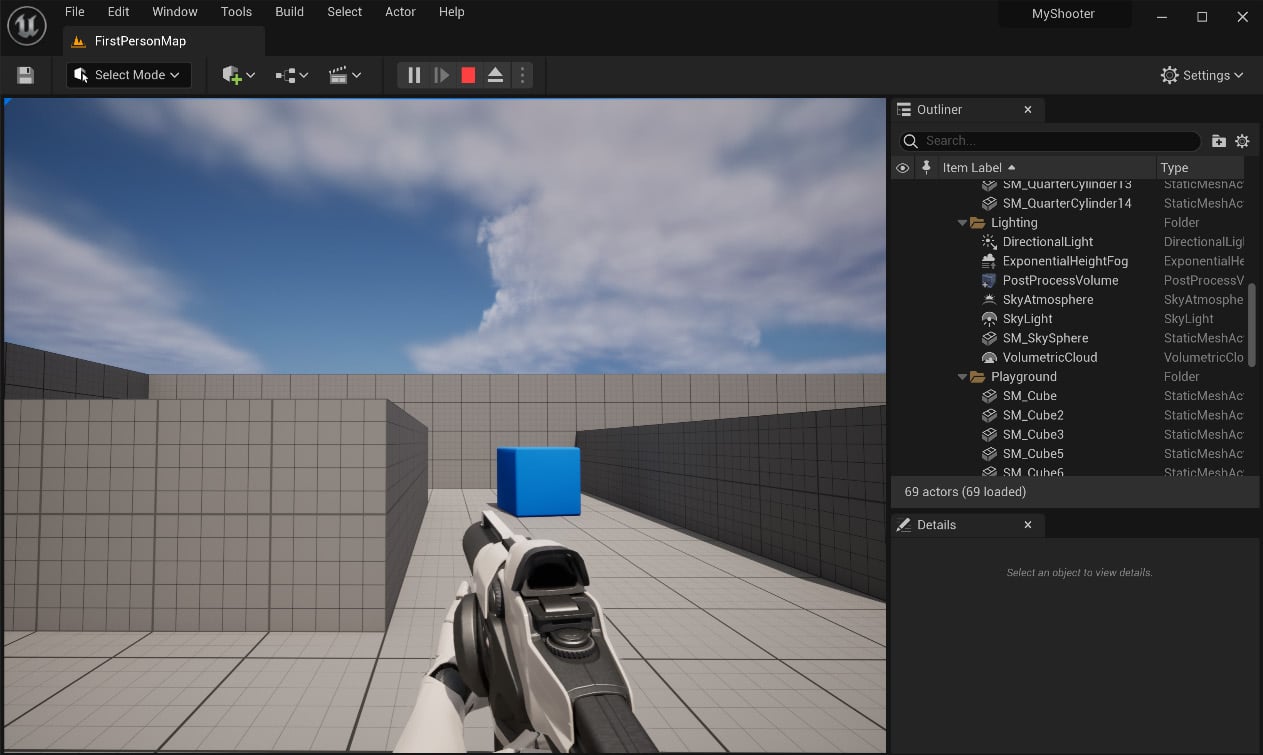
Figure 1.11 – Playing the MyShooter game
We have learned how to create a UE C++ project from scratch. However, what if we already have a Blueprint project and want to convert it to a C++ project? UE allows developers to do it by adding a new C++ class to the project. Let’s practice converting a MyBPShooter Blueprint project.


