Search icon CANCEL
Subscription
0
Cart icon
Your Cart (0 item)
Close icon
You have no products in your basket yet
Save more on your purchases! discount-offer-chevron-icon
Savings automatically calculated. No voucher code required.
Arrow left icon
Explore Products
Best Sellers
New Releases
Books
Videos
Audiobooks
Learning Hub
Free Learning
Arrow right icon
Arrow up icon
GO TO TOP
.NET Core 2.0 By Example

You're reading from   .NET Core 2.0 By Example Learn to program in C# and .NET Core by building a series of practical, cross-platform projects

Arrow left icon
Product type Paperback
Published in Mar 2018
Publisher Packt
ISBN-13 9781788395090
Length 458 pages
Edition 1st Edition
Languages
Tools
Arrow right icon
Authors (2):
Arrow left icon
Neha Shrivastava Neha Shrivastava
Author Profile Icon Neha Shrivastava
Neha Shrivastava
Rishabh Verma Rishabh Verma
Author Profile Icon Rishabh Verma
Rishabh Verma
Arrow right icon
View More author details
Toc

Table of Contents (12) Chapters Close

Preface 1. Getting Started 2. Native Libraries in .NET Core FREE CHAPTER 3. Building Our First .NET Core Game – Tic-Tac-Toe 4. Let's Chat Web Application 5. Developing the Let's Chat Web Application 6. Testing and Deploying – The Let's Chat Web Application 7. To the Cloud 8. Movie Booking Web App 9. Microservices with .NET Core 10. Functional Programming with F# 11. Other Books You May Enjoy

Setting up an Ubuntu Linux VM

In this section, we will see how to set up Linux (Ubuntu) on a virtual machine, so that a Windows user can also develop and test their .NET Core 2.0 applications in Linux. To do so, let’s start with the VirtualBox setup. Oracle provides an open source VirtualBox executable, which we downloaded in the previous section. The following are the steps we need to follow to set up VirtualBox:

  1. Double-click on the VirtualBox executable. It will open a wizard. Before installation, click on Disk usage and check Disk Space Requirement. It is recommended that the virtual machine for Ubuntu Linux is set up with at least 2 GB RAM and 25 GB free hard drive space. So, instead of choosing the default drive (the C drive in our case, where Windows is installed), select another drive if it exists (for example, the D drive) so that you can easily allocate more space, and it also prevents any impact on the host operating system.
  2. The VirtualBox setup needs approximately 241 MB of disk space to install. It's recommended to create a new folder (for example, VirtualBox) to easily identify and track the VM. 
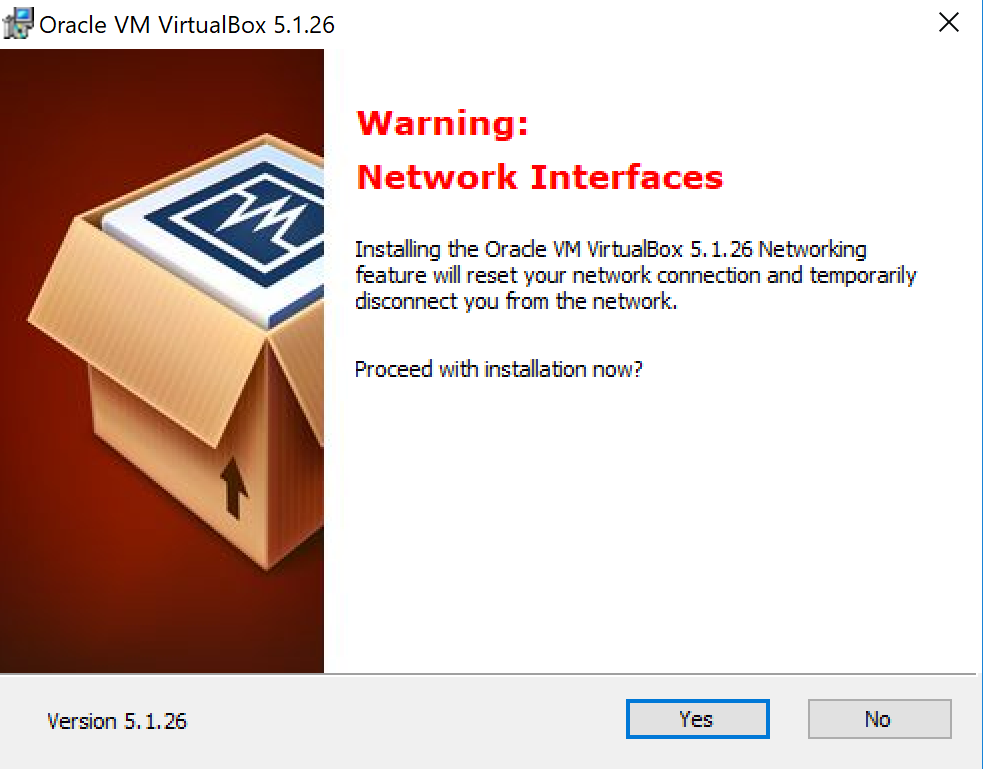
  1. Keep clicking the Next button until the last page. At the end, a warning will be displayed that the installation of VirtualBox will reset the network connection and temporarily disconnect the machine from the network. This is alright if you are working on the same physical machine. So, click on the Yes button and continue, and then click on the Install button and finish the installation:
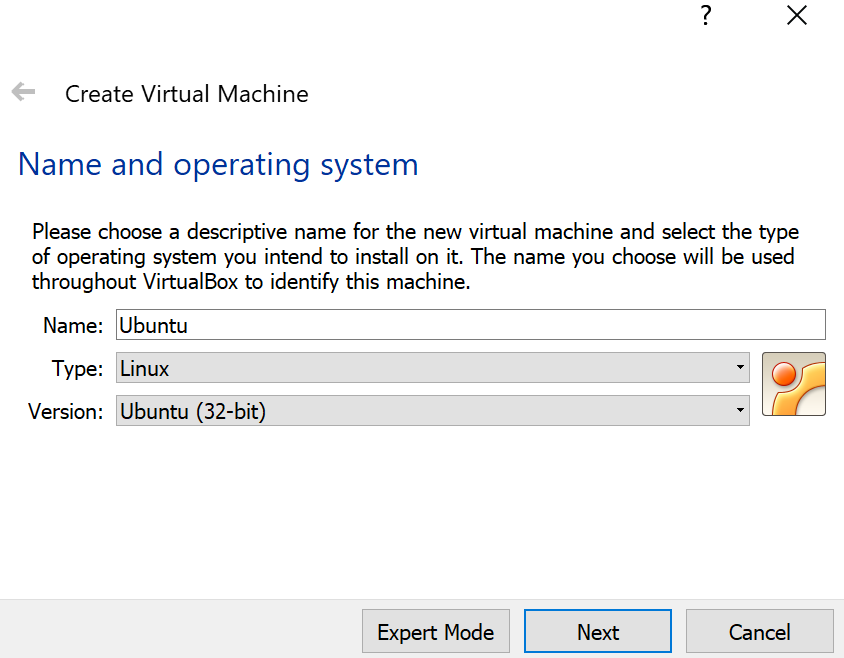
  1. Once the preceding installation is done, open the VirtualBox manager to create a new virtual machine. Click on New and give the Name of the machine (for example, Ubuntu, as shown), and select the Type as Linux and the Version as Ubuntu (32 bit):
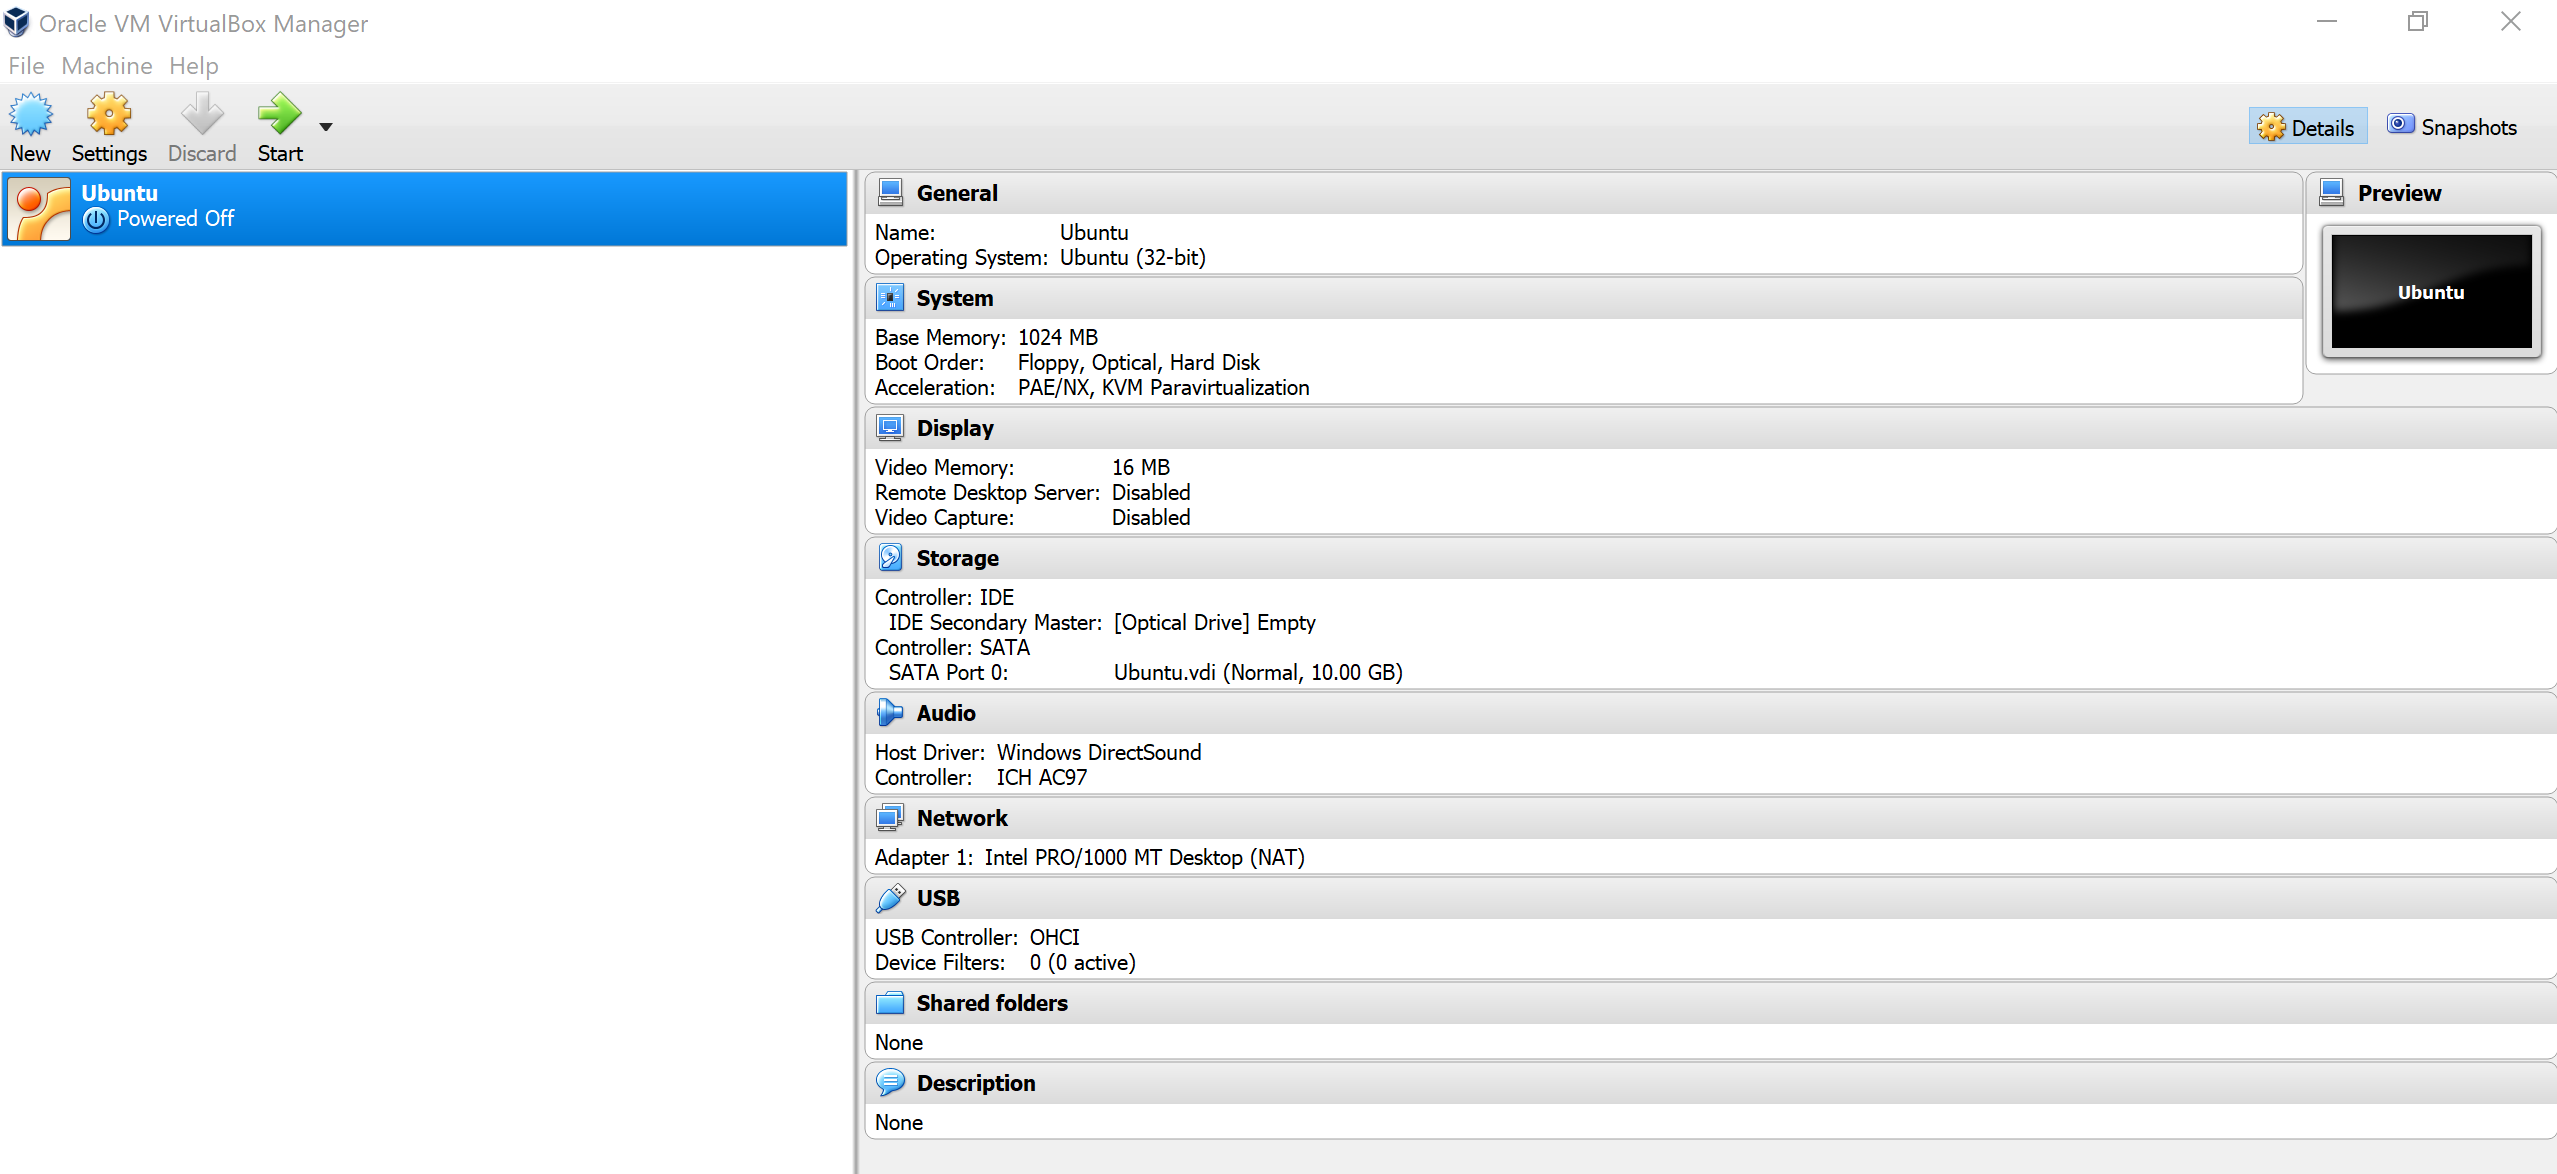
  1. We need to specify the memory size. More memory is good, but we should consider our disk space before selecting it. A minimum of 2 GB system memory is required for Ubuntu 17.04. Select Create and then select VDI (VirtualBox Disk Image) as Hard disk file type. Select a Dynamically allocated hard disk. It will use space on your physical hard disk as it fills up (up to the maximum fixed size). Set the disk space maximum size to 25 GB and click on Create. It will create a virtual machine with the Ubuntu operating system (32-bit) and 4 GB RAM, and the full details will be displayed on the final page:
 

Ubuntu setup using Hyper-V

For Windows machines, we can use Hyper-V to create a Linux virtual machine. Let's start with the basic settings and important configuration changes:

  1. First, enable Hyper-V Management Tools and Hyper-V Platform from Windows Features
  1. Change the default virtual directory. By default, Hyper-V uses the same drive as that on which the OS is installed but this is not a good practice. We should change the default drive the drive on which the operating system is not installed, such as the D drive in our case.  It's a good practice to keep Windows and system files separate from other files. To make configuration changes, open Hyper-V Manager and then Hyper-V Settings. Instead of the default selection, change it to some other drive (D in our case). Create a new folder named Virtual Machine on this new drive location:
   
  1. Create a virtual switch. A virtual switch is used to join computers and to create networks. We can create three types for virtual switches:
    • External: An accessible network where the virtual machines are hosted on the same physical computer and all external servers from which the host machine can connect.
    • InternalCreates a virtual switch that can be used only by the virtual machines that run on the same physical computer, and between virtual machines and the physical computer. An internal virtual switch doesn't provide connectivity to a physical network connection.
    • Private: Creates a virtual switch that can be used only by the virtual machines that run on the same physical computer.

Create a Private or External type of virtual switch. This will be used for the virtual machine:  

Open Network and Sharing Center on your host machine and then open the external virtual switch properties. You will find Hyper-V Extensible Virtual Switch. This provides network connectivity to the virtual machine. Enable this or the virtual machine won't be able to connect to the host machine network:

  1. Create a new virtual machine, and choose the name and location for the virtual machine. Select Generation 1 on the next page and select External Virtual Switch. Select the Install an operating system from a bootable CD/DVD-ROM option and select Image file (.iso), which we downloaded earlier for Ubuntu. Continue clicking the Next button in the wizard and the Ubuntu virtual machine will be created. Click on Start and connect to it:
  1. After connection, we will be able to see the following screen. Select Install Ubuntu and set the language as English. Choose the Erase disk and install Ubuntu option and then click Continue
  1. Provide the username and password that you want and click Continue. Restart the system once the installation is done:

After restarting the virtual machine, it will display a login page. Enter the password that you provided while installing Ubuntu. On successful login, it will open the homepage, from where we can start Visual Studio Code and .NET Core 2.0 SDK installation on this Ubuntu machine.

lock icon The rest of the chapter is locked
Register for a free Packt account to unlock a world of extra content!
A free Packt account unlocks extra newsletters, articles, discounted offers, and much more. Start advancing your knowledge today.
Unlock this book and the full library FREE for 7 days
Get unlimited access to 7000+ expert-authored eBooks and videos courses covering every tech area you can think of
Renews at $19.99/month. Cancel anytime
Banner background image