In this section, we will take a look at how to create a Xamarin.Forms solution for the first time. We will begin by developing the basic structure for our application, as well as creating and designing the user interface files using XAML, and then creating the C# code to display planetary information.
Before we can proceed, we need to create our PlanetaryApp project. It is very simple to create this using Visual Studio for Mac. Simply follow these steps:
- Firstly, launch the Visual Studio application; depending on your version of Visual Studio installed, you'll be presented with the following screen:
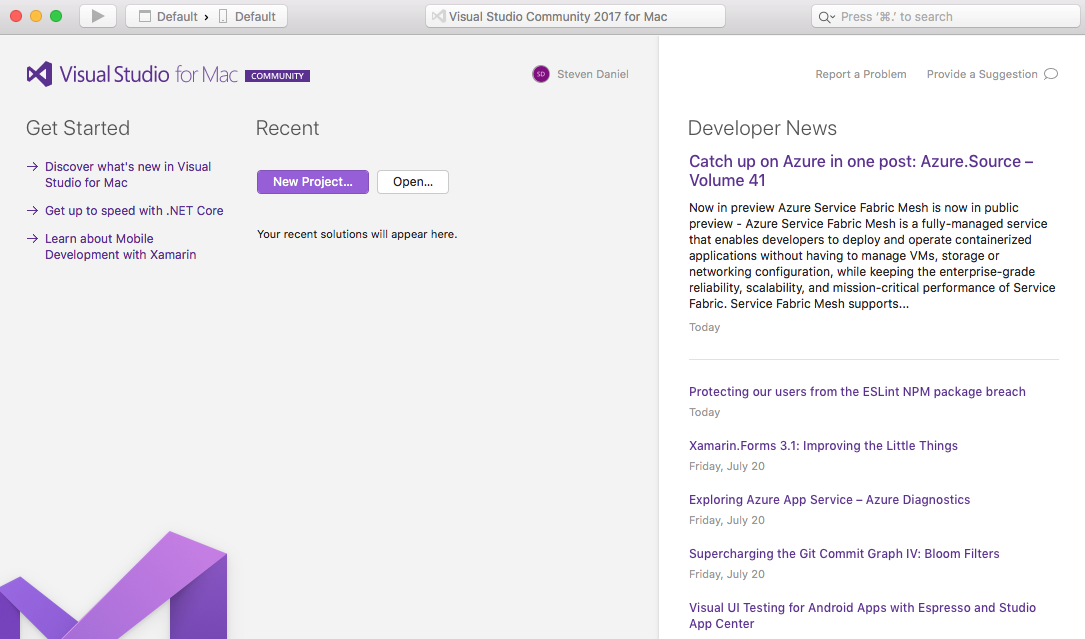
- Next, choose the New Project… option, or alternatively choose File|New Solution..., or simply press Shift + command + N.
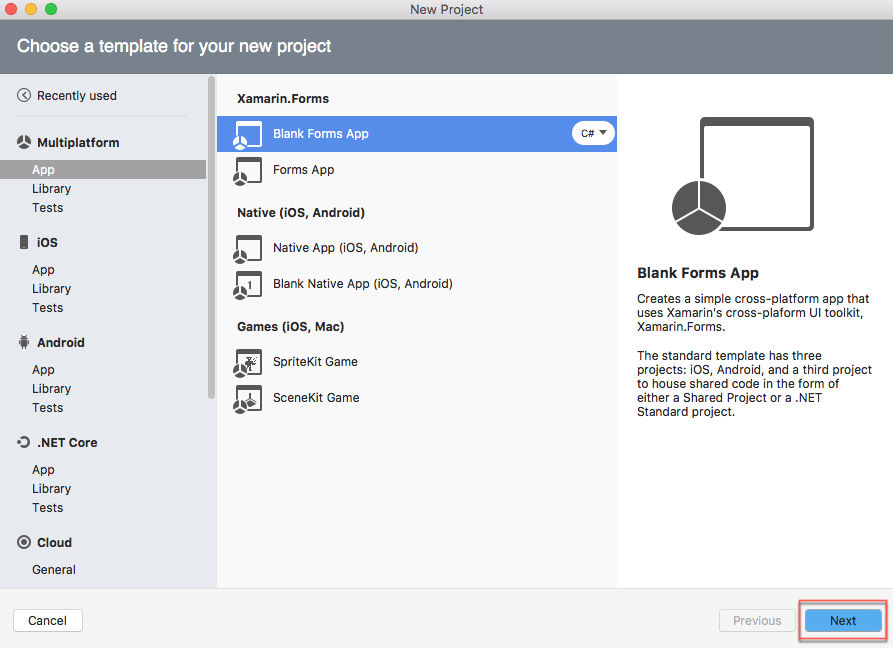
- Then, choose the Blank Forms App option, which is located under the Multiplatform|App section, and ensure that you have selected C# as the programming language to use.
- Next, click on the Next button to proceed to the next step in the wizard:
- Next, enter PlanetaryApp to use as the name for your app in the App Name field and then specify a name for the Organization Identifier field.
- Then, ensure that both the Android and iOS checkboxes have been selected for the Target Platforms field and ensure that the Use .NET Standard option has been selected in the Shared Code section, as shown in the following screenshot:
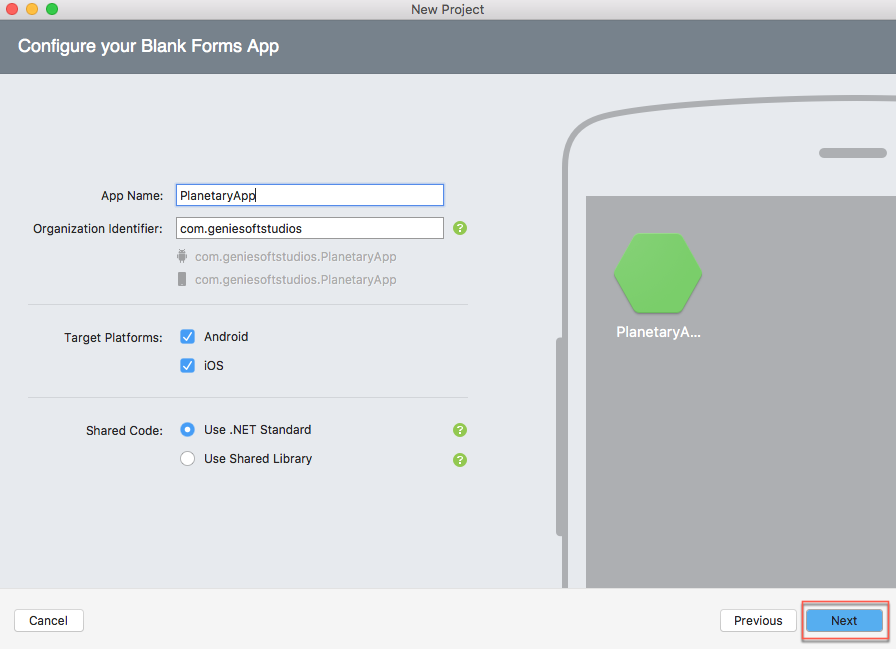
The Organization Identifier option for your app needs to be unique. Xamarin recommends that you use the reverse domain style (for example, com.domainName.appName).
- Then, click on the Next button to proceed to the next step in the wizard:
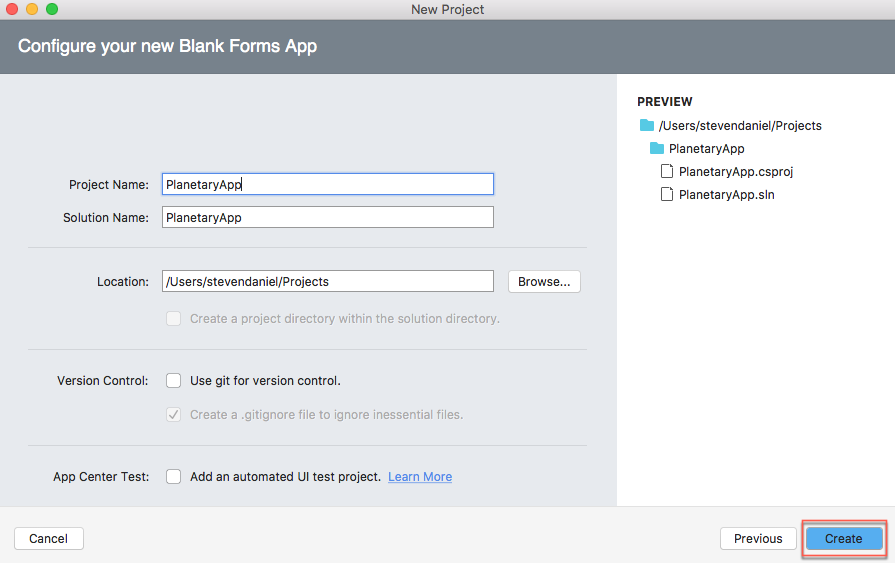
- Finally, click on the Create button to save your project at the specified location.
Once your project has been created, you will be presented with the Visual Studio Community 2017 for Mac development environment, containing several project files that the template has created, as shown in the following screenshot:
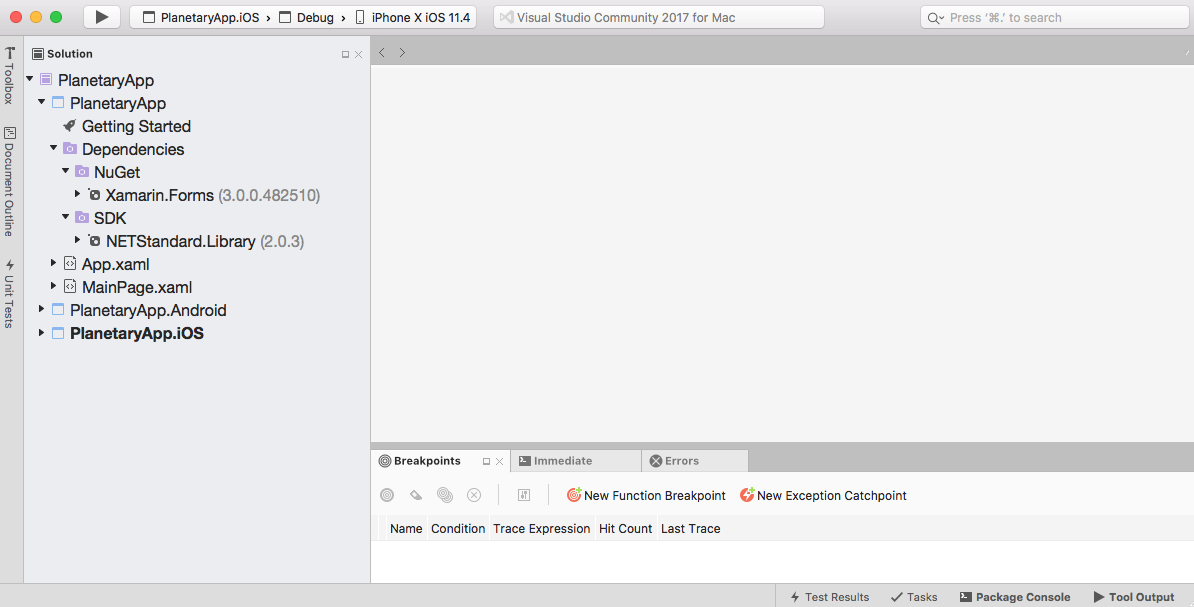
As you can see from the preceding screenshot, the PlanetaryApp solution has been divided into three main areas. The following table provides a brief description of what each area is used for:
|
Project details |
Description |
|
PlanetaryApp |
This is the .NET Standard (Shared Library) project that will be responsible for acting as the main architectural layer for the PlanetaryApp solution. This project contains all of the business logic, data objects, Xamarin.Forms ContentPages, Views, and other non-platform-specific code. Any code that you create in this project can be shared across multiple platform-specific projects. |
|
PlanetaryApp.Android |
This is an Android-specific project that contains all of the code and assets required to build and deploy the Android app contained in the solution. By default, this project contains a reference to the PlanetaryApp (.NET Standard Shared Library). |
|
PlanetaryApp.iOS |
This project is an iOS-specific project that contains all of the code and assets required to build and deploy the iOS app contained in the solution. By default, this project contains a reference to the PlanetaryApp (.NET Standard Shared Library). |
One thing you will notice is that our solution contains a file called App.xaml.cs, which is part of the .NET Standard (Shared Library). The App.xaml.cs file contains a class named App that inherits from the Xamarin.Forms.Application class hierarchy, as can be seen in the following code snippet:
 //
 //  App.xaml.cs
 //  Main class that gets called whenever our PlanetaryApp is started
 //
 //  Created by Steven F. Daniel on 17/02/2018.
 //  Copyright © 2018 GENIESOFT STUDIOS. All rights reserved.
 //
 using Xamarin.Forms;

 namespace PlanetaryApp
 {
     public partial class App : Application
     {
         public App()
         {
             InitializeComponent();

             MainPage = new MainPage();
         }

         protected override void OnStart()
         {
             // Handle when your app starts
         }

         protected override void OnSleep()
         {
             // Handle when your app sleeps
         }

         protected override void OnResume()
         {
             // Handle when your app resumes
         }
     }
 }
The App constructor method sets up the MainPage property to a new instance of the ContentPage that will simply display some default text as created by the project wizard. Throughout this chapter, we will be building the initial user interface using XAML and then populating a list of planet names in the control elements contained in the XAML.


